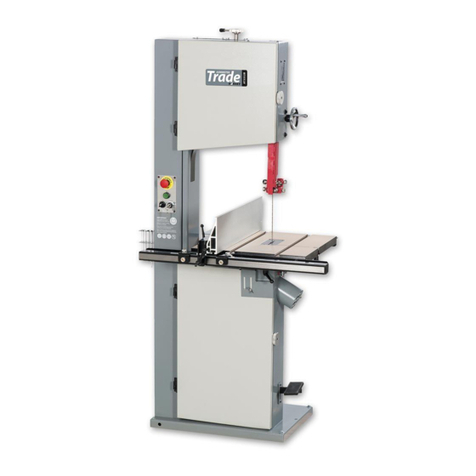
Axminster Trade AP3352B User manual

AP3352B
Woodworking Bandsaw
Code 107644
Original Instructions
AT: 20/06/2022
BOOK VERSION: 7

INDEX OF CONTENTS
2
Cert No: HW615E
Axminster Tool Centre Ltd
Axminster Devon
EX13 5PH UK
axminstertools.com
Type Bandsaw
Model AP3352B conforms to the machinery example for which the
EC Type-Examination Certificate No BM 50273249 001, BM 50451848
has been issued by Harvey Industries Co., Ltd.
at: 01 Building, No.68 Suyuan Road,Jiangning Economic & Technological Development Zone,
Nanjing 211100 China (Mainland)
and complies with the relevant essential health and safety requirements.
2006/42/EC
EN 60204-1:2018
EN 1807-1:2013
06/42/EC - Annex I/05.2006
declares that the machinery described:-
This machine complies with the following directives:
EU Declaration of Conformity
EN 1807-1: 2013
EN 60204 -1:2006+A1+AC
Signed
Andrew Parkhouse
Operations Director Date: 18/11/2019
EU DECLARATION OF CONFORMITY
The symbols below advise the correct safety procedures when using this machine.
Fully read manual
and safety instructions
before use
Eye protection
should be worn
Ear protection
should be worn
Two Man Assembly HAZARD
Dust mask
should be worn
EU Declaration of Conformity 02
What’s Included 03
General Instructions for 230V Machines 04
Specification 04
Assembly 05-06-07
Illustration & Parts Description 08-09-10-11
Setup & Adjustment 12-13-14-15-16-17
Operating Instruction 17
Changing the Saw Blade 18-19-20
Maintenance 20-21
Exploded Diagrams/Lists 22-23-24-25-26-27-28-29-30-31-32-33
Wiring Diagram 34
Notes 35

WHAT’S INCLUDED
3
Quantity Item Part Model Number
AP3352B
1 Bandsaw A
1 Instruction Manual B
1 Tool Storage Bracket C
1 Dust Extraction Cover D
4 Floor Mounting Feet 12x60 E
2 Flat Washers F
2 Spring Washers G
2 Cap Screw 5x12 H
1 Hex Key 5mm I
1 Hex Key 4mm J
1 Hex Key 3mm K
1 Hex Key 2mm L
1 Gas Strut with x2 Pins & Split Pins M
2 Gas Strut Brackets with Hex Screws,Washers/ Spring Washers N
Please Note: Before discarding any packaging material check to make sure all terms are accounted for.
Supplied with an 230V 3 pin 16 Amp plug
N
M

GENERAL INSTRUCTIONS FOR 230V MACHINES
4
The following will enable you to observe good working
practices, keep yourself and fellow workers safe and maintain
your tools and equipment in good working order.
WARNING!! KEEP TOOLS AND EQUIPMENT
OUT OF REACH OF YOUNG CHILDREN
Mains Powered Tools
• Tools are supplied with an attached 16 Amp plug.
• Inspect the cable and plug to ensure that neither are
damaged. Repair if necessary by a suitably qualified person.
• Do not use when or where it is liable to get wet.
Workplace
• Do not use 230V a.c. powered tools anywhere
within a site area that is flooded.
• Keep machine clean.
• Leave machine unplugged until work is about to commence.
• Always disconnect by pulling on the plug body
and not the cable.
•Carry out a final check e.g. check the cutting tool
is securely tightened in the machine and the correct
speed and function set.
•Ensure you are comfortable before you start work,
balanced, not reaching etc.
•Wear appropriate safety clothing, goggles, gloves,
masks etc.Wear ear defenders at all times.
•If you have long hair wear a hair net or helmet to prevent it
being caught up in the rotating parts of the machine.
•Consideration should be given to the removal of rings and
wristwatches.
•Consideration should also be given to non-slip footwear etc.
•If another person is to use the machine, ensure they are
suitably qualified to use it.
•Do not use the machine if you are tired or distracted
•Do not use this machine within the designated safety areas
of flammable liquid stores or in areas where there may be
volatile gases.
•Check cutters are correct type and size, are undamaged
and are kept clean and sharp, this will maintain their
operating performance and lessen the loading on the
machine.
•OBSERVE…. make sure you know what is happening
around you and USE YOUR COMMON SENSE.
KEEP WORK AREA AS UNCLUTTERED AS IS
PRACTICAL. UNDER NO CIRCUMSTANCES SHOULD
CHILDREN BE ALLOWED IN WORK AREAS.
Code 107644
Model AP3352B
Rating Professional
Power 2.2kW 230V 1ph
Plug 3 pin 16 Amp
Blade Speed 950 m/min
Blade Length 3,352 mm (132")
Max Width of Cut 360 mm
Max Depth of Cut 350 mm
Max Width of Cut with Fence 315 mm
Airflow Required 1,200 m3/hr
Table Size 510 x 510 mm
Table Tilt +15˚ to -45˚
Table Height 860 mm
Wheel Diameter 380 mm
Noise Level 75dB (A)
Dust Extraction Outlet 2 x 100 mm
Overall L x W x H 960 x 910 x 1,830 mm
Weight 202 kg
SPECIFICATION
ASSEMBLY
5
Floor Mounting Feet
Cast Iron Table
Table Support Gas Strut
Remove the shipping pallet and place aside. Locate the four
mounting feet (E) and with help mount them to each corner of
the bandsaws base, see fig 01.
Manoeuvre the bandsaw to the required position with plenty
of space around the unit. Adjust each foot in turn until the
bandsaw is level.
Remove the two clamping handles (A) from the underside
of the table. Lower the table down so the steel threaded slot
through the two holes on either side of the tilt quadrant and
the trunnion (B) rests in the quadrants cradial. Replace the two
clamping knobs (A) to secure the assembly, see fig 02.
Fig 01
Fig 02
Tilt quadrant
Continues over...
1
2
1. Locate the two gas strut brackets, secure the first bracket
using two Hex screws, washers/spring washers to the underside
of the table. Repeat for the remaing bracket to the rear of the
bandsaw, see picture 1.
2. Locate the gas strut, the two pins and split pins. Lineup the
mounting hole in the gas strut housing with the pre-drilled
hole in the bracket, insert the pin through. Slot the split pin
through the pin’s hole and bend the split pin back to secure
the strut in place, see picture 2. Repeat the process for the
lower end of the gas strut, see picture 3 on page 6.
Split pin
Pin
Gas strut housing
Gas strut
support bracket

ASSEMBLY
6
Rip-Fence Assembly
Follow the instructions below to assemble the fence.
Front fence rail
1
Countersunk Hex screw
2
Fence scale
block cap head screws
3
Rear fence
guide rail
Hex screws
4
3
3.Table gas strut installed.
4
Pin
Split pin
Gas strut

ASSEMBLY
7
5
6
7
8
Fence clamp
assembly
Fence
Clamp in Place
Adjustable guide
Tool Storage Bracket
Fit the tool storage bracket to
the side of the bandsaw, below
the NVR switch assembly.
Lower the tabe down and nip-up the two clamping
handles to secure it in place. Using a Hex key, screw in the
two caphead pin bolts into the tilt quadrant mechanisum
until there is no side play movement in the table, see the
images below.
Pin bolts
Tilt Quadrant Slack Pin Bolts
Table clamp
Tilt quadrant

ILLUSTRATION & PARTS DESCRIPTION
8
Manual motor brake lever
The electric motor brake is used to decelerate or hold
motor loads when the power is cut intentionally or
accidentally. DO NOT REMOVE THE BRAKE LEVER!
1Upper Wheel Door
2NVR Switch with isolating Key Lock
3Tool Storage Bracket
4Main Frame
5Lower Wheel Door
6Blade Tensioning Lever
7Blade Tracking Window
8Upper Blade Guide adjusting Wheel
9Saw Table
10 Dust Extraction Outlet
11 Upper Door Lock Knob
12 Upper Blade Guide
13 Rip Fence Assembly
14 Table Alignment Handle
15 Table Tilt Operating Wheel
16 Corner Peddle Foot Brake Stop
17 Tracking Control Knob with Locking Wheel
18 Quick Release Tensioning Lever
19 Table Support Gas Strut
20 Motor with Electric Brake and Manual Operating Lever

ILLUSTRATION & PARTS DESCRIPTION
9
Emergency stop (A),
‘ON’ button (B), Selector switch (C),
Power isolating key lock (D)
Dust extraction outlet
Fence scale (E) and pointer (F)
Table clamping handle (G),Table tilt scale (H),
Scale pointer (I),Table tilt operating wheel (J)
A
B
CD
F
E
I
J
H
G
To disengage the electric motor brake
manually, pull the lever back towards you

ILLUSTRATION & PARTS DESCRIPTION
10
Blade tensioning lever (K)
Tracking knob & locking wheel (L)
Quick release tensioning lever (M),
Upper guide adjusting wheel (N)
Upper guide locking handle (O)
Blade tension scale (P)
Four fence alignment Hex screws (Q) adjust each Hex screw until
the fence is perpendicular with the blade and the table
Corner peddle foot brake stop
Press down to stop the bandsaw instantly
P
K
M
L
NO
Q
Release
Tension

ILLUSTRATION & PARTS DESCRIPTION
11
Blade Guide Description
1Guide Holder
2Guide Holder Cap head screw
3Guide Bearing Adjusting knob
4Guide Bearings
5Guide Bearing Clamping knob
6Thrust Bearing
7Thrust Bearing Clamping Knob
8Guide Assembly Cap head Screws
9Guide Assembly
7
7
5
5
3
3
4
5
4
6
6
1
2
9
8
Lower Guide Assembly
Upper Guide Assembly
9

SETUPADJUSTMENT
12
Tensioning and Tracking the Blade
Make sure both top and bottom blade guides
are clear of the blade
Open the upper and lower wheel doors, giving good access
to the saw wheels.To tracking the blade first adjust all guide
bearings so they are clear of the blade, see fig 03.
Fig 03
Check that the blade is sitting approximately in the middle of
the wheel. Apply some tension to the blade by turning the
tensioning wheel clockwise, see fig 04-05 spin the top wheel
by hand and check that the blade remains centrally on the tyre.
Fig 04
If it does not, adjust the tracking by turning the tracking control
at the rear of the head box, see fig 05.Viewed directly onto the
tracking control wheel, turning clockwise should cause the
blade to track to the rear of the tyre; anti-clockwise to the front,
(DO NOT make large adjustments). Spin the top wheel again.
Continue until the blade tracks in the centre of the tyres with
no appreciable to and fro movement.
Tighten the tracking control knob to lock the setting.Tension
the blade fully. A sideways push of about 7-8 lbs( 3+kgs) in the
middle of the blade should allow a 1/4”(6.5mm) distension.
Check the tracking again, adjust if necessary.
Fig 04-05
Tracking control knob (A) and locking wheel (B)
B
Check that the drive belt is tensioned correctly. If it is slack,
apply ‘take up’ pressure to the belt by loosening the motor
locking bolts (C) and turn the tensioning bolt (D) to press
down the motor until the belt is under tension then
re-tighten the bolts (C) to lock the motor in position, see fig 06.
Fig 06
D
C
MOVE THE LOCK SWITCH (D) TO
THE POWER ON POSITION, MOVE
THE OTHER SWITCH TO THE ‘BRAKE
OFF’ POSITION & PRESS THE GREEN
BUTTON, SEE PAGE 9.
A

SETUPADJUSTMENT
13
Close the upper/lower doors, move the selector switch to the
‘RUN’ position and turn the ‘LOCK’ key to the power on position
see fig 07. Stand clear and start the saw by pressing the ‘GREEN’
button. Check the saw is running smoothly, (no thumps, bumps,
knocking or excessive vibration) and the blade appears to be
tracking correctly (in one place).You can check this by holding
a marker, e.g. a pencil, close to the back of the blade (approach
from the back of the blade only) and check that the gap
remains constant.
If further tracking is required, make very small adjustments
and wait for the saw to react before you adjust again. Some-
times the reaction is not instantaneous. Once you are satisfied
that the tracking is correct, switch the machine off by pressing
‘RED’ emergency off button. Allow it to come to a complete
stop.
Fig 07
Checking the Table is Square
TURN THE KEY TO THE ‘LOCK’
POSITION TO ISOLATE THE
POWER TO THE BANDSAW!
1. Loosen the two clamping handles beneath the table,
clamping the tilt mechanism. Lower the table until its against
the stop, see fig 07-08. The head of the bolt acts as a stop when
it strikes the machine frame.Tighten the clamping knobs.
Fig 07
2. Make sure the upper blade guide is raised as high as possible.
Place a square on the table and move it up against the blade
(behind the teeth), see fig 09. Check that the blade is
perpendicular to the table. If it is not, try resetting the table. If it
is still not correct, loosen the table locking handles and adjust
the table stop bolt until this is achieved, see fig 10. Tighten the
lock nut and then re-check.
Fig 09
Fig 10
Lock nut
Levelling stop bolt
Table bracket stop
Clamping handle
Square
Power on
3.The tilt quadrant can also be adjusted by loosening the three
bolts (1) on the tilt quadrant housing, see fig 11 on page 14.
Using a Hex key adjust the two grub screws (2) to tilt the
quadrant forward or back. NOTE: Make small adjustments and
lower the table back down, place a square against the blade
and check again. Continue until the blade is perpendicular to
the table. Nip-up the three bolts (1) to secure the quadrant in
place.
Continues over...

SETUPADJUSTMENT
14
Setting the Fence
To make sure the guide fence is at 90˚ to the table, line up the
guide fence with the edge of the table’s ‘T’ slot, see fig 13. If you
find that the fence is out of alignment follow the step below.
1. Secure the fence with the locking handle (A).
2. Loosen the four Hex screws (B) on the fence camp assembly
and adjust until correct.Tighten the locking rings (C) to secure
the setting, see fig 14.
Fig 13-14
Fig 11
B
A
‘T’ Slot
Upper Blade Guides
Open the blade guide access door (1). Loosen the locking knobs
(2), adjust the fore and aft position of the guide bearings so
they are approximately 2mm behind the gullets of the saw
blade, see fig 15-16-17. Tighten the knobs (2).
Fig 15-16-17
1
Access door clamp
Guide Bearing Assembly
Pull/Push
2mm
MOVE THE SELECTOR SWITCH
TO ‘BRAKE OFF’ POSITION
22
C
1
2
Fig 12
Hex screws
Scale
Pointer
When you are satisfied that the table is set correctly, check that
the pointer of the tilt scale reads zero, see fig 12.

SETUPADJUSTMENT
15
Lower Blade Guides
Loosen the locking knob (3), position the thrust bearing (4)
1mm behind the blade. Note: loosen the two cap head screws
(5) to the rear of the guide assembly and adjust, so the thrust
bearing is centred with the back of the blade, see fig see fig
18-19-20-21.Tighten the knob (3) to secure the setting.
Fig 18-19-20-21
3
4
5
Blade
Loosen the clamping knobs ( 2) and adjust the guide bearings
so they are approximately 0.5mm to the blade, see fig 22-23.
NOTE: A sheet of A4 of photocopy paper is approximately
0.5mm thick. Re-tighten knobs (2). Close the blade guide
access door (1).
Fig 22-23
2
Remove the table insert, see fig 24-25.
Fig 24-25
Insert spring latch
Table insert
Twist latch
Continues over...
0.5mm
1mm
2

SETUPADJUSTMENT
16
Fig 26-27-28-29
Remove the lower blade guard (6). Loosen the clamping knob
(7) and adjust the lower guide bearings (8), so they are 2mm
behind the gullets of the saw. Check the thrust bearing is
centred with the back of the blade. If not, loosen the two Hex
screws (10) to the rear of the assembly & carefully move the unit
until centred.Tighten the Hex screws (10).
Adjust the guide bearings with a clearance of 0.5mm between
the blade and nip-up the clamping knobs (7). Next loosen the
thrust bearing clamping knob (9) and manoeuvre, so there’s a
1mm clearance behind the blade. Secure the clamping knob
(9). Replace the lower blade guard (6) and table insert, see fig
26-27-28-29.
6
9
7
Table Positioning Stops
Beneath the table there are two positioning stop to accurately
stet the table at 45˚ or -15˚ degrees.
1. Rotate the table at 45˚ with the hand wheel (C). Adjust bolt
(A) until the bolt rests against the table casting and lock in
place with the nut (B), see fig 30.
2. Lower the 90˚ table stop bracket (D). Rotate the table to
-15 degrees on the scale and adjust stop screw (A) so it rests
against the saw frame and tighten the nut (B), see fig 31.
Fig 30-31
Thrust bearing
Guard clamp
0.5mm
1mm
2mm
8
Adjusting knobs
10

SETUPADJUSTMENT
OPERATING INSTRUCTIONS
17
1. Make sure you have read and fully understood the general
instructions and safety precautions in the preceding pages
of this manual.
2. Before connecting the machine to the supply; check
the machine for obvious signs of damage, paying particular
attention to the plug and the power cable. Check that the
blade you are using is the correct one for the job in hand.
Change the blade if necessary. Check the blade is not
damaged; is clean, sharp, tracks properly and is correctly
tensioned.
3. Set the upper blade guide to approximately 12mm (1/2”)
above the height of the work piece.
4. Check there are no foreign objects e.g. old nails, screws,
small stones etc embedded in the material you are about
to cut.
5. Remove all accessories, tools etc., that have been used
to set the machine.
6. Ensure the machine is switched off. Plug the power cable
into a correctly rated switched socket outlet. If extension
leads are being used, check these for damage, do not use if
damaged. Switch on. Allow the saw to run up to speed.
7. Make sure that the material you are about to cut is within
the machine’s capacity, and the cut you are about to make
is within the blades’capabilities, e.g. do not try to cut a 1”
radius curve using a 5/8” blade.
8. Make sure the blade is not in contact with the material
when you start the saw. Do not try to cut too quickly; the
correct cutting speed, would never see the blade pushed
back against the thrust bearing, the saw would cut and clear
the saw line at the rate the work piece was fed into it. If you
notice that you require more and more pressure to effect
the cut, the blade is probably becoming blunt. Check and
change if necessary.
9. DO NOT let go of the work piece, if you have to change your
grip, make sure one hand is holding the material at all times.
10. If you are cutting long pieces of material think about sawing
cutouts (i.e. a saw cut from the edge of the material to the
saw line) along the saw line so that you can discard the off
cuts as you progress down the saw line.
11. Observe the old woodworkers’ adage of never allowing
your hand/fingers within one handbreadth of the blade.
12. If you have to cut pieces of material of less than 20mm long,
use a push stick.
13. Remember to check the blade tension after a new blade has
been ‘working’for 30-60 mins.The blade will ‘stretch’ slightly
when new.
14. DO NOT release the tension on the saw blade when work
is complete.The blades and the main saw frame do not
respond kindly to constant changes in stress and tension.
Only release the tension to change the blade or once work
has finished for the day, using the release lever.
The blade in tension over a long period of non-use will
cause the tyres to develop‘flat’ spots.
WARNING! IF THE SAW JAMS
SWITCH OFF IMMEDIATELY.
45˚ Stop bolt
-15˚ Stop screw
Lower the table down and lock in place. There are two
caphead pins bolt, forward and aft on the tilt quadrant
mechanism. Adjust each bolt clockwise to take up the
slack this will remove any side play movement from the
table, see image below.
Tilt Quadrant Slack Pin Bolts
Pin bolts

CHANGING THE SAW BLADE
18
Upper door lock
Lower door lock
MOVE THE SELECTOR SWITCH
TO ‘BRAKE OFF’ POSITION

CHANGING THE SAW BLADE
19
Set the upper blade guide assembly approximately midway
in the throat. Open the top and bottom covering doors and
remove the table insert (B), see fig 31.
Remove the table stabilising bolt (C) and release the blade
tension by pushing the quick release lever up, see fig 32.
Fig 31
Fig 32-33
Remove the lower blade guard (8), see fig 26 open the upper
guard door (1), see fig 34. Slip the blade (A) off the wheels,
carefully ‘wiggling’ it clear of the upper blade guard and clear
of the lower blade guides and out through the slot in the table,
see fig 35.
Fig 34-35
Table slot
1
Clean the interior of the machine; remove the impacted ‘crud’
from the tyres, apply a little light oil to the screw threads of
the blade and drive belt tensioners and the tracking control.
The pivots and the slides of the top wheel mounting assembly
and the captive stub axle of the drive belt tensioner (in its slot)
could likewise be lightly oiled.
Check the new blade for signs of damage.
WARNING! BE VERY CAUTIOUS WHEN
YOU ‘UNFOLD’THE BLADE; IT TENDS
TO ‘SPRING’ OPEN.
Throw the blade away from you and check the blade did not
“unfold”inside out.
MAKE SURE THE BLADE TEETH ARE
POINTING DOWN!
Open up all blade guides so that they are clear of the blade.
Hold the blade (A) approximately midway on either side of the
loop and feed it into the table slot.‘Wriggle’ the right hand side
of the blade through the slot in the lower bearing guide guards
and through the guard on the upper blade guide assembly.
Ease the blade over the wheels and locate the blade in the
blade guides. Check that the blade is sitting approximately in
the middle of the wheels and re-tension the blade by pulling
the quick release lever down, see fig 33.
Continues over...
Release
Tension

CHANGING THE SAW BLADE
20
Turn the top wheel by hand to ensure the blade will not skip off
the wheels and the blade is travelling in the blade guides. Re-fit
the table stabilising bolt and table insert.
Loosen the upper guide clamp (2) and position the assembly (3)
so that the top of the blade guide is level with the centre of the
top drive wheel, see fig 36-37. Re-tighten the clamp (2).
Now carry out the procedures as detailed in ‘Setup/Adjustment’.
Fig 36-37
2
3
Operating
wheel
MAINTENANCE
Daily
• Keep the machine clean.
• Check the saw blade for missing teeth and cracks (B).
• Spray Axcaliber Dry lubricant on the bare metal surfaces.
Weekly
• Open the top and bottom wheel covers and clean
out all saw dust using an ‘M Class’Vacuum cleaner.
Monthly
• Open the lower and upper door and check the condition
of the tyres and the drive belt. Clean out all saw dust and
impacted ‘crud’ from the wheels and compartment area.
• Apply a little oil to the screw threads of the blade and drive
belt tensioners. DO NOT TO GET ANY OIL ON THE TYRES
AND DRIVE BELT.
• Check the condition of the tyres (A)
• Check the blade for missing teeth and cracks (B)
• Check the condition of the upper/lower blade guides
and thrust bearings and clean using a soft brush, spray dry
lubricant, (Axcaliber Dy Lubricant) on the bearing to prevent
resin build up.
• Using an ‘M Class’Vacuum cleaner, clean the motor vents
and casing.
Code: 503468
MOVE THE SELECTOR SWITCH
TO ‘BRAKE OFF’ POSITION
TURN THE KEY TO THE ‘LOCK’
POSITION TO ISOLATE THE
POWER TO THE BANDSAW!
This manual suits for next models
1
Table of contents
Other Axminster Trade Saw manuals

Axminster Trade
Axminster Trade AT3086B User manual

Axminster Trade
Axminster Trade AW10BSB2 User manual

Axminster Trade
Axminster Trade AT3352B User manual

Axminster Trade
Axminster Trade AT254LTS User manual

Axminster Trade
Axminster Trade AT305SB User manual

Axminster Trade
Axminster Trade AT406SS User manual

Axminster Trade
Axminster Trade AT254PS16 User manual

Axminster Trade
Axminster Trade AT2552B User manual

Axminster Trade
Axminster Trade AT254PS13 User manual

Axminster Trade
Axminster Trade AT460SS User manual