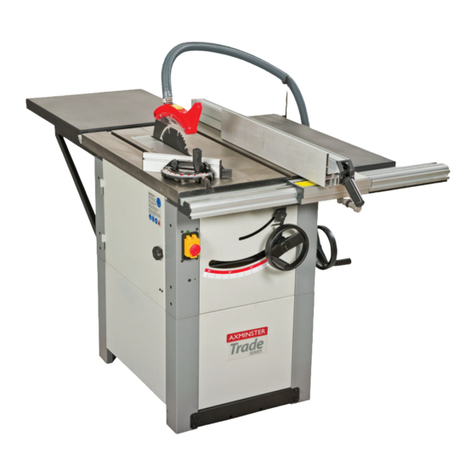
Axminster Trade AT254SB User manual

AT254SB, AT315SB
Saw Bench
AT254SB Code 501196
AT315SB Code 501197
Original Instructions
AT&M: 20/08/2018
BOOK REF : 508304
AT254SB AT315SB
Code: 951539
Sliding Table Kit
Table Extension Set
Setup 1
Setup 2
AT254SB Code: 951538
AT315SB Code: 951541
AT254SB Code: 718652
AT315SB Code: 718653
Saw Bench Package

Index of Contents
02
EU Declaration of Conformity 03
What’s Included 04-05-06
General Instructions for 230V Machines 07
Specification 08
Initial Assembly
Saw Body Assembly 09-10-11
Fitting Hand Wheels 11-12
Saw Guard Assembly 12-13-14
Mitre Fence Assembly 16
Rip Fence Assembly 14-15
Micro-Adjuster Assembly 15
Rip Fence Extension 16
Kick-Plate Assembly 19
951538 10” and 951541 12” Table Extension Kits (Box 1 of 2) and (Box 2 of 2)
Setup 1 17-18
Setup 2 18-19
951539 10” and 12” Sliding Table Kits (Box 1 of 2) and (Box 2 of 2)
Mounting Bracket/Adjuster Block Assembly 20-21
Slide Rail and Table Assembly 21-22
Mitre Angle Rip Fence Assembly 22-23
Setting the Machine
Setting the Table 24
Setting the Sliding Tables 24-25-26
Setting the Angle Fence to the Saw Blade 27-28
Setting the Rip Fence 28
Setting the Mitre Fence 29
Checking the Belt Tension 29-30
Specific Instructions/Precautions for the Saw Bench 30-31
Operating Instructions 31
Illustration and Parts Description 32-33-34
Changing the Saw Blade 35-36
Maintenance 36
Wiring Diagram 37
Exploded Diagrams/Lists
Diagram A (Saw Bench Assembly) 38-39
Diagram B ( Saw Bench Table and Extension Tables Assembly) 40-41-42
Diagram C (Mitre Fence Assembly) 43
Diagram C (Mitre Fence Assembly) 43-44
Diagram D (Saw Mechanism Assembly) 44-45
Diagram E (Rip Fence Assembly) 46
Diagram F (Sliding Table Assembly) 47
Diagram G (Mitre Angle Rip Fence Assembly) 48
Notes 49-50-51

EU Declaration of Conformity
03
Cert No: MJ2325D / MJ2330D
Axminster Tools & Machinery Ltd
Axminster Devon
EX13 5PH UK
axminster.co.uk
Type Saw Table
Model AT234SB, AT315SB and conforms to the machinery example for which the
EC Type-Examination Certificate No BM50300862
has been issued by Laizhou Fulin Machinery Co.,Ltd.
at:Wenchang Road Street Nanwuli Industry Yard Laizhou, Shandong261400 China
and complies with the relevant essential health and safety requirements
2006/42/EC
06/42/EC - Annex I/05.2006
EN 1870-19:2013
EN 60204-1:2006+A1+AC
declares that the machinery described:-
This machine complies with the following directives:
EU Declaration of Conformity
EN 61000-3-3: 1995+A1
EN 55014-2: 1997+A1
EN 61000-3-2: 2000
EN 55014-1: 2000+A1
Signed
Andrew Parkhouse
Operations Director Date: 07/01/2015
The symbols below advise the correct safety procedures when using this machine.
Fully read manual
and safety instructions
before use
Eye protection
should be worn
Ear protection
should be worn
HAZARD
Dust mask
should be worn

What’s Included
04
1
2
3
3A
4
4A
4B
5
5A
5B
6
7
8
9
10
11
12
13
14
15
16
17
18
18A
18B
19
19A
501196 10” and 501197 12” Saw Bench (Box 1 of 2)
1 Saw Table on upper chassis (with motor, table insert, saw blade & NVR Switch fitted)
2 Side Panels and Front & Back Panels
4 Lower Leg Columns
1 Side Table Extension
1 Dust Extraction Moulding 100mm
1 Dust Extraction Hose 100mm
Bag Containing:
8 M8 x 25mm Square bolts, washer and nuts(for 501196,8pcs;for 501197,7pcs)
4 M8 x 20mm Bolts, washers (for the connection of worktable & extension table)
4 M6 x 16mm Phillips screws, washers/nuts
4 M8 x 16mm Bolts, washers and nuts
16 M8 x 16mm Bolts, washers and nuts
1 Rear Extention Table
2 Extention Table Support Brackets
1 Kick-Plate with M8 Bolts & Washers
Bag Containing:
4 M8 x 20mm Caphead Bolts
4 M8 x 20mm Caphead Bolts and washers
2 Hand Wheels and locating keys
1 Mitre Fence and Mitre Fence Extension with clamping screw knobs
1 Mitre Fence Steel Plate with pre-driled holes
1 Saw Guard with Phillips screw/nut and coach bolt/knob
1 Riving knife
1 M6 x 40mm Coach bolt and knob
2 125mm and 50mm Hose Clips
1 30mm hose
Bag Containing:
1 Tommy Bar
1 Spanner for (Changing the Blade)
1 Push stick
Bag Containing:
2 13/17mm Spanners
Hex Keys: 3,4,5,6 and 8mm
1 Instruction Manual
Model Number: MJ2325D/MJ2330D

What’s Included
05
20
21
22
23
24
24A
24B
24C
25
26
27
28
29
30
31
32
33
34
35
36
37
38
39
40
41
501196 10” and 501197 12” Saw Bench (Box 2 of 2)
1 Rip Fence Assembly (partially assembled)
1 Rip Fence Extension
1 Short Rip Fence (front rail)
1 Short Rip Fence (back rail)
Bag Containing:
2 ‘T’ bolts M6 x 70mm and M6 knobs
2 Plastic Capping Plates (for ends of the rip fence mounting bracket)
2 Plastic Capping Plates (for ends of front rip fence rail)
8 4mm Round head self tapping screws
1 Micro Adjuster Assembly
951538 10” and 951541 12” Table Extension Kits (Box 1 of 2)
2 Extension Tables with M8 x 25mm ‘T’ bolts, washers and nuts
1 Table support leg
1 Threaded rubber foot
Bag Containing:
8 M8 x 30mm bolts, washers and nuts
2 M8 x 20mm bolts washers and nuts
951538 10” and 951541 12” Table Extension Kits (Box 2 of 2)
1 Long Rip Fence (front rail)
1 Long Rip Fence (back rail)
1 Measuring scale extension label
951539 10” and 12” Sliding Table Kits ( Box 1 of 2)
2 Sliding Table Mounting Brackets
2 Steel Clamping Plates (for Mounting brackets)
1 Work Clamp and Tool Post
1 Sliding Table Assembly
Bag Containing:
6 M10 x 19mm Hex bolts (for table adjustment)
951539 10” and 12” Sliding Table kits ( Box 2 of 2)
1 Sliding Table Rail Assembly
1 Mitre Angle Rip Fence Assembly
Continues over...

What’s Included
06
951539 10” and 12” Sliding Table kits ( Box 2 of 2)
1 Mitre Angle Rear Quadrant (with lift and shift handle)
1 Table Fence Mounting Casting
1 Mitre Angle Rip Fence
2 Height Adjusting Blocks
1 Distance Stop (with lift and shift handle)
42
43
44
45
46

General Instructions for 230V Machines
07
The following will enable you to observe good working
practices, keep yourself and fellow workers safe and
maintain your tools and equipment in good working
order.
WARNING!! KEEP TOOLS AND EQUIPMENT
OUT OF REACH OF YOUNG CHILDREN
Mains Powered Tools
• Tools are supplied with an attached 13 Amp plug.
• Inspect the cable and plug to ensuree that neither
are damaged. Repair if necessary by a suitably
qualified person.
• Do not use when or where it is liable to get wet.
Workplace
• Do not use 230V a.c. powered tools anywhere within
a site area that is flooded.
• Keep machine clean.
• Leave machine unplugged until work is about to
commence.
• Always disconnect by pulling on the plug body and
not the cable.
•Carry out a final check e.g. check the cutting tool
is securely tightened in the machine and the correct
speed and function set.
•Ensure you are comfortable before you start work,
balanced, not reaching etc.
•Wear appropriate safety clothing, goggles, gloves,
masks etc.Wear ear defenders at all times
• If you have long hair wear a hair net or helmet to
prevent it being caught up in the rotating parts of
the machine.
•Consideration should be given to the removal of
rings and wristwatches.
•Consideration should also be given to non-slip
footwear etc.
•If another person is to use the machine, ensure they
are suitably qualified to use it.
•Do not use the machine if you are tired or distracted
•Do not use this machine within the designated safety
areas of flammable liquid stores or in areas where
there may be volatile gases.
•Check cutters are correct type and size, are undam-
aged and are kept clean and sharp, this will maintain
their operating performance and lessen the loading
on the machine.
•OBSERVE…. make sure you know what is happening
around you and USE YOUR COMMON SENSE.
KEEP WORK AREA AS UNCLUTTERED AS IS
PRACTICAL. UNDER NO CIRCUMSTANCES SHOULD
CHILDREN BE ALLOWED IN WORK AREAS.

08
Specification
Initial Assembly
Code 501196
Model AT245S
Rating Trade
Power 2.2kW 230V 1ph
Blade Dia/Bore 254 x 30mm
Blade Tilt 0-45°
Max Depth of Cut @ 45˚ 60mm
Max Depth of Cut @ 90˚ 75mm
Max Width of Cut with Fence (with optional table extensions) 840mm
Max Ripping Width (with optional table extensions) 990mm
Table Size (incl side table) 800 x 830mm
Table Height 865mm
Table Size With Extensions 800 x 1,170mm
Dust Extraction Outlet 100mm
Min Extraction Airflow Required 1,000 m³/hr
Overall L x W x H 1,170 x 800 x 865mm
Weight 184kg
501197
AT315SB
Trade
3kW 230V 1ph
315 x 30mm
0-45°
75mm
100mm
1,160mm
1,320m
800 x 870mm
865mm
800 x 1,480mm
100mm
1,000m³/hr
2,030 x 840 x 865mm
215kg
Please read through the Section entitled Illustation & Parts Description, this will enable you to more
readily identify those parts of the saw to which we will be referring.
Please note. Some of this assembly procedure is best accomplished by two persons. Although
the tasks are not impossible, some of the items are heavy and awkward, and a mishandling error
could cause injury. Please think about what you are doing, your capabilities and your personal
safety. We have added the ‘two person symbol’ to any operation that we recommend should be a
two person task.
You will require: A pozi screwdriver in addition to the tools supplied.
Unpack all the boxes and check all the components against the “What’s Included”. If any parts or components are
missing, please contact our customer services department using the procedures and telephone numbers listed in our
catalogue, and you will be dealt with quickly and efficiently.
Please note: that, on occasion, the packing list is not strictly adhered to, please check all the boxes, packets etc,
to make sure that all the parts have been accounted.

Initial Assembly
09
PLEASE RECYCLE ANY UNWANTED PACKAGING RESPONSIBLY
Saw Body Assembly
Having unpacked the boxes, put the parts and
components where they are readily to hand. Break
down the main box by knocking the sides away (be
careful of exposed nails etc.), but leave the machine
sitting on its pallet. Identify the short rear panel
with the dust extraction cutout (2), locate the dust
extraction moulding (4) and fit to the panel using
the nuts and bolts (5) provided. (See fig 1)
The orientation of the moulding should leave the
30mm outlet pointing upwards i.e. pointing up the
long length of the panel. Put the panel aside, and
locate the lower leg columns (3) and 4 No. M8x16mm
(5A) bolts, nuts and double washers. Fix the lower legs
to the upper legs using a washered bolt through the
legs and secure with washer and nut, only turn the nuts
up finger tight at this time. (See fig 2) Locate the rear
extention table (6), table support brackets (7) and 4 No.
M8 x20mm caphead bolts and washers (9).
NOTE: the manufacturer has fitted adjusting bolts
to the brackets, these are the faces that back
against the legs.
NOTE: The upper leg columns (3) has welded nuts
to the inside face to mount the support brackets (7)
Fasten the support brackets (7) to the upper leg
columns (3) using the bolts washers (9) and finger
tighten the at this time. (See fig 4-5-6)
Fig 1 Fig 2
2
3
4
5
Fig 3 Fig 4
7
5A

Fig 7
Fig 8
16
4A
Initial Assembly
10
Adjusting bolt
Table supporting brackets assembled
Fig 5
Fig 6
9
7
Locate the remaining three panels (2) and 20 No.
M8x16mm (5B) bolts, nuts and double washers.
Take up the rear panel with the dust extraction
moulding fitted and fit between the rear legs,
using washered bolt through the leg and panel
and securing with washer and nut. Again, secure
the nuts finger tight only. (See fig 7)
With easy open access, now is a good time to fit the
dust extraction hose. Locate the hose (4A) and the
two 125mm hose clips (16). Stretch the hose out to
its full length. Slip the hose clips over the ends of
the hose, fit the hose to the outlet on the saw box
and the dust extraction moulding and tighten the
hose clips to clamp them in place. (See figs 8-9-10)
Fit the hose over the dust extraction
moulding and clamp in place
Fit the hose over to the saw box outlet
and clamp in place
Fig 9
Fig 10
Fit the remaining panels to the legs, using the same
securing sequence. Wriggle, push, pull, press, lever
etc., the legs and the panels into the best alignment
with the upper chassis and tighten the nuts and
bolts using the spanners provided. (See figs 11-12)
Fig 11
4A
16

Initial Assembly
11
Fig 12
Fig 13
Fig 14
Fig A
Fig B
When everything is tightened up, the machine can
now be tipped over, towards its blind face until it is
resting on the pallet with its legs on the floor. Lift
the machine upright. (See figs 13-14)
Blind face
Side extension table
Locate the rear table (6) and the other 4 No. M8
caphead bolts and washers (9). Mount the table
onto the brackets, Note: that the securing bolts
need to feed through the elongated holes in the
bracket (7), the rear extension table is spaced off
the main table to allow clearance for the rear
clamping rail and the rip fence. Leave all bolts
finger tight at this time. (See figs 15-16)
Fig 15
Fig 16
Elongated holes
7
Continues Over....
Side Extension Table
Locate four M8 x 16mm hexhead bolts and washers.
Ensure the table is correctly orientated. Stand the
back end of the side extension table (3A) on the
floor, close to the front and edge of the main saw
table (1), with the underside of the table facing the
front of the saw. Lift the table up and introduce a
bolt and washer through the first hole in the table
and screw it into the first threaded hole along the
main table edge. Repeate for the remaining bolts.
Place a level across both table surfaces and tighten
the bolts, (See figs A-B).
1
3A
M8 x 16 Bolt

Initial Assembly
12
Drive shaft for the tilt mechanism
Insert the hand wheel over the
shaft for the tilt mechanism
Fig 17
Fig 18
Secure the hand wheel in place using a
Hex screw and washer then tighten using
the supplied Hex key
Fig 19
Key slot
Key slot
Shaft
Square key
Hex screw
Fig 21
Fig 22
Fig 20
10
14
Saw Guard Assembly
Locate the Riving Knife (14), remove the 5 screws
that secure the saw gullet, place both carefully aside.
(See figs 21 22) Raise the saw blade up to its highest
point.
NOTE: The mounting plate for the riving knife
has been factory set to ensure that the riving
knife is aligned with the blade. DO NOT alter
the setting bolts.
Locate the two hand wheels (10). Remove the Hex
screw and washer from both drive shafts and place
aside. Insert a square key into each machined slot
on the drive shafts and slide the hand wheels onto
the shafts. Replace the Hex screws and washers and
tighten securely , (See figs 17-18-19-20)
NOTE: Line up the key slot in the hand wheel with
the square key and slide the wheel onto the shaft,
tighten securely.
NOTE. Please ensure that the rise and fall LOCK is
unlocked before operating the mechanism.
Fitting Hand Wheels

Initial Assembly
13
Introduce the slot in the riving knife (14) over the two centre line bolts, behind the washers
and nip the bolts to just hold the riving knife against the mounting plate. Set the riving knife so
its close to the blade, (gap with in 8mm). Tighten the clamping bolts securely. (See figs 23-24)
Replace the saw gullet.
Fig 23 Fig 24
14
8mm gap
Mounting plate
Locate the saw hood guard (13), the 30mm extraction hose (17) and the 50mm hose clips (16).
Introduce the pin bolt through the pre-drilled hole in the guard (13) and lightly screw on the
clamping knob. Lower the guard so the pin bolt fits into the curved slot in the riving knife then
tighten the clamping knob to pinch the guard to the riving knife. (See fig 26-27)
Fig 25 Fig 26
Fig 27 Fig 28
Clamping knob
Curved slot
Pin bolt
Push the hose clips (16) over the ends of the hose (17), push the hose onto the dust extraction
outlet on the guard (13) and the main dust extraction moulding (4) and tighten the hose clips to
hold it in place. (See figs 28-29)
13
17
16
Continues Over....

Initial Assembly
14
Fig 29 Fig 30
4
There is no requirement to remove the guard. The profile of the riving knife precludes the use of the saw
for slotting or grooving, and the maximum depth of cut can be achieved with the guard in place.
NOTE: The positioning of the extraction hose could be a nuisance if you are cutting big boards, in such a
case it is better to remove the hosing from the guard, then there is less risk getting the workpiece snagged
and perhaps ‘slewing’ on the saw.
17
Fig 31 Fig 32
Locate the M8 x 25mm SQUARE head bolts washers and nuts (4B). The best way to fit the rails is to
introduce the bolts through the holes in the front and rear edges of the tables, hold in position by adding
the washer and fitting the nut a couple of turns onto the bolt. (See figs 30-31)
Rip Fence Assembly
Fig 33 Fig 34
Select the front short rip fence guide rail (22), introduce the square head of the furthest right hand bolt
into the channel in the extrusion; slide the rail along the front of the machine picking up all the bolt heads
as you go along. (See fig 32) Reach under the table edge and lightly tighten all the nuts. (See fig 33) Repeat
the process for the back rail (23). (See fig 34)
23
22
4B
4B

Initial Assembly
15
Locate the capping plates for the front rail (24B) and using the self tapping screws (24C), secure
in place. (See fig 35) Set the front rail in position, remembering that it must be slightly inside
the front left hand edge of the main saw table, so that the sliding table does not collide with it.
Tighten ONLY the 3 bolts in the main saw table. Repeat the process for the back rail.
Fig 35 Fig 36
Locate the Rip Fence assembly (20),fit the rip fence assembly to the saw by ensuring the
clamping lug at the rear of the fence is hooked over the back rail (23), lower the fence and
manoeuvre the bracket over the front guide rail (22). (See fig 36)
Micro-Adjuster Assembly
Tighten the Phillips screws securely
Fig 37 Fig 38
Locate the Micro-Adjustor (25) there are two Phillips screws through the adjustor
mounting bracket with square nuts on them. Ensure the nuts are undone sufficiently to allow
them to slide into the channel in the Rip Fence mounting bracket, position as required, normally
slightly to the right of the rip fence, (See figs 37-38) and tighten the screws securely.
25
20
22
Capping plate
Fig 39 Fig 40
Locate the capping plates for the Rip Fence Mounting Bracket (24A) and fit carefully using the self
tapping screws. (See figs 39-40)
24A
24B
24C

Initial Assembly
16
Locate the Rip Fence Extension (21), the two M6 x
70mm ‘T’ bolts and M6 knobs (24). Slot the two ‘T’
bolts into the fence extension recess, see figs 41
and 42. Slot the bolts into the pre-drilled holes in
the fence extension and secure in place with the M6
knobs. (See fig 43-44)
NOTE: The rip fence extension (21) can be
repositioned to the opposite direction for guiding
thin timber pieces through. (See fig 45)
Fig 41 Fig 42
Fig 43
Fig 45
Fig A
Fig B
21
24
M6 Knob
Hex blot
Hose support bracket
Rip Fence Extention
Mitre Fence
Hose Support Bracket
tighten to clamp the extension in place. (See fig 46)
Introduce the nose of the bar (12) into the required
‘T’ slot in the main table. (See fig 47)
Note: With the rear extension table fitted it is
not possible to push the small mitre fence
completely through. However, the travel is such
that the fence is able to travel well past the
cutting edge of the saw.
Fig 46
11
Fig 44
Fig 47
12
Locate the hose support bracket and the Hex bolt/
nut. insert the bolt through the pre-drilled hole in
the bracket and loosely screw on the nut. Insert the
bolt into the end of the rear guide rails‘T’ slot, see fig
A until the bracket support is upaginst the guide rail.
Tighten the nut to secure the asssembly in position.
(See fig B)
Locate the Mitre Fence and Extension (11), loosen
the clamping screw knobs on the extension and
slot each into the slot recesses on the mitre fence,

Initial Assembly
17
951538 10” and 951541 12”
Table Extension Kits (Box 1 of 2)
Select one of the extension tables (26), locate four
M8 x 30mm hexhead bolts and washers (30). Ensure
the table is correctly orientated (the front edge of
the table is bevelled). Stand the back end of the
table on the floor, close to the front and edge of the
main saw table (1), with the underside of the table
facing the front of the saw. Lift the table up and
introduce a washered bolt through the first hole in
the table and screw it into the first threaded hole
along the main table edge. Fig 50
Fig 51
Screw the bolt in until it is almost home. You can
now relax the lifting effort. The extension will hang
pivoted on the bolt. Carefully lift the bottom end
of the extension up until the edges are level and
introduce a bolt and washer through the rear hole
and the last threaded hole in the table edge, screw
Setup 1
Fig 48
30
Fig 49
26
Continues Over...
WARNING!! THE EXTENSION TABLES
ARE VERY HEAVY YOU WILL REQUIRE A
SECOND PERSION TO HELP!
it almost home. The extension should be hanging
approximately in its correct position held by the
two bolts. Introduce and almost screw home the
other two bolts and washers. Using a level, align the
top and front edges at the front of the saw, nip the
front bolt to hold the extension in place; carefully
manoeuvre the rear of the extension to align the
two top edges and ‘nip’ the rear bolt.
Check this movement has not disturbed the
alignment at the front of the table, if it has, repeat
the procedure until the front and top edges are
aligned. Tightened all the bolts securely. (See figs
48-49-50 and 51) Repeat using the other extension
table (26) for the opposite side of the saw bench (1).

Initial Assembly
18
Locate the long Rip Fence (front rail) (32) and (back
rail) (33), remove the short rip fence front and
back rails (22-23) from the saw bench (1), (follow
the instruction on pages 14 and 15, “Rip Fence
Assembly” to assemble the long rip fence rails.
NOTE: Make sure the both rip fence rails are parallel
to the far left of the left extension table (26), (See fig
52). Replace the rip fence assembly (20) on the saw
bench (1), as described on page 15.
501196 10” and 501197 12”
Table Extension Kits (Box 2 of 2)
The left extension table, with both
fence rails parallel to the edge.
Table Extension Kit, (Setup 1) assembled
Fig 52
Fig 53
Setup 2
Fig 54
Fig 55
26
The Left extension table (26) can be
repositioned to the end of the right
extension table to create a large
surface area, in doing so it also free’s
up the space to attach the sliding table assembly
(code no: 951539).
Locate the table support leg (27), the threaded
rubber foot (28) and two M8 x 20mm hex bolts,
washers and nuts (31).
Line up the two middle holes to outside edge of the
table with the pre-drilled holes in the support leg
bracket (27) and fasten securely using the M8 bolts,
washers and nuts. (See figs 55-56)
26
27
First remove the rip fence assembly (20) and place
safely aside, loosen both rip fence rails (32-33) and
slide them to the right. Undo the four M8 x 30mm
hex bolts and remove the left table. Attach the left
table to the right table using the four M8 x 30mm
bolts,washers and nuts as before, (WARNING:
YOU MUST ENSURE THAT THE NUTS IS FULLY
ENGAGED ON THE BOLTS BY SERVERAL TURNS,
BEFORE RELAXING THE LIFTING EFFORT). Tighten
all the bolts securely. (See fig 54)

Initial Assembly
19
Fig 56
27
Screw the threaded rubber foot (28) on to the end
of the support leg (27), until it’s tight. (See fig 57)
Unlock the caphead clamping bolt of the support
leg and allow the inner section to slide through until
the foot is resting on the floor. DO NOT put the leg
under tension at this time. ‘Nip’ up the clamp bolt
(See fig 58)
Fig 57
28
Support leg foot and caphead clamping bolt
Fig 58
27
Replace both long rip fence rails (32-33) as
described on the previous page and replace the
rip fence assembly (20) on the saw bench (1), as
described on pages 15 and 18.
The Measuring Scale extension label (34) can
be used for the different setup configurations.
(See fig 60)
Measuring Scale Extension label
Table Extension Kit, (Setup 2) assembled
Fig 60
Fig 61
Fig A
Replacing both rip fence rails
Fig 59
33 32
34
M8 Bolts/washer
Kick-Plate
Locate the ‘Kick-Plate’ and the remaining four M8 bolts/
washers. Line up the pre-driled holes in the plate with
the threaded holes to the front of the panel saw frame
and secure with the M8 bolts and supplied spanner.
(See fig A)
8

Initial Assembly
20
951539 10” and 12” Sliding Table Kits (Box 1 of 2) and (Box 2 of 2)
Locate and identify the mounting brackets (35) and
the height adjustor blocks (45). These are mounted
on the outside faces of the upper chassis legs. They
are anchored against clamping the plates (36) that
are behind the face of the legs.
NOTE: These clamping plates are ‘loose items’, each
is initially held in place by three M10 x 19mm hex
Line up the holes in the clamping plate in
ready ness for fitting mounting bracket
Mounting plate in position
Fig 62 Fig 63
Unscrew the caphead bolt until the
recessed hole is clear
Attaching the mounting bracket (35) to
the side of the saw bench (1)
Fig 64 Fig 65
36
45 35
Caphead bolt
Fit a bolt (39) through the bottom hole of the
bracket, screw it back into its position. Align the
adjustor block (45) as near vertical as you can
judge and fasten the caphead bolt.
Screw the adjusting caphead bolt back through the
block until it touches the lower face of the mounting
bracket (35). (See fig 66) Nip the securing bolts for
Mounting Bracket/Adjuster Block Assembly
bolts (39). Unscrew the caphead bolt in the height
adjustor block (45), see fig 64, until the recessed
hole for the caphead bolt (39) is clear, fit it through
the height adjustor block and screw it back into its
position. Screw it almost home. Next fit a caphead
bolt through the top hole of the bracket (35), and
with the bracket tilted to one side, screw it back into
its position. (See figs 62-63 and 65)
the mounting bracket. Fit the other bracket in the
same way. NOTE: When screwing the adjusting bolt
back through the block, set it to leave the brackets
at approximately the same height. (See fig 67)
Unscrew the slide rail assembly lift and shift handles
(A) so that the square clamps have plenty of
movement.
This manual suits for next models
1
Table of contents
Other Axminster Trade Saw manuals

Axminster Trade
Axminster Trade AT406SS User manual

Axminster Trade
Axminster Trade PS315 User manual

Axminster Trade
Axminster Trade AT254PS13 User manual

Axminster Trade
Axminster Trade AT2552B User manual

Axminster Trade
Axminster Trade AT305SB User manual

Axminster Trade
Axminster Trade AT460SS User manual

Axminster Trade
Axminster Trade AT3352B User manual

Axminster Trade
Axminster Trade AW10BSB2 User manual

Axminster Trade
Axminster Trade AT3086B User manual

Axminster Trade
Axminster Trade AT1854B User manual