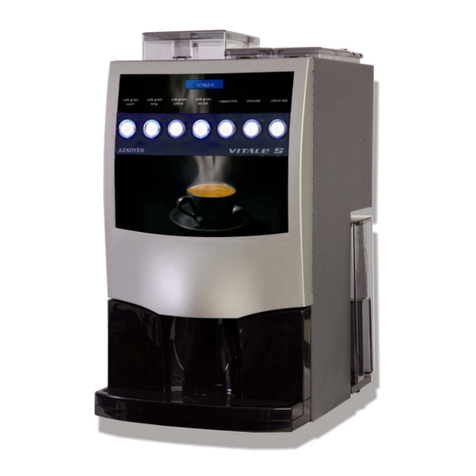
Azkoyen VITALE S User manual

USER MANUAL
VITALE “S” COFFEE MACHINE
MANUAL REFERENCE: 81037070; EDITION 01-2013
AZKOYEN

User Manual
- 2 -

User Manual
- 3 -
USER MANUAL.......................................................................................................................... 1
VITALE “S” COFFEE MACHINE................................................................................................ 1
WARNINGS................................................................................................................................. 4
General 4
Maintenance 4
Electrical 5
CHAPTER 1. GENERAL CHARACTERISTICS.......................................................................... 6
1.1.- Description of the machine. 6
1.3.- Description of the main components 7
CHAPTER 2. INSTALLATION AND STARTING-UP.................................................................. 8
2.1.- Choice of location for the machine 8
2.2. - Electrical installation 8
2.3. - Water supply 8
2.4. - Start-up 8
CHAPTER 3. DESCRIPTION OF THE MACHINE...................................................................... 9
3.1.- Soluble product hoppers 9
3.2. - Initial loading of soluble product. 9
3.3 – Loading coffee beans 9
3.4. - Initial loading of water 9
3.5.- Bean coffee group (Espresso Machines) 10
3.6.- Dismantling the coffee bean group 10
3.7.- Settings and adjustments 11
3.8.- Changing product fall in the milk and chocolate hoppers 12
3.9.- Hydraulic Circuit Diagram (Espresso/Instant) 12
CHAPTER 4. Programming..................................................................................................... 13
4.1.- How do we communicate with the machine? 13
4.2.- What can be programmed? 13
4.3.- Quick access to functions 13
4.4.- Programming menu 13
CHAPTER 5 – TROUBLESHOOTING AND MAINTENANCE.................................................. 20
5.1 - Reset 20
5.2 – Error detected by the machine. 20
5.3.- Changing the product signs and the photo 20
CHAPTER 6. CLEANING THE MACHINE................................................................................ 22
6.1 – Parts which need to be cleaned regularly 22
6.2.- Periodical cleaning of the coffee bean group 22
6.3.- Cleaning cycle for the group brewing chamber 23
6.4.- Descaling cycle. 24
6.5.- Replacing the water filter. 25
6.5 – Exterior cleaning 26

User Manual
- 4 -
WARNINGS
General
READ THIS MANUAL CAREFULLY BEFORE USING THE DISTRIBUTOR.
This distributor has been designed and built in accordance with current safety standards.
AZKOYEN guarantees that these machines comply with the following directives:
oEC low voltage directive DBT 2006/95/CEE and modifications.
oEC electromagnetic compatibility directive EMC 2004/108/CEE and modifications.
These machines are designed for INDOOR USE ONLY.
They must not be fitted at locations in which they may be exposed to water jets and must not be cleaned
by this method.
This document contains information which is private property and is protected by laws on intellectual
property. All rights reserved. The photocopying, reproduction and translation into any language of any
part of this document is not permitted without the prior written consent of AZKOYEN.
AZKOYEN accepts absolutely no responsibility for damage caused to persons or property as a result of:
oIncorrect installation
oUnsuitable electric and/or hydraulic installation
oIncorrect cleaning or maintenance
oIncorrect use of the machine
oThe use of non-original replacement parts and unauthorised modifications
AZKOYEN reserves the right to apply improvements arising as a result of its constant research to the
present model without prior notice.
This manual is an integral part of the machine and, as such, must always be kept inside it so that it may
be consulted at any time.
This appliance is not designed to be used by persons (including children) with reduced physical, sensory
or mental capabilities, lack of experience or knowledge, unless they are supervised or have been
instructed in its use by somebody responsible for their safety. Children should be supervised to ensure
that they do not play with the appliance. Section 7.12 of EN60335
Maintenance
The user or the person responsible for reloading and cleaning the appliance must follow the instructions
indicated in this manual.
When reloading, only use ready-prepared products specific to this type of machine. Do not touch the
product with your hands and prevent liquid from falling inside the product hoppers.
The components do not require tools for dismantling and must only be handled by qualified technical staff.
Prevent water from freezing inside the machine. Empty the boiler when maintenance work is to be
performed or when the machine is going to be disconnected for a long period of time.
Given the characteristics of some food products, these may lead to incorrect operation of the machine if
used beyond the parameters of temperature and relative humidity recommended in this manual.
If it is necessary to move the machine avoid:
oTipping the machine
oDragging or lifting it with some kind of pulling system (rope, straps, etc.).
oShaking or striking the machine, no matter whether it is in protective wrapping or not.
The machine must be installed at locations which comply with the recommendations of temperature,
electricity and water installation, weights, etc. given in this manual and must be performed by qualified
personnel..
User Manual
- 5 -
Electrical
THE MACHINE INCLUDES DANGEROUS HIGH-VOLTAGE COMPONENTS. DO NOT DISCONNECT
ANY COMPONENT. ONLY THE TECHNICAL SERVICE IS AUTHORISED TO DO SO. THE POWER
CABLE MAY ONLY BE REPLACED BY TECHNICAL STAFF AUTHORISED BY AZKOYEN.
Make sure that the electrical installation, socket and automatic switch are appropriately dimensioned for
machine consumption.
The machine plug (1, Fig. 3) is equipped with earth. The base must be connected to a good earth and
must be located so as to be accessible when the machine is installed.

User Manual
- 6 -
CHAPTER 1. GENERAL CHARACTERISTICS
1.1.- Description of the machine.
The machines on the VITALE range are
TABLETOP coffee and soluble
beverage machines especially designed
for use in areas with medium coffee
consumption, such as waiting rooms,
medium-sized offices, etc.
There are three machine configuration
options:
Instant, only with soluble products
Espresso + 2 (Mixed), with two soluble product containers and coffee-bean system.
Espresso, fitted with a system to make espresso coffee from coffee beans
Instant Espresso+2 Espresso
No. of selections 7 7 3
Product
No. bean containers 0 1 1
No. soluble product containers 4 2 0
Bean container capacity (l.) - 3,1 l
Soluble product container capacity (l) 1,6 l -
Coffee bean container capacity (kg) - 1,1 1,1
Milk container capacity (kg) 0,6 0,6 -
Chocolate container capacity (kg) 0,8 0,8 -
Soluble coffee container capacity (kg) 0,4 - -
Soluble decaf. coffee container capacity (kg) 0,4 - -
Dimensions
Height 560 590
Width 305
Depth 410
Weight (kg) 20.7 27.2 25.3
Electrical characteristics
Voltage 230V +6V/-10V
Power consumption (W) 1.100
Water supply
Types of supply Mains or incorporated tank
Minimum input pressure min 49 Kpa.; Max. 980 Kpa
Diameter of the stopcock (to connect the mains
hose) ¾” M
Water tank capacity (l) 4
Other Characteristics
Maximum work gradient 2º (on any axis)
Sound level <80 dB(A)
Optimum exterior environment temperature > 1ºC - <40ªC; <95% Rel. hum.

User Manual
- 7 -
1.3.- Description of the main components
1. Coffee bean container
2. Soluble product container
3. Ground coffee doser
4. Soluble product blender
5. Coffee bean group
6. Rubber threshold
7. Drip tray
8. Programming button
9. Upper photo
10. Display
11. Lower photo
12. Tray full level
13. Water tank
1
2
3
4
5
6
7
8
9
10
11
13
12

User Manual
- 8 -
CHAPTER 2. INSTALLATION AND STARTING-UP
2.1.- Choice of location for the machine
The machine must be placed on a unit or support so that it is stable and cannot be accidentally
knocked over.
THE INSTALLATION OPERATIONS REQUIRED FOR THE INITIAL START-UP OF
THESE MACHINES MUST BE PERFORMED BY QUALIFIED TECHNICAL STAFF.
2.2. - Electrical installation
The voltage of the electrical system must comply with the voltage indicated on the
characteristics plate on the back of the machine and must not exceed the limits set in the
country of use.
Maximum power consumption is indicated on the machine characteristics plate.
2.3. - Water supply
If your machine is fitted with mains service, then prepare a water supply where the machine is to
be fitted in accordance with the indications in the general characteristics table. The distance
between this water supply and any electric socket base must be at least 1 m. Observe
European directives.
If your machine is fitted with a water tank, remove it from the side of the machine for filling.
2.4. - Start-up
Press the switch on the back of the machine.
Once the tank has been filled or the water hose has been
connected to the mains and current fed to the socket, close
the door: The machine will be ready for use in a few minutes.
If the machine is mounted on a support, then the support
must be well secured to the wall.

User Manual
- 9 -
CHAPTER 3. DESCRIPTION OF THE MACHINE
3.1.- Soluble product hoppers
The Instant and Mixed machines have 2 or more soluble product containers.
These containers extract the product via a spindle to the Blender, where it is mixed with water
sent from the boiler.
Each hopper must always be loaded with the same type of product because the serving
configuration activates the hopper programmed for each case.
e.g. do not load the coffee hopper with a different product because the machine will use it for
servings programmed with coffee.
3.2. - Initial loading of soluble product.
Lift the lid of the hopper to be loaded and load the product. Make sure that
the product loaded is the right product for the hopper (each hopper has a
label indicating the product to load).
When the product has been loaded, close the lid and proceed to load the
next hopper.
3.3 – Loading coffee beans
Lift the hopper lid and pour in the contents of the packet of coffee to
the desired level.
3.4. - Initial loading of water
All the machines automatically fill the boiler when the machine is started up.
BEFORE CONNECTING THE MACHINE, MAKE SURE THAT THERE IS WATER
AVAILABLE TO FILL THE BOILER (check the mains hose connection or make
sure that the water tank is full)

User Manual
- 10 -
3.5.- Bean coffee group (Espresso Machines)
The coffee beans are stored in the grinder hopper. When a serving is requested, the brewing
group moves to the loading position and the grinder grinds the amount of coffee programmed,
sending it to the doser, where the coffee is dosed and then falls to the brewing piston.
The group then advances to the brewing position and the piston tamps the coffee.
The pump injects the programmed water into the group for the pre-set length of time. The result
of this operation is the Espresso coffee which pours into the cup.
Fig. 3
1Hopper
2Doser
3Upper piston
4Lower group
5Grinder adjustment lever
6Water input hose
7Group anchoring lever
8Group positioning crank
3.6.- Dismantling the coffee bean group
Turn the group positioning crank to its stand-by (rest) position.
If you wish to dismantle the entire lower group, dismantle the group
water input hose and then turn the group securing levers and extract the
group by pulling it out.
5
6
7
8
1
2
3
4

User Manual
- 11 -
To extract the brewing piston,
1. Set the group to stand-by position by
entering programming and pressing button 6
(see programming).
2. Remove the securing pin.
3. Pull the piston upwards.
4. If you wish to dismantle the piston completely,
remove the securing clip.
3.7.- Settings and adjustments
Adjusting the coffee dose. The brewing piston on the group has a washer with which it is
possible to increase or decrease the capacity of the brewing cylinder and thereby adjust the
amount of ground coffee it can contain. The quantity can vary between 5g and 8g. The doser
also needs to be adjusted so as to send the right amount to the cylinder.
The following diagram indicates the position of the washer and the doser lever to set the desired
amount.
The dose is factory set to 6.5 g of ground coffee (100 % natural coffee)
Coffee grinding point adjustment. The grinder leaves the factory set to the optimum grinding
position. If you want to grind the coffee finer, then you can move the adjustment lever one or
two positions (with the motor running to prevent the teeth from jamming with coffee).
The grinder adjustment lever is at the top of the group. Use it to set the ground coffee
grade you wish to use.
A “good coffee” is one which has been brewed at 9 kg/cm2, which is equivalent to a
brewing time of between 15 and 20 sec.

User Manual
- 12 -
3.8.- Changing product fall in the milk and chocolate hoppers
If you wish to change the order in which the products fall into the blender, then you can release
the rear cover and change the order of the connectors. The hopper which had direct fall then
becomes inclined and vice versa.
3.9.- Hydraulic Circuit Diagram (Espresso/Instant)
Espresso Hydraulic Circuit Diagram
Instant Hydraulic Circuit Diagram

User Manual
- 13 -
CHAPTER 4. Programming
4.1.- How do we communicate with the machine?
The VITALE S machine uses a selection keypad to communicate with the machine user.
When the machine is in programming status, the programmable functions are accessed by
pressing the different buttons.
The machine has an information screen which shows messages during service, programming
and warning messages for maintenance and cleaning.
4.2.- What can be programmed?
To access Programming, press the button on the circuit board inside the
door (P).
4.3.- Quick access to functions
Press the P button to enter the quick access mode. In this mode, several functions are available
with a single press of a selection button. The display shows: “SELECT OPTION”.
The available functions are:
Button Function
1 Rinse mixer bowls
2 Clean espresso group
3 Audit – individual drinks
4 Audit – total drinks
5 Descaling
You can press and hold the P button for 3 seconds to access the standard programming menu.
4.4.- Programming menu
On Vitale machines, programming is performed on the machine display. If the machine is fitted
with a pay module, then the values being modified may appear on the module’s screen, but the
functions are controlled from the machine display.
Press and hold the P button for 3 seconds to access the programming menu.
P

User Manual
- 14 -
The first function available appears on the screen of the machine:
The buttons flash. Press a button to access the function or the P button to quit.
Use pushbutton 1 (on machines with 3 and 7 pushbuttons) to lower the function No. and
pushbutton 2 to raise the function No.. Use pushbutton 3 to access the function. Press the
programming button to exit.
Function F030 is used to access a set of tests on the elements of the machine. When the
function is entered, the test that can be performed is shown on the bottom line. The tests
available, both on espresso and soluble product machines, are:
BLENDERS
EXTRACTORS
SOLENOID VALVES
WASH BLENDER
FILL BOILER
SERVICE TEST
DESCALING
On machines with espresso group, the following tests are also available:
MOVE GROUP
GRINDER
DOSER
CLEAN GROUP
Choose the test you want to perform by pressing buttons 1 and 2, and select using button 3.
After entering either function F110, F111 or F201, you are asked which selection you want to
access via the following screen:
In functions F490 and F491, you are asked to select a hopper or a service. The hopper or
service to edit is selected with the first 4 buttons, in the same way that the function number is
selected.
010 LISTING
- + ENTER
PRESS SELECTION

User Manual
- 15 -
The following is a list of the programmable or executable functions:
Function Description
F010 On-screen display of incidents history
F030 Machine test
F110 Accountancy of money sold per selection
F111 Accountancy of units sold per selection
F120 Accountancy of total money sold
F121 Accountancy of total units sold
F171 Deletion of accountancies
F201 Programming of price for each selection
F204 Programming the same price for all the selections
F300 Association of selections to services
F315 Programming services
F401 Factory settings (*)
F412 Programming coin values
F461 Programming setpoint temperature
F465 Autonomy mode selection (water tank/connection to mains)
F472 Programming operator code
F490 Programming the names of the hoppers
F491 Programming the names of the services
(*) Warning: If you run the F401 function, ensure you have placed the liquids tray, otherwise the
machine will identify that it is mounted on a pedestal and will deactivate the pads counter and
the machine not it will alert you on the screen if the waste tray is full.
Editing values:
When many of the functions are entered, a numeric or alphanumeric value can be edited. The
digit or character to edit flashes on the display.
The 4th button only works when editing the 2nd digit or greater. The 3-button machine does not
have this button. In order to modify a digit which has already passed, you have to continue to
the end of the number and access the edition of the value again.
OUT OF CHANGE
The display flashes the credit on models connected to a change-giver when it is in "change
stock out" mode.
- + Æ Å

User Manual
- 16 -
4.4.- Service programming.
4.4.1.- What is a service?
A service is the act that the machine performs every time that a customer presses a selection.
More specifically, a service is the steps that the machine must take in order to complete the
operation that has been selected.
Therefore, when programming a service, each one of these steps must be programmed. For
example: At home, when you prepare a soluble coffee with milk, various actions must be taken:
1) Put coffee in a cup.
2) Add sugar.
3) Add hot water.
4) Stir the mixture.
5) Add milk.
In brief, in order to serve a coffee with milk, the same sequence must be programmed in the
machine.
It is also a good idea for the actions to overlap each other in order to shorten the service time
and to get the optimum mixture.
The service sequence of coffee with milk in the machine could thus be stated as follows:
Step 1
Step 2
Step 3
Step 4
Step 5
The machine begins to dispense coffee at the start of the service, which it continues to do for
1.6 seconds. Going to the next step after the service is initiated, it dispenses sugar for 1.2
seconds. Once the coffee has been added, the machine adds water in the coffee blender and it
causes the blender motor to operate for 4 seconds. Meanwhile, after 3 seconds have elapsed,
the machine begins to add water in the milk blender, and 0.3 seconds later it begins to dispense
milk for 2 seconds. The milk blender will end its operation after 3 seconds and will finalise the
service. The total elapsed time is 6 seconds.

User Manual
- 17 -
4.4.2. Function 315 PROG. SERVICE.
The complete configuration of each service can be programmed at function 315.
Within this configuration, you can program the various steps that the machine must perform in
order to provide that service, the time that it starts during the service and the duration.
Once function 315 is accessed, choose the service to program, pushing the corresponding
selection button.
The following may subsequently be performed:
MODIFY an already-programmed step.
ADD a new step to a service, or
DELETE a step from a service.
Pass from one step of the service to another by pressing buttons 1 and 2 (up/down respectively)
and then button 3 to select the step displayed on the screen.
If the option, MODIFY A STEP, is selected, the machine will display the CONFIGURATION
SCREEN of the step: HOPPER ACTION
ST: 00.0 ET: 00.0
Where:
HOPPER is the name of the hopper that is going to used.
ACTION is the type of operation that is going to be performed with that hopper (add water,
product...).
ST The start time of the action, which starts counting as from the moment the
machine is in the service position. Two whole numbers and one decimal can be
entered (between 0.0 and 25.59.
ET Tiempo de producto o volumen.
If WATER is being programmed, the volume in c.c., en máquinas con contador
volumétrico, that is going to be dispensed in that step should be programmed
instead of the end time.
After choosing the step to edit, start editing. The field to be edited flashes (it can be the field of
the name of the hopper, the type of step or one of the digits in the time or volume values).
The buttons work as follows:
- +
ÆÅ

User Manual
- 18 -
The 4th button only works when editing the 2nd digit or higher. This button does not exist on 3-
button machines and so in order to modify a digit that has already passed, it is necessary to
continue to the end of the number and access the edition of the value again, Finish by pressing
“P”.
In each step, the start time, the action to be performed and what hopper or blender is going to
perform the action and its time in seconds must all be programmed.
After finishing the programming of each step, the screen will display the programming and then
the next step can be programmed.
If ADD A STEP has been selected, direct access to the new step will be provided. The
procedure is the same as the aforementioned one.
If DELETE A STEP is selected, select the step (pressing 1 or 2) and then delete it (pressing 3).
NOTE: If P is pressed at any time during the programming of a step, programming will be exited
and the data will not be recorded
The complete schematic of function 315 PROG. SERVICE is shown below:

User Manual
- 19 -
315 PRG. SERVICE
S.01 BLACK COF.
MODIFY STEP P1 00.0 PROD2 01.6 P2 01.0 PROD3 01.0
START 00.0 SEGS START 02.5 SEGS
TYPE WATER + MIX TYPE WATER + MIX
TYPE WATER ONLY
TYPE MIX ONLY
TYPE PRODUCT
T2. COFFEE T2. COFFEE
T3. MILK
T4. (*)
FOR 01.6 SEGS FOR 02.5 SEGS
MODIFY STEP START 00.0 SEGS START 02.5 SEGS
TYPE WATER + MIX TYPE WATER + MIX
TYPE WATER ONLY
TYPE MIX ONLY
TYPE PRODUCT
T2. COFFEE T2. COFFEE
T3. MILK
T4. (*)
FOR 01.6 SEGS FOR 02.5 SEGS
MODIFY STEP P1 00.0 PROD2 01.6 P2 01.0 PROD3 01.0
→
←
→
→
+ / −
+
/ −
+
/ −
+
/ −
+
/ −
+ / −+ / −+ / −+ / −
+
/ −
+
/ −
+
/ −
→
←
→
←
→
←
→
→
→
←
→
+
/ −
←
←
←

User Manual
- 20 -
CHAPTER 5 – TROUBLESHOOTING AND MAINTENANCE
5.1 - Reset
If your machine is out of service, enter and exit programming by pressing the programming
button twice.
5.2 – Error detected by the machine.
The machine communicates different errors it detects in the normal serving function through
different illuminated button combinations.
To inform you that there is an anomaly, buttons 1 and 2 light up intermittently.
Different combination of the buttons 3 to 7 indicate what error has occurred.
The following is a list of possible errors:
Message Possible causes
LOW TEMPERATURE The machine displays this warning for approx. 1 min. on being started up
ERROR: NO WATER Check the water supply.
Fill the water tank
NO COFFEE BEANS Load the hopper with coffee
Check the position of the group outlet shutter
WASTE BIN FULL Remove the waste tray, clean it and refit it
LONG DISTRIBUTIO Adjust the grinding time to coarser.
Clean the group showers
Check that there is voltage to the input solenoid.
RESIST. FAULTY Element broken or disconnected
TEMP.SENSOR ERR. Probe broken or disconnected
FAIL.WATER LEVEL Check mains pressure.
Input solenoid or level ball broken or disconnected.
DOSAGE ERROR Doser broken or disconnected
F.ESPRSS.UNT.POS The group motor does not work.
The position detector does not work properly.
NO WASTE BIN The tray is missing or not fitted properly.
5.3.- Changing the product signs and the photo
Both the signs and photo on the machine are "customisable". You can make your own signs, so
long as they coincide with the programmed servings, or your own photo.
Other manuals for VITALE S
2
Table of contents
Other Azkoyen Coffee Maker manuals

Azkoyen
Azkoyen VITALE S Owner's manual

Azkoyen
Azkoyen VITRO S-1 Manual

Azkoyen
Azkoyen VITALE S Manual

Azkoyen
Azkoyen VITRO S-1 User manual

Azkoyen
Azkoyen Vitro S1 MIA Operating instructions

Azkoyen
Azkoyen ZEN Manual

Azkoyen
Azkoyen VITRO X-1 User manual

Azkoyen
Azkoyen VITRO M5 User manual

Azkoyen
Azkoyen BRAVO Automatic 2G Manual

Azkoyen
Azkoyen VITRO S-1 Owner's manual
Popular Coffee Maker manuals by other brands

Nescafe Dolce Gusto
Nescafe Dolce Gusto KRUPS GENIO user manual

Hamilton Beach
Hamilton Beach 40515 use and care manual

Krups
Krups KM100050 user manual

Black & Decker
Black & Decker DCM500 Series Use and care book

Fakir
Fakir Cafe Prestige instruction manual

DeLonghi
DeLonghi Coffee Maker ESAM4400 Important instructions