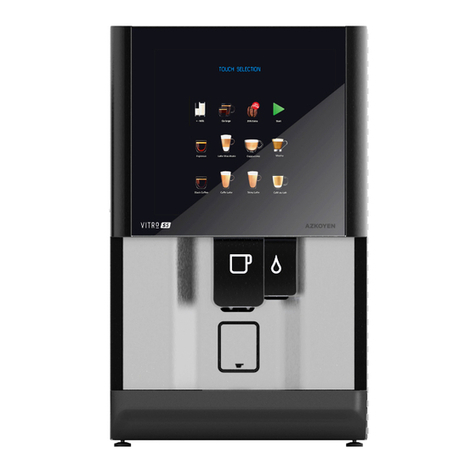
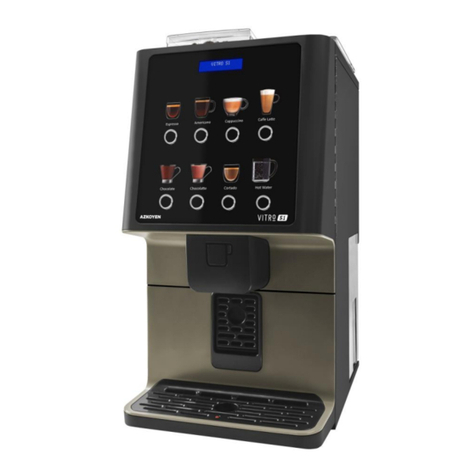
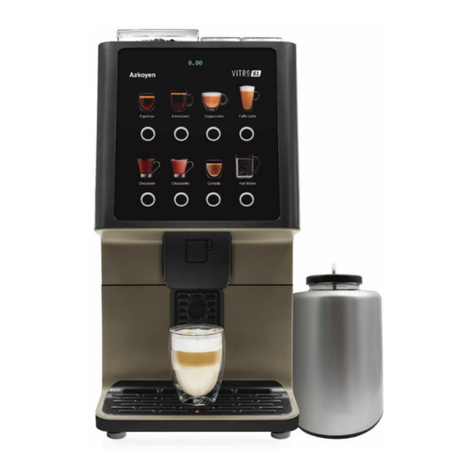
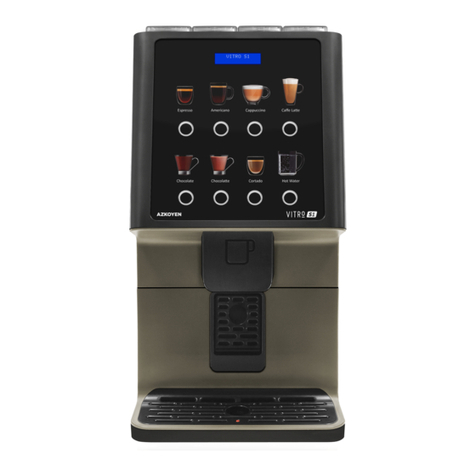
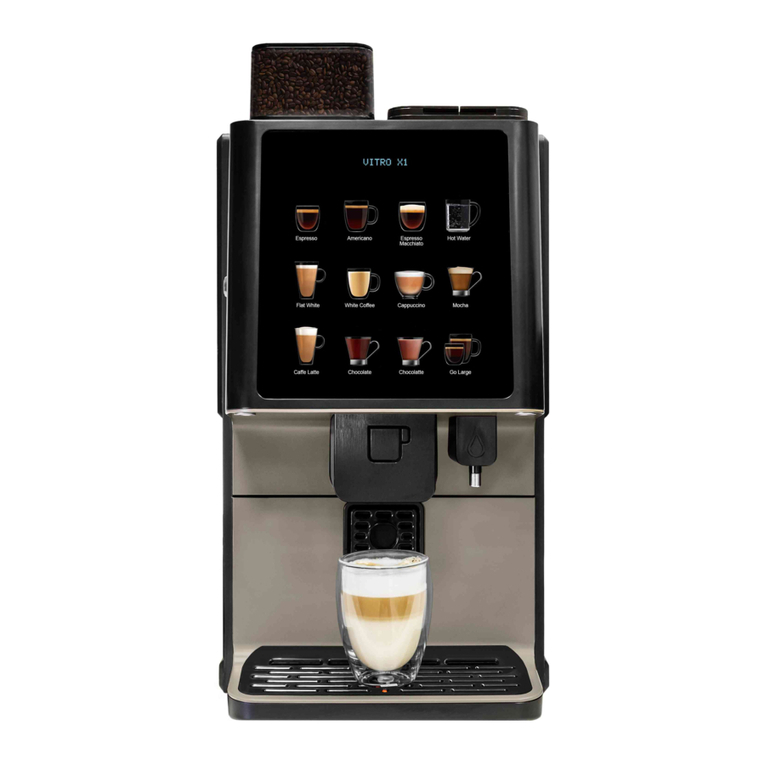
Azkoyen VITRO X-1 Manual

Technical
information
VITRO X1

Technical Principles
1ª review –UK 12 –2020
2
Avda. San Silvestre, s/n
31350 Peralta (Navarra) Spain
Tel.: +34 948 709 709
Cliente.azkoyenvending.es
I N D E X
1. INTRODUCTION
1.1. DEFINITIONS
1.2. MODELS
1.3. PRINCIPAL TECHNICAL CHARACTERISTICS
2. DESCRIPTION OF COMPONENTS
2.1. PRINCIPAL COMPONENTS
2.2. HYDRAULIC CIRCUIT
3 INSTALLATION AND SWITCHING ON
3.1. INSTALLATION
3.2. WATER CONNECTION
3.3. ELECTRIC CONNECTION AND START UP
3.4. FILLING CANISTERS
3.5. FILLING BOILER
4. ERROR MESSAGES ON DISPLAY
5. CONTROL POINTS
6. CLEANING AND MAINTENANCE
7. WORKING CONDITIONS AND NORMS
8. DIMENSIONS

Technical Principles
1ª review –UK 12 –2020
3

Technical Principles
1ª review –UK 12 –2020
4
1. INTRODUCTION
The semiautomatic machines of the Vitro X1 series are destined for the elaboration of
espresso coffee and soluble drinks consisting of the mixing of warm water with product in
powder or granulated.
In the rest of the book, and for major briefness, the elements that are
indicated will be named like:
The machines of the series Vitro X1: machine or machines.
The coffee brewer or coffee group: group or brewer.
The electroválvulas: EV.
1.1. DEFINITIONS
Espresso coffee: Infusion of coffee elaborated according to the following conditions:
-7 g of ground coffee.
-The temperature of the infusion water between 92º C and 96º C.
-The water pressure at 8 kg/cm²La presión del agua de erogación a 9 kg/cm².
-The infusion time of the coffee between 12 and 20 seconds.
-The volume of water in the infusion 50 ml.
Infusion: this is the name given to the process of passing hot water through the ground
coffee to extract its oils and essences.
-Volumetric infusion: when the process of infusion uses a constant volume of
water.
Coffee tablet: the residual compressed coffee grounds after the infusion process.
Programming mode: when the machine is ready for any of its functions or parameters to be
programmed.
Working mode: when the machine is in the working state and ready to prepare any of the
services it offers.

Technical Principles
1ª review –UK 12 –2020
5
1.2 MODELS AND PRINCIPLE TECHNICAL CHARACTERISTICS
The purpose of the Vitro X1 range is to make espresso coffee, which can be combinated with
two soluble products. The machine can also produce soluble products independent of espresso
coffee and has a direct outlet to the cup of hot water.
To push a button is enough to elaborate any service; espresso or instant.
It grinds the coffee when it is ordered.
Products that the machine can dispense:
Model
Coffee beans
Chocolate
Milk
Hot water
X1 Espresso
Yes
Yes
Yes
Yes
The water temperature is programmable.
The ground coffee dose is programmable between 5 g and 8 g.
Water pump for water pressure incorporated in the machine.
Volume dosage of water in the different espresso coffee services is programmable.
Electrical consumption, voltage and frequency depend on the country.
VITRO X1 espresso
Voltage
Power
Length
Mains voltage
110/230 Vca 50/60 Hz
Heating element
110/230 Vca 50/60 Hz
1100 W
Mains flex
1.800 mm

Technical Principles
1ª review –UK 12 –2020
6
2. DESCRIPTION OF COMPONENTS
2.1. MAIN COMPONENTS

Technical Principles
1ª review –UK 12 –2020
7
A1. Coffee beans hopper/canister
It has a capacity of 1,2 kilograms.
A manual lock allows the user to remove the canister without loosing
any bean.
A2. Instant product hopper
With a capacity of 1,6 litres in each one of the hoppers of instant for instant products.
The approximate weight of the product is:
Capacity in grams
Product
Vitro XE+2
Milk
600
Chocolate
800
A3. Product extractor
This motor will move the spindle inside the canister to move instant poder out to the mixing
bowls. These motors are from Componenti.
Motor manufacturer: Componenti
Voltage: 24 V cc
Speed: 140 rpm
A4. Beaters/Mixers/Whippers
The mixing of the products with hot water from the boiler is done with these elements.
B1. Assembly beater motor
B2. Mixer blade impellor
B3. Whipper chamber
B4. Stream hood
B5. Screw
B6. Mixer fixing pivots
B7. Mixing motor clips

Technical Principles
1ª review –UK 12 –2020
8
A motor spins the mixing Blade. Motor technical data:
Motor manufacturer
Mabuchi
Voltage
34 Vcc
Power
20 w
Speed
15.000 rpm
Mixing assy can be removed by pulling untill free the clipping pivots. Then unscrew the fixing
screw and twist the motor to the right to set free the clips.
In case of total
dissambly; pay
attention to the details
shown in the pictures
next to this text.
As shown in the pictures, grey inside base must be moved to the motor. If not, the base will be
in friction provoking a break in the motor.
The tool reference 10040130 can be used as a help.
A5. Extractor
Extractor
The steam and vapour that is generated by the
beaters can reach the product containers and if
they become damp they form lumps in the powder.
This consequently results in the irregular extraction
of the product. To avoid this, the extractor is used
to remove the steam and vapour from the interior
of the machine. It works on 24 Vdc

Technical Principles
1ª review –UK 12 –2020
9
A6. Coffee grinder
It’s the M03 Azkoyen model.
Voltage
230 Vac
Nominal power
400 w
Speed
1250 rpm
Diameter of the grinders
63 mm
Grind points
0.026 mm
Turning the handle anticlockwise gives a coarser grind and moving it clockwise gives a finer
grind. The grinder used in Vitro X1 is regulated by time. Grinder programming in function 315
(check details in programming manual)
To get the desired amount of coffee for your Service: first adjust the “grinding point” using
the handle. After set a time for the grinder in the function 315 “grinding time”. It is advised
to scale the ground coffee in each Service. Last, adjust the piston washers in the best position
(check in section A7. Coffee Group+Piston).
Turning the handle that adjusts the grinding point will have an effect on
ground coffee granulometry, but also on ground coffee Flow. Remember that
grinder is controlled by time: 3 seconds of coarse coffee will make more
grams than 3 seconds of thin coffee.
It can be said that turning right or left the grinding point handle will vary the amount of coffee
ground for your Service. In that case, the grinding time set in function 315 must be modify as
well to keep getting the desired amount of coffee for each Service.
A7. Espresso Group+Piston/Brewer
The Vitro X1 machine has the espresso group model V30. Made of
resin, it is the element that the machine uses to make the espresso
coffee.
The group has moving parts that are activated by a 220 Vac motor
that moves a crank which moves the coffee from the dosage element
to the piston. At the same time it also moves a lever that activates a
micro switch; this indicates the position of the infusion element to the
control board.

Technical Principles
1ª review –UK 12 –2020
10
To remove from its position of anchor, the lower lever must be turned and the two upper
screws must be loosened, as indicated in the photographs. If the group was in brewing
position, to remove it, it is necessary to acces programming function 30 and raise the piston.
To put the group back on the machine, it can be in any position and not
matter that it has been turned out of the machine: Just put it in its place and fix its two
anchor levers; the engine of the group will position it correctly.
C1. Piston
C2. Group
C3. Filter
C4. Holding handle
C5. Position microswitch
C6. Group movement handle
C7. Group motor
AZK 30, variable coffee brewer
The AZK 30 group is variable and automatic positioning from 7 gr to 14 gr, thanks to a 24 VDC
position control motor.
The variable group allows a more controlled and better pressed dosage because the positioning
of the piston is done by the activation of a direct current motor, controlled by a pulse counter.

Technical Principles
1ª review –UK 12 –2020
11
The motor assembly positions the piston and exerts
appropiate pressur on the coffee tablet, according to
the grinding time or grams settings that is made in the
recipe.
D8. Micro switch positioning.
D9. Motor connector.
D10. Gear box motor
The apper piston assembly has a pinion that is
coupled to the engine, to make the right compression
to the coffee tablet according to its number of grams.
D11. Espresso spout
D12. Positioning pinion
D13. Upper piston seal
A8. Tray of liquid residues and coffee cakes deposit
Coffee cakes deposit collects “coffee cakes” coming from
coffee group. It has capacity for 60 cakes. After 60 coffee
services the display will show a message asking to empty the
deposit. If the counter want to be disabled use your laptop
and the Configurator app to modify the settings cmq file.
Tray of liquids collects all the liquid residues that the
machine generates. It has capacity for 1 litre.
Both parts can be removed with the machine lock. Pull the tray to remove both parts.
A9. Water Deposit
It is made of copolyester (Tritan TX1001) and has a capacity for
500 cc of water. It is at atmospheric pressure and temperature.
From this deposit is taken the water to elaborate the espresso
coffee and instant beverages. The water level in this tank is
controlled by a magentic switch activated by a float.
D8
D9
D10
D11
D12
D13

Technical Principles
1ª review –UK 12 –2020
12
A10. Volumetric counter
Its function is to measure the quantity of water that is pumped
for the elaboration of the espresso coffee
A blade inside it spins boosted by the water flow. Two magnets
on the blades activate a terminal locate on the counter cap. The
three terminals on the cap are positive, negative (5V cc) and the
_П_ (square signal symbol). If it is measured between negative
and _П_ when water is pumped through the counter it will be
gotten the voltage difference 0V and 5V. In a digital tester it will
be shown 2.5V which indicates that the counter is working well.
A11. Water pump
E1. By-pass
E2. Non return
When an espresso coffee is elaborated, the water pressure needed is quite high to be able to
pass through the compressed ground coffee in the infusion element. This resistance the coffee
offers makes the water pressure in the boiler increase up to a pressure of 9 Kg/cm². At this
pressure the by-pass opens allowing a small amount of water to return; sufficient to prevent
the water pressure from going over the 9 Kg/cm².
The by-pass is a small hole covered with a ball that is held in place by a spring. This spring will
hold a pressure of 9 Kg/cm², but over this pressure it compresses and allows the water to
pass.
The pressure of 9 Kg/cm² is considered the ideal for elaborating espresso coffee.
When the instant beverages are elaborated, there is no resistance offered and so during there
elaboration the water pump works at lower pressures than when elaborating espresso coffee.
The pump has an non return valve that prevents the return of water from the boiler.
Technical characteristics:
Voltage
230 Vdc
Power
48 w
Working pressure
9 Kg/cm²

Technical Principles
1ª review –UK 12 –2020
13
A12. Boiler
The boiler works under pressure and has a capacity of 700 cc. It warms up the water for the
elaboration of the products, espresso coffee or soluble products.
F1. Temperature sensor
F2. Clixon, rated at 120º C
F3. 1100 W heating element
F4. Electrovalves
F5. Upper cover
F6. lower cover
F7. Water inlet
The boiler is made of brass and does not need any device to control the level of water as the
boiler fills automatically from the moment the machine is switched on. After this the water that
is used is replaced with water from the cold deposit so the boiler is always full.
There are three outlets; one through a 3-way EV for the elaboration of espresso coffee. This EV
has an outlet from the boiler, another goes to the infusion element, and the third that, at rest,
allows the infusion element to be at atmospheric pressure.
G1. Solenoid
G2. Valve
G3. 3rd outlet
When the machine is in the espresso coffee making process, the third is closed while the outlet
from the boiler and the inlet to the infusion element are open to each other.
H1. 3rd outlet closed
H2. To the infusion group
H3. From the boiler
When the machine finishes elaborating an espresso coffee, the EV goes to rest state and closes
the outlet from the boiler leaving the infusion element open to the third outlet. In this way the
water that did not pass through the coffee and was retained in the infusion element goes out
through the third outlet to the residue bucket.

Technical Principles
1ª review –UK 12 –2020
14
The water recedes back from the infusion element towards the third outlet because of the
pressure it was submitted to by the pump in the infusion process.
I1. 3rd outlet open
I2. Infusion element joined to atmospheric pressure
I3. Boiler water closed
Technical Characteristics:
Heating element voltage
230 Vca
Power
1.100 w
Temperature programming
70ºC -94ºC
Safety protection with manual reset
120º C
Voltage of 3-way EV
24 Vcc
Power of 3-way EV
10 w
Maximum pressure of EV
14 Kg./cm²
Working temperature of EV
-10º C a 140º C
Temperature control of the water in the boiler is done with a PTC100. Default Temperature
from factory is programmed to 85ºC, it can be programmed up to 96ºC.
It must be taken into account that, depending on the altitude at which the
machine is installed, the water can boil at a temperature below 100ºC.
Altitud (meters)
(above sea level)
Boiling water
temperature
Max. advised temp. in
boiler (F461)
1500
95ºC
92ºC
1800
94ºC
91ºC
2100
93ºC
90ºC
2400
92ºC
89ºC
2700
91ºC
88ºC
The following table shows the resistance values that the PT100 gives according to the
temperature that it is submitted.

Technical Principles
1ª review –UK 12 –2020
15
ºC
0
1
2
3
4
5
6
7
8
9
0
100,00
100,39
100,78
101,17
101,56
101,95
102,34
102,73
103,12
103,51
10
103,90
104,29
104,68
105,07
105,46
105,85
106,24
106,63
107,02
107,40
20
107,79
108,18
108,57
108,96
109,35
109,73
110,12
110,51
110,90
111,28
30
111,67
112,06
112,45
112,83
113,22
113,61
113,99
114,38
114,77
115,15
40
115,54
115,93
116,31
116,70
117,08
117,47
117,85
118,24
118,62
119,01
50
119,40
119,78
120,16
120,55
120,93
121,32
121,70
122,09
122,47
122,86
60
123,24
123,62
124,01
124,39
124,77
125,16
125,54
125,92
126,31
126,69
70
127,07
127,45
127,84
128,22
128,60
128,98
129,37
129,75
130,13
130,51
80
130,89
131,27
131,66
132,04
132,42
132,80
133,18
133,56
133,94
134,32
90
134,70
135,08
135,46
135,84
136,22
136,60
136,98
137,36
137,74
138,12
100
138,50
138,88
139,26
139,64
140,02
140,39
140,77
141,15
141,53
141,91
110
142,29
142,66
143,04
143,42
143,80
144,17
144,55
144,93
145,31
145,68
120
146,06
146,44
146,81
147,19
147,57
147,94
148,32
148,70
149,07
149,45
130
149,82
150,20
150,57
150,95
151,33
151,70
152,08
152,45
152,83
153,20
140
153,58
153,95
154,32
154,70
155,07
155,45
155,82
156,19
156,57
156,94
150
157,31
157,69
158,06
158,43
158,81
159,18
159,55
159,93
160,30
160,67
160
161,04
161,42
161,79
162,16
162,53
162,90
163,27
163,65
164,02
164,39
170
164,76
165,13
165,50
165,87
166,24
166,61
166,98
167,35
167,72
168,09
180
168,46
168,83
169,20
169,57
169,94
170,31
170,68
171,05
171,42
171,79
190
172,16
172,53
172,90
173,26
173,63
174,00
174,37
174,74
175,10
175,47
200
175,84
176,21
176,57
176,94
177,31
177,68
178,04
178,41
178,78
179,14
210
179,51
179,88
180,24
180,61
180,97
181,34
181,71
182,07
182,44
182,80
220
183,17
183,53
183,90
184,26
184,63
184,99
185,36
185,72
186,09
186,45
230
186,82
187,18
187,54
187,91
188,27
188,63
189,00
189,36
189,72
190,09
240
190,45
190,81
191,18
191,54
191,90
192,26
192,63
192,99
193,35
193,70
250
194,07
194,44
194,80
195,16
195,52
195,88
196,24
196,60
196,96
197,33
260
197,69
198,05
198,41
198,77
199,13
199,49
199,85
200,21
200,57
200,93
270
201,29
201,65
202,01
202,36
202,72
203,08
203,44
203,80
204,16
204,52
280
204,88
205,23
205,59
205,95
206,31
206,67
207,02
207,38
207,74
208,10
290
208,45
208,81
209,17
209,52
209,88
210,24
210,59
210,95
211,31
211,66
300
212,02
212,37
212,73
213,09
213,44
213,80
214,15
214,51
214,86
215,22
310
215,57
215,93
216,28
216,64
216,99
217,35
217,70
218,05
218,41
218,76
320
219,12
219,47
219,82
220,18
220,53
220,88
221,24
221,59
221,94
222,29
330
222,65
223,00
223,35
223,70
224,06
224,41
224,74
225,11
225,46
225,81
340
226,17
226,52
226,87
227,22
227,57
227,92
228,27
228,62
228,97
229,32
350
229,67
230,02
230,37
230,72
231,07
231,42
231,77
232,12
232,47
232,82
360
233,17
233,52
233,87
234,22
234,56
234,91
235,26
235,60
235,96
236,31
370
236,65
237,00
237,35
237,70
238,04
238,39
238,74
239,09
239,43
239,78
380
240,13
240,47
240,82
241,17
241,51
241,86
242,20
242,55
242,90
243,24
390
243,59
243,93
244,28
244,62
244,97
246,69
245,31
245,66
246,00
246,35
400
247,04

Technical Principles
1ª review –UK 12 –2020
16
A13. Water inlet solenoide valve
Allows water to pass from the hydraulic network to the cold-water
tank. Works at 120/230 VAC.
It has a grid that retains solid elements from the hydraulic network, the
normal closure of the EV cuts the passage of
water to the machine. It should be checkingthat the filter or grid is not
hindered by debris.
A14. Control board and transformer
H1. Transformer (96 VA)
H2. Control pcb
H3. Display
H4. Push buttons board
Vitro X1 range machines have 2 electronic boards,a Control board and a key board. The control
unit provides the supply voltages for the rest of the components and managing the machine.
This board is the same of the Zen, Zintro and Vitro S5 models, but with a different firmware.
On the door and protected by a cover, there is the key board, wish has 8 direct products
selections and 4 pre-selections . The activation of these selections and pre-selections is done
by capacitive detectors; To order a product it is not necessary to press any pushbutton, just
move your finger to the desired product and the machine supplies the service.
Each product label and pre-selection is backlit by a LED, when a product is ordered from the
machine, the remaining labels are turned off, remaining illuminated only the requested one. When

Technical Principles
1ª review –UK 12 –2020
17
a pre-selection is pressed, only the product labels affected by that pre-
selection are illuminated, the rest is turned off.
On the electronic pushbutton card, the display is connected, which is of the
alphanumeric type with two lines of 16 characters each.
The pushbutton card is tied with 4 plastic nuts and protected by a plastic
panel. The label holders are attached to the card by pressure. To access the
card, the cup container must be removed.
2.2. Hydraulic circuit
Conecction to water network
JI1. Water deposit
J2. Flowmeter
J3. Pressure pump
J4. Overpressure pump
J5. Non return
J6. Boiler
J7. Electrovalves
J8. Water inlet valve
Autonomy mode
I1. Water deposit
I2. Flowmeter
I3. Pressure pump
I4. Overpressure pump
I5. Non return
I6. Boiler
I7. Electrovalves
I8. Autonomy pump
I9. Plastic jerry

Technical Principles
1ª review –UK 12 –2020
18
3. INSTALLATION AND SWITCHING ON
3.1. Installation
The power supply of the machine requires a socket, or another system, that allows its disconnection.
The method used must guarantee the complete disconnection of both poles.
Elemental safety requirements:
a) Never touch any mechanisms with wet hands or feet.
b) Never connect or use the machine barefoot.
c) Never pull on the flex to unplug the machine.
d) Never leave the machine exposed to the elements: sun, rain, snow, etc.
3.2 Water connection
The machine can operate connected to the hydraulic grid or with a battery unit. For connection to
the hydraulic mains has a 3/4-inch male socket. It shall be connected to a drinking water intake
supplying a minimum flow rate of 5 liters/minute at a pressure between 0.5 and 10 kg/cm2.
The hydraulic mains connection hose is not supplied with the machine.
According to the low voltage regulation, the distance between the water intake and any electrical
plug base will have a minimum of 1 meter.
L1. Línea de agua
L2. Distancia minima 1 metro
Depending on water quality, degree of
hardness; chlorine; bleach; etc., the
installation should be complemented by a
resin scrubber filter.
If the machine incorporates a scrubber filter or softener filter, the minimum network pressure must
be 1 Kg/cm2.

Technical Principles
1ª review –UK 12 –2020
19
3.3 Electrical connection
The supply voltage of the machine is indicated in the characteristics
plate, there is one inside the machine and another on the back.
Depending on the machine code and the country, it can operate at 110
or 220 Vac, with a frequency of 50 or 60 Hz. The installation must have:
An earthed socket
A minimum power rating of 2000 w
The installation site must have a breaker switch and a good ground connection
It is convenient that the electrical power supply system of the machine
incorporates a switch that allows the disconnection of the two phases
3.4 Filling the product containers
To put products in the containers, you should lift the cover of the machine. Otherwise it is
necessary to remove the container from the machine.
1. Coffee beans hopper
2. Soluble product hoppers
After filling the containers for instant beverages, it is advised to request a
service of each as the first time it is used, only a small quantity of product is
served
3.5 Filling the hot water boiler
Start the machine and hot water boiler will be filled automatically.
In the espresso coffee machines, the following process occur:
- The volumetric counter is tested, and the boiler is filled with the EVs open.
- Subsecuently, the boiler is filled with the EVs closed, filling that is detected when
the counter stops spinning. Then the instant product EVs open to let out the air
in the lines and boiler.

Technical Principles
1ª review –UK 12 –2020
20
4. ERROR MESSAGES
In the following table there are described the errors that the machine can detect.
LOW TEMPERATURE
The machine displays this warning for approx. 1
min. on being started up.
ERROR: NO WATER
Check the water supply.
Fill the water tank
NO COFFEE BEANS
Load the hopper with coffee
Check the position of the group outlet shutter
WASTE BIN FULL
Remove the waste tray, clean it and refit it
LONG DISTRIBUTION
Adjust the grinding time to coarser.
Clean the group showers
Check that there is voltage to the input solenoid.
RESIST. FAULTY
Element broken or disconnected
TEMP.SENSOR ERR.
Probe broken or disconnected
FAIL.WATER LEVEL
Check mains pressure.
Input solenoid or level ball broken or
disconnected.
DOSAGE ERROR.
Dosser broken or disconnected
F.ESPRSS.UNT.POS
The group motor does not work.
The position detector does not work properly.
NO WASTE BIN
The tray is missing or not fitted properly.
Other manuals for VITRO X-1
1
Table of contents
Other Azkoyen Coffee Maker manuals

Azkoyen
Azkoyen AZKOY GROUP VITRO S5 User manual

Azkoyen
Azkoyen VITRO S-1 Owner's manual

Azkoyen
Azkoyen VITRO S-1 Manual

Azkoyen
Azkoyen VITALE S Manual

Azkoyen
Azkoyen VITRO S-1 User manual

Azkoyen
Azkoyen VITRO M5 User manual

Azkoyen
Azkoyen Vitro S1 MIA Operating instructions

Azkoyen
Azkoyen VITALE S Owner's manual

Azkoyen
Azkoyen BRAVO Automatic 2G Manual

Azkoyen
Azkoyen ZEN Manual