manuals.online logo
Brands
  1. Home
  2. •
  3. Brands
  4. •
  5. Aztech
  6. •
  7. Wireless Router
  8. •
  9. Aztech 200Mbps HomePlug AV Ethernet Adaptor User manual

Aztech 200Mbps HomePlug AV Ethernet Adaptor User manual

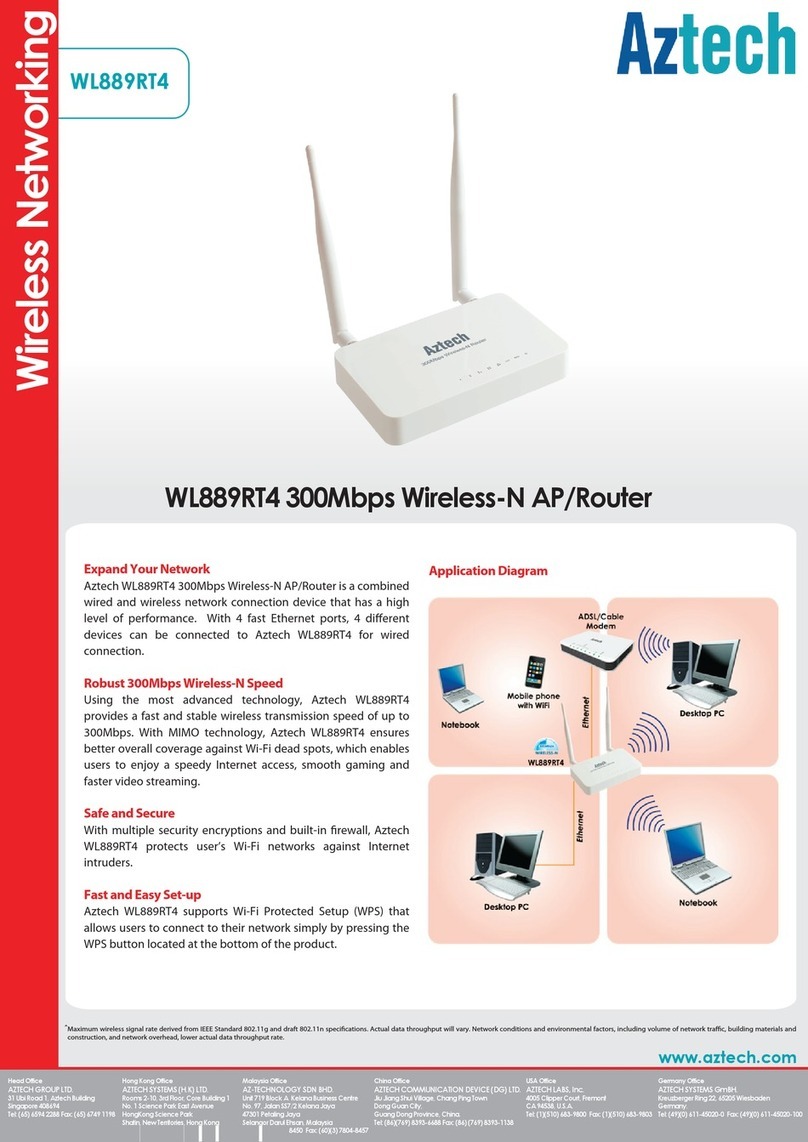
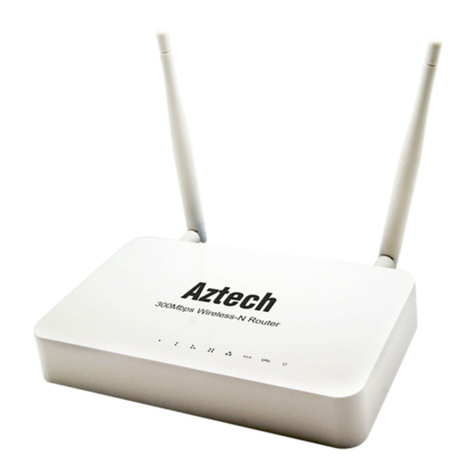
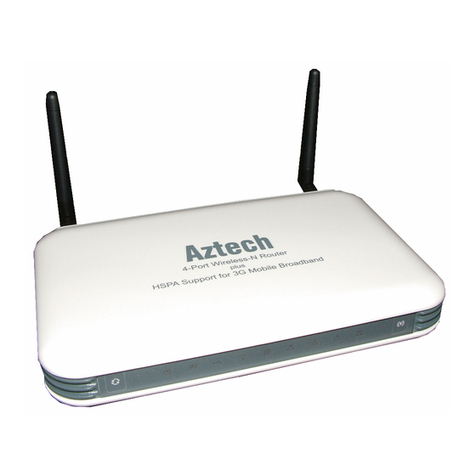
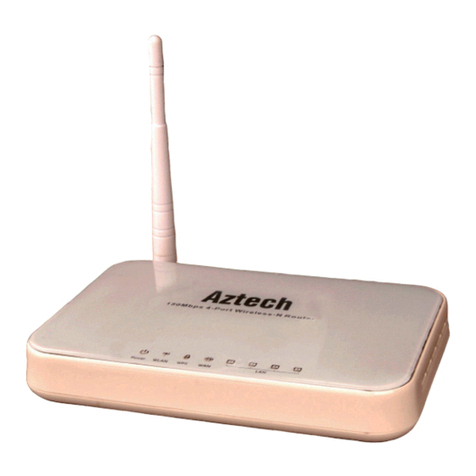
HomePlug AV 200Mbps 4-Port Wireless-N Router
User Manual
Page 2
of 73
200 Copyright. All rights reserved. Version 1.0
No part of this document may be reproduced, republished, or retransmitted in any form or by any means
whatsoever, whether electronically or mechanically, including, but not limited to, by way of photocopying,
recording, information recording, or through retrieval systems without the express written permission. We
reserve the right to revise this document at any time without the obligation to notify any person and/or
entity. All other company or product names mentioned are used for identification purposes only and may
be trademarks of their respective owners.
LIMITATION OF LIABILITY AND DAMAGES
THE PRODUCT AND THE SOFTWARES WITHIN ARE PROVIDED "AS IS," BASIS. THE MANUFACTURER AND
MANUFACTURER’S RESELLERS (COLLECTIVELY REFERRED TO AS “THE SELLERS”) DISCLAIM ALL WARRANTIES,
EXPRESS, IMPLIED OR STATUTORY, INCLUDING WITHOUT LIMITATION THE IMPLIED WARRANTIES OF NON-
INFRINGEMENT, MERCHANTABILITY OR FITNESS FOR A PARTICULAR PURPOSE, OR ANY WARRANTIES ARISING
FROM COURSE OF DEALING, COURSE OF PERFORMANCE, OR USAGE OF TRADE. IN NO EVENT WILL THE SELLERS
BE LIABLE FOR DAMAGES OR LOSS, INCLUDING BUT NOT LIMITED TO DIRECT, INDIRECT, SPECIAL WILLFUL,
PUNITIVE, INCIDENTAL, EXEMPLARY, OR CONSEQUENTIAL, DAMAGES, DAMAGES FOR LOSS OF BUSINESS
PROFITS, OR DAMAGES FOR LOSS OF BUSINESS OF ANY CUSTOMER OR ANY THIRD PARTY ARISING OUT OF THE
USE OR THE INABILITY TO USE THE PRODUCT OR THE SOFTWARES, INCLUDING BUT NOT LIMITED TO THOSE
RESULTING FROM DEFECTS IN THE PRODUCT OR SOFTWARE OR DOCUMENTATION, OR LOSS OR INACCURACY OF
DATA OF ANY KIND, WHETHER BASED ON CONTRACT, TORT OR ANY OTHER LEGAL THEORY, EVEN IF THE PARTIES
HAVE BEEN ADVISED OF THE POSSIBILITY OF SUCH DAMAGES. THE ENTIRE RISK AS TO THE RESULTS AND
PERFORMANCE OF THE PRODUCT OR ITS SOFTWARE IS ASSUMED BY CUSTOMER. BECAUSE SOME STATES DO NOT
ALLOW THE EXCLUSION OR LIMITATION OF LIABILITY FOR DAMAGES, THE ABOVE LIMITATION MAY NOT APPLY
TO THE PARTIES. IN NO EVENT WILL THE SELLERS’ TOTAL CUMULATIVE LIABILITY OF EACH AND EVERY KIND IN
RELATION TO THE PRODUCT OR ITS SOFTWARE EXCEED THE AMOUNT PAID BY CUSTOMER FOR THE PRODUCT.
User Manual
Page 3
of 73
Contents
About the Product
About the ProductAbout the Product
About the Product................................
................................................................
................................................................
................................................................
................................................................
................................................................
................................................................
................................................................
............................................
........................
............5
55
5
Requirements.............................................................................................. 6
Package Contents ........................................................................................ 6
Device Design .............................................................................................. 7
Getting Started
Getting StartedGetting Started
Getting Started ................................
................................................................
................................................................
................................................................
................................................................
................................................................
................................................................
................................................................
..............................................
............................
..............10
1010
10
Planning Your Network ............................................................................. 11
Remove or Disable Conflicts ...................................................................... 12
Internet Sharing, Proxy, and Security Applications ................................................12
Configuring TCP/IP Settings.......................................................................................13
Configuring Internet Properties.................................................................................13
Removing Temporary Internet Files.........................................................................14
etup the Device ....................................................................................... 15
Connecting to the Internet ........................................................................ 16
Connecting Wireless Devices ..................................................................... 18
Manual Setup ..............................................................................................................1
WPS (Wi-Fi Protected Setup).....................................................................................19
WCN (Windows Connect Now)..................................................................................20
Creating a HomePlug AV Network............................................................. 21
Using Simple Connect Button....................................................................................21
Using HomePlug AV Utility ........................................................................................22
Abo
AboAbo
About the Web Manager
ut the Web Managerut the Web Manager
ut the Web Manager ................................
................................................................
................................................................
................................................................
................................................................
................................................................
...............................................................
..............................................................
...............................25
2525
25
Menus........................................................................................................ 26
Basic Menu ..................................................................................................................26
Advanced Menu ..........................................................................................................26
Maintenance................................................................................................................26
Basic Menu
Basic MenuBasic Menu
Basic Menu ................................
................................................................
................................................................
................................................................
................................................................
................................................................
................................................................
................................................................
....................................................
........................................
....................27
2727
27
Quick tart ................................................................................................. 27
Product Info............................................................................................... 29
Advanced Menu
Advanced MenuAdvanced Menu
Advanced Menu................................
................................................................
................................................................
................................................................
................................................................
................................................................
................................................................
................................................................
.............................................
..........................
.............31
3131
31
Qo ............................................................................................................ 32
StreamEngine ..............................................................................................................32
WISH .............................................................................................................................35
NAT (Network Address Translation) .......................................................... 38
Port Forwarding ..........................................................................................................3
Port Trigger..................................................................................................................40
User Manual
Page 4
of 73
Virtual Server...............................................................................................................41
DMZ...............................................................................................................................43
Routing...................................................................................................... 44
Static Routing ..............................................................................................................44
RIP (Routing Information Protocol) ..........................................................................46
ecurity...................................................................................................... 47
Access Control .............................................................................................................47
Firewall Settings .........................................................................................................4
Inbound Filter ..............................................................................................................52
Inbound Filter Rules List.............................................................................................53
MAC Address Filter (Network Filter).........................................................................53
Website Filter ..............................................................................................................54
Applications............................................................................................... 55
DDNS (Dynamic DNS) .................................................................................................55
Schedules.....................................................................................................................56
Syslog ...........................................................................................................................57
Time..............................................................................................................................5
UPnP .............................................................................................................................59
Wireless..................................................................................................... 60
tatus ........................................................................................................ 63
Internet Sessions.........................................................................................................63
Logs ..............................................................................................................................64
Routing.........................................................................................................................65
Traffic Status................................................................................................................66
Wireless Clients ...........................................................................................................67
WISH Sessions..............................................................................................................67
Maintenance.............................................................................................. 69
System .........................................................................................................................69
System Settings ..........................................................................................................70
Firmware Upgrade......................................................................................................71
Reboot..........................................................................................................................71
Regulatory Compliance Notices
Regulatory Compliance NoticesRegulatory Compliance Notices
Regulatory Compliance Notices ................................
................................................................
................................................................
................................................................
................................................................
................................................................
.....................................................
..........................................
.....................72
7272
72
FCC tatement ........................................................................................... 72
User Manual
Page 5
of 73
About the Product
The HomePlug AV 200Mbps 4-port Wireless-N Router offers an All-in-one In-house Networking Device. The
HomePlug wireless router offers high capacity for HD and SD multimedia distribution, while carrying other
Internet services, is easy to use, simple to install and requires no new wires. It instantly converts existing
power lines installations into high-speed virtual Ethernet networks.
The HomePlug Wireless Router combines the benefits of HomePlug AV and 02.11n Wireless-N features,
provides dedicated powerline date rate up to 200Mbps - perfect for streaming HD IPTV and VoD (Video-on-
Demand) while offering full in-house wireless coverage at a speed up to 300Mbps*. On top of that, the
HomePlug wireless router has built-in QoS (Quality-of-Service) engine for enhanced Internet experience.
For powerline security, HomePlugAV 4-port wireless 02.11n Router supports 12 -bit Advanced Encryption
Standard (AES) to ensure maximum security. Coupled with "Simple Connect" button to enable the security
and pairing up of HomePlug Adapters at a simple touch of a button. For maximum wireless security, the
HomePlug wireless router supports WEP, WPA and WPA2 with WPS (Wi-Fi Protected Setup) feature.
Applications: High Definition (HD) and Standard Definition (SD) video distribution, TV over IP (IPTV), Higher
data rate broadband sharing, Shared broadband internet access, Audio and video streaming and transfer,
Expanding the coverage of wireless LANs, Voice over Internet Protocol (VoIP), PC files and applications
sharing, Printer and peripheral sharing, Network and online gaming, Security camera.
User Manual
Page 6
of 73
Requirements
Your computer must meet the following minimum requirements.
 Any operating system can be used
 Internet Explorer 4.0 or Netscape Navigator 3.02
 233MHz processor
 CD-ROM Drive
 Ethernet network adapter
Package Contents
Package contents are listed below. For any missing items, please contact your dealer immediately. Product
contents vary for different models.
 Router
 Ethernet cable
 +12VDC, 1.67A Power Adapter
 Easy Start Guide
 Resource CD
User Manual
Page 7
of 73
Device Design
Front Panel
Front PanelFront Panel
Front Panel
A
AA
A
B
BB
B
C
CC
C
D
DD
D
E
EE
E
F
FF
F
G
GG
G
H
HH
H
User Manual
Page
of 73
Label
LabelLabel
Label
Action
ActionAction
Action
Description
DescriptionDescription
Description
A
AA
A
Simple Connect
Simple ConnectSimple Connect
Simple Connect
Button
Button Button
Button
Press for 2 seconds to create or join a HomePlug AV
network.
Press for 10 seconds to reset the Private Network Name to
a random key.
Off No power is supplied to the device B
BB
B
Power
PowerPower
Power
Steady light Connected to an AC power supply
Off No Homeplug connection
Steady light Homeplug connection established
The LED colors represents the connection rate within the
HomePlug AV network whether it is good (red), better
(amber), or best (green).
C
CC
C
Powerline
Powerline Powerline
Powerline
Activity
Activity Activity
Activity
Blinking light Transmitting/Receiving data
D
DD
D
USB
USBUSB
USB
Blinking light Will blink 3 times indicating Windows Connect Now (WCN)
Process
Off Wireless Disabled
Steady Light Wireless Enabled
E
EE
E
WLAN
WLANWLAN
WLAN
Blinking light Transmitting/Receiving data wirelessly
Off No modem connection
Steady light Connected to an active modem
F
FF
F
WAN
WANWAN
WAN
Blinking light Transmitting/Receiving data
Off No Ethernet connection
Steady light Connected to an active Ethernet device
G
GG
G
Ethernet 1
Ethernet 1Ethernet 1
Ethernet 1-
--
-4
4 4
4
Blinking light Transmitting/Receiving data
H
HH
H
WPS
WPSWPS
WPS
(Wi
(Wi(Wi
(Wi-
--
-Fi Protected
Fi Protected Fi Protected
Fi Protected
Setup)
Setup)Setup)
Setup)
Press for two seconds (or until the LED blinks) to start WPS
pairing.
Wireless client must be WPS-enabled and must be pressed
within 3 minutes.
User Manual
Page 9
of 73
Back Panel
Back PanelBack Panel
Back Panel
Label
LabelLabel
Label
Used for…
Used for…Used for…
Used for…
1
11
1
Power
PowerPower
Power
Connecting the +12VDC, 1.67A DC power adapter
2
22
2
USB
USBUSB
USB
Windows Connect Now (WCN)
3
33
3
Reset
ResetReset
Reset
Press for 10 seconds to reset the router
4
44
4
WAN
WANWAN
WAN
Connecting with a modem using an Ethernet cable
5
55
5
Ethernet 1
Ethernet 1Ethernet 1
Ethernet 1-
--
-4
44
4
Connecting with computers/devices using an Ethernet cable
6
66
6
Antenna 1
Antenna 1Antenna 1
Antenna 1-
--
-3
33
3
Sending/receiving wireless signals
User Manual
Page 10
of 73
Getting tarted
Setting up the device is easy. The flowchart below provides an outline of the steps needed to complete the
installation. Brief descriptions appear beside each step. Detailed instructions are provided in the
subsequent pages.
Remove/Disable
Conflicts
Plan your Network
Ready to Use
Setup the Router
Connect to the
Internet
You may need to check some
setting or disable some application
before installation.
Connect the modem, computer, and
power adaptor to the router.
Open a browser to access the Web
Manager and then use Setup Wizard
to connect to the Internet.
User Manual
Page 11
of 73
Planning Your Network
Before moving ahead to setup your network, it is a good idea to draw out a network diagram to help
identify your network devices and plan out how to connect these devices. The illustration below is an
example of a network diagram.
To create a network diagram:
 For wireless devices, identify the wireless devices you want to include in the network
 For wired devices, identify which router port you want to use for each device.
 For HomePlug devices, identify the HomePlug devices you want to include in the network.
User Manual
Page 12
of 73
Remove or Disable Conflicts
To make sure the router installation moves on smoothly, you need to remove or disable conflicts that may
interfere the installation. Probable conflicts may include:
 Internet sharing applications
 Proxy software
 Security software
 TCP/IP settings
 Internet properties
 Temporary Internet files
Internet Sharing, Proxy, and Security Applications
Internet sharing, proxy software, and firewall applications may interfere with the router installation. These
should be removed or disabled before start the installation.
If you have any of the following or similar applications installed on your computer, remove or disable them
according to the manufacturer’s instructions.
Internet Sharing Applications
Internet Sharing ApplicationsInternet Sharing Applications
Internet Sharing Applications
Proxy Software
Proxy SoftwareProxy Software
Proxy Software
Security Software
Security SoftwareSecurity Software
Security Software
Microsoft Internet Sharing WinGate Symantec
WinProxy Zone Alarm
User Manual
Page 13
of 73
Configuring TCP/IP Settings
Check if your computer uses the default TCP/IP settings.
To check the TCP/IP properties:
1. Click the Start button, and then click Run. This opens the Run dialog box.
2. Type control ncpa.cpl, and then click OK. This opens the Network Connections in your computer.
3. Right-click LAN, and then select Properties. This opens the Local Area Connection Properties dialog
box.
4. Select Internet Protocol (TCP/IP), and then click Properties. This opens the Internet Protocol
(TCP/IP) dialog box.
5. Check Obtain an IP address automatically.
6. To close the Internet Protocol (TCP/IP) dialog box, click OK.
7. To close the Local Area Connection Properties dialog box, click OK.
Configuring Internet Properties
To set the Internet Properties:
1. Click the Start button, and then click Run. This opens the Run dialog box.
2. Type control inetcpl.cpl, and then click OK. This opens Internet Properties.
3. Click Connections tab.
4. In Dial-up and Virtual Private Network settings, check Never dial a connection.
5. To close Internet Properties, click OK.
User Manual
Page 14
of 73
Removing Temporary Internet Files
Temporary Internet files are files from Web sites that are stored in your computer. Delete these files to
clean the cache and remove footprints left by the Web pages you visited.
To remove temporary Internet files:
1. Click the Start button, and then click Run. This opens the Run dialog box.
2. Type control, and then click OK. This opens Control Panel.
3. Double-click Internet Options. This opens Internet Options.
4. In the Temporary Internet Files pane, click Delete Cookies.
5. Click Delete Files.
6. To close Internet Properties, click OK.
User Manual
Page 15
of 73
etup the Device
When installing the router, find an area where there are enough electrical outlets for the router, the main
computer, and your other computer devices.
To setup the router:
A
AA
A
Use an Ethernet cable to connect a modem to the WAN port.
B
BB
B
Use an Ethernet cable to connect a computer to any of the available Ethernet ports from 1-4.
C
CC
C
Connect the power adapter and then plug it to an electrical source.
User Manual
Page 16
of 73
Connecting to the Internet
To connect to the Internet, use the Web Manager’s Setup Wizard.
Note:
Note:Note:
Note: To connect to the Internet, make sure that your router is connected to a modem and you have an
active Internet service account.
To connect to the Internet via the Web Interface:
1. Open your browser.
2. Type 192.16 .1.1 in the address field and then press Enter. This opens the Log In Authentication
page.
3. Type your Username and Password. The default username is admin, with blank password.
4. Quick Start Setup opens. You will be asked to provide the WAN and LAN Settings.
5. Configure the WAN and LAN settings, and click Next.
User Manual
Page 17
of 73
6. Configure the Wireless Network Settings including the Wireless Security Mode and click Finish.
7. After you click Finish, the router will save the new settings and then try to establish a connection
with your Internet service provider.
To verify if your connection has been successful, click Product Info under the Basic Menu. A WAN IP
address will appear under the WAN Connection Information pane.
User Manual
Page 1
of 73
Connecting Wireless Devices
 Manual Setup
 Using WPS (Wi-Fi Protected Setup)
 Using WCN (Windows Connect Now)
Manual Setup
After you setup the Router settings through the main computer, you can connect other devices with
wireless capabilities. Wireless devices relieve you from the task of laying out cables and allow you to use
the Internet connection from your router.
To connect with wireless devices:
1. Turn on your wireless device.
2. Open the software you use to detect a wireless connection. This opens a window to ask for the
connection settings.
3. Enter the connection settings for the wireless network. These settings are defined in your router
during setup.
User Manual
Page 19
of 73
WPS (Wi-Fi Protected Setup)
WPS button allows you to enable Wi-Fi Protected Setup (WPS). When enabled, Wi-Fi Protected Setup
automatically detects and connects wireless clients into the wireless network by broadcasting the wireless
network settings from your Access Point to you wireless device/s.
To setup WP :
1. Press the WPS button on the router for two seconds, or until the LED blinks
2. Within 3 minutes, press the WPS button on the Wireless Client.
Note:
Note:Note:
Note: WPS can only be used with wireless client devices that have a compatible WPS component.
User Manual
Page 20
of 73
WCN (Windows Connect Now)
WCN (Windows Connect Now) technology allows users to easily create a wireless network and add
additional wireless devices using a USB flash drive.
With Windows Connect Now, users running Windows XP Service Pack 2 and later Windows OS version can
create wireless network configuration settings and transmit them to the access point and other wireless
devices.
To setup WCN (Windows Connect Now):
1. Click Start and then click Control Panel.
2. For Control Panel Category View: click Network and Internet Connections, and then click Wireless
Network Setup Wizard.
For Control Panel Classic View: click Wireless Network Setup Wizard.
3. Follow the instructions on your screen.
4. Choose "Use a USB flash drive"
5. Insert the USB Flash drive into your computer. Wireless network configuration settings will be
saved to the flash drive.
6. Plug the flash drive into your Access Point, wireless client or Windows Connect Now compatible
device that you want to add to the wireless network.
Note:
Note:Note:
Note: Windows Connect Now can only be used with WCN compatible devices.

Other manuals for 200Mbps HomePlug AV Ethernet Adaptor

2

This manual suits for next models

2

Other Aztech Wireless Router manuals

Aztech DSL1015EN L Instructions for use

Aztech

Aztech DSL1015EN L Instructions for use

Aztech WL557RT4 User manual

Aztech

Aztech WL557RT4 User manual

Aztech HW550-RT4 User manual

Aztech

Aztech HW550-RT4 User manual

Aztech WMB260AC Instructions for use

Aztech

Aztech WMB260AC Instructions for use

Aztech WL557RT4 Manual

Aztech

Aztech WL557RT4 Manual

Aztech WL557RT4 User manual

Aztech

Aztech WL557RT4 User manual

Aztech Singtel FG7009GR AC User manual

Aztech

Aztech Singtel FG7009GR AC User manual

Aztech DSL5029EN(1T1R) User manual

Aztech

Aztech DSL5029EN(1T1R) User manual

Aztech WL730RT4 User manual

Aztech

Aztech WL730RT4 User manual

Aztech WL950RT4 Instructions for use

Aztech

Aztech WL950RT4 Instructions for use

Aztech AIR-706P User manual

Aztech

Aztech AIR-706P User manual

Aztech WL889RT4 User manual

Aztech

Aztech WL889RT4 User manual

Aztech MWR647 Instructions for use

Aztech

Aztech MWR647 Instructions for use

Aztech HW553-3G User manual

Aztech

Aztech HW553-3G User manual

Aztech MWR638 Instructions for use

Aztech

Aztech MWR638 Instructions for use

Aztech WL852RT4(T) Instructions for use

Aztech

Aztech WL852RT4(T) Instructions for use

Aztech HW550-3G User manual

Aztech

Aztech HW550-3G User manual

Aztech WL852RT4(T) Manual

Aztech

Aztech WL852RT4(T) Manual

Aztech WL852RT4 Instructions for use

Aztech

Aztech WL852RT4 Instructions for use

Aztech WL852RT4 Manual

Aztech

Aztech WL852RT4 Manual

Aztech DSL8800GR User manual

Aztech

Aztech DSL8800GR User manual

Aztech HL109RN User manual

Aztech

Aztech HL109RN User manual

Aztech FG7008GR(AC) User manual

Aztech

Aztech FG7008GR(AC) User manual

Aztech WL830RT4 User manual

Aztech

Aztech WL830RT4 User manual

Popular Wireless Router manuals by other brands

Billion BiPAC 8500 user manual

Billion

Billion BiPAC 8500 user manual

Franklin Wireless R774 user guide

Franklin Wireless

Franklin Wireless R774 user guide

Verizon Jetpack MiFi 4510L user guide

Verizon

Verizon Jetpack MiFi 4510L user guide

Lantech HR-114 II user guide

Lantech

Lantech HR-114 II user guide

NETGEAR DGN2200v3 user manual

NETGEAR

NETGEAR DGN2200v3 user manual

D-Link DIR-620 Quick installation guide

D-Link

D-Link DIR-620 Quick installation guide

Cisco ASR 9000 Series installation guide

Cisco

Cisco ASR 9000 Series installation guide

Moxa Technologies WDR-3124A Quick installation guide

Moxa Technologies

Moxa Technologies WDR-3124A Quick installation guide

Molpir 3G012 user manual

Molpir

Molpir 3G012 user manual

ZyXEL Communications ARMOR G1 user guide

ZyXEL Communications

ZyXEL Communications ARMOR G1 user guide

Gemtek WRTM-106B user manual

Gemtek

Gemtek WRTM-106B user manual

Linksys WRT54GX2 - Wireless-G Broadband Router user guide

Linksys

Linksys WRT54GX2 - Wireless-G Broadband Router user guide

qpcom QP-WR254G Quick install guide

qpcom

qpcom QP-WR254G Quick install guide

Cisco Linksys WRT54G3G brochure

Cisco

Cisco Linksys WRT54G3G brochure

MSI RG70SE user manual

MSI

MSI RG70SE user manual

NetComm N300 GATEWAY SERIES user guide

NetComm

NetComm N300 GATEWAY SERIES user guide

Sony PCWA-AR300 - VAIO Wireless Router troubleshooting guide

Sony

Sony PCWA-AR300 - VAIO Wireless Router troubleshooting guide

D-Link DSL-2640B Quick installation guide

D-Link

D-Link DSL-2640B Quick installation guide

manuals.online logo
manuals.online logoBrands
  • About & Mission
  • Contact us
  • Privacy Policy
  • Terms and Conditions

Copyright 2025 Manuals.Online. All Rights Reserved.