manuals.online logo
Brands
  1. Home
  2. •
  3. Brands
  4. •
  5. Balmar
  6. •
  7. Controllers
  8. •
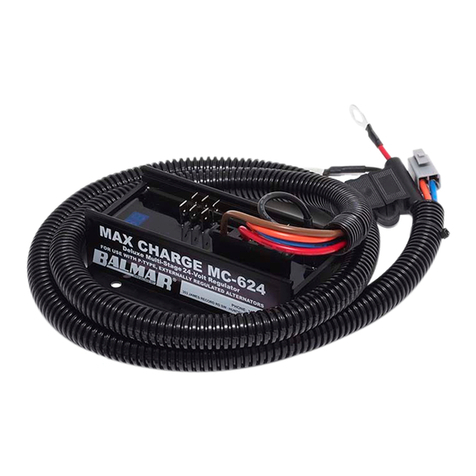
  9. Balmar Max Charge MC-624 Setup guide

Balmar Max Charge MC-624 Setup guide

- 1 -
I. INTRODUCTION
The microprocessor-controlled Max Charge
MC-624 is the most advanced regulator avail-
able. Designed to continually monitor battery
voltage and automatically optimize charging, the
MC-624 uses up to 12 time and voltage increments to
ensure your batteries receive a full charge quickly and safe-
ly.
The MC-624 lets you choose from a variety of selectable preset
programs to best suit your charging needs. Its Universal Factory
Program allows you to connect the MC-624 to your alternator right out of the box. Six additional preset programs sup-
port most popular battery types, including standard and deep-cycle flooded batteries, AGM, gel, and Optima (spiral wound)
technologies. An easy-to-use magnetic reed switch delivers quick, precise regulator adjustment. Should your charging system
require individualized adjustment, the MC-624 provides additional user-defined programming options.
When used with optional alternator and battery temperature sensors, the MC-624 automatically monitors ambient tempera-
tures and compensates for over-temperature conditions by reducing field output. Alarm outputs connect to audible or visual
alarms to warn of dangerous system conditions.
II. SAFETY CONSIDERATIONS
Before installing your MC-624 marine regulator, please take a moment to consider
these guidelines for safe regulator installation. Failure to work safely could result in
personal injury or damage to your electrical system.
1. Always disconnect your battery banks and ensure that switches are “OFF”
prior to installing your regulator.
2. Remove loose-fitting clothing or jewelry, which could become entangled in
your motor or other machinery.
3. Wear ANSI-approved safety glasses.
4. DO NOT attempt to modify the regulator. Alterations could result in damage to
your charging system, and will void your warranty.
5. Do not attempt installation if tired or fatigued.
6. Ensure the engine has cooled before initiating installation.
7. Do not attempt installation while using alcohol or any medication that could
impair your judgment or reaction time.
8. Always use the right tool for the job. Improper tool use may damage the regu-
lator or your boat, and could result in personal injury.
9. Take time to read the manual. Equipment damage and possible injuries may
result from an incomplete understanding of the installation and operation of the
MC-624 regulator. If you are unfamiliar with marine electrical systems, consult
with a licensed marine electrician.
TABLE OF CONTENTS
I. Introduction
II. Safety Considerations
III. Basic Installation
IV. Alarm and Sensor Installation
V. Short Display (SD)
VI. Preset Battery Programming
VII. Long Display (LD)
VIII. Advanced Programming (AP)
Amp Manager
Equalization
Advisory / Diagnostic Codes
IX. Troubleshooting
CAUTION
The following instructions are intend-
ed for use by experienced marine
electrical installers. If you are not
experienced at installing electrical
system components, we recommend
the use of a qualified marine
electrical technician.
!"#$"%&19009 61st Ave. NE, Arlington, WA 98223 PHONE: (360) 435-6100
FAX: (360) 435-3210 E-MAIL: balmar@balmar.net WEB: www.balmar.net
Max Charge MC-624
Installation and Operator’s Manual
III. BASIC INSTALLATION
The MC-624 is shipped with either a Port or Starboard harness. If the wiring needs
to be extended beyond the length of the harness, marine grade 12AWG
(American Wire Gauge) wire should be used.
03-00 Rev. # 3.01
To install the regulator:
1. Mount the regulator in a dry, well-ventilated location, well
away from hoses and exhaust manifolds which may cause
damage to the regulator or wiring. Avoid areas of heat
and/or high vibration.
2. Attach the Ford-type harness plug to the regulator (see
Figure 1).
3. The RED wire (in the harness) powers the regulator.Attach
at the positive output terminal at the alternator. If an isola-
tor is used, this wire must be located on the battery side of
the isolator. On a 24V system, this wire can carry 8 amps
and must be protected by a 10-amp fuse. A fuse is includ-
ed with the wiring harness.
3. The BROWN (ignition) wire activates the regulator when
+24VDC is applied to the system.Attach the BROWN wire
to a switched +24VDC source. The auxiliary side of the
ignition switch, or an independent (ungrounded) oil pres-
sure switch are both acceptable connection points. A tog-
gle switch may be added to this circuit to shut down
the alternator load in cases where maximum propul-
sion is needed.
5. The BLACK (ground) wire in the harness attaches to
the System Ground Terminal. The BLACK wire
attaches to preferred ground terminal on the alterna-
tor. A (user supplied) ground strap between the alter-
nator and the preferred ground at the engine is also
strongly recommended.
6. Plug duplex connector with BLUE (field) and
ORANGE (stator) wires into rear of alternator.
7. An AC tap wire for the tachometer can be utilized by
splicing into the ORANGE stator wire with a wire
connecting to the AC tap terminal at the tachometer.
- 2 -
Figure 1 -
Regulator wiring attachment.
Figure 3 - Regulator terminal layout and function description.
Length 10 Ft. 15 Ft. 20 Ft. 25 Ft. 50 Ft 75 Ft. 100 Ft.
Amps
25 10 8 8 6 4 2 1
50 8 6 4 4 1 2/0 3/0
75 6 4 2 2 2/0 3/0 4/0
100 4 2 2 1 3/0 4/0
125 4 2 1 1/0 3/0 4/0
150 2 1 1/0 2/0 4/0
175 2 1/0 2/0 3/0
200 2 1/0 2/0 3/0
225 1 2/0 3/0 4/0
250 1 2/0 3/0 4/0
275 1/0 2/0 4/0
300 1/0 3/0 4/0
325 1/0 3/0 4/0
350 2/0 3/0
375 2/0 4/0
- 3 -
IV. ALARM AND SENSOR INSTALLATION
Alternator Temperature Sensor
(MC-TS-A) - Optional
The Alternator Temperature Sensor enables the regu-
lator to sense when the alternator temperature exceeds
safe working limits. The MC-624 responds by reducing
the field current at the alternator and activating the
alarm output. To install the Alternator Temperature
Sensor:
1. Attach the positive and negative wires to the
Alternator Temperature Sensor terminals on the
MC-624 (See Figure 4). See Figure 3 on previ-
ous page for pin locations. Observe proper polar-
ity at the terminals.
2. Attach the heavy lug terminal to a location
described below on your alternator. Flat wash-
ers are included with the temperature sensors to ensure solid mounting connections.
The following are typical installation locations:
MID CASE MOUNT - Small Case Alternator - Remove (1) of (4) 5/32" Allen bolts,
install probe, re-secure bolt. (See Figure 5.)
MID CASE MOUNT - Large Case Alternator - Remove (1) of (4) 3/16" Allen bolts,
install probe, re-secure bolt.
Caution: The alternator temperature sensor is not meant to be used as a method to main-
tain alternator temperature. Optional temperature sensors are not a guarantee of protection
against damage from overheat conditions. Inspect your system as quickly as possible if the
sensor alarm is activated. Have your system inspected if overheating occurs.
Battery Temperature Sensor (MC-TS-B) - Optional
When equipped with the optional Battery Temperature Sensor, the MC-624 will auto-
matically compensate for variation above and below normal ambient temperatures. The
MC-624 is equipped with dual battery sensors to enable sensing at two separate bat-
teries. To ensure proper operation, be sure the battery terminals are completely clean
and free of corrosion prior to installation. To install:
1. Secure the 3/8" copper probe to a clean negative (-) battery terminal (see
Figure 6). The 20' leads may be shortened or extended, if needed. Note: An
improperly installed or corroded battery terminal may generate heat and severe-
ly diminish charging and impede accurate temperature sensing.
2. While observing polarity, connect the battery temperature pins to the positive and
negative terminals as shown on Figure 4.
Note: Battery #1 terminal temperature compensates andactivates alarm. Battery #2 terminal activates the warning alarm only.
Lamp / Alarm Outputs
The MC-624 includes an output terminal for system alarms (dash lamp). This terminal outputs battery negative (0.5-amp max)
when in alarm condition. Refer to Figure 7 for common system conditions that may initiate an alarm.
Small Engine Mode
The MC-624 can be modified for provide a half-power setting by installing a toggle switch between the positive and negative
terminals of the alternator temperature sensor circuit. When activated by closing the switch, the regulator reduces the alterna-
tor output by approximately 50%. This mode is ideal for smaller engines that are not capable of providing suitable horsepower
to drive both the alternator and propeller at full output. When in Small Engine Mode, the regulator will send a signal to the
Auxiliary #1 Status Output.
V. SHORT DISPLAY
The Model MC-624 provides a wide range of operational, programming and diagnostic data through its 3-digit numeric LED
readout. After an initial start-up period, the numeric LED will cycle through the Short Display, shown in Figure 8 on the fol-
lowing page. The short display includes manufacturer, model, battery type, charging cycle, actual voltage and target voltage.
This display cycles continuously during regulator operation.
Figure 4 -Proper attachment of
optional battery and alternator temp
sensors at the regulator.
Figure 5 - Mounting temperature
sensor mid-case on small case
alternator.
Figure 6 - Mounting temperature
sensor on battery.
Alarm Output Functions
Alarm Output (Dash Lamp)
(-) 0.5 amp - when in alarm mode
• Low battery voltage (030)
• High battery voltage (040)
• High temperature at battery #1 (020)
• High temperature at battery #2 (021)
• High temperature at alternator (022)
Figure 7 - Alarm output functions.
- 4 -
VI. PRESET BATTERY PROGRAMMING
In addition to its Universal (default) factory program, which can be used safely
with most battery types, the MC-624 features programs for: gel, standard lead
acid, deep-cycle lead acid, AGM (absorbed glass mat), Optima (spiral), as well
as voltage-sensitive (halogen) applications.
The MC-624 is equipped with a magnetic reed switch, embedded in the epoxy
potting, which activates the regulator’s program-
ming. The switch works in two specific actions,
described in the shaded box below:
To set the regulator for your desired battery pro-
gram:
1. ‘ACTIVATE-HOLD’ the switch. The display will
show the “Pro” mode, indicating that the
Program mode has been activated.
2. ‘HOLD’ while the display scrolls, until the
numeric equivalent to your battery type is dis-
played on the LED screen. See Figure 10 to
determine which selectable preset program is
most desirable for your battery technology.
Figure 11 provides detailed information
regarding preset programs.
3. ‘RELEASE’ when the desired value is attained.
4. Once a value has been chosen, the display will return to the “Pro” mode. At this point, you can adjust, up or down, by
repeating Steps 1 through 3 until the numeric display reflects your desired preset program.
If no changes are made, the program you have selected will be locked into permanent memory until modified. The “SAV”
code will be displayed, indicating the program has been locked into memory.
SD Mode 1 - Manufacturer name.
Readout displays “BAL”.
SD Mode 2 - Regulator model.
Readout displays “624”.
SD Mode 4 - Battery type. Readout
displays abbreviated battery type.
SD Mode 5 - Charging stage. Shows
current stage of charging cycle. See
Figure 12 on Page 5.
SD Mode 6 - Battery voltage.
Displays current battery voltage state.
SD Mode 7 - Calculated voltage.
Readout displays voltage target
based on charging stage.
Figure 8 - Short display (SD).
SD Mode 3 - Battery type. Readout
displays program currently in memory.
Figure 9 - Operation of
magnetic reed switch.
Figure 10 - Selectable battery presets.
Universal Factory Program
(UFP). For multiple battery types.
Flooded Deep Cycle (Fdc). For
deep-cell lead acid batteries.
Sealed Gel Cell (GEL). For
sealed gel batteries.
Absorbed Glass Mat (AGL). For
AGM batteries.
Optima (OPS). For Optima spiral
wound batteries.
Flooded Standard (FSB). For
standard lead acid batteries.
Halogen (HAL). For voltage
sensitive applications.
1
2
3
4
5
6
7
‘ACTIVATE-RELEASE’ Refers to the activation and immediate deactivation of
the switch by lowering a magnetic tool (such as a pocket screwdriver with a
magnetic tip -- see Figure 9) onto the upper corner of the switch, and immedi-
ately deactivating the switch by removing the magnet from the switch. An LED
dot, described in Figure 9 will indicate switch activation.
‘ACTIVATE-HOLD ... RELEASE’ Typically used during programming, this
action requires holding the magnet to the switch until desired values are shown
on the display. Once the desired setting is reached, the magnet is removed to
deactivate the switch.
Note: Program function will alternately cycle up or down each time the PrA Mode is acti-
vated. If you miss your desired program value, release the switch and re-activate, the
cycling direction will automatically change. Any advanced programming values will be
retained within the regulator’s memory until the preset battery programming is reset.
Primary Program Settings PRG-1 PRG-2 PRG-3 PRG-4 PRG-5 PRG-6 PRG-7
Universal Deep Cycle Gel Absorbed Optima Standard Halogen
Factory Flooded Cell Glass Spiral Flooded Voltage
Mode Program Lead Acid Mat (AGM) Wound Lead Acid Sensitive
Start Delay (Seconds) 45 45 45 45 45 45 45
Ramp Up (Seconds) 60 60 60 60 60 60 60
Bulk Voltage (Max) 28.40 29.20 28.20 28.76 29.20 28.80 28.00
Bulk Time (Minimum) 36 min. 36 min. 36 min. 36 min. 36 min. 36 min. 36 min.
Absorption Voltage 27.80 28.80 27.80 28.36 28.80 28.40 27.60
Absorption Time (Minimum) 36 min. 36 min. 36 min. 36 min. 36 min. 36 min. 36 min.
Float Voltage 27.00 26.70 27.40 26.76 26.80 28.40 27.00
Float Time (Maximum) 6 hr. 6 hr. 6 hr. 6 hr. 6 hr. 6 hr. 6 hr.
High Voltage Alarm 30.40 31.20 30.20 30.76 31.20 30.80 30.00
Low Voltage Alarm 25.60 25.60 25.60 25.60 25.60 25.60 25.60
Max Battery Temperature 125F/52C 125F/52C 125F/52C 125F/52C 125F/52C 125F/52C 125F/52C
Max Alternator Temperature 225F/107C 225F/107C 225F/107C 225F/107C 225F/107C 225F/107C 225F/107C
Equalization (User Prog.) Yes Yes No No No Yes No
Figure 11 - Preset program values. Voltages shown may vary by +/- 3% from values shown.
Indicates ‘ACTIVATE’
VIII. Advanced
Programming
Advanced programming levels can
be accessed when the MC-624 is in
Long Display mode. To access:
1. With regulator in Long Display
mode, ACTIVATE-HOLD until
the “Pro” display code appears.
RELEASE. The “PrA” display
code will appear. (CAUTION: If
the switch is held too long,
the regulator will return to the
preset program adjustment
mode). Once in advanced pro-
gram mode, the display will
cycle through the the individual
advanced programming selec-
tions (see Figure 14).
2. When the desired advanced
program mode is reached,
ACTIVATE-HOLD. The display
will scroll through the available
time or voltage value selections. - 5 -
Figure 13 - Long Display (LD) attributes as displayed on digital numeric readout.
Figure 14 - Advanced Programming (PrA) as displayed on digital numeric readout.
VII. Additional Displays
Charging Stages
The MC-624 utilizes up to 12 individ-
ual stages to ensure proper charg-
ing. Each stage may contain a spe-
cific voltage or time value, or a com-
bination of values which may be
implemented by the regulator’s
microprocessor as it monitors your
battery’s state of charge. These
stages are displayed in both Short
and Long Display modes, and are
described in Figure 12.
Long Display
At any time during the Short
Display’s continuous cycle, addition-
al data for various operations and
diagnostic information can be moni-
tored by accessing the numeric read-
out’s Long Display mode.
To access the Long Display, ‘ACTI-
VATE-RELEASE’ the reed switch
while the Short Display is cycling.
The numeric LED will immediately
return to the “BAL” code and start
cycling through the Long Display.
See Figure 13 for code definitions.
Once the Long Display has cycled
through all of its information modes,
the display will automatically revert
to the Short Display.
LD Mode 1 - Readout displays “BAL”
(Short for Balmar.)
LD Mode 2 - Regulator model.
Readout displays “624”.
LD Mode 3 - Program level. (P)
Displays program currently in memory.
LD Mode 4 - Battery type. Readout
displays abbreviated battery type.See
Figure 10 for descriptions.
LD Mode 5 - Charging stage Displays
the specific stage of the charging
cycle. See Figure 13 for descriptions.
LD Mode 6 - Battery voltage.
Shows current system voltage.
LD Mode 7 - Calculated (Target) volt-
age based on program mode.
LD Mode 8 - Revision number.
Displays software version.
LD Mode 9 - Battery #1 temp.
Followed by the sensor reading
in degrees(Celcius).
LD Mode 10 - Battery #2 temp.
Followed by the sensor reading
in degrees(Celcius).
LD Mode 11 - Factory use only.
LD Mode 12 - Factory use only.
LD Mode 13 - Run time. “Hr ”
code is followed by a numeric
readout in 1/10-hr increments.
LD Mode 14 - Explanatory
mode. May be followed by one or
more diagnostic codes. See
Figure 17 for details.
PrA Mode 1 - Advanced program
mode indicator.
PrA Mode 2 - Start delay “DL”. Adjusts
seconds before ramp up.
PrA Mode 3 - Bulk voltage control. “Bv”
code is followed by volt reading. Adjust up
or down.
PrA Mode 4 - Bulk time control. “Bc”
code is followed by time reading. Adjust
up or down.
PrA Mode 5 - Absorption voltage control.
“Av” code is followed by volt reading.
Adjust up or down.
PrA Mode 6 - Absorption time control.
“Ac” code is followed by time reading.
Adjust up or down.
PrA Mode 7 - Float voltage con-
trol “Fv”. Followed by time read-
ing. Adjust up or down.
PrA Mode 8 - Float time control.
“Fc” code is followed by time
reading. Adjust up or down.
PrA Mode 9 - Amp Manager
control. See details for Amp
Manager on following page.
PrA Mode 10 - Equalization
Voltage control. See details for
Equalization on following page.
PrA Mode 11 - Equalization
Time control. See details for
Equalization on following page.
Stage 1 - Start Delay. Provides a 45-
second delay before load is placed on
engine and belts. Adjust time in PrA*.
Stage 2 - Soft Ramp. One minute volt-
age ramp minimizes belt slippage.
Non-adjustable.
Stage 3 - Bulk. 30-minute set period.
Program determines charging voltage.
Time/voltageadjustable in PrA*.
Stage 4 - Calculated Bulk. Time varies
by state of charge at end of Stage 3.
Adjustable in PrA*.
Stage 5 - Ramp Down. Transition
from Bulk to Absorption stage. Non-
adjustable.
Stage 6 - Absorption. 30-min. set time.
Preset program sets charging voltage.
Time/voltage adjusts in PrA*.
Stage 7 - Calculated Absorption.
Time varies by state of charge at
end of Stage 6. Adjust in PrA*.
Stage 8 - Ramp Down.
Transition from Absorption to
Float stage. Non-adjustable.
Stage 9 - Float. 30-minute time
period. Program sets charging
voltage. Time/volts adjust in PrA*.
Stage 10 - Calculated Float. Time
& voltage based on state of charge
at end of Stage 9.Adjust in PrA*.
Stage 11 - Ramp to Equalize.
Batteries should be at full charge
before initiating eqalization.
Stage 12 - Equalization. Time
and Voltage adjustable in PrA*.
See battery mfg. limits for time
and voltage values. User set.
PrA* - Time and/or voltage adjustments can be made in the Advanced Program mode.
Figure 12 - Charge stage codes as seen in Short and Long displays.
Advanced Programming and Diagnostics
Amp Manager
TheAmp Manager function enables you to reduce the alternator output by controlling the volt-
age at the field wire. This feature can be used as a method to minimize alternator overheat-
ing in warmer climates, as well as minimizing difficulties with chronic belt slippage. To adjust
Amp Manager values:
1. ‘ACTIVATE-RELEASE’ when display cycles to “AP” (PrA Mode 09). “AP” will be fol-
lowed by “OFF” code.
2. ‘ACTIVATE-HOLD’ “OFF” display cycles to “249”. The value “249” represents full field
output. The numeric value on the display will decrease until you RELEASE.
Note: The value “200” represents approximately 75% field output, “150” represents approx-
imately 50% field output, and “75” represents approximately 25% field output.
Equalization Mode
Equalization mode allows owners of some battery types to increase charging voltage for the purpose of minimizing battery sul-
fation. (Equalization is only suggested for batteries noted as “equalization friendly” in Figure 11 on Page 4). Consult
your battery manufacturer to determine what equalization time and voltage is best for your specific battery. Equalization must
be initiated through the advanced programming mode. It is NOT a standard mode of opera-
tion. This feature should ONLY be used periodically on batteries requiring equalization. Once
equalization voltageAND time values are chosen and saved into the regulator’s programming,
the equalization process will start immediately. Once equalization has occurred, the regulator
will revert to its preset program status. When equalization is once again warranted, the user
will need to re-activate the equalization mode. Equalization voltage is limited to 31.2 volts.
To adjust equalization voltage (PrA Mode 10):
1. ‘ACTIVATE-RELEASE’ “PrA” display cycles to “Ev” followed by “OFF” code.
2. ‘ACTIVATE-HOLD’. “OFF” display cycles to numeric voltage values. When the manu-
facturer-recommended voltage is reached, RELEASE.
To adjust equalization time (PrA Mode 11):
1. ‘ACTIVATE-RELEASE’ “PrA”. Display cycles to “Ec” followed by “OFF” code.
2. ‘ACTIVATE-HOLD’. “OFF” display cycles to numeric equalization time values. When the
manufacturer-recommended time value is reached, ‘RELEASE’.
Explanatory / Advisory Codes
The codes in the final mode of the Long Display (LD Mode 14) provide a wide range of advisories regarding regular operations
and possible technical difficulties. The descriptions for these codes can be found in Figure 17. For additional technical infor-
mation regarding Explanatory and Advisory codes, see our Technical Support pages at the Balmar website (http://www.bal-
mar.net). To reset advisory/diagnostic codes, access the Advanced Programming mode as described at the beginning
of Section VIII. Codes will automatically reset.
- 6 -
Figure 17 - Advisory/diagnostic codes as displayed in LD Mode 14 on the digital numeric readout.
CODE 001 - Factory use only.
CODE 002 - Factory use only.
CODE 010 - Wire short at battery #1 tempera-
ture sensing terminal.
CODE 011 - Factory use only.
CODE 012 - Wire short at battery #2 tempera-
ture sensing terminal.
CODE 013 - Factory use only.
CODE 014 - Wire short at alternator temperature
sensor terminal.
CODE 015 - Sensor wire not found at alternator
temperature sensor terminal.
CODE 020 -Factory use only.
CODE 021 -Battery #2 exceeding recommended
temperature limits.
CODE 022 -Factory use only.
CODE 024 - Factory use only.
CODE 030 -Voltage too low at battery.
CODE 031 - Factory use only.
CODE 032 - Factory use only.
CODE 040 -Voltage too high at battery.
CODE 041 - Factory use only.
CODE 042 - Factory use only.
CODE 050 - Open field.
CODE 051* -Small Engine Mode activated.
CODE 052* -Amp manager is in operation.
Underlined codes represent those pertaining to
Alarm Output (dash lamp) operation.
Codes highlighted by an asterisk (*) pertain to
Aux. #1 advisory output.
Figure 16 - Equalization
Voltage mode is activated.
3. RELEASE when desired values are reached. Inversely, the values can be decreased, if desired. ACTIVATE-HOLD while
values decrease. RELEASE when desired value is attained.
4. The PrA mode will cycle 3 times. Any changes made during those cycles will be saved.
Figure 15 - Indicates Amp
Manager Mode.
NOTES:
IX. SYSTEM TROUBLESHOOTING
Determining the causes of failures in an electrical system is a “step by step” process. We recommend that you inspect and clean all system
electrical connections before you begin your search to determine if the failure can be attributed to one of the two main components of your
charging system: the alternator, and/or the voltage regulator.
Most charging system problems will be corrected by performing the following steps.
1. Remove and clean all charging system electrical connections from the alternator through the batteries (this includes the ground side).
Also, check the voltage regulator’s harness for resistance. Wires and terminals can and will become corroded and need to be cleaned
or replaced.
2. Charge all batteries to their proper fully charged state and determine if they are serviceable. If your batteries are flooded-type, use your
hydrometer to determine their condition.
3. Check and tighten alternator belt. If the belt shows signs of wear or damage, now is an ideal time for replacement. Always replace
existing belts with the finest quality replacements available.
After determining that your batteries and wiring are in suitable condition, use the following tests to determine if charging problems are a result
of a faulty alternator or regulator. The following tests provide an opportunity to isolate the alternator, regulator and wiring harness in order to
determine which component may be malfunctioning. In order to preform these tests, you will need an independent multimeter (preferably a
digital type). In an emergency, a 24V light bulb can be used to help determine if power or working grounds exist. An amp meter and a bat-
tery hydrometer with a thermometer are also helpful diagnostic tools.
Alternator /Regulator Field Tests
Test A - The alternator and regulator can be tested for function by determining if a magnetic field exists at the alternator’s pulley shaft or rear
bearing. To test:
1. With the ignition in the OFF position, place the head of a steel screwdriver near the nut on the pulley shaft or near the rear bearing of
the alternator. There should be no evidence of a magnetic field pulling the screwdriver toward the alternator.
2. Engage the ignition, without starting the engine, to activate the voltage regulator. If an oil pressure switch is used, a jumper across the
switch will activate the regulator.
3. After allowing time for the regulator’s start-up delay, place the head of a steel screwdriver near the nut on the pulley shaft or near the
rear bearing of the alternator. There should be evidence of a magnetic field pulling the screwdriver toward the alternator. If a magnet-
ic field is present, the voltage regulator, alternator brushes and rotor are likely to be working prop-
erly. If the system is not charging, remove the alternator and have it inspected by a qualified alter-
nator shop.
Test B - If there is little or no magnetic pull at the pulley shaft or at the rear bearing, initiate the follow-
ing test:
1. With the key off and the engine off, remove the large harness plug from the regulator.
2. Insert the end of a short length of electrical wire to the RED connector slot of the regulator har-
ness and the other end of the wire to the BLUE connector slot. (See Figure 18.) This bypasses
the regulator and tests the alternator and the harness.
3. Using your steel screwdriver, inspect for a magnetic field as described above.
4. With your voltmeter, check for voltage on the blue wire at the alternator. If voltage does not exist,
the harness may be at fault. If voltage does exist at the harness, but charging is not occurring,
the alternator is likely to be malfunctioning.
If a magnetic field is present. Both harness and alternator brushes and rotor appear to be working prop-
erly. If no magnetic field is present, proceed with the next test.
Test C - Testing the actual output of the alternator is known as “Full Field Testing”. This can be accomplished by jumping a positive 24VDC
current to the field terminal at the rear of the alternator. This test eliminates both the regulator and the harness, making it easier to isolate
your investigation to the alternator. CAUTION: Ensure that all voltage sensitive equipment is turned off prior to starting the engine.
Voltage is unregulated during this test and could damage sensitive electronics. DO NOT let the engine run any longer than neces-
sary to detect charging.
To test the alternator:
1. Clip a jumper wire to the positive post of the alternator, or on the battery side of the isolator, if an isolator is in use. Use a SHIELDED
alligator clip for post attachment. Unintentional contact between the alligator clip and the alternator case could result in damage to
your electrical system.
2. Disconnect the field/stator plug from the rear of the alternator and attach the other end of the jumper wire to the alternator’s Field ter-
minal (F). Attach a female spade connector to the field end of the wire for a solid connection. CAUTION: Do not allow the wire to con-
tact the case while it is attached to the positive post. The case is grounded and severe damage could occur.
3. The regulator is now bypassed. When the ignition is engaged and the motor is started, the voltage should rise and charging current
should be present.
4. The motor should be run long enough to determine that charging voltage is present. Unregulated voltage can rise quickly. Do not allow
extended unregulated charging to occur without carefully monitoring voltage levels.
If the alternator fails to generate voltage during field testing, a malfunction of the alternator is likely. Contact your local alternator repair shop
or Balmar’s technical service staff for recommendations.
Voltage Regulator Test
When you have inspected and repaired any wires and connections, inspected belts and replace as needed, and after you have determined
- 7 -
R
Bl
Figure 18 - Jumping power wire
to field.
that your batteries are properly charged, set your voltmeter to 24V and connect the
voltmeter’s negative lead to the BLACK ground wire at the regulator. Normally, con-
nection is accomplished by inserting the negative lead alongside the ground wire in
the regulator harness plug (see Figure 19) and the positive lead alongside the wire
referred to in each specific test. With the voltmeter securely connected to the regula-
tor’s ground, test for voltage at the points listed below.
1. With the ignition in the OFF position and your voltmeter’s ground wire con-
nected to the regulator’s ground, check for voltage on the RED (sensing),
BLUE (field) and BROWN (ignition) wires in the regulator plug by inserting the
positive lead of the voltmeter alongside each wire in the regulator harness
plug. The voltmeter should read:
Red Wire Brown Wire Blue Wire
Expected Reading 24 V * 0 V 0 V
Your Reading
2. With the ignition in the ON position (engine not running) and your voltmeter’s ground wire connected to the regulator’s ground, check
for voltage on the RED (sensing), BLUE (field) and BROWN (ignition) wires in the regulator plug. The voltmeter should read:
Red Wire Brown Wire Blue Wire
Expected Reading 24 V* 24 V >24 V
Your Reading
3. With the ignition in the ON position (with engine running at 1,400 rpm fast idle) and your voltmeter’s ground wire connected to the reg-
ulator’s BLACK wire, check for voltage on the RED (sensing), BLUE (field) and BROWN (ignition) wires in the regulator plug. The volt-
meter should read: Red Wire Brown Wire Blue Wire
Expected Reading 24 - 28V** 24 V >25 V
Your Reading
* 23-24.5 VDC battery voltage at rest (no charging occurring). If your batteries are isolated and your RED (sensing) wire shows voltages other than those shown above, make sure
that the wire is connected on the “battery” side of the isolator. The RED wire must “see” the battery directly.
** 27 - 28 VDC battery voltage when charging.
If your readings differ substantially from the “Expected Readings” listed in the charts above, the regulator may be malfunctioning, or there
may be a continuity problem. Contact our technical support staff at (360) 435-6100. Keep your recorded readings in the spaces provided
below the “Expected Readings” so you can share them with the technical support person. If your readings match those listed in the charts,
your regulator should be working correctly. Continue with tests below to determine if your alternator may be the source of charging difficul-
ties.If the preceding tests do not prove the existence of a failure within the regulator or alternator, we recommend you contact a licensed
marine electrician who can test your system for wiring and circuit damage or other system failures that could be responsible for charging dif-
ficulties. If you determine that repair service is necessary for either your alternator or regulator, please gather the following information before
contacting our service technicians.
1. Model of alternator.
2. Model of voltage regulator.
3. Voltage readings on red, brown and blue wire at regulator with engine off, key on.
4. Voltage readings on red, brown and blue wire at regulator with engine running at a fast ideal 1400 rpm.
- 8 -
XII. LIMITED PRODUCT WARRANTY
BALMAR warrants to the original consumer/purchaser the product is free from any defects in material or workmanship for a period of one year from the date of purchase. If any
such defect is discovered within the warranty period, BALMAR will replace the regulator free of charge, subject to verification of the defect or malfunction upon delivery or ship-
ping prepaid to BALMAR.
This warranty DOES NOT apply to defects or physical damage resulting from abuse, neglect, accident, improper repair, alteration, modification, or unreasonable use of the prod-
ucts resulting in breakdown, cracked or broken cases nor are parts damaged by fire, water, freezing, collision, theft, explosion, rust, corrosion or items damaged in shipment in
route to BALMAR for repair. BALMAR assumes no responsibility for consequential damage or loss or expense arising from these products or any labor required for service or
repair.
BALMAR WILL NOT repair or be held responsible for any product sent without proper identification and return address or RA number clearly marked on the package. You must
include proof of date and place of purchase (photocopy of purchase invoice) or we cannot be responsible for repairs or replacement. In order to expedite warranty claims more
efficiently, BALMAR asks that prior to returning a defective product for repair, you call their customer service department for a warranty return authorization number .
If factory service is required, you can contact our BALMAR Customer Service Department Monday through Thursday, 7:30 AM to 5:30 PM, (PST)1-360 435-6100 ext “3”.
Material required for the repair or replacement for the defective part or product is to be supplied free of charge upon delivery of the defective regulator to BALMAR, 19009 61st
Ave. NE,Arlington, WA98223. Customer is responsible for all return transportation charges and any air or rush delivery expense. BALMAR reserves the right to determine whether
to repair or replace defective components.
THE ABOVE LIMITATIONS MAY NOT APPLY TO YOU. SOME STATES DO NOT ALLOW LIMITATIONS ON HOW LONG AN IMPLIED WARRANTY LASTS. NO PERSON,
AGENT, DEALER IS AUTHORIZED TO GIVE ANY WARRANTY.
!"#$"% 19009 61st Ave. NE, Arlington, WA 98223 Phone: (360) 435-6100, Fax: (360) 435-3210
E-mail: balmar@balmar.net, Web: www.balmar.net
Figure 19 - Inserting voltmeter probes.

Other manuals for Max Charge MC-624

1

Other Balmar Controllers manuals

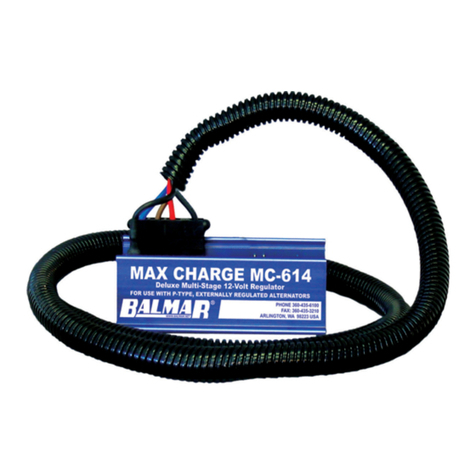
Balmar MAX CHARGE MC-614 User manual

Balmar

Balmar MAX CHARGE MC-614 User manual

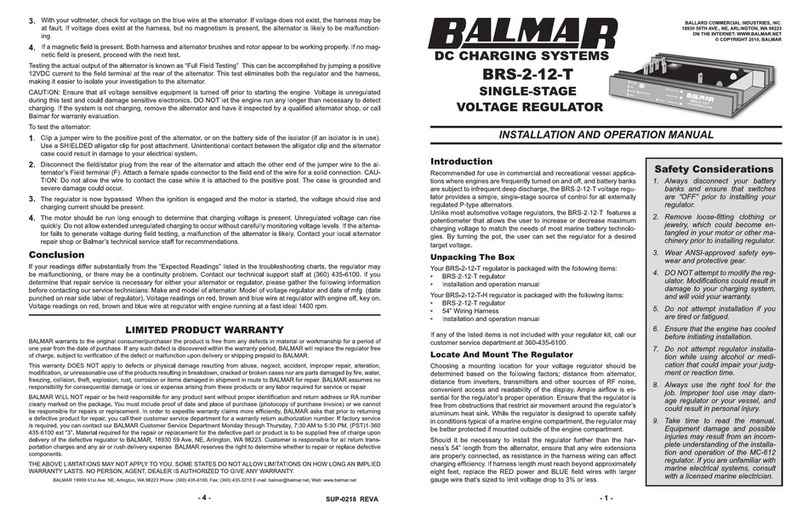
Balmar BRS-2-12-T User manual

Balmar

Balmar BRS-2-12-T User manual

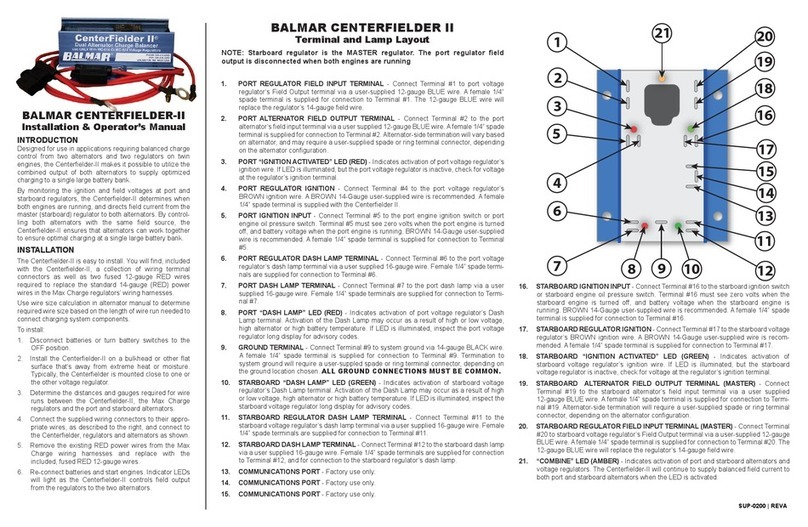
Balmar CENTERFIELDER II Administrator Guide

Balmar

Balmar CENTERFIELDER II Administrator Guide

Balmar Max Charge MC-614-H User manual

Balmar

Balmar Max Charge MC-614-H User manual

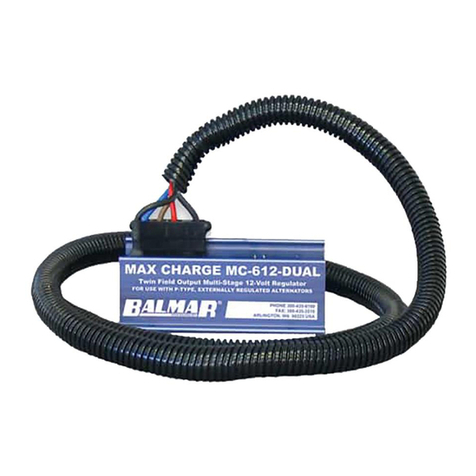
Balmar MAX CHARGE MC-612-DUAL User manual

Balmar

Balmar MAX CHARGE MC-612-DUAL User manual

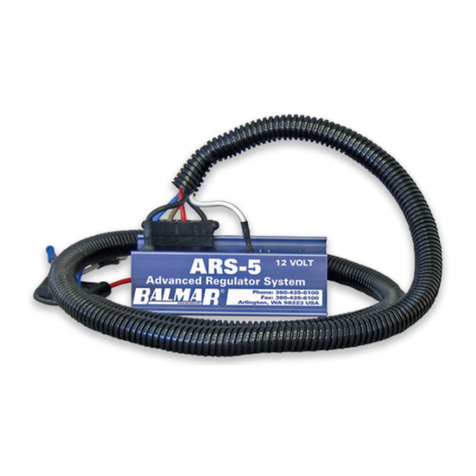
Balmar ARS-5 User manual

Balmar

Balmar ARS-5 User manual

Balmar 96 Series User manual

Balmar

Balmar 96 Series User manual

Balmar ARS III User manual

Balmar

Balmar ARS III User manual

Balmar BRS-2T-24 User manual

Balmar

Balmar BRS-2T-24 User manual

Balmar MAX CHARGE MC-614 User manual

Balmar

Balmar MAX CHARGE MC-614 User manual

Balmar ARS-5-H User manual

Balmar

Balmar ARS-5-H User manual

Balmar Max Charge MC-618 User manual

Balmar

Balmar Max Charge MC-618 User manual

Balmar MAX CHARGE MC-614 User manual

Balmar

Balmar MAX CHARGE MC-614 User manual

Balmar Max Charge MC-624 User manual

Balmar

Balmar Max Charge MC-624 User manual

Balmar Centerfielder Setup guide

Balmar

Balmar Centerfielder Setup guide

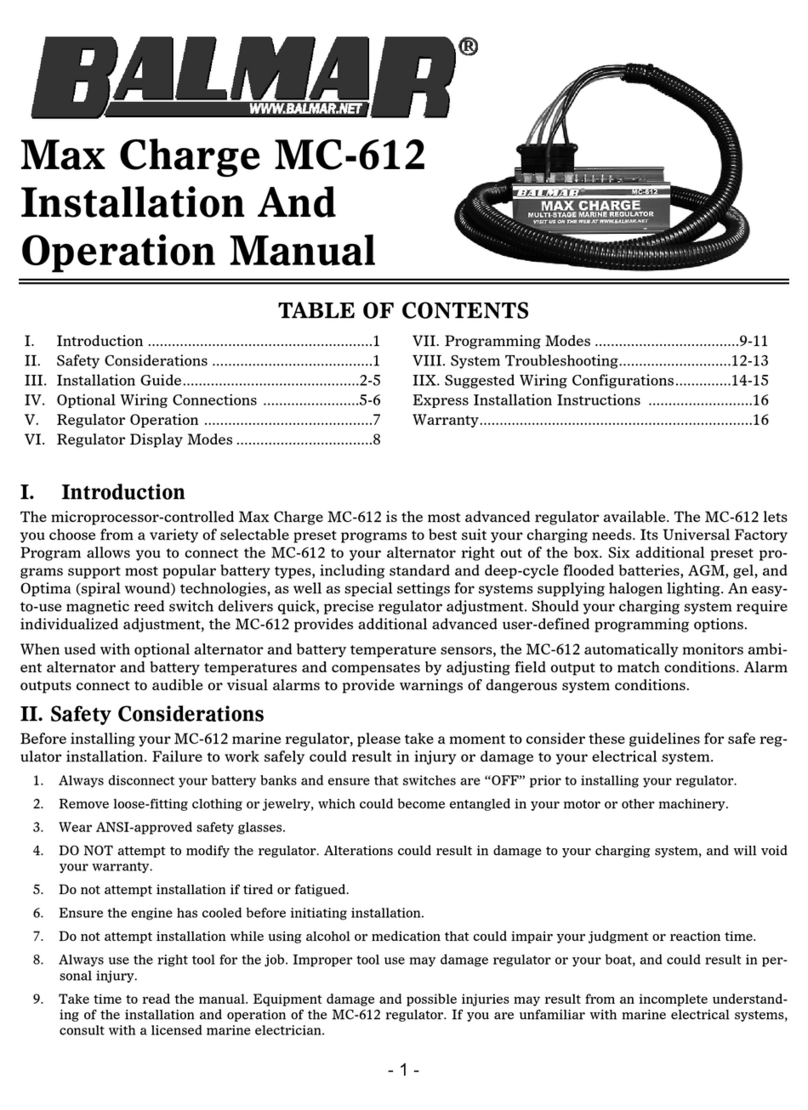
Balmar Max Charge MC-612 User manual

Balmar

Balmar Max Charge MC-612 User manual

Popular Controllers manuals by other brands

dixell XR01-02CX Installing and operating instructions

dixell

dixell XR01-02CX Installing and operating instructions

MrCool SMART CONTROLLER manual

MrCool

MrCool SMART CONTROLLER manual

DCS 090 Series Reference manual

DCS

DCS 090 Series Reference manual

Buderus RC20 operating instructions

Buderus

Buderus RC20 operating instructions

OmniCure LX500 quick start guide

OmniCure

OmniCure LX500 quick start guide

Mitsubishi Electric MELSEC iQ-R RD78G4 user manual

Mitsubishi Electric

Mitsubishi Electric MELSEC iQ-R RD78G4 user manual

Vimar by-me 01417 quick start guide

Vimar

Vimar by-me 01417 quick start guide

Norac UC4 Plus Rogator 64 Series installation manual

Norac

Norac UC4 Plus Rogator 64 Series installation manual

SLV 470810 Quick installation guide

SLV

SLV 470810 Quick installation guide

Evco EV3B33N7VXRX04 instruction sheet

Evco

Evco EV3B33N7VXRX04 instruction sheet

KiSS KIPR Link manual

KiSS

KiSS KIPR Link manual

Roger CPR32-NET user manual

Roger

Roger CPR32-NET user manual

American Standard Gold 824 user guide

American Standard

American Standard Gold 824 user guide

Airwell RCW22 Installation and owner's manual

Airwell

Airwell RCW22 Installation and owner's manual

phytron MCC-1 manual

phytron

phytron MCC-1 manual

Maxcess H6630EM user manual

Maxcess

Maxcess H6630EM user manual

Yisutongma Network Technology ESM-9013 instruction manual

Yisutongma Network Technology

Yisutongma Network Technology ESM-9013 instruction manual

SeaHawk LD1000 quick start guide

SeaHawk

SeaHawk LD1000 quick start guide

manuals.online logo
manuals.online logoBrands
  • About & Mission
  • Contact us
  • Privacy Policy
  • Terms and Conditions

Copyright 2025 Manuals.Online. All Rights Reserved.