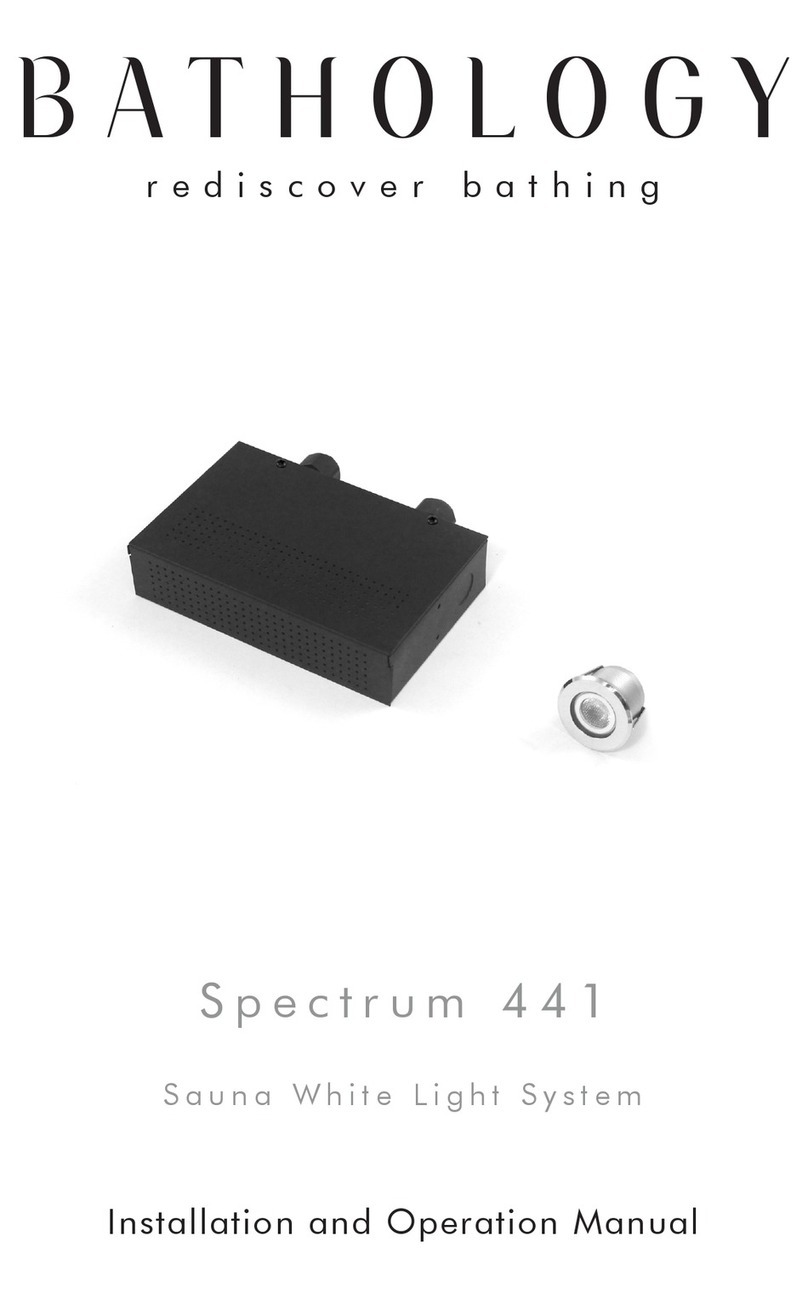
Bathology Spectrum 441D User manual

BATHOLOGY
Spectrum 441D
Sauna White Light System
Installation and Operation Manual
rediscover bathing

2
Spectrum 441D
ContentsContents
Installation ConsiderationsInstallation Considerations ---------------------------------------------
InstallationInstallation ---------------------------------------------------------------
Electrical DiagramElectrical Diagram ------------------------------------------------------
Product CareProduct Care -------------------------------------------------------------
SpecificationsSpecifications ------------------------------------------------------------
NotesNotes ---------------------------------------------------------------------
Replacement PartsReplacement Parts -------------------------------------------------------
33
44
66
1111
1212
1313
1313

3
BATHOLOGY
by
Carefully review all
installation options and instructions
before proceeding.
For safety purposes, use
safety goggles at all times.
Do not hot swap any
electrical components. This will void
the warranty, and likely cause the
product to fail. Fully disconnect theFully disconnect the
system from its power source beforesystem from its power source before
swapping any electrical components.swapping any electrical components.
Check for piping /
electrical before cutting or drilling.
Some electrical
components are not waterproof.
If there is any risk of
uninsulated electrical connections in
your wall / ceiling area, use insulating
gloves.
The splitters should be
kept in an accessible location when
installed. Only use the splitters
provided when assembling the
Brilliance light fixtures and components
of this kit.
The Spectrum 441D
Sauna White Light System can be
controlled by the use of a light switch
provided by others. NEVER place a
switch where it can be reached from a
tub or shower.
All wiring must be done in
accordance with National Electric Code
and local building code.
The Spectrum 441D White
Light System should be installed by a
licensed, qualified electrician.
Consider light placement
carefully. The fixture(s) for this system
should be placed to avoid direct contact
with the bather’s eyes.
Splitters should be kept in
a dry accessible location when installed.
Only use the splitters provided when
assembly brilliance light fixtures and
components of this kit.
Both “OUT” ports of a
splitter must be used. An open splitter
connection will prevent the lights from
turning on. Fully disconnet the power
supply of this system from its power
source before changing any lights.
Installation ConsiderationsInstallation Considerations
Please read this manual in its entirely prior to installationPlease read this manual in its entirely prior to installation
! IMPORTANT
! IMPORTANT
! IMPORTANT
! IMPORTANT
! IMPORTANT
IMPORTANT:IMPORTANT: DO NOT HOT SWAP ANY ELECTRICALDO NOT HOT SWAP ANY ELECTRICAL
COMPONENTS. This will void the warranty, and likely cause theCOMPONENTS. This will void the warranty, and likely cause the
product to fail.product to fail.

4
Spectrum 441D
InstallationInstallation
Package Includes
Item Quantity Description
A 1 Driver
1Screw
1Locknut
B 1 Enclosure
1Enclosure Top
Item Quantity Description
2Enclosure Top Screws
4Screws / Anchors
4Wire Nuts
1Ground Connector
C 2 Strain Relief Bushings
Sauna Desired Switch Location
(must be placed outside
the sauna)
Allow for 2” of clearance from
insulation above and around fixture.
B
I
K
J
L

5
BATHOLOGY
by
Package Includes
Item Quantity Description
D 1 Male NEMA Cable
E 1 Light Cable
F0* Cat6 Cable, 1’
G1* Cat6 Cable, 25’
H0* Splitter
Item Quantity Description
I1* Mounting Template
J1* Brilliance Light Fixture
K1* Wire Fit Cap
L 1 Dimmer
Accessible, dry location
120VAC Grounded Power Source
(Controlled by switch by others. NEVER
place a switch where it can be reached
from a tub or shower)
IMPORTANT:IMPORTANT: DO NOT HOT
SWAP ANY ELECTRICAL
COMPONENTS
PHYSICALLY UNPLUG FROM
POWER SOURCE BEFORE
SWAPPING ELECTRICAL
COMPONENTS
NOTE:NOTE: Quantity with an * increases by one per each additional light purchased. Quantities shown
assume no additional lights purchased with Spectrum 440D system.
A
C
C
D
E
G

White
Blue
Neutral
Neutral
Ground
Ground
Switch Leg
Hot
Field Supplied
Factory Supplied
Gray
Purple
6
Spectrum 441D
Electrical DiagramElectrical Diagram
A
B
D
E
L
Driver
Enclosure
Male NEMA Cable
Light Cable
Dimmer
Electrical Panel
NOTE: Neutral from Electrical Panel not
needed for Dimmer, but passes through to
Electrical Outlet.
Electrical Outlet

7
BATHOLOGY
by
Electrical Detail
1) Electricla Panel to Dimmer (L)
a) The Dimmer (F) will make use of a 120VAC, 15 Amp branch
circuit. The Dimmer (L) should be place where most convenient
for operation. The Dimmer (L) must be installed outside the Sauna
Room. Never place a switch where it can be reached from a tub or
shower.
b) ELECTRICAL PANEL ----------> DIMMER (L)
Ground Ground
Neutral (passes through to Outlet)
Hot Black
2) Dimmer (L) to Electrical Outlet
a) DIMMER (L) -----------> ELECTRICAL OUTLET
Ground Ground
(Neutral from Panel) Neutral
Red Hot
3) Driver (A) to Dimmer (L)
a) DRIVER (A) ----------> DIMMER (L)
Blue Purple
White Gray

8
Spectrum 441D
1. Install a standard single gang
electrical box in an accessible,
dry location.
2. Run a grounded 120VAC
from the power supply to
the accessible, dry location’s
electrical box.
3. Secure enclosure (B) to wall in
an accessible, dry location using
provided screws / anchors.
Installation (Continued)Installation (Continued)
Accessible, dry location
Typical Installation
Accessible,
dry location
120VAC Grounded
Power Source
AB
DE
C
Brown - Black
Blue - White
Ground - GND
Black - Black
Red - White
Typical Installation
E D
A
Accessible, dry
location
120VAC Grounded
Power Source
B
E
D
Typical Installation
IMPORTANT:IMPORTANT: DO NOT HOT SWAP ANY ELECTRICALDO NOT HOT SWAP ANY ELECTRICAL
COMPONENTS. This will void the warranty, and likely cause theCOMPONENTS. This will void the warranty, and likely cause the
product to fail.product to fail.

9
BATHOLOGY
by
Joist
I
1”
Ceiling / Wall
Material
16” Location
Template
Joist
Joist
Joist
16” Location
Template
Notch used to align
fixture center to other
fixture centers
Desired Fixture
Location
I
Installation (Continued)Installation (Continued)
4. Arrange lights per separate light
sheet. Both “OUT” ports of a
splitter (H) must be used if a
splitter is used.
5. Determine desired brilliance
light fixture (J) location. Note:Note:
Fixture should be placed to avoid
direct contact with the bather’s
eyes. Allow for 2” clearance from
insulation above and around the
fixture.
SEE SEPARATE LIGHT SHEET
2” Clearance from insulation
above and around the fixture.
6. Optional: Mount 16” location
template (I) to ceiling / wall
framework. Use notches to
quickly align desired location to
other fixtures in the room.

10
Spectrum 441D
7. Make a 1-5/8” hole in desired
location.
8. Mount brilliance light fixture (J)
to ceiling through 1-5/8” cut-
out. Allow for 2” clearance from
insulation above and around the
fixture.
9. Repeat steps 6 - 8 for each light.
1-5/8”
Bathing Space
J
Installation (Continued)Installation (Continued)

11
BATHOLOGY
by
Product CareProduct Care
For routine cleaning, simply use
a soft damp cloth and common
household soap. Use a damp cloth
to wipe clean, then dry. Clean
product frequently to avoid calcium
deposits on surfaces. Use only
mild soap. Never use abrasiveNever use abrasive
cleaners, bleach, disinfectantscleaners, bleach, disinfectants
or cleaning products containingor cleaning products containing
alcohol, ammonia, hydrochloricalcohol, ammonia, hydrochloric
or phosphoric acidsor phosphoric acids as they may
damage the product’s finish. To
clean electrical components, gently
wipe down using a dry cloth or
duster. Never use a wet duster,Never use a wet duster,
water, or any other liquid to cleanwater, or any other liquid to clean
the device.the device.

12
Spectrum 441D
SpecificationsSpecifications
DriverDriver
Operating Voltage:Operating Voltage: 90 - 305 VAC
Dimensions:Dimensions: 4-1/8” W x 2-1/2” H x
1-3/16” D
Brilliance FixtureBrilliance Fixture
Lumens:Lumens: 142 per Brilliance Fixture
Type:Type: LED White 3500 Kelvin
Operating Voltage:Operating Voltage: 12VDC
Maximum Input Current:Maximum Input Current: 700mA
LED:LED: 1 x 3 Watt
Beam Angle:Beam Angle: 35°
Trim Finish:Trim Finish: Polished Stainless Steel
Housing Composition:Housing Composition: First Grade
Aluminum
Lens:Lens: Frosted, 1-7/32” Diameter
Lens Composition:Lens Composition: Tempered Glass
Rough-in Cutout:Rough-in Cutout: 1-5/8” to
1-11/16”
Trim Dimension:Trim Dimension: 2-3/64” Diameter,
1/8” Profile
Body Dimensions:Body Dimensions: 1-15/32”
Diameter x 1-7/8” Deep
Rating:Rating: IP68
Certifications:Certifications: CE / RoHS / WEEE
Max Operating Temperature:Max Operating Temperature: 220°F
when installed per instructions
EnclosureEnclosure
Housing Composition:Housing Composition: Steel, black
powder coated finish
Dimensions:Dimensions: 7-3/4” W x 1-7/8” H x
4-7/8” D
Standards:Standards: NEMA 1
Listing:Listing: ETL, UL
Construction TemplateConstruction Template
Composition:Composition: Steel, Galvanized,
Gauge 22
Dimensions:Dimensions: 15-1/8” L x 1/32” H x
3” D
DimmerDimmer
Type:Type: 0-10V

13
BATHOLOGY
by
Replacement PartsReplacement Parts
Contact your Bathology
representative for Spectrum
441D Sauna White Light System
replacement parts.
800-957-2862
www.Bathology.com
DescriptionDescription Part NumberPart Number
Driver Spectrum114
Enclosure Spectrum079
Strain Relief Bushings Spectrum077
Male NEMA Cable Spectrum038
Cat6 Cable, 1’ Spectrum030
Cat6 Cable, 25’ Spectrum031
Splitter Spectrum071
Mounting Template Spectrum-68-Temp
Frosted LED White Light Spectrum107
NotesNotes

14
Spectrum 441D
NotesNotes

15
BATHOLOGY
by
NotesNotes

Spectrum441D
900-0143-1019
Rev-07
07/27/21
A division of Bathing Brands,Inc.
www.Bathology.com 800-957-2862
rediscover bathing
BATHOLOGY
Table of contents
Other Bathology Lighting Equipment manuals
Bathology
Bathology Spectrum 350 User manual

Bathology
Bathology Spectrum 510 User manual

Bathology
Bathology Spectrum 440 User manual
Bathology
Bathology Spectrum 321 User manual

Bathology
Bathology Spectrum 620-C User manual

Bathology
Bathology Spectrum 441 User manual

Bathology
Bathology Spectrum 620-W User manual