Battery Doctor 23140 User manual
Made in China exclusively for Wirthco Engineering Inc.
© 2020 Wirthco Engineering, Inc. All rights reserved.
Instruction Manual
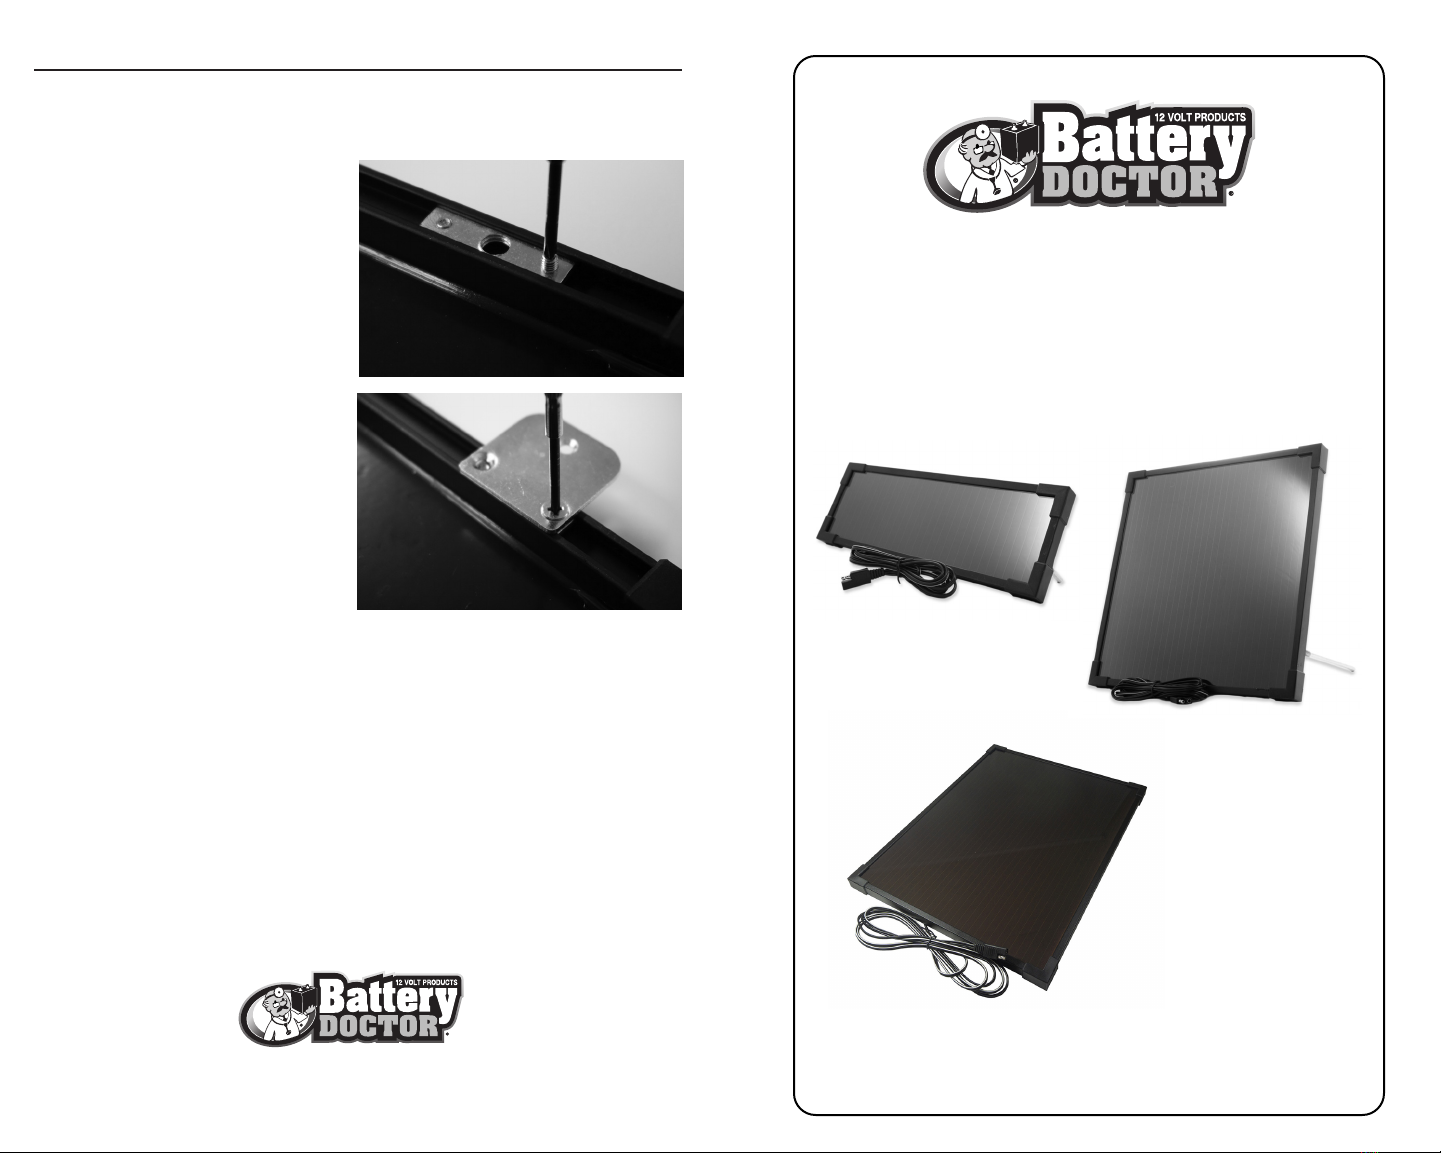
1.8 Watt Maintainer
5 Watt Trickle Charger/Maintainer
9 Watt Charger/Maintainer
1.8 Watt Maintainer
(Model #23140)
MOUNTING HARDWARE
To install the mounting brackets on the #23143 and #23144, please follow the below instructions.
Step 1
Remove the screws from the silver bracket on the back
side of the solar panel as shown in the picture. This will
require a 2mm Allen head wrench (included). The screws
that are removed will not be needed to fasten the bracket.
Step 2
Line up the bracket’s two holes over the solar panel
bracket’s holes and use the supplied Flush Head screws to
secure the bracket to the panel.
Step 3
Repeat these steps for the other three remaining brackets if required.
Please refer to our website for troubleshooting and FAQ’s.
www.wirthco.com
WARNING: This product contains chemicals known to the State of California to cause cancer, birth defects or other
reproductive harm.
ADVERTENCIA: Este producto contiene sustancias químicas que el estado de California causan cáncer, defectos congénitos
u otros daños reproductivos.
5 Watt Trickle Charger/Maintainer
(Model #23143)
9 Watt Charger/Maintainer
(Model #23144)

Battery Doctor’s®5 watt Trickle Charger/Maintainer (Model #23143)
Specifications and Included Items:
Power Rating: Up to 5 Watts
Current: Up to 420mAmps @ 12 Volts
Includes: Solar Panel with 8’ 8” Cable, 12 Volt DC Plug, Alligator Battery Clamps, (4) Steel Mounting Brackets, Tilting Rods, Voltage
Indicator
Installation
Securely place the solar panel in the sun. Included mounting brackets and screws can be used if necessary for permanent installa-
tion. Tilting rods are also supplied positioning the solar panel at an angle.
Installation Through 12 Volt DC Plug:
Plug the included 12VDC Plug into the 12 Volt DC socket (cigarette lighter socket) in the vehicle. Make sure both ends are secure and
aligned correctly. For optimal power, ensure the panel (solar cell facing up) is directly facing the sun.
Installation to Battery with Alligator Clamps:
Connect the included alligator clamps correctly by matching the red clamp which is Positive (+) to the Positive (+) terminal on your
battery. Connect the black Clamp which is Negative (-) to the Negative (-) Terminal on your battery.
WARNING Follow this carefully to not cause any bodily harm. Wrong connections may cause sparking or explosion.
For optimal power, ensure the panel (with the solar cell facing up) is directly facing the sun.
NOTE:
This solar panel has a built in blocking diode to prevent reverse discharge. Please do not use this panel while vehicle is in use. When
operating your vehicle it is best to secure the solar panel in the glove box or in another secure location.
Battery Doctor’s®9 watt Charger/Maintainer (Model #23144)
Specifications and included items:
Power Rating: Up to 9 Watts
Current: Up to 750m Amps @ 12 Volts
Includes: Solar Panel with 8’ 8” Cable, Alligator Clamps, 12 Volt DC Plug, (4) Steel Mounting Brackets, Tilting Rods, Voltage Indicator
Installation
Securely place the solar panel in the sun. Included mounting brackets and screws can be used if necessary for permanent installa-
tion. Tilting rods are also supplied positioning the solar panel at an angle.
Installation through 12 Volt DC Plug:
Plug the included 12V DC Plug into the 12 Volt DC socket (cigarette lighter socket) in vehicle. Make sure both ends are secure and
aligned correctly. For optimal power, ensure the panel (solar cell up) is directly facing the sun.
Installation using Battery with Alligator Clamps:
Connect the included alligator clamps correctly by matching up the red clamp which is Positive (+) to the Positive (+) terminal on your
battery. Connect the black Clamp which is Negative (-) to the Negative (-) Terminal on your battery.
WARNING: Follow this carefully to avoid bodily harm; wrong connections may cause sparking or explosion.
For optimal power, ensure the panel (with the solar cell facing up) is directly facing the sun.
NOTE:
This solar panel has a built in blocking diode to prevent “reverse discharge”. Please do not use this panel while vehicle is in use.
When operating your vehicle, it is best to secure the solar panel in another secure location. The 9W Solar Panel is weather resistant
and can safely operate in most weather conditions.
IMPORTANT!
Please read the instructions before operating and before and during the use of this product.
• It is important to observe and follow industry standard and manufacturer’s safety procedures when working around batteries
and other electrical equipment. Again, when working around batteries and other electrical equipment, please observe industry
standard and manufacturer’s safety procedures.
• To reduce the risk of electrical sparking when installing these solar chargers, please use a thick fabric to cover the panels, ensur-
ing the panels are producing very little charge, or do the installation in low light conditions.
• Ensure that you are making connections in a well-ventilated area free from flammable gases or vapors.
• These panels are designed for 12 Volt battery configurations only.
• For 12 V systems, ALL connections should be in PARALLEL: Positive (+) to Positive (+), Negative (-) to Negative (-).
• DO NOT attempt to recharge NON-RECHARGEABLE batteries.
• When disconnecting your solar panel, DISCONNECT the battery LAST.
General Product Description
Battery Doctor’s® Model #23140, Model #23143 and Model #23144 capture the energy of the sun to generate power that can
charge a 12 Volt battery for small power applications such as lighting systems or any small appliance.
The battery bank is an important component of any off-grid solar charging system, and we suggest using a deep-cycle battery. A 12
Volt battery is not included in this kit and is sold separately.
Please note: A full battery has a voltage of 12.8 Volts. Never deeply discharge your battery; never let your battery voltage pass 11.0
volts. It will cause permanent damage to the battery. Use a DMM (Digital Multi-Meter) to measure your battery’s voltage.
Battery Doctor’s®1.8 watt Maintainer (Model #23140)
Specifications and included items:
Power Rating: Up to 1.8 Watts
Current: Up to 150 mAmps @ 12 Volts.
Includes: Solar Panel with 8’ 8” Cable, Alligator Clamps, 12 Volt DC Plug, Tilting Rods, Voltage Indicator
Installation
Installation through 12 Volt DC Plug:
Plug the included 12VDC Plug into the 12 Volt DC socket (cigarette lighter socket) in vehicle. Make sure both ends are secure and
aligned correctly. For optimal power, ensure the panel (solar cell up) is directly facing the sun.
Installation to Battery with Alligator Clamps:
Connect the included alligator clamps correctly by matching the red clamp which is Positive (+) to the Positive (+) terminal on your
battery. Connect the black Clamp which is Negative (-) to the Negative (-) Terminal on your battery.
WARNING: Follow this carefully to not cause any bodily harm. Wrong connections may cause sparking or explosion.
For optimal power, ensure the panel (with the solar cell facing up) is directly facing the sun.
Positioning the Solar Panel:
The #23140 can be laid flat on a surface or if needed, there are (2) tilting rods supplied to keep the panel at an angle. These rods
screw into the back of the frame which allows the panel to be positioned at various levels for best results.
This manual suits for next models
2
Other Battery Doctor Batteries Charger manuals


