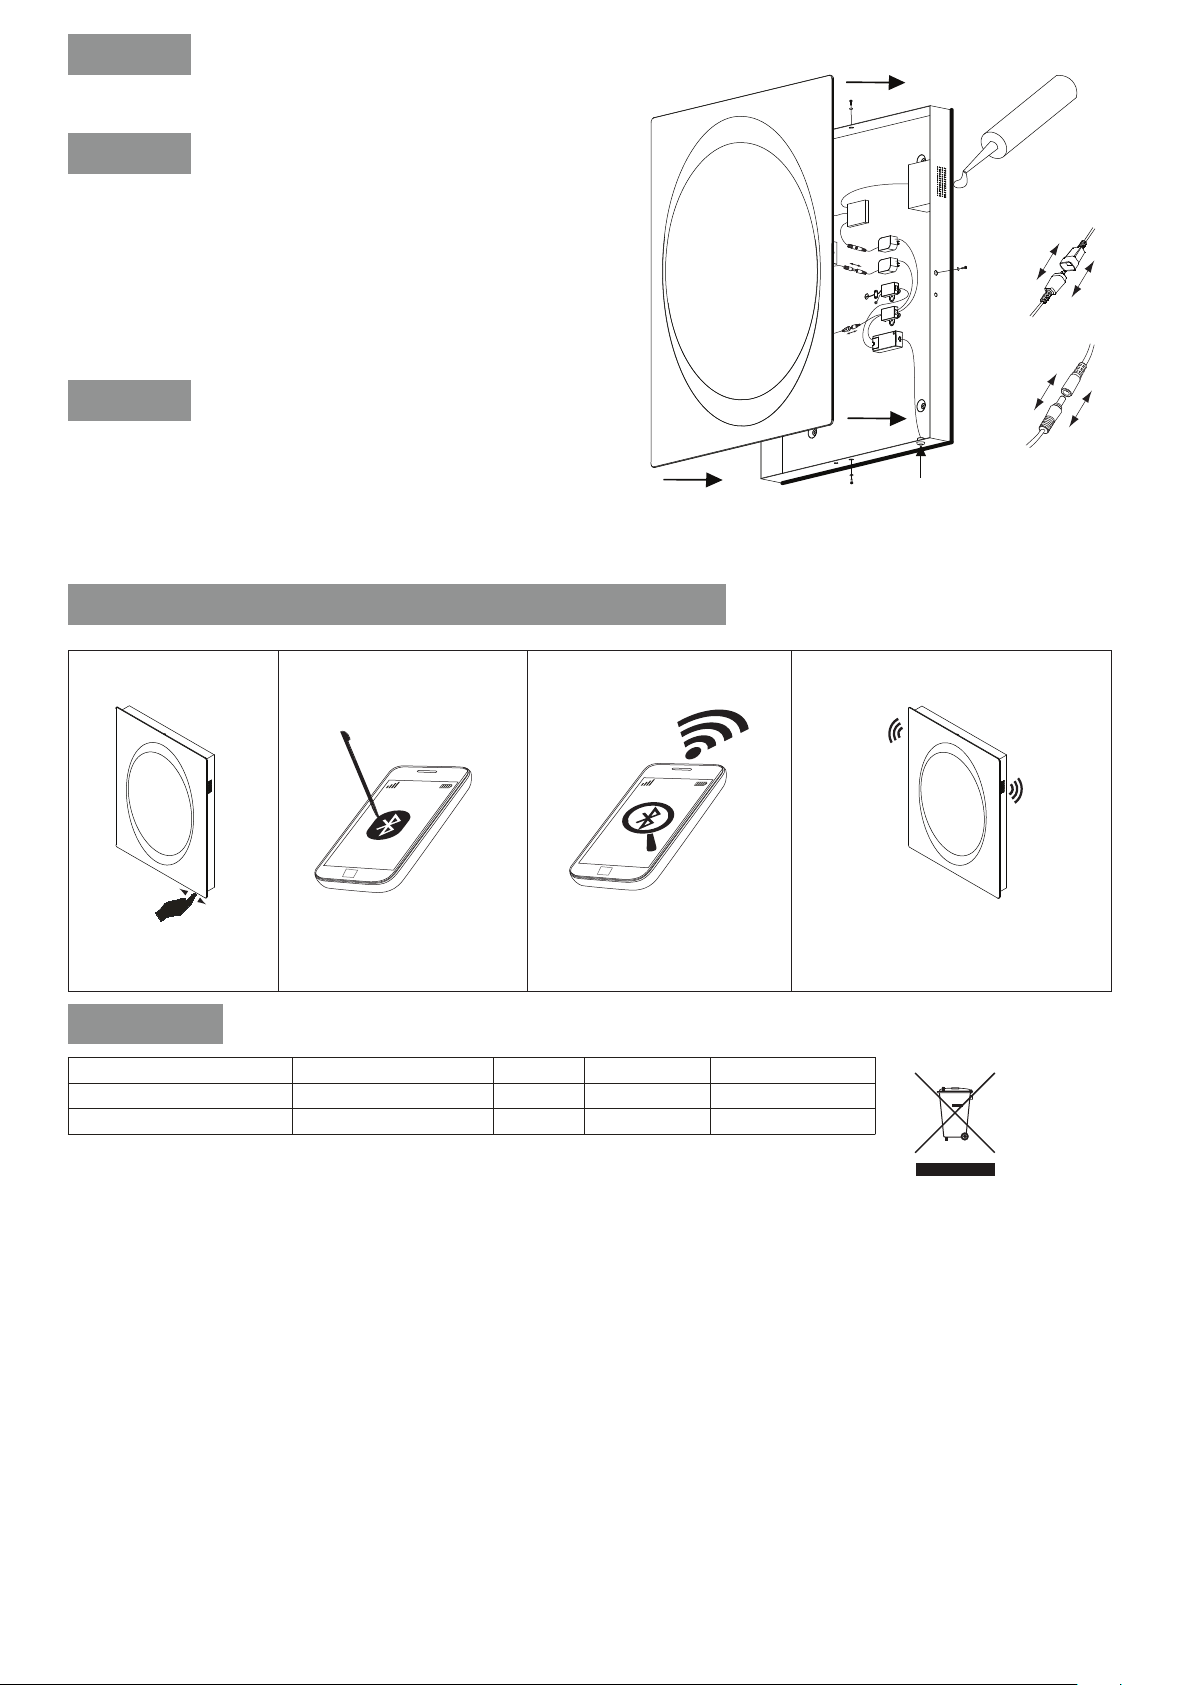
Reconnect the heated mirror pad and LED as shown
Carefully reposition the mirror inside the the mirror frame, accurately line
up the screw holes and reattach using the 4 screws, washers and cover
caps removed at stage 1.
Apply a bead of clear silicone sealant on all 4 sides between the mirror
frame and wall surface. Allow to dry for 24 hours.
Reconnect the electrical power supply.
OPERATION INSTRUCTIONS
To turn the mirror lights on or off, activate the switch by passing your hand over the sensor.
The heated pad will operate when the light is illuminated; the heat pad will work if the mirror lamp(s) expire.
Once turned on the heating pad will warm the mirror and clear the surface of condensation.
Waste Electrical & Electronic Equipment Regulations (WEEE) requires that any electrical products showing the mark
above must not be disposed of with other household or commercial waste. To prevent possible harm to the environment or human
health from uncontrolled waste disposal, please separate any such product from other waste types and recycle it responsibly at your
local facilities. Check with your Local Authority, Recycling Center or retailer for recycling advice.
CARE & MAINTENANCE
Add sentence:
LED light strips last for thousands of hours under normal domestic use, in the unlikely event that the LED light strip shouldfail please
contact customer services for a replacement part.- write this in bold type face.
Do not strike/hit glass components with hard or pointed items. Do not place very hot or very cold items against or in close proximity to
glass surfaces unless a suitably thick insulation material is used.
The nominal thickness of the mirror glass used in this product is 5mm and is safety film backed in accordance to BS:EN6206 for your
safety. If the mirror glass becomes chipped or broken, replace immediately. For details on replacement mirror glass and other
components contact customer services.
Cleaning:
The mirror edges are treated with a specially formulated sealant designed to protect the mirror edges from contaminants and
discolouring. Failure to follow cleaning guide-lines can/will remove the benefits of the sealant.
NEVER use products containing bleach, cleaners of a gritty or abrasive nature or so called “glass and mirror” cleaning products, that
can be detrimental to the long lasting finish of the mirror.
ONLY use a clean micro fibre cloth to clean the mirror and mirror frame.
Remove protective film from the mirror face, and clean as directed
below.
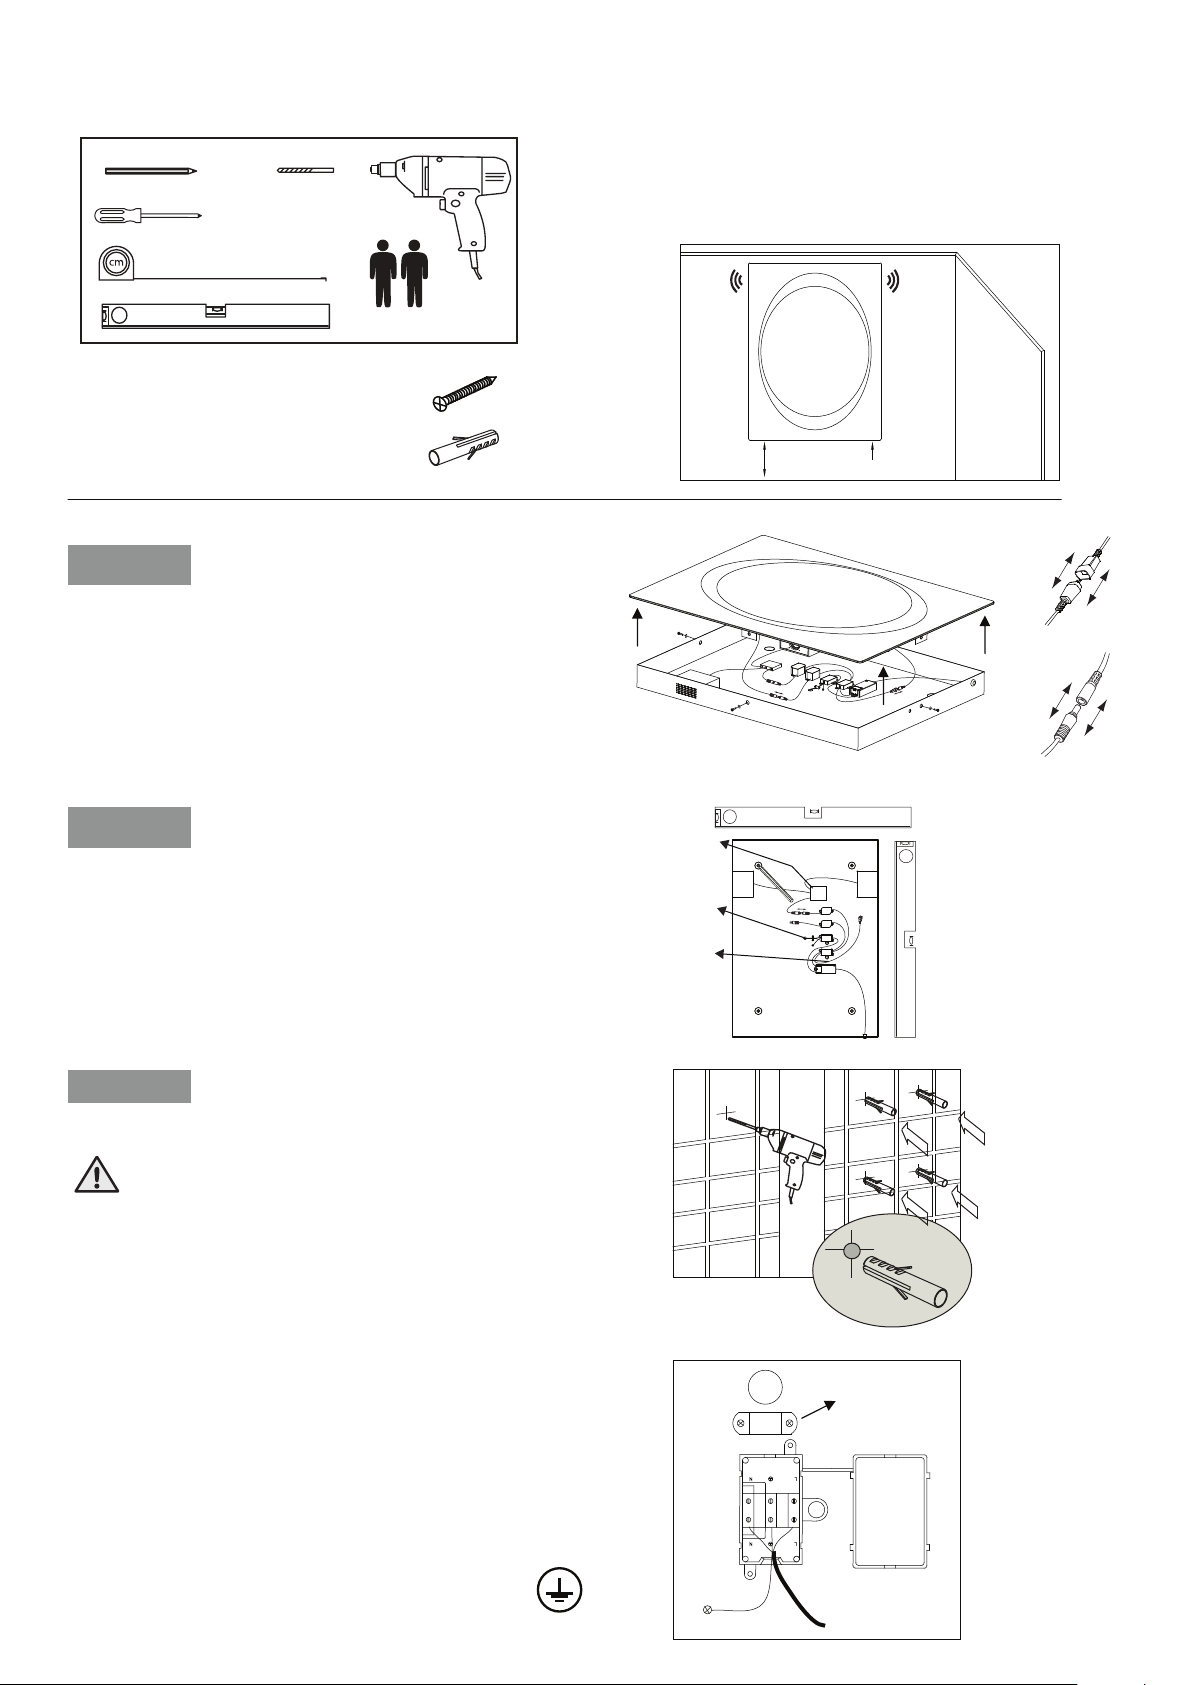
STEP 4
STEP 5
STEP 6
1.
Turn on the light
using the sensor.
4.
You can now listen to your favorite
song or on line radio station via the
stereo speakers
•
3.
Search for “Bauhaus”
Password: “0000”.
•
•
2.
Activate the Bluetooth
on your device.
••
Tube Type
Bluetooth wireless technology enabled device operation
Model Led Parameter Led Drive Bluetooth Drive
96 Leds / 0.06W / 6400K 6W
MEB8060A square corners
MEB8060B radius corners
4.5W
96 Leds / 0.06W / 6400K 6W 4.5W
wattage of speakers
2x3W
2x3W
De-mister
LED
Sensor
®
®