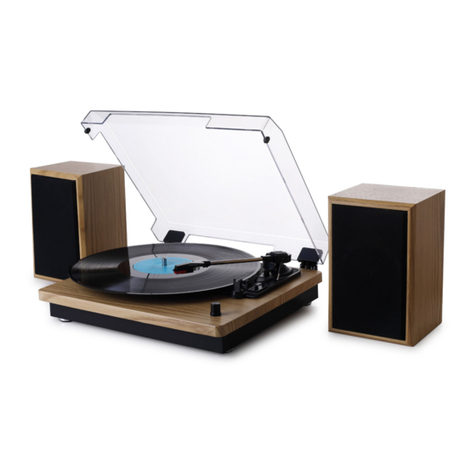
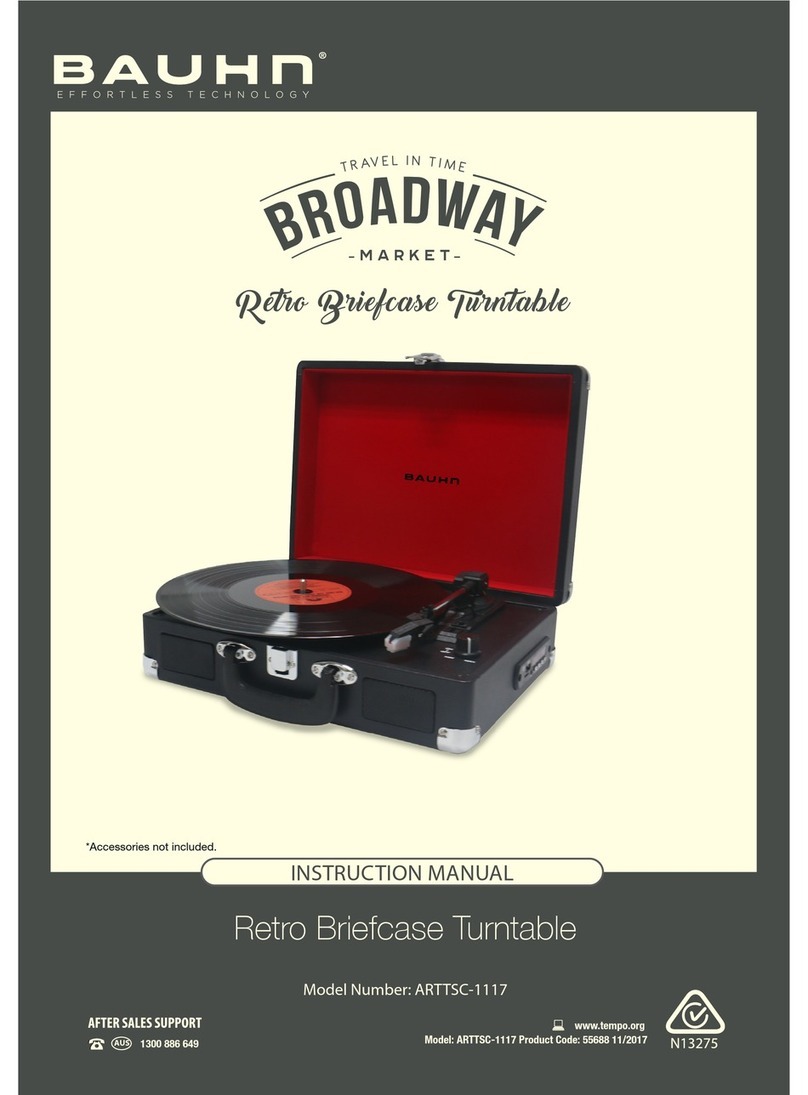
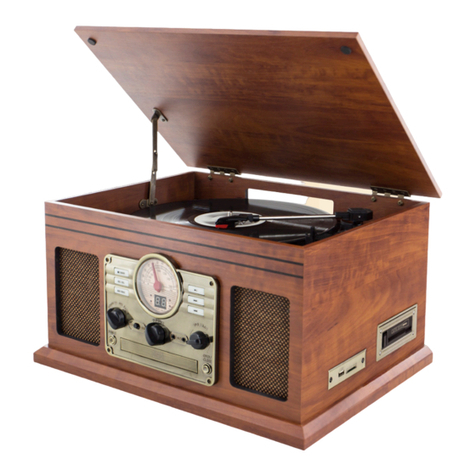
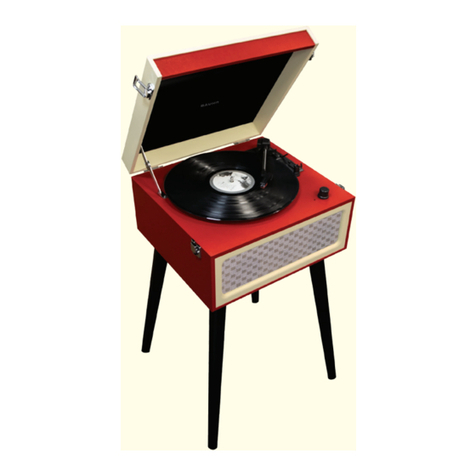
Bauhn XR-179ERB-1 User manual

NOSTALGIC TURNTABLE
WITH BLUETOOTH
English .....02
Español .... 19
User Manual
Manual
del usuario
TOCADISCOS NOSTÁLGICO CON BLUETOOTH

Contents
Important safetyguards ...................................................................3
Product overview..............................................................................5
Setup/Basic operation ...................................................................... 7
Setup...........................................................................................................7
Power connection.....................................................................................7
Using headphones ...................................................................................7
Using external speakers..........................................................................7
Listening to a vinyl record ................................................................ 7
Auto stop function................................................................................... 8
Listening to a CD................................................................................9
Program function .................................................................................... 9
Listening to files from USB device/SD card .................................... 10
Delete a file ..............................................................................................10
Record onto a USB device/SD card........................................................11
Listening to an external audio device (Bluetooth mode)..............11
Playback controls.................................................................................... 12
Disconnecting a Bluetooth device ....................................................... 12
Listening to an external audio device (AUX mode)........................12
Listening to the FM radio ................................................................ 13
Cleaning and maintenance............................................................. 13
Cleaning ................................................................................................... 13
Handling a vinyl record ......................................................................... 13
Replacing the turntable stylus ............................................................. 13
Storage ............................................................................................ 14
Specifications .................................................................................. 15
Troubleshooting.............................................................................. 16
Responsible disposal .......................................................................17
FCC statement .................................................................................. 18

Important safetyguards
3
IMPORTANT SAFETYGUARDS
READ ALL INSTRUCTIONS BEFORE USING.
When using electric devices, basic safety precautions should always be followed to
reduce the risk of fire, electric shock and injury to persons, including but not limited
to the following:
• Keep children and small animals away during unpacking, which the packaging
wrapper may get the children and small animals caught in it and suffocate.
• Children should be supervised to ensure they do not play with the device.
• Only use the device as described in this user manual. Any other use is not rec-
ommended. The device is intended for domestic use only and not intended for
commercial use.
• If the device is brought directly from a cold to a warm location, moisture may
condense inside the device, and cause damage to it. During transportation,
minimize thermal exchange between hot & cold environment. Wait for at least
30 minutes before operating the device.
• Improper installation and the use of accessories not recommended by the device
manufacturer may result in personal injury and property damage and will
invalidate your warranty. We assume no responsibility for any eventual damages
caused by improper or faulty use.
• Only place the device on flat, level surfaces without vibrations; otherwise, there is
a risk of unintended falling from an elevated position. Do not place the device in
a confined space, such as a bookcase or built-in cabinet.
• The device should be operated only by the type of power source indicated on the
rating label or in this user manual.
• Do not touch the power plug or adapter with wet hands. If moisture enters
device, disconnect from the power source.
• The power cable should be run in such a way that there will be no risk of anyone
pulling it inadvertently or tripping over it.
• Do not kink, bend, squash, strain or damage the power cable and protect it from
sharp edges and heat source, such as fire. Do not let the power cable touch hot
surfaces.
• Do not use the device when abnormal situations occur, such as unusual smell/
heating distortion or color-change of the housing material.
• To prevent fire or shock hazard, unplug the device from the power outlet when
not in use and before cleaning, servicing or moving the device.
• The device is not intended to be operated by means of an external timer or a
separate remote control system.

Important safetyguards
4
• Do not open the housing of the device. This might cause a damage to circuitry
or electrical shock.
• There are no user-serviceable parts inside the device. Do not attempt to service
this product. Please call our after sales support for instructions.
• Always carry/hold the device by two hands. Never carry the device by the power
cable.
• In order to prevent environmental factors (dampness, dust, food, liquid etc.)
harming the device, only use it in a well ventilated, clean and dry environment,
away from excessive heat or moisture, such as steamy kitchens, bathrooms or
basements.
• Keep the device away from direct sunlight or heat sources. For good ventilation,
do not place a cloth around the device, where ventilation openings may become
blocked.
• Do not immerse the power cable, plug, or the device itself in water or other
liquid. Do not expose the electrical connections to water. Make sure all electrical
connections are clean and dry before switching on.
• The device is not intended for use by persons (including children) with reduced
physical, sensory or mental capabilities, or lack of experience and knowledge,
unless they have been given supervision or instruction concerning use of the
product by a person responsible for their safety.
• Do not put any objects on top of the device.
• Do not expose the device to microwaves.
• Keep the device away from oils, chemicals or any other organic liquids.
• Do not place or store the device where it can fall or be pulled into a bath or sink.
Do not place or drop it in water or any other liquids.
• WARNING: Do not place the device too close to ears. It may cause damage to ear
drums, especially in young children. Use the device only for its intended use as
described in this user manual. BAUHN® is not liable for any damage caused to
iPod/MP3 players or any other devices.
• When not using the device for a long period of time, disconnect the device from
the power outlet. When removing the power cable, never drag the cable.
• Do not use this device if it exists obvious damages after dropping / bumping /
shaking.
• Never touch the wire of the FM antenna during a thunderstorm. Furthermore,
immediately disconnect the power cable from the radio.
• Do not open / repair / disassemble the device by yourself; instead, have qualified
professionals perform any repairs. Contact a qualified workshop for this. Liability
and warranty claims are waived in the event of repairs performed by the user of
incorrect operation.
SAVE THESE INSTRUCTIONS

Product overview
5
/USB/SD
REC/DEL
REP/PROG
FM BLUETOOTH
FM/BLUETOOTH
PHONO
CD AUX
POWER
TUNING
AUX
VOLUME
OPEN/
CLOSE
/USB/SD
REC/DEL
REP/PROG
PHONO FM / BLUETOOTH
CD AUX
FM
BLUETOOTH
TUNING
VOLUME
AUX
POWER
OPEN /
CLOSE
REC FM ST
DEL
PLAY
REP PROG
FM MHz
88
90
92
94
96 98 100
102
104
106
108
1
2
3
5
6
7
8
10
9
16
17
18
3
19
11 13 1514
4
1Turntable cover
2Cover support latch
3Stereo speaker, 2×
4Display panel
5/USB/SD button*
6REC/DEL button**
7REP/PROG button***
8Selection knob
Front View
12
Product overview
9FM/BLUETOOTH switch
10 POWER button
11 Compact disc tray
12 Radio tuner knob
13 3.5 mm headphone jack
14 3.5 mm AUX-IN jack
15 OPEN/CLOSE button
16 VOLUME knob
*: stop playback (in CD/USB/
SD/Bluetooth modes)/stop
recording/toggle between
USB/SD card playback
**: record/delete recording
***: repeat tracks/
program a music list
17 button
18 button
19 button

Product overview
6
USB
SD MMC CARD
20 21
24
23
22 26
25
Rear View
Parts of the Turntable
33
45
78
AUTO
STOP
-OFF-
-ON-
27 29 30
33
34
353637
31
32
28
20 USB port
21 SD/MMC CARD port
22 Support feet, 4×
23 FM antenna
24 RCA output jacks (left & right)
25 Power input jack (DC 12 V 2 A)
26 Power adapter
27 Handle
28 Turntable platter
29 45 RPM adapter
30 Tone arm
31 Cue-lever
32 Tone arm lock
33 Speed switch
34 AUTO
STOP switch
35 Stylus cartridge
36 Stylus
37 Stylus holder

Setup/Basic operation
7
Setup/Basic operation
Setup
1. Unpack the device and keep all packaging materials until you have made sure
your new device is undamaged and in good working order.
2. Place the device on a flat and level surface that is free from vibration.
3. Before first use, remove the black plastic tie-wrap that is
holding the tone arm 30 .
4. Detach the stylus guard (white plastic cover) by pulling it
straight off the stylus cartridge 35 .
Power connection
1. Plug the smaller end of the power adapter 26 into the power input jack 25 on
the back of the device.
2. Plug the power adapter into an appropriate power outlet (100–240 V).
3. Press the POWER button 10 to power the device on or off.
Using headphones
Connect headphones (not provided) to the headphone jack 13 for private listening.
The stereo speakers 3will not work if you use headphones.
WARNING: Do not adjust the headphone volume too high. There is danger of hearing
impairment.
Using external speakers
This feature enables you to play audio on the device through
external speakers. You need an RCA cable (not included) to make
this connection.
Plug one end of the L(white) and R(red) RCA jacks into the RCA
output jacks 24 at the back of the device, and the other end into
L(white) and R(red) RCA jacks at the back of the external speakers.
Listening to a vinyl record
1. Lift the turntable cover 1all the way up until the cover
support latch 2stops and fully opens. Push the latch
forwards with some pressure if necessary.

Listening to a vinyl record
8
2. Turn the selection knob 8to PHONO.
PH shows on the display panel 4.
3. Place a vinyl record in the center of the
turntable platter 28 . If you want to play a
45 RPM record requiring an adapter, use the provided 45 RPM
adapter 29 in the center of the turntable platter.
4. Select the correct playing speed (33/45/78 RPM).
5. Set the AUTO
STOP switch 34 to the ON position,
to make the vinyl record stop
automatically once playing is finished.
6. Unlock the tone arm by opening the tone
arm lock 32 .
7. Push the cue-lever 31 backwards to
raise the tone arm, then gently move the
tone arm to the desired position over the
vinyl record (the turntable platter begins
spinning). Pull the cue-lever forwards to
lower the tone arm onto the vinyl record.
The record begins playing. Avoid bumping the stylus 36 on
the turntable or a record’s edge.
8. The auto stop function will make the record stop
automatically at the end (see chapter “Auto stop function”).
9. If the AUTO
STOP switch is set to the OFF position, the turntable platter continues spinning
and has to be stopped manually at the end.
10. Push the cue-lever backwards to raise the tone arm. Re-position the tone arm
back to the rest position. Pull the cue-lever forwards to lower the tone arm. Lock
the tone arm to protect it from accidental movement.
11. Carefully pull the cover support latch 2until it disengages.
Slowly close the turntable cover 1by hands. Make sure you
hold the cover carefully to avoid pinching your fingers.
Auto stop function
The auto stop function is designed to extend the service life of your stylus 36 .
If the AUTO
STOP switch 34 is set to the ON position, the turntable platter 28 will automati-
cally stop spinning at the end of a vinyl record playing.
Note: The auto stop function will take approximately 30 seconds at the end of the
record before the turntable platter stops spinning. Due to variances in vinyl record
production, the auto stop function may not work correctly with some records.
33
45
78
AUTO
STOP
-OFF-
-ON-
REP/PROG
PHONO FM / BLUETOOTH
CD AUX
FM
BLUETOOTH
TUNING
REC
PLAY
REP PROG

Listening to a CD
9
Listening to a CD
1. Turn the selection knob 8to CD.
Cd shows on the display panel 4, flashing for a few seconds.
If an invalid disc, or no disc, is loaded, NO shows on the display
panel.
2. Press OPEN/CLOSE button 15 to eject the compact disc tray 11 .
OP shows on the display panel. Place a CD in the center of the disc
tray with the printed label facing up. Do not place more than one
disc on the tray at a time.
3. Press OPEN/CLOSE button again to close the compact disc tray,
CL shows on the display panel. You will then see the total number of sound tracks
on the display panel. Do not force the compact disc tray by hand when it is
opening and closing.
4. The device starts playback automatically from the first sound
track. PLAY indicator stays lit on the display panel during
playback and the number of the current track displays on the
display panel.
− To repeat a single track, press the REP/PROG button 7once during playback.
The REP indicator flashes on the display panel 4.
− To repeat all the tracks, press the REP/PROG button again.
− Press the REP/PROG button once again to disenable the repeat mode.
5. Press the button 19 during playback to pause the sound track. PLAY indicator
flashes on the display panel. To resume playback, press the button again.
6. Turn the VOLUME knob 16 to adjust the volume.
7. Use the / buttons 17 /18 to navigate between previous and next tracks.
For fast forward/backward, during playback press and hold the / button
respectively and release when the desired position of the track is found.
8. Press the /USB/SD button 5to stop playback.
Program function
Up to 20 tracks can be programmed from your CD and be played in your desired order.
1. In stop mode (using the /USB/SD button 5), press the REP/PROG button 7.
The PROG indicator flashes while 01 is flashing on the display panel 4.
2. Use the / buttons 17 /18 to select a track and press the REP/PROG button
again to save the track. 02 shows on the display panel automatically.
3. Use the / buttons to select another track. Press the REP/PROG button again
to save the track.
REC FM ST
DEL
PLAY
REP PROG
REP/PROG
FM / BLUETOOTH
CD AUX
FM
BLUETOOTH
TUNING
REC FM ST
DEL
PLAY
REP PROG

Listening to files from USB device/SD card
10
4. Repeat the above steps (2–3) to continue programming.
Press the button to start playing your programmed tracks.
Press the / USB/SD button to stop playback. Your programmed playlist is still
available.
Press the / USB/SD button again to delete the programmed tracks.
The PROG indicator is off.
Listening to files from USB device/SD card
The device is able to decode and play all MP3/WMA
files stored in the memory media connected to the
USB port 20 or SD/MMC CARD port 21 .
1. Insert a USB device into the USB port, or insert
a SD card into the SD/MMC CARD port, making
sure to insert it straight without bending. Check to ensure the direction is correct
before connection.
2. Turn the selection knob 8to CD.
To play sound track from the USB drive, press and hold the
button 19 until Ud flashes on the display panel 4, then
release the button. To play a sound track from a SD card, press
and hold the button again until Sd flashes on the display
panel. If you have both a USB drive and a SD card inserted, press
the /USB/SD button 5to toggle between USB and SD mode.
3. The device will start reading the storage media automatically after mode
selection and will display the total number of folders and MP3/WMA files.
The PLAY indicator stays lit on the display panel.
• To pause playback, press the button 19 once. Press it again to continue
playback.
• To play the previous track, press the button 17 once or press and hold to
rapidly advance through previous tracks.
• To play the next track, press the button 18 once or press and hold to
rapidly advance through next tracks.
• To stop playback, press the /USB/SD button 5.
Delete a file
• To delete a file from your media storage device, in stop mode, first select the track
by using the / buttons 17 /18 . You can also delete a track while it is being
played in playback mode. Press and hold the REC/DEL button 6until the DEL
indicator flashes along with dL on the display panel 4. Then press the REC/DEL
button again. The DEL indicator flashes rapidly and the file will be deleted.
USB
SD MMC CARD
USB
SD MMC CARD
REP/PROG
O
NO FM / BLUETOOTH
CD AUX
FM
BLUETOOTH
TUNING
REC FM ST
DEL
PLAY
REP PROG
REP/PROG
O
NO FM / BLUETOOTH
CD AUX
FM
BLUETOOTH
TUNING
REC FM ST
DEL
PLAY
REP PROG

Listening to an external audio device (Bluetooth mode)
11
Record onto a USB device/SD card
This device has the capacity to encode your sound tracks (from vinyl record, CD,
a connected Bluetooth or AUX-IN device) into digital format and record them onto a
USB device or SD card as MP3 file(s). The recording format is preset at MP3 bit rate
128 kbps.
1. Insert a storage device (USB drive or SD card) into the device’s USB port 20 or
SD/MMC CARD port 21 .
2. Tune the selection knob 8to the appropriate function (PHONO, CD, AUX or
FM/BLUETOOTH) and get your audio media ready for playback.
3. During your selected playback, press the REC/DEL button 6
to start recording. rE shows on the display panel 4and the
REC indicator is on. The recording will start a few seconds later
with the REC indicator starting to flash.
− The recording volume level can not be adjusted with the VOLUME knob 16 .
− The recording speed is 1:1. Recording will take as long as playing the audio tracks.
4. Press the /USB/SD button 5to stop recording. The sound track(s) will be saved
directly in the USB device/SD card as MP3 file(s).
Listening to an external audio device
(Bluetooth mode)
This device can play audio signal received from your external device via Bluetooth.
You need to do initial pairing between the device and your external device.
The effective distance between your external device and this device is about 33 feet
(10 meters).
1. Turn the selection knob 8to FM/BLUETOOTH.
2. Slide the FM/BLUETOOTH switch 9to the BLUETOOTH
position. bt flashes on the display panel 4, the device is now
ready for pairing.
3. Turn on the Bluetooth function on your external device
(i.e. smartphone or other media device, one device at a time).
The Bluetooth starts pairing automatically. Bauhn Turntable
as the device’s identification name should be selected on your
external device. You will hear an audible chime if the pairing
is successful. bt stops flashing on the display panel.
4. After initial pairing, the device will stay paired unless
unpaired manually by the user or erased due to a reset of
the external device. Once the device is switched on under
the Bluetooth mode, it automatically connects with your last
paired external device if it is around.
/USB/SD
REC/DEL
REP/PROG
FM BLUETOOTH
FM/BLUETOOTH
PHONO
CD AUX
POWER
TUNING
AUX
VOLUME
OPEN/
CLOSE
E
P/PROG
FM / BLUETOOTH
AUX
FM
BLUETOOTH
TUNING
REC
F
PLAY
REP PROG
REC FM ST
DEL
PLAY
REP PROG

Listening to an external audio device (AUX mode)
12
Playback controls
• After pairing to a Bluetooth device, use either the controls on your connected
Bluetooth device or the / / / buttons 19 /17 /18 /5on the front
panel of the turntable to play, pause, select a track, skip or stop it.
• Audio played through the connected Bluetooth device will now be heard
through the stereo speakers 3.
• Adjust the sound volume either using the VOLUME knob 16 on the front panel
of the turntable or on your connected Bluetooth device.
Disconnecting a Bluetooth device
• Switch off or erase the pairing from the connected Bluetooth device manually.
Listening to an external audio device
(AUX mode)
This device can play audio from an external audio device in AUX mode with an AUX
cable (not included).
1. Turn the selection knob 8to AUX.
AU indicator will be lit on the display panel.
2. Connect one end of a 3.5 mm AUX-IN cable (not included) into
the 3.5 mm AUX-IN jack 14 of the device and the other end
to your external audio device, such as CD player, tablet, MP3
player, smartphone, etc.
3. Start playback on your external audio device.
The stereo speakers 3will output the sound.
• The volume output is affected by the volume level on your
connected audio device. Ensure that the source volume is
set to about 70–80 % to avoid sound distortion.
• Playback must be controlled from your connected audio
device while using AUX mode.
VOLUME
AUX
OPEN /
CLOSE
REP/PROG
FM / BLUETOOTH
AUX
FM
BLUETOOTH
TUNING
REC
PLAY
REP PROG

Listening to the FM radio
13
Listening to the FM radio
This device comes supplied with a FM antenna 23 . Before first use, remove the
black plastic tie-wrap that is holding the antenna. Keep any digital devices or mobile
phones away from the antenna, as this may lead to interference of reception. The
antenna may need to be re-positioned if you move the device to a new location.
1. Turn the selection knob 8to FM/BLUETOOTH.
2. Slide the FM/BLUETOOTH switch 9to the FM position.
3. Turn the radio tuner knob 12 to search your desired
radio station while adjusting the antenna location to
obtain the best reception. If FM-stereo signal has been
found, FM ST indicator will be lit on the display panel 4.
Cleaning and maintenance
WARNING: NEVER immerse the device in water or any other liquids.
CAUTION: NEVER use alcohol-based fluids, abrasive cleaners or hard brushes to clean
the device, these may damage the device surface or markings.
Cleaning
1. Power off and unplug all cables from the device.
2. Clean the device with a clean, soft and dry cloth.
3. Do not touch the stylus tip with your fingers. Remove the dust on the stylus
cartridge with a soft brush. Dust the stylus from time to time using a very soft
brush (brushing from back to front of the cartridge).
Handling a vinyl record
− Do not touch the vinyl record groove once out of the sleeve. Only handle it by its
edge or the label. Ensure that your hands are clean, otherwise dirty hands will
gradually deteriorate the vinyl record.
− Keep your vinyl records away from dust and store in a dry, cool place.
− Keep your vinyl records in sleeves when not in use to avoid damages.
− Store records upright, vinyl records stored horizontally might bend and warp.
Replacing the turntable stylus
For best performance, your stylus (needle) 36 should be replaced periodically
(approximately every 130 hours of play time). Replacement of the stylus is also
recommended as soon as you notice a deterioration of sound quality. Using a worn
out stylus may damage your vinyl records.
REP/PROG
FM / BLUETOOTH
AUX
FM
BLUETOOTH
TUNING
REC FM ST
DEL
PLAY
REP PROG

Storage
14
WARNING: If not done correctly, separating the stylus holder 37 from the stylus
cartridge 35 can cause damage to the parts. Use only identical replacement parts.
Never directly touch the stylus during replacement. Contact a qualified repair person
if you are having difficulties changing.
1. Lock the tone arm 30 and remove the stylus guard from the stylus cartridge.
2. Push down on the top edge of the stylus holder to detach it (see Fig. 1 above).
3. Carefully remove the stylus holder (see Fig. 2 above).
4. To assemble the new stylus, hold the front tip of the stylus holder and attach its
rear edge to the stylus cartridge (see Fig. 3 above).
5. Carefully and gently push the tone arm and the stylus holder together (see Fig. 4
above).
The new stylus is now ready for use.
Storage
• All parts must be completely dry before being stored.
• Remove all the vinyl record/CD/USB/SD/MMC cards from the device, then store the
device in a clean and dry place without direct sunlight.
• Move the device using two hands and hold it by the handle 27 .
• Keep the device out of the reach of children.
1. 2. 3. 4.

Specifications
15
Specifications
GENERAL
Power input.................................................100–240 V~50/60 Hz, 0.65 A MAX
Power consumption................................... 18 W
Dimensions (L × W × H)............................... 17.5 × 13.2 × 9.3 in (44.5 × 33.5 × 23.5 cm)
Weight.......................................................... 7 kg
SPEAKERS
Output power.............................................. 2× 10 W
Frequency response.................................. 60–16,000 Hz
TURNTABLE
Motor............................................................ DC motor
Speeds......................................................... 33⁄/45/78 rpm
S/N Ratio...................................................... 45 dB
Cartridge type............................................. Needle cartridge (402–M208–015)
CD PLAYER
Frequency response.................................. 20 Hz–20 Hz ± 3 dB
S/N Ratio...................................................... >60 dB
USB DRIVE/SD CARD PORT
Memory card size........................................ Max. 32 GB
Playing format............................................ MP3, WMA
Recording format....................................... MP3, 128 kbps
Folders limit................................................. Max. 99 folders
Files limit...................................................... Max. 999 files
Recording time........................................... Max. 65 hours (use of approx. 4 GB)
FM RADIO
Range........................................................... 88–108 MHz
BLUETOOTH
Bluetooth version....................................... V 2.0; profil A2DP & HFP
Frequency range........................................ 2.4 GHz
Operating distance.....................................33 feet (10 meters)

Troubleshooting
16
Troubleshooting
Some problems may be caused by minor faults that you can fix yourself. To do so,
follow the instructions in the following table. If it is still not possible to resolve the
problem, contact customer service. Do not repair the device yourself.
Problem Possible cause and solution
GENERAL
Device has
no power.
• Make sure that the device’s power adapter is connected
to an appropriate power outlet.
No sound, poor
sound quality or
distorted sound.
• Rotate the VOLUME knob clockwise to increase the
volume.
• In radio mode, the antenna is not oriented properly.
• In Bluetooth mode, make sure the device is within the
device’s Bluetooth range. Move your external device
closer to the device.
• The device is too close to a TV set or another device.
PHONO
The vinyl record
will not play.
• Make sure the selection knob is set to PHONO mode and
the right speed (33, 45 or 78 RPM) is selected.
• Install the 45 RPM adapter if your vinyl record needs it.
• Check the stylus condition and whether it is in the appro-
priate position, or consider to replace a worn out stylus.
CD
The CD will not
play.
• Make sure a valid CD is placed properly with the printed
surface facing up.
• Make sure the selection knob is set to CD mode.
• The CD may be paused, press the button.
• Replace with another CD for testing.
USB DEVICE/SD CARD
Nothing will
play via the USB
device or SD
card.
• Make sure the selection knob is set to CD mode.
• Make sure the memory device is properly inserted in the
USB port (or SD/MMC CARD port).
• Check the USB port and SD/MMC card port are not
blocked by any object.

Responsible disposal
17
Problem Possible cause and solution
BLUETOOTH
Bluetooth
pairing cannot
be established.
• Make sure the device is within its effective working
range, 33 feet (10 meters).
• If the device is connected to another external media
device, disconnect it from the device and pair again.
• Make sure your device’s Bluetooth function is turned on
and it is discoverable.
• If there are too many Bluetooth devices near the device,
turn off unused external devices to avoid interference.
• Check the power connection if necessary.
AUX
Nothing will
play via the AUX
IN connection.
• Make sure the AUX cable is firmly connected and check if
the external device is working and undamaged.
• Make sure the selection knob is set to AUX mode.
• Check that the volume of the external device is at 70–80 %.
RADIO
Cannot listen to
any station, or
signal appears
weak.
• Properly tune-in the desired station using the radio
tuner knob.
• Keep away any digital devices or mobile phones from the
antenna, as this may lead to interference of reception.
• Re-position the antenna.
Note: If normal operation or any of the above solutions do not fix the issue, unplug
the power adapter from the power outlet and plug it in again.
Responsible disposal
At the end of its working life, do not throw this device out with your household trash.
Electrical and electronic products contain substances that can have a detrimental
effect on the environment and human health if disposed of inappropriately. Observe
any local regulations regarding the disposal of electric products and dispose of it
appropriately for recycling. Contact your local authorities for advice on disposal
recycling facilities in your area.

FCC statement
18
FCC statement
This device complies with Part 15 of the FCC Rules. Operation is subject to the
following two conditions: (1) this device may not cause harmful interference, and
(2) this device must accept any interference received, including interference that
may cause undesired operation.
Warning: Changes or modifications to this unit not expressly approved by the party
responsible for compliance could void the user’s authority to operate the equipment.
NOTE: This equipment has been tested and found to comply with the limits for a
Class B digital device, pursuant to Part 15 of the FCC Rules. These limits are designed
to provide reasonable protection against harmful interference in a residential
installation. This equipment generates, uses and can radiate radio frequency energy
and, if not installed and used in accordance with the instructions, may cause harmful
interference to radio communications.
However, there is no guarantee that interference will not occur in a particular
installation. If this equipment does cause harmful interference to radio or television
reception, which can be determined by turning the equipment off and on, the user
is encouraged to try to correct the interference by one or more of the following
measures:
• Reorient or relocate the receiving antenna.
• Increase the separation between the equipment and receiver.
• Connect the equipment into an outlet on a circuit different from that to which the
receiver is connected.
• Consult the dealer or an experienced radio/TV technician for help.
The Bluetooth® word mark and logos are registered trademarks owned by Bluetooth
SIG, Inc. and any use of such marks by HANDS (IP) Holdings Pty Ltd is under license.
Other trademarks and trade names are those of their respective owners.
To maintain compliance with FCC’s RF Exposure guidelines, This equipment should be
installed and operated with minimum 20cm distance between the radiator and your body:
Use only the supplied antenna.

Contenido
19
Contenido
Precauciones de seguridad importantes ...............................................20
Resumen del producto ............................................................................ 22
Instalación/funcionamiento básico........................................................ 24
Configuración ..............................................................................................24
Conexión eléctrica ......................................................................................24
Uso de auriculares ......................................................................................25
Uso de altavoces externos.........................................................................25
Escuchar un disco de vinilo ..................................................................... 25
Función de parada automática ................................................................26
Escuchar un CD ......................................................................................... 26
Función del programa................................................................................ 27
Escuchar archivos de un dispositivo USB/tarjeta SD.............................. 28
Eliminar un archivo.....................................................................................28
Grabar en un dispositivo USB/tarjeta SD.................................................29
Escuchar un dispositivo de audio externo (modo Bluetooth)............... 29
Controles de reproducción........................................................................30
Desconexión de un dispositivo Bluetooth ..............................................30
Escuchar un dispositivo de audio externo (modo AUX) ........................30
Escuchar la radio FM..................................................................................31
Limpieza y mantenimiento.......................................................................31
Limpieza ........................................................................................................31
Manejar un disco de vinilo..........................................................................31
Sustituir la aguja del tocadiscos ...............................................................32
Almacenamiento...................................................................................... 32
Especificaciones ....................................................................................... 33
Resolución de problemas ........................................................................ 34
Eliminación responsable ......................................................................... 36
Declaración de la FCC ...............................................................................36

Precauciones de seguridad importantes
20
PRECAUCIONES DE SEGURIDAD
IMPORTANTES
LEA TODAS LAS INSTRUCCIONES ANTES DE USAR.
Al usar aparatos eléctricos, se deberían tomar siempre precauciones básicas de
seguridad para reducir el riesgo de incendio, descarga eléctrica y lesiones sobre las
personas, incluidas, entre otras, las siguientes:
• Mantenga alejados a los niños y a los animales pequeños durante el
desembalaje, ya que el envoltorio puede hacer que los niños y los animales
pequeños queden atrapados en él y se asfixien.
• Los niños deberían estar supervisados para garantizar que no juegan con el
aparato.
• Utilice el aparato únicamente en la forma descrita en el presente manual de
usuario. No se recomienda ningún otro uso. El aparato está únicamente previsto
para uso doméstico y no para uso comercial.
• Si el aparato se lleva directamente de un lugar frío a uno caliente, puede
condensarse humedad dentro del aparato y dañarlo. Durante el transporte,
minimice el intercambio térmico entre el ambiente caliente y frío. Espere al
menos 30 minutos antes de utilizar el aparato.
• La instalación inapropiada y el uso de accesorios no recomendados por el
fabricante del aparato pueden provocar lesiones personales y daños materiales,
e invalidarán la garantía. No asumimos ninguna responsabilidad en caso de
posibles daños causados por un uso indebido o incorrecto.
• Coloque el aparato únicamente sobre superficies planas y niveladas, sin
vibraciones, ya que, de lo contrario, existe el riesgo de caídas involuntarias desde
una posición elevada. No coloque el aparato en un espacio confinado, como una
estantería o un armario empotrado.
• El aparato se debería usar solo con el tipo de fuente de energía indicado en la
etiqueta de especificaciones o en este manual de usuario.
• No toque el enchufe o el adaptador con las manos mojadas. Si entra humedad en
el aparato, desconéctelo de la fuente de energía.
• El cable eléctrico debería estar tendido de forma que nadie pueda tirar de él ni
tropezar con él por descuido.
• No doble, tuerza, aplaste, sobrecargue ni dañe el cable eléctrico y protéjalo de
bordes afilados y de fuentes calor, como el fuego. No deje que el cable eléctrico
entre en contacto con superficies calientes.
• No utilice el aparato cuando se produzca una situación inusual, como un olor/
calentamiento inusual, una distorsión o un cambio de color del material de la
Table of contents
Languages:
Other Bauhn Turntable manuals

Bauhn
Bauhn ARTTS-0822-W User manual

Bauhn
Bauhn ARTTS-0823 User manual

Bauhn
Bauhn AFST-815 User manual

Bauhn
Bauhn ARTL-0816-R User manual

Bauhn
Bauhn ARTTSC-1117 User manual

Bauhn
Bauhn ARTTS-1219 User manual

Bauhn
Bauhn ARTTS-0820 User manual

Bauhn
Bauhn ARTTS-0322-B User manual

Bauhn
Bauhn ARTTS-0321 User manual