Bechara Qatar Panel User manual

1
Painel/Panel/Panel 1600 x 2000 x 335mm
QATAR
IDENTIFICAÇÃO DAS PEÇAS / IDENTIFICACIÓN DE LOS COMPONENTES / PARTS IDENTIFICATION
Manual do Produto e Instruções para Montagem
Guía del Producto y Instrucciones de Montaje
Product Guide and Assembly Instructions
A Móveis Bechara se reserva o direito de modificar desenhos e especificações de seus produtos sem aviso prévio.
Móveis Bechara se reserva el derecho a modificar los diseños y las especificaciones de sus productos sin previo aviso.
Móveis Bechara reserves the right to modify designs and specifications of its products without notification.
© Móveis Bechara. Projeto 798, Ed. 001 - Mar./2022.
N.° ID Quantidade
Cantidad
Quantity
Descrição / Descripción / Description
Dimensões (mm)
Dimensiones (mm)
Dimensions (mm)
Painel frontal central / Panel frontal central / Central Front Panel 1
1600 x 352 x 15
01
VISTA TRASEIRA / VISTA POSTERIOR / REAR VIEW
Painel frontal superior / Panel frontal superior / Upper Front Panel 1
Painel traseiro no nicho / Panel trasero del nicho / Rear Panel of the niche 1
1448 x 260 x 15
Porta* / Puerta* / Door*3*
630 x 254 x 15
1600 x 448 x 15
Base / Base / Base 1
1936 x 290 x 15
Lateral esquerda / Panel lateral izquierdo / Left Side Panel 1
260 x 288 x 15
Tampo / Repisa central / Middle Shelf 1
1980 x 320 x 25
02
03
04
05
06
07
08
09
10
11
12
13
Indústria de Móveis
Bechara Nassar Eireli.
Av. Bechara Nassar Frange, 113
Jd. Brasília,
Tanabi, São Paulo - Brasil
CEP 15170-000
Telefones: (17) 3272 9900
(17) 3272 9919
www.moveisbechara.com.br
14
15
16
17
22
23
2
1200 x 92 x 25
Coluna interna / Columna interior / Inner Column
Barra traseira (chanfrada) / Barra trasera (biselada) / Rear Bar (beveled) 1
1398 x 116 x 15
Painel traseiro esquerdo / Panel trasero izquierdo / Left Rear Panel 1
1600 x 300 x 15
Painel traseiro direito / Panel trasero derecho / Right Rear Panel 1
1600 x 300 x 15
Lateral direita / Panel lateral derecho / Right Side Panel 1
260 x 288 x 15
Divisória do nicho / Partición del nicho / Partition of the niche 2
260 x 254 x 15
Suporte traseiro superior / Soporte trasero superior / Upper Rear Support 2
384 x 252 x 25
-3
Puxador / Tirador / Handle
-1
Kit com 2 fitas luminárias LED / Kit con 2 tiras de luz LED / Kit with 2 LED strips luminaires
17
15
Painel frontal inferior / Panel frontal inferior / Lower Front Panel 1
1600 x 448 x 15
Suporte traseiro inferior / Soporte trasero inferior / Lower Rear Support 1
384 x 106 x 25
Barra para parede (chanfrada) / Barra de pared (biselada) / Bar for wall (beveled) 1
1200 x 116 x 15
Barra inferior da porta central / Barra inferior de la puerta central / Lower Bar of the Central Door 1
630 x 60 x 15
18
Barra superior da porta central / Barra superior de la puerta central / Upper Bar of the Central Door 1
630 x 60 x 15
19
20
21 Painel interno da porta central / Panel interior de la puerta central / Inner Panel of the Central Door 1
516 x 142 x 2,5
Coluna da porta central / Columna de la puerta central / Column of the Central Door 2
134 x 60 x 12
_______________
*Nas versões do Painel Qatar com porta central com detalhe com pintura padrão "Rattan" moldurado, uma das três portas das versões standard é substituída pelas peças abaixo:/
En las versiones Panel Qatar con la puerta central con detalle de pintura con motivo "Rattan", una de las tres puertas de las versiones estándar se substituye por las seguientes piezas: /
In the Qatar Panel versions with the central door with framed "Rattan" pattern paint detail, one of the three doors of the standard versions is replaced by the parts below:
01
02
03
04
04
05
06
06
07
Para fixação atrás do painel.
Para fijación detrás del panel .
For fixing behind the panel .
08
09
09
08
10
10 11
11
12
13
14
16 Para fixação na parede.
Para fijación en la pared .
For fixing on the wall .
*Porta central com detalhe com pintura padrão "Rattan".
Puerta central con detalle de pintura con motivo "Rattan".
Central Door with framed "Rattan" pattern paint detail.
17
17
22
22
22
20
20
18
19
22
12
15
14
***
23
21
03
02

2
KIT DE ACESSÓRIOS E PARAFUSOS / KIT DE ACCESORIOS Y TORNILLOS / ACCESSORY AND BOLTS
100 20 30 40 50
mm
60
!IMPORTANTE! Verificar as medidas dos parafusos na escala ao lado ou com uma trena antes de aplicá-los nas peças.
iIMPORTANTE! Verificar las medidas de los tornillos en la escala o con una cinta métrica antes de aplicarlos en las partes .
IMPORTANT! Check the measures of the bolts on the scale or with a measuring tape before applying them in parts.
Ler atentamente e considerar todas as instruções antes e durante a montagem e guardar este manual para consultas futuras. São necessárias 2 pessoas para montar e instalar este
produto. Paredes curvas ou com superfícies irregulares não são recomendadas ou podem não possibilitar a instalação do Painel Qatar, pois comprometem a fixação e podem acarretar empenamento
das peças e até desprendimento e queda do painel. Antes de iniciar a instalação, verificar todas as condições da parede, especialmente quanto à resistência e ao suporte ao peso e quanto à existência e
posição de tubulações hidráulicas, elétricas ou de gás, evitando danos a estas estruturas ao executar os furos. A Móveis Bechara não se responsabiliza por problemas de imperícia, inadequação ou
inobservância das recomendações na montagem e instalação de seus produtos por terceiros. O Painel Qatar é adequado para Smart TV de até 70" com peso de até 30kg, desde que observadas as
especificações dimensionais e de instalação próprias destes aparelhos. Os suportes e os parafusos para fixação de TV não estão inclusos no produto Painel Qatar. Os furos que vierem a ser executados
no produto para a fixação de TV ou para quaisquer outras finalidades são de responsabilidade do cliente/montador/instalador, não cabendo a estes o direito de requerer à Móveis Bechara a substituição
do produto, no todo ou em parte, por avarias decorrentes destas operações ou nos casos em que eventuais trocas de aparelhos acarretarem necessidade de novos furos ou deixarem aparentes os furos
já executados. Não expor o produto diretamente à luz solar e à umidade. Para limpeza, utilizar flanela seca ou levemente umedecida em água. Não utilizar produtos químicos,
abrasivos e solventes. Pesos máximos recomendados: TV de até 30kg, fixada ao painel; e mais até 20kg de outros materiais uniformemente distribuídos nos nichos e prateleiras.
Nunca utilizar quaisquer partes do móvel como apoio ou como degrau para escalar o próprio painel ou a parede.
GARANTIA (Brasil): este produto tem garantia de 90 dias contra eventuais defeitos de fabricação, conforme Art. 26, inc. II do Código de Defesa do Consumidor. O direito à assistência técnica ou à
substituição do produto ou de partes dele é assegurado, dentro do período de garantia, desde que observadas as instruções constantes deste manual e com a apresentação da Nota Fiscal. O desgaste
natural do móvel e os problemas decorrentes de montagem incorreta e de uso inadequado não são cobertos pela garantia.
Lea atentamente y considere todas las instrucciones antes y durante la montaje y guarde este guía del producto para futuras consultas. Se necesitan dos personas para la montaje y
la instalación de esto producto . Paredes curvas o con supeficies irregulares no se recomiendan para la instalación del Panel Qatar, ya que conduce a fijación incorrecta y puede causar deformaciones
en las piezas y el desprendimiento y la caída del panel. Antes de iniciar la instalación, verificar todas las condiciones de la pared, sobretodo cuanto a la resisitencia para el peso y la existencia de lineas
hidráulicas, eléctricas o de gas, evitando daños a estas estructuras quando se ejecutar los agujeros. Móveis Bechara no se responsabiliza por poblemas causados por inexperiencia o por no seguir las
recomendaciones apropiadas en la montaje y instalación de sus productos por parte de terceros. Panel Qatar es adecuado para Smart TV de hasta 70 pulgadas con peso de hasta 30 kg, siempre que
hayan cumplido con las especificaciones dimensionales y de instalación propias de estos equipos. Soportes y tornillos para la fijación de TV no están incluídos en el producto Panel Qatar. Los orifícios que
se ejecutarán en el mueble para fijación de TV o para cualquier otro propósito son de responsabilidad del cliente, instalador o montador, que no tienen derecho de exigir al fabricante Móveis Bechara la
substitución del producto, en su totalidad o en parte, por los daños causados
por estas operaciones o cuando un posible intercambio de equipos o TV implicar en la necesidad de orifícios adicionales o
dejar visibles los orifícios ya ejecutados. No exponer los muebles a la luz solar directa y la humedad. Para limpiar el panel, utilice un paño seco o ligeramente humedecido.
No utilizar productos químicos, abrasivos y solventes. Pesos máximos recomendados: TV hasta 30kg, fijada al panel; más hasta 20kg de otros materiales distribuidos uniformemente
en los demás niches y repisas. No utilice nunca el panel como soporte o como un escalón para subir el propio panel o la pared.
NO OBSERVAR LAS RECOMENDACIONES DE MONTAJE Y USO PUEDE AFECTAR LA FUNCIONALIDAD Y CONDICIONES DE GARANTÍA.
Read carefully and consider all instructions before and during the assembly and keep this product guide for future reference. Two people are required to assembly and install this product.
Curved walls or uneven surfaces are not recommended or may not allow the installation of the Qatar Panel, because it leads to incorrect fixation and can cause warping the parts and to the detachment
and fall of the panel. Before starting the installation, check all the conditions of the wall, notably regarding resistance to weight and the existence and position of hydraulic, electrical or gas lines,
avoiding damage to these structures when running holes. The Móveis Bechara not responsible for problems caused by inexperience, inadequancy or failure to follow due recommendations in assembly
and installation of their products by third parties. The Qatar Panel is adequate for fixing Smart TV up to 70 inches with weight up to 30 kg, since observed the dimensional and installing specifications of
these equipments. The supports and bolts for TV are not included in the product Qatar Panel. The holes that will be executed on the panel for fixing the TV or other purpose are the responsibility of the
customer and the installer or assembler, not leaving it to them the right to require from the Móveis Bechara the replacement product, in whole or in part, by damage from these operations or where
possible exchanging equipment would entail the need for additional holes or leave visible the holes already executed. To clean, use dry cloth or slightly moistened with water. Do not use chemical and
abrasives products and do not expose the furniture to direct sunlight and humidity. Recommended maximum weights: TV up to 30kg; and more up to 20kg of materials evenly distributed in
the niches and shelves. Never use any part of the panel as a support or as a step to climb the panel itself or the wall.
FAILURE TO FOLLOW THE RECOMMENDATIONS FOR ASSEMBLY, INSTALLATION AND USE MAY CAUSE FUNCTIONALITY PROBLEMS AND THE LOSS OF THE WARRANTY CONDITIONS.
!
B4 un.
Sachê de cola branca.
Sachet de pegamento.
Glue sachet
88 un.
C
Parafuso 4,5 x 35mm cab. chata phs.
Tornillo 4,5 x 35mm cab. plana phs.
Bolt 4.5 x 35mm flat head phs.
J
Tapa-furo adesivo (cor principal).
Capa adhesiva (color principal).
Adhesive Cover (main color).
8 un.
A
Cavilha Ø6 x 30mm.
Clavija Ø6 x 30mm.
Dowel Ø6 x 30mm.
40 un.
G
Parafuso Minifix.
Tornillo Minifix.
Minifix Bolt.
4 un. I
Tambor Minifix Ø12mm.
Tuerca Minifix Ø12mm.
Minifix Drum Ø12mm.
4 un.
6 un.
L
Dobradiça 26mm Alta
com Calço 12mm.
Bisagra 26mm Alta
con Cuña 12mm.
High Hinge 26mm
with 12mm Shim.
M
Parafuso 4,0 x 14mm cab. chata phs.
Tornillo 4,0 x 14mm cab. plana phs.
Bolt 4.0 x 14mm flat head phs.
24 un.
20 un. H
Parafuso 5,0 x 50mm cab. chata phs.
Tornillo 5,0 x 50mm cab. plana phs.
Bolt 5.0 x 50mm flat head phs.
N
Bucha plástica 8mm para parede.
Buje de plástico 8mm para pared.
Plastic Bushin 8mm for wall.
14 un.
O
Parafuso 5,0 x 60mm cab. flangeada phs.
Tornillo 5,0 x 60mm phs.
Bolt 5.0 x 60mm flange head phs.
14 un. P
Tampa passa-fios Ø40mm plástcio
Capa de plastico Ø40mm.
Plastic Cover
Ø40mm.
1 un.
Painel/Panel/Panel 1600 x 2000 x 335mm
QATAR
K
Tapa-furo adesivo (cor secundária).
Capa adhesiva (color secundária).
Adhesive Cover (secondary color).
8 un.
Parafusadeira e Furadeira
com ponteiras phillips e
brocas Ø8mm.
Perforadora y Atornillador
con puntas philips y
taladros Ø8mm.
Drilling machine and electric
screwdriver with philips tips
and drills Ø8mm.
!IMPORTANTE! Ferramentas necessárias ou recomendadas para a montagem não inclusas e não fornecidas com o produto.
iIMPORTANT! Herramientas necesarias o recomendadas para la montaje no incluidas y no suministradas con el producto.
IMPORTANT! The required or recommended tools for assembly not included and not supplied with the product.
FERRAMENTAS RECOMENDADAS / HERRAMIENTAS RECOMENDADAS / RECOMMENDED TOOLS
VÍDEO DE MONTAGEM
VÍDEO DE MONTAJE
ASSEMBLY VIDEO
D8 un.
Junção/Chapa de aço c/ 4 furos.
Placa metalica cuadrada.
Metal Plate
with 4 holes.
Parafuso 3,5x12mm cab. flang. phs.
Tornillo 3,5 x 12mm phs.
Bolt 3.5 x 12mm phs.
E34 un.
8 un.
F
Parafuso 3,5 x 25mm cab. chata phs.
Tornillo 3,5 x 25mm cab. plana phs.
Bolt 3.5 x 25mm flat head phs.
Q
Tapa-furo Ø8mm (cor secundária).
Capa Ø8mm (color secundária).
Cover for hole Ø8mm (secondary color).
4 un.
Trena ou fita métrica
Cinta métrica.
Measuring tape.
Martelo comum.
Martillo común.
Simple hammer.
Chave de fenda
simples e philips.
Atornillador
simples y philips.
Simple and philips
screwdriver.
Indicador de Nível.
Indicador de nivel.
Level indicator.

3
PASSO 1 / PASO 1 / STEP 1
a) Forrar o piso com a isomanta da
embalagem, para proteger as peças,
e dispor os Painéis (01), (02) e (03)
com a face traseira voltada para cima ,
verificando corretamente a posição de
cada um conforme os furos e o desenho.
Forre el piso con la isomanta de empaque,
para proteger las piezas y organizar los
Paneles (01), (02) y (03) con la face posterior
hacia arriba, observando correctamente la posición
de cada uno de acuerdo con los orificios y con los deseños.
Line the floor with the foam mantle of the packing to protect the
parts and arrange the Panels (01), (02) and (03) with the rear face upwards , correctly checking the position of each one according to the holes and the drawing.
b) Alinhar as bordas dos Painéis (01), (02) e (03) e fixá-los entre si aplicando chapas de aço (D) com parafusos (E), nas posições indicadas .
Alinear los bordes de los Paneles (01), (02) y (03) y fijarlos entre sí aplicando las placas de acero (D) con tornillos (E), en las posiciones indicadas.
Align the edges of the Panels (01), (02) and (03) and fix them together by applying the steel plates (D) with bolts (E), in the indicated positions.
c) Fixar os Suportes superiores (04) nos Painéis (01) e (02), aplicando cola entre as peças , posicionando-as com cavilhas (A) e aplicando os parafusos 4,5x35mm (C) indicados.
Fijar los Soportes superiores (04) en los Paneles (01) y (02) aplicando pegamento entre las piezas , posicionándolas con clavijas (A) y aplicando los tornillos (C).
Fix the Upper Supports (04) to the Panels (01) and (02), applying glue between the parts , positioning them with dowels (A) and applying the indicated bolts (C) .
d) Fixar o Suporte traseiro inferior (05) no Painel (03), posicionando-o com cavilhas (A) e aplicando os parafusos 4,5 x 35mm (C).
Fijar el Soporte trasero inferior (05) en el Panel (03), posicionándolo con clavijas (A) y aplicando los tornillos (C).
Fix the Lower Rear Support (05) to the Panel (03), positioning it with dowels (A) and applying the bolts (C).
01 Face traseira.
Face posterior.
Rear face.
BORDA INFERIOR / BORDE INFERIOR / LOWER EDGE
PASSO 2 / PASO 2 / STEP 2
a) Fixar as Colunas internas (06) nos Painéis (01), (02) e (03), aplicando cola entre as peças , posicionando-as atrás
dos painéis com as cavilhas (A) e aplicando os parafusos 4,5 x 35mm (C), conforme indicações no desenho.
Fijar las Columnas interiores (06) en los Paneles (01), (02) y (03), aplicando pegamento entre las piezas,
posicionandolas detrás de los paneles con clavijas (A) y aplicando tornillos (C), como se muestra en el deseño .
Fix the Inner Columns (06) in the Panels (01), (02) and (03) , applying glue between the parts , by positioning
them behind the panels with the dowels (A) and applying the bolts (C), as shown in the drawing.
Painel/Panel/Panel 1600 x 2000 x 335mm
QATAR
Interruptor para luminárias LED
Interruptor para luminarias LED
Switch button for LED luminaires
Pode-se iniciar a instalação das fitas luminárias LED nesta etapa, aplicando-as nas posições indicadas no desenho, na
face traseira e próximo às bordas laterais dos painéis (01), (02) e (03), e seguindo instruções do próprio kit de LED.
Puede iniciar la instalación de las tiras de luminarias LED en esta etapa, aplicándolas en las posiciones
indicadas en el deseño, en la face posterior y cerca de los bordes laterales de los paneles (01), (02) y (03), y
siguiendo las instrucciones del propio kit de luminarias.
The installation of the LED light strips can be started at this stage, applying them in the positions indicated in the
drawing, on the rear face and close to the side edges of the panels (01), (02) and (03), and following the instructions
of the kit itself of luminaires.
APLICAR COLA.
Aplicar pegamento.
Apply glue.
04
05
03 Face traseira.
Face posterior.
Rear face.
02 Face traseira.
Face posterior.
Rear face.
04
Furo para botão-interruptor e fios do sistema de iluminação LED.
Orifício para botón y cables del sistema de iluminación LED.
Hole for the on/off switch button and for the LED lighting system wires.
Para fixar os Suportes superiores (04)
nos Painéis (01) e (02), aplicar cola,
espalhando-a pela superfície de contato
das peças, além das cavilhas (A) e dos
parafusos (C).
Para fijar Soportes superiores (04) en los
Paneles (01) y (02), aplicar pegamento
en la superficie de contacto de las piezas ,
además de las clavijas (A) y tornillos (C).
To fix the Upper Rear Supports (04) on the
Panels (01) and (02), apply glue, spreading
it over the contact surface of the parts , in
addition to the dowels (A) and bolts (C).
!
Para fixar as Colunas internas (06) nos
Painéis (01), (02) e (03), aplicar cola,
espalhando-a pela superfície de contato
das peças, além das cavilhas (A) e dos
parafusos (C).
Para fijar las Columnas interiores (06) en
los Paneles (01), (02) y (03), aplicar
pegamento en la superficie de contacto
de las piezas, además de las clavijas (A)
y tornillos (C).
To fix the Inner Columns (06) on the Panels
(01), (02) and (03), apply glue, spreading
it over the contact surface of the parts , in
addition to the dowels (A) and bolts (C).
!
APLICAR COLA.
Aplicar pegamento.
Apply glue.
APLICAR COLA.
Aplicar pegamento.
Apply glue.
06
03 Face traseira.
Face posterior.
Rear face.
01 Face traseira.
Face posterior.
Rear face.
02 Face traseira.
Face posterior.
Rear face.
04
04
05
06
Fita LED
Tira LED
LED strip
Fita LED
Tira LED
LED strip
BORDA INFERIOR / BORDE INFERIOR / LOWER EDGE

4
PASSO 3 / PASO 3 / STEP 3
Painel/Panel/Panel 1600 x 2000 x 335mm
QATAR
PASSO 4 / PASO 4 / STEP 4
07
01 Face traseira.
Face posterior.
Rear face.
BORDA INFERIOR / BORDE INFERIOR / LOWER EDGE
08
03 Face traseira.
Face posterior.
Rear face.
02 Face traseira.
Face posterior.
Rear face.
04
05
04
06
06
09
a) Encaixar o Painel traseiro esquerdo (08) e o Painel traseiro direito (09) atrás das Colunas internas (06) por meio das cavilhas (A),
posicionando-os corretamente conforme o desenho, e fixá-los aplicando todos os parafusos 4,5 x 35mm (C) indicados.
Encajar el Panel trasero izquierdo (08) y el Panel trasero derecho (09) detrás de las Columnas interiores (06) utilizando las
clavijas (A), colocándolos correctamente según el deseño, y fijarlos aplicando todos los tornillos 4,5 x 35mm (C) indicados.
Fit the Left Rear Panel (08) and the Right Rear Panel (09) behind the Inner Columns (06) using
the dowels (A), positioning them correctly according to the drawing, and fix them by applying
all the indicated bolts 4.5 x 35mm (C).
a) Fixar a Barra traseira (07) nos Suportes superiores (04) e nas Colunas internas (06), aplicando cola entre as peças , posicionando-a
corretamente atrás dos Suportes superiores (04) com as cavilhas (A) e aplicando todos os parafusos 4,5 x 35mm (C), conforme desenho.
Fijar la Barra trasera (07) en los Soportes superiores (04) y en las Columnas interiores (06), aplicando pegamento entre las
piezas, posicionándola detrás de los Soportes superiores (04) con las clavijas (A) y aplicando todos los tornillos (C) indicados .
Fix the Rear Bar (07) to the Upper Supports (04) and to the Inner Columns (06) , applying glue between the parts , by positioning it
correctly behind the Upper Supports (04) with the dowels (A) and applying all the bolts 4.5 x 35mm (C), as shown in the drawing.
Para fixar a Barra traseira (07) nos
Suportes superiores (04), aplicar cola,
espalhando-a pela superfície de contato
das peças, além das cavilhas (A) e dos
parafusos (C).
Para fijar la Barra trasera (07) nos
Soportes superiores (04), aplicar
pegamento en la superficie de contacto
de las piezas, además de las clavijas (A)
y los tornillos (C).
To fix the Rear Bar (07) on the Upper
Supports (04), apply glue, spreading it
over the contact surface of the parts , in
addition to the dowels (A) and bolts (C).
!
01 Face traseira.
Face posterior.
Rear face.
APLICAR COLA.
Aplicar pegamento.
Apply glue.
03 Face traseira.
Face posterior.
Rear face.
BORDA INFERIOR / BORDE INFERIOR / LOWER EDGE
05
09
08
06
04
04
06

5
PASSO 5 / PASO 5 / STEP 5
PASSO 6 / PASO 6 / STEP 6
a) Fixar o Tampo (15) sobre as Divisórias (10), a Lateral esquerda (13) e a Lateral direita (14) com cavilhas (A) e com dispositivos Minifix (H+I).
Ao finalizar a fixação, aplicar tapa-furos adesivos (K) sobre os tambores Minifix (I).
Fijar la Repisa central (15) en las Particiones (10) y en los Paneles laterales izquierdo (13) y
derecho (14) con clavijas (A) y dispositivos Minifix (H+I).
Después de la fijación, aplicar las capas adhesivas (K) en las tuercas Minifix (I).
Fix the Middle Shelf (15) on the Partitions (10) and on the Side Panels (13) and
(14) with dowels (A) and Minifix cam lock hardware (H+I).
After the fixing, apply the adhesive covers (K) on the Minifix drums (I).
Painel/Panel/Panel 1600 x 2000 x 335mm
QATAR
11
13
14
10
18
11 Face traseira.
Face posterior.
Rear face.
10
a) Fixar o Painel traseiro do nicho (11) atrás das
Divisórias (10) com parafusos 5,0 x 50mm (G)
Fijar el Panel trasero del nicho (11) detrás
de las Particiones (10) con tornillos (G).
Fix the Rear Panel of the niche (11) behind
the Partitions (10) with bolts 5.0 x 50mm (G).
b) Fixar a Base (12) nas Divisórias (10) e nas Laterais (13) e (14) com cavilhas (A) e parafusos 5,0 x 50mm (G).
Fijar la Base (12) en las Particiones (10) y en los Paneles laterales (13) y (14) con clavijas (A) y tornillos 5,0 x 50mm (G).
Fix the Base (12) under the Partitions (10) and the Sideboards (13) and (14) with dowels (A) and bolts 5.0 x 50mm (G).
c) Aplicar os dois parafusos 4,5 x 35mm (C) indicados no desenho, para fixar a Base (12) na borda inferior do Painel traseiro do nicho (11).
Aplicar los dos tornillos 4,5 x 35mm (C) indicados en el deseño, para fijar la Base (12) en el borde inferior del Panel trasero del nicho (11).
Apply the two bolts 4.5 x 35mm (C) indicated in the drawing, to fix the Base in the lower edge of the Rear Panel of the niche (11).
10
15 Face inferior.
Face inferior.
Lower face.
12 Face inferior.
Face inferior.
Lower face.
10

6
PASSO 7 / PASO 7 / STEP 7
Painel/Panel/Panel 1600 x 2000 x 335mm
QATAR
PASSO 8 / PASO 8 / STEP 8
PREPARAÇÃO DAS PORTAS: /
PREPARACIÓN DE LAS PUERTAS /
PREPARING THE DOORS :
a) Fixar as dobradiças (L) nas Portas (17) com parafusos 4,0 x 14mm (M).
Fijar bisagras (L) en las Puertas (17) con tornillos 4,0 x 14mm (M).
Fix the hinges (L) on the Doors (17) with bolts 4.0 x 14mm (M) .
b) Fixar o puxador (22) nas Portas (17) com parafusos 3,5 x 12mm (E).
Fijar tirador (22) en las Puertas (17) con tornillos 3,5 x 12mm (E).
Fix the handle (22) in the Doors (17) with bolts 3.5 x 12mm (E). 18
22
03 Face traseira.
Face posterior.
Rear face.
a) Fixar o Tampo (15) e a Base (12) nos Painéis traseiros (08) e (09) com cavilhas (A) e parafusos 5,0 x 50mm (G).
Fijar Repisa superior (15) y Base (12) en los Paneles traseros (08) y (09) con clavijas (A) y tornillos (G).
Fix the Top Panel (15) and the Base (12) in the Rear Panels (08) and (09) with dowels (A) and bolts 5.0 x 50mm (G).
b) Fixar o Soporte inferior (05) no Tampo (15) com chapas de aço (D) com parafusos 3,5 x 12mm (E) e 3,5 x 25mm (F) .
Fijar el Soporte inferior (05) en la Repisa (15) con placas de acero (D) y con tornillos (E) y (F).
Fix the Lower Support (05) in the Top Panel (15) with steel plates (D) and with bolts (E) and (F).
11 Face traseira.
Face posterior.
Rear face.
01 Face traseira.
Face posterior.
Rear face.
02 Face traseira.
Face posterior.
Rear face.
09 Face traseira.
Face posterior.
Rear face.
08 Face traseira.
Face posterior.
Rear face.
05
07
04
04
12
14
15
PARA VERSÃO COM PORTA CENTRAL COM DETALHE COM PINTURA PADRÃO "RATTAN": /
PARA VERSION CON PUERTA CENTRAL CON DETALLE DE PINTURA MOTIVO "RATTAN": /
FOR VERSION WITH CENTRAL DOOR WITH "RATTAN" PAINT DETAIL:
a) Encaixar o Painel interno (21) no canal das Colunas (20) e das Barras (18) e (19) e fixar
estas peças entre si com cavilhas (A) e parafusos 5,0 x 50mm (G). Aplicar tapa-furos (Q).
Encajar el Panel interior (21) en el canal en las
Columnas (20) y en las Barras (18) y (19) y
fijar estas partes con clavijas (A) y con
tornillos 5,0 x 50mm (G).
Aplicar las capas (Q).
Fit the Inner Panel (21)
into the channel of the
Columns (20) and Bars
(18) and (19) and fix
these parts together
with dowels (A) and
bolts 5.0 x 50mm (G).
b) Fixar as dobradiças (L)
e o puxador (22).
Fijar bisagras (L) y tirador (22).
Fix the hinges (L) and the handle (22). 19 22
21
20
20
17

7
PASSO 9 / PASO 9 / STEP 9
12
a) Finalizar a fixação dos Painéis frontais (01) e (02) nos
Suportes traseiros superiores (04), aplicando os oito
parafusos 4,5 x 35mm (C) indicados no desenho e,
depois, os tapa-furos adesivos (J).
Terminar de fijar los Paneles frontales (01) y
(02) en los Soportes traseros superiores (04),
aplicando los tornillos 4,5 x 35mm (C) indicados
en el deseño y, despues, las capas adhesivas (J).
FinishfixingtheFrontPanels(01)and(02)inthe
UpperRearSupports(04),applyingtheeightbolts
4.5x35mm(C)showninthedrawingand,then,
theadhesivecovers(J).
b) Fixar o Painel traseiro do nicho (11) nos Painéis (08) e
(09) aplicando os parafusos 3,5 x 25mm (F) indicados
no desenho e, depois, os tapa-furos adesivos (K).
Fixar Panel trasero del nicho (11) en los Paneles
(08) y (09) aplicando los tornillos 3,5 x 25mm (F)
indicados en el deseño y, después, las capas
adhesivas (K).
FixtheRearPaneloftheniche(11)inthePanels(08)
and(09)applyingthebolts3.5x25mm(F)shownin
thedrawingand,then,theadhesivecovers(K).
c) Fixar os calços para dobradiças (M) na Base (12) com
parafusos 4,0 x 14mm (M), conforme o DETALHE 2.
Fijar las cuñas para bisagras (M) en la Base
(12) con tornillos (M), como en el DETALLE 2.
Fixthemetallicshimsforhinges(M)ontheBase(12)
withbolts4.0x14mm(M),asshownintheDETAIL2.
Painel/Panel/Panel1600x2000x335mm
QATAR
DETALHE 2
DETALLE 2
DETAIL 2
14
12
PASSO 10 / PASO 10 / STEP 10
a) Marcar na parede a posição dos furos para fixar a Barra (16), conforme
indicado no desenho e utilizando a próprias peça como referência.
*ATENÇÃO! A altura de 1400mm, indicada no desenho , entre o piso e
a borda inferior da Barra (16), é sugestivas para instalar o Painel Qatar
a aproximadamente 400mm do piso .
Marque en la pared la posición de los orifícios para fijar la Barra (16),
como se ilustra en deseño y utilizando la propia pieza como referencia.
*iATENCIÓN! La alturas 1400mm que se muestra en deseño , entre el
piso y el borde inferior de la Barra (16), és sugestivo para instalar
el Panel Qatar a aproximadamente 400 mm desde el piso .
MarkonthewallthepositionoftheholesforfixingtheBar(16),asshown
inthedrawingandusingthepartitselfasreference.
*ATTENTION!Theheightof1400mmindicatedinthedrawing,between
thefloorandtheloweredgeoftheBar(16),issuggestivetoinstallthe
QatarPaneltoabout400mmfromthefloor.
b) Com furadeira e broca Ø8mm (não fornecidas), fazer os furos na parede.
Con perforadora y taladro Ø8mm (no incluídos), hacer orifícios en pared.
Withdrillingmachineand drillØ8mm(notsupplied),maketheholesinthewall.
c) Aplicar as buchas 8mm (N) nos furos da parede e fixar a Barra (16) com a borda
chanfrada voltada para cima e para a parede, aplicando todos os parafusos
Ø5,0 x 60mm (O) indicados no desenho.
Aplicar bujes 8mm (N) en los orifícios en la pared y fijar la Barra (16)
con el borde biselado hacia arriba y hacia la pared, aplicando todos los
tornillos Ø5, 0 x 60mm (O) indicados en el deseño .
Applythebushings8mm(N)intotheholesinthewallandfixtheBar(16)with
thebevellededgefacingupandtothewall,applyingalltheboltsØ5.0x60mm
(O)indicatedinthedrawing.
1400mm*
400mm
Distância mínima de fixação da Barra (16) para instalação do Painel junto ao canto de paredes.
Distancia mínima de montaje de la Barra (16) para instalación del Panel junto a canto de pared.
Minimum fixing distance of the Rear Bar (16) to the panel installation close to corner walls.
1200mm
Ao marcar a posição e fixar a Barra (16) na parede, verificar o nivelamento da peça.
Al marcar la posición y fijar la Barra (16) en la pared, asegúrese de nivelar la pieza.
TomarkthepositionandfixtheBar(16)onthewall,checkthelevelofthepart.
16
01 Face frontal.
Face frontal.
Front face.
02 Face frontal.
Face frontal.
Front face.
03 Face frontal.
Face frontal.
Front face.
08
09
10
10
13
15
11

8
PASSO 11 / PASO 11 / STEP 11
Painel/Panel/Panel 1600 x 2000 x 335mm
QATAR
a) Com o painel já montado, encaixar a Barra (07) fixada atrás do painel na Barra (16) fixada na parede.
Con el panel ya montado, encajar la Barra (07) fijada detrás del panel en la Barra (16) fijada en la pared .
With the panel already assembled, fit the Bar (07) fixed behind the panel in the Bar (16) fixed on the wall.
16
Fixada na parede.
Fija en la pared .
Fixed on the wall .
07
Fixada atrás do painel.
Fija detrás del panel.
Fixed behind the panel.
b) Instalar as Portas, encaixando e fixando as dobradiças (L) nos calços metálicos na Base (12)
através dos parafusos fixador e regulador de cada dobradiça.
Se necessário, ajustar o alinhamento das portas através do parafuso regulador - DETALHE 3.
Instalar las Puertas, insertando y fijando las bisagras (L) en las cuñas metálicas en
la Base (12) a través de los tornillos de fijación y de ajuste.
Ajustar la alineación de las puertas por el tornillo de ajuste - DETALLE 3.
Install the Doors, fitting and fixing hinges (L) on the metal shims on the Base (12) through the
fixer and adjustment bolts. If necessary, adjust the alignment of the door by adjustment bolt,
shown in the DETAIL 3.
Parafuso fixador
Tornillo de fijación
Fixer bolt
Parafuso regulador
Tornillo de ajuste
Adjustment bolt
DETALHE 3
DETALLE 3
DETAIL 3
IMPORTANTE! Para remover o Painel da parede, desatarrachar os parafusos de segurança (O) aplicados no PASSO 11 e movimentá-lo ligeiramente para cima, desencaixando as bordas chanfradas das Barras (07) e (16) fixadas atrás
do painel e na parede. Antes de movimentar o Painel, remover TV e outros objetos que estejam instalados ou assegurar-se de que todo o conjunto está seguro, evitando quedas e danos.
¡IMPORTANTE! Para retirar el panel de la pared, destornillar los tornillos de seguridad (O) aplicados en el PASO 11 y moverlo hacia arriba, para desenganchar los bordes biselados de las Barras (07) y (16) fijadas
detrás del panel y en la pared. Antes de mover el panel, retirar TV y otros objetos que están instalados y asegurarse de que todo el conjunto está seguro, evitando caídas y daños.
IMPORTANT! To remove the panel from the wall, to unscrew the security bolts (O) applied as in STEP 11 and moving it upwards slightly so as to disengage the chamfered edges of the Bars (07) and (16) fixed behind the panel and on
the wall. Before moving the panel, remove TV and other objects that are installed and ensure that the entire set is safe, preventing falls and damage to the panel and equipment .
03
02
01
15
08
10
13
09
10
14
12
17
17
17
Furos nos Painéis (08) e (09) para fixação de segurança: após ancorar o Painel Qatar
encaixando a Barra traseira (07) na Barra da parede (16), marcar e furar a parede
com broca Ø8mm, nas posições destes furos, aplicar buchas 8mm (N) e fixar com
parafusos 5,0 x 60mm (O).
Orificios en los Paneles (08) y (09) para fijación de seguridad: después de
anclar el Panel Qatar encajando la Barra trasera (07) en la Barra de pared
(16), marcar y perforar la pared con un taladro Ø8mm en las posiciones de
estos agujeros, aplicar bujes 8mm (N) y fijar con tornillos 5,0 x 60mm (O).
Holes in the Panels (08) and (09) for safety fixing: after anchoring the Qatar Panel
by fitting the Rear Bar (07) to the wall Bar (16), mark and drill the wall with drill
Ø8mm in the positions of these holes, apply the bushings 8mm (N) and fix with
bolts 5.0 x 60mm (O).
18
19
21
20
20
Other Bechara Indoor Furnishing manuals
Bechara
Bechara PARIS 1.6 User manual

Bechara
Bechara VIENA User manual
Bechara
Bechara FENDI User manual
Bechara
Bechara TALISMA PLUS BAR User manual
Bechara
Bechara KENZO User manual

Bechara
Bechara AMETISTA User manual

Bechara
Bechara DUBAI User manual

Bechara
Bechara DOHA User manual
Bechara
Bechara CARTIER Center table User manual
Bechara
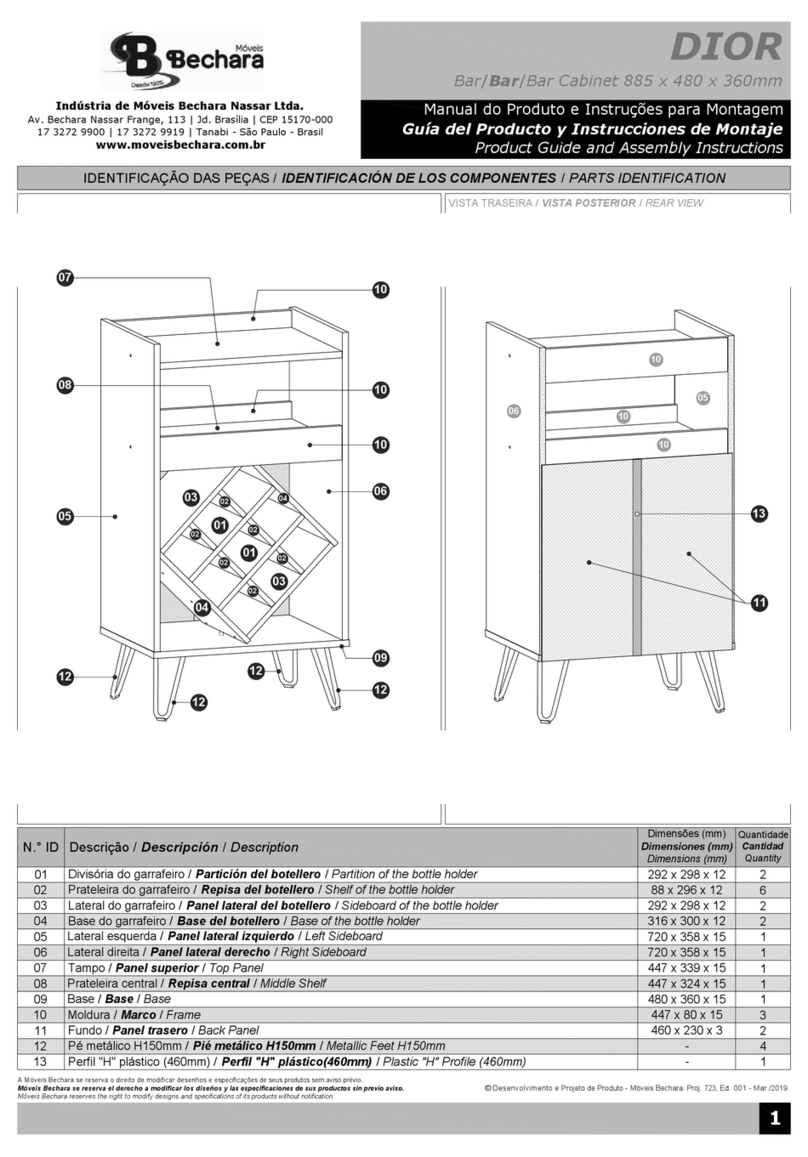
Bechara Dior Bar Cabinet User manual
Popular Indoor Furnishing manuals by other brands

Regency
Regency LWMS3015 Assembly instructions

Furniture of America
Furniture of America CM7751C Assembly instructions

Safavieh Furniture
Safavieh Furniture Estella CNS5731 manual

PLACES OF STYLE
PLACES OF STYLE Ovalfuss Assembly instruction

Trasman
Trasman 1138 Bo1 Assembly manual

Costway
Costway JV10856 manual

