manuals.online logo
Brands
  1. Home
  2. •
  3. Brands
  4. •
  5. Becker
  6. •
  7. Timer
  8. •
  9. Becker U26 User manual

Becker U26 User manual

Fig. 1
Fig. 2
en
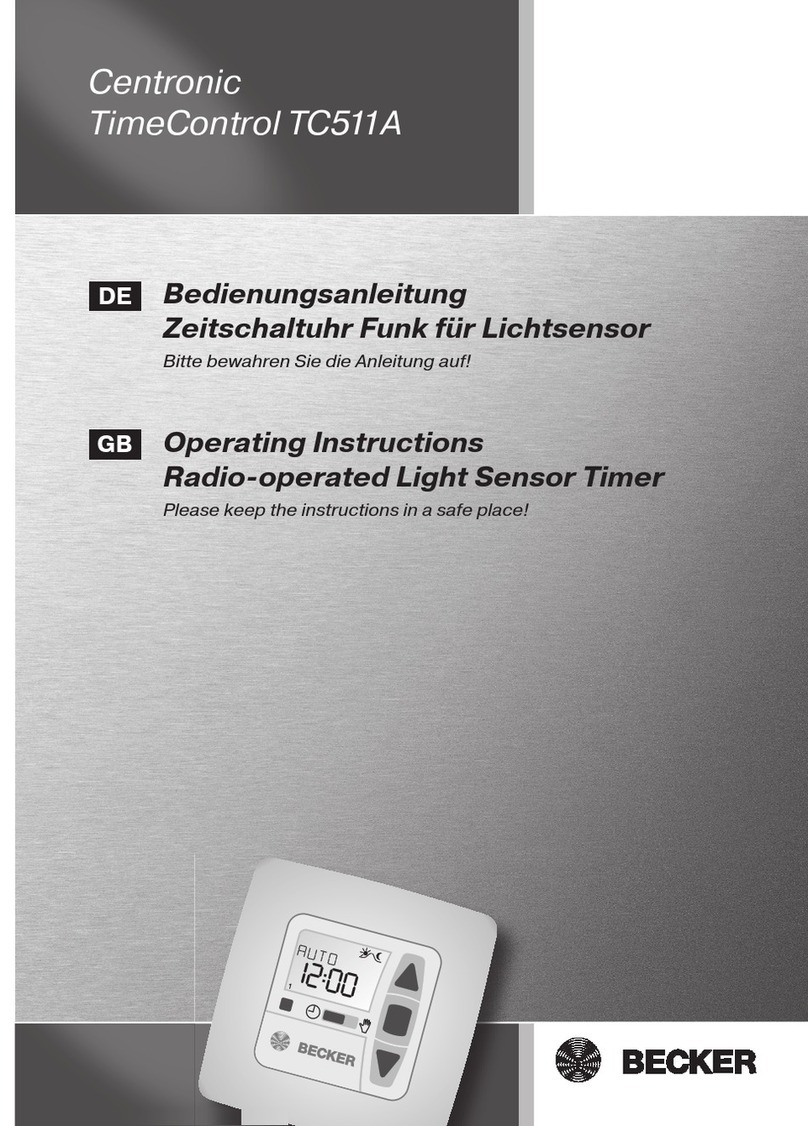
Operating Instructions
Roller shutter timer
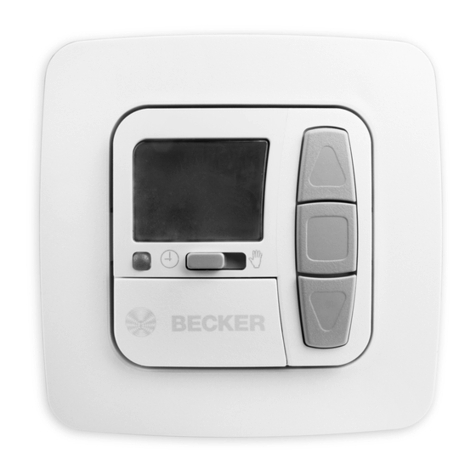
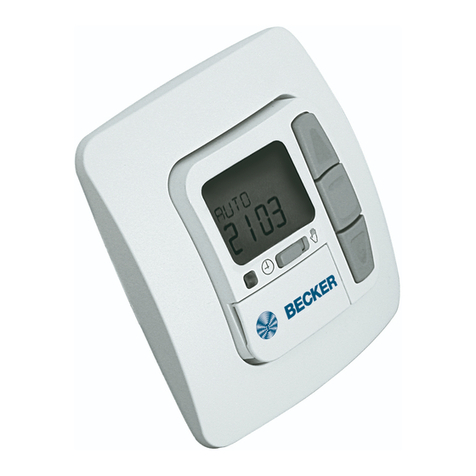
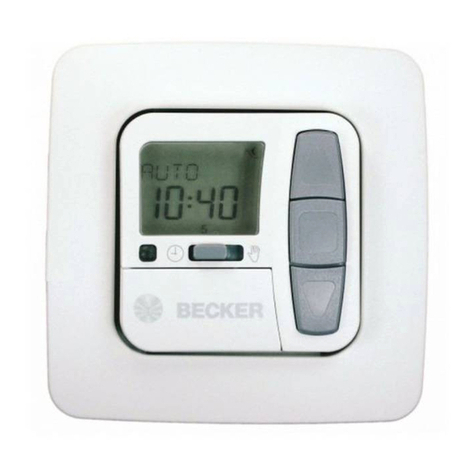
Timer U26
The timer U26 is an electronic roller shutter timer for operating a 230 V tubular
drive. If more than one drive is controlled using the U26, the drives must be de-
coupled by relay controls. There is no need for decoupling in the case of drives
with electronic limit switching.
The U26 timer can easily be extended to form a convenient sun protection con-
trol unit, providing additional light-dependent control for the roller shutter, using
the LS26 light sensor, which anyone can attach without difficulty. You can obtain
the LS26 light sensor, as well as other control elements, from your roller shutter
dealer.
Caution
• Pleasekeeptheinstructionmanualsafe!
• Riskofinjuryduetoelectricshock.
• Connectionstothe230Vmainsmustalwaysbeperformedbyaspe-
cialist.
• Disconnecttheconnectingcablefromthepowerpriortoinstallation.
• Alwayscomplywithregulationsoflocalenergysupplycompaniesas
wellasVDE100provisionsforwetanddamproomsduringinstalla-
tion.
• Onlyuseindryrooms.
• Only use unmodied original parts from the control unit manufac-
turer.
• Keeppeopleoutofthesystem’srangeoftravel.
• Keepchildrenawayfromcontrolunits.
• Observeallpertinentcountry-specicregulations.
• Ifthesystemiscontrolledbyoneorseveralappliances,thesystem’s
rangeoftravelmustalwaysbevisibleduringoperation.
• Whenconnectingthecontrolcables(protectedextra-lowvoltages),
onlyusecableswithsufcientelectricalstrength.
• Devicecontainssmallpartsthatcanbeswallowed.
The U26 is designed for fitting in a flush-mounted switch box or a surface-
mounted housing. Install as follows:
• Removethefrontplatebypullingito.
• Pulltheconnectingterminalofromtherearofthetimer(plug-interminal),
and make the electrical connections according to the connecting diagram
(Fig.1).Avoidunnecessarilylongconnectingwires.
• Pushtheconnectingterminalon.
• Fasten the timer by inserting the two screws supplied in the holes of the
ush-mountedbox(Fig.2).
• Thenswitchonthepowersupply.Pleasenotethatthersttimetheunitis
operated, there may be a delay in switching on the timer, as the timer must
first must initialise itself. The number (Fig.3)willappearashingonthe
display within 10 seconds.
If,afterapowerfailure(5hours),oratthetimeofinitialinstallation,nothingap-
pears on the display within 10 seconds, press the "Reset" button illustrated on
Fig. 2. now appears flashing on the display.
• Now check the direction in which the drive is operating using the UP ()
andDOWN()buttons.Iftherollershuttermovesintheoppositedirection
tothebuttonyouhavepressed,turnothepowertothesystemandswap
theconnectingwiresforthe UP and DOWN commands at the connecting
terminal.
• Afteryouhavemadethesettingsforthetime,theswitchingtimesandthe
sunlight-twilightparameter(thesunlight-twilightparametercanonlybead-
justedwhenthesensorisconnected),tthefrontplate.
Application
Assembly
Fig. 3
Becker-AntriebeGmbH
Friedrich-Ebert-Strasse 2-4
35764Sinn/Germany
www.becker-antriebe.com
green/yellow
green/yellow
blue blue
black blackbrown
Mains
230 V
Timer U26
Plug-interminal
Drive
Important information for:
•Fitters/•Electricians/•Users
Pleaseforwardaccordingly!
These instructions must be kept safe for future reference.
Reset
Adjusting the set values
for:
sunprotection(S)
twilightfunction(d)
runningtime(L)
reversaltime(U)
Increase the upward trav-
el distance or adjustment
value
Reduce the downward
travel distance or adjust-
ment value
Hole for fastening
screw
Switch between man-
ual, automatic or holi-
day mode
Setting the time and
the day of the week,
change between sum-
mer and winter time
Programming the
switching times, oset
function Unlock button for the
light sensor plug
2
Operating Instructions
Fig.5
Fig. 6
Fig.7
Fig. 8
Fig. 4
1 2 3 4 5 6 7
1 2 3 4 5 6 7
1 2 3 4 5 6 7
Adjustmentofthetimeandofthedayoftheweek
Setting/programmingtheswitchingtimes
4
Switchbetweenmanual,automaticorholidaymode
Pressthe button briefly to set the current time. The sym-
bol ashesontheLCDdisplay(Fig.4).Thecurrenttime
can now be adjusted using the and buttons.
The time that has been set is saved by pressing the but-
tonagain.Atthesametime,thedayoftheweek(Fig.5)
willappearonthedisplay(thisisthesettingmodeforthe
dayoftheweek).Younowdecidewhetherthetimeristo
be operated using a daily or weekly program.
Dailyprogram:
If the timer is to operate at the same times every day,
press the button again. The U26 then does not save the
current day of the week, and executes the programmed
switchingtimesforUPandDOWNeveryday.
Switching times of 7.00 a.m (for UP) and 8.00 p.m. (for
DOWN) are factory programmed. To change these swit-
chingtimes,brieypressthe"P"button.Thedisplaynow
shows the switching time for the UP command (Fig. 6).
This switching time can be changed using the and 
buttons.Pressthe"P"buttonagainbrieytochangethe
switchingtimefortheDOWNcommand.Thedisplaynow
showstheswitchingtimefortheDOWNcommand(Fig.6).
This switching time can again be changed using the and
buttons.
If the U26 is being operated in the daily program, then
whenthe"P"buttonispressedagain,thedisplaychanges
to the current time. The changed switching times are sa-
ved at the same time.
If the U26 is being operated in the weeklyprogram, the
time jumps to the UP command for the following day.
Throughrepeatedlypressingthe"P"button,theswitching
times for each weekday are called up, and can again be
changed using the and buttons.Finally,afterday7,
you return to the display of the current time. The changed
switching times are saved at the same time.
IftherollershutterbeingoperatedisnottocarryoutanUP
command on one day, delete the displayed value by pres-
sing the button; appearsonthedisplay(Fig.7).
PresstheManual/Auto/Holidaymodebutton.Thecurrent
mode is indicated on the display.
Automaticmode:
TheUPandDOWNcommandsthathavebeensetareex-
ecuted. If the sun and twilight sensor is used, the sun and
twilight functions are executed. Manual operation is also
possibleatanytime(Fig.8).
Manualmode:
TheUPandDOWNcommandsthathavebeensetarenot
executed.
Note
Ifthesunandtwilightsensorisused,thesun and
twilightfunctionsarenotexecuted.Manualopera-
tionisneverthelesspossibleatanytime.
Weeklyprogram:
If the timer is to switch at dierent times each
day, set the current day of the week now by ap-
propriately pressing the and buttons
(e.g.:number1forMonday).
Nowpressthe button again. The U26 saves the day of
the week that has been set, and executes the switching
times programmed for each day.
If you want to change from the weekly program to the dai-
ly program, select the day of the week by pressing the
buttontwice.Nowpressthebutton until all the numbers
(1-7)areshownonthedisplay.Conrmthenewsettingby
pressing the button.
Offsetfunction:
The oset function moves all the programmed switching
times, separated according to opening and closing time,
by a certain amount all at once. This allows the times se-
lected in the weekly program to be adjusted easily to the
seasonal changes in sunrise and sunset. This is how it is
done:
Pressthe "P" button foratleast3seconds." " ap-
pearsonthedisplay.Nowusetheand buttons to en-
ter the period of time by which you want to shift the times
currently programmed for the UP commands. Negative
values shift the switching time to an earlier moment, posi-
tive values to a later moment.
Conrmyourinputbypressingthe"P"buttononce.Now
enter the period of time by which you want to shift all the
programmedDOWNcommands.Againacknowledgethe
inputbypressingthe"P"button.
Reset:
All the programmed values are deleted by pressing the
Reset button. The program is restarted, and adopts the
specified standard values.
Holidaymode:
In this mode, the set switching times are operated with a
randomly generated delay of between 1 and 31 minutes.
The resulting irregularity of the switching commands simu-
latesanoccupiedhouse.Hereagain,manualoperationis
possible at any time, and if the sun and twilight sensor is
used, the sun and twilight function is executed.
3
Fig. 9
Fig. 10
Fig. 11
Fig. 12
The "LS26" combined sun-twilight sensor is necessary to
provide shade in intense sunshine, or for closing the roller
shutter at dusk. This sensor is pressed onto the window
withasuctioncup(Fig.9).Thesensorispluggedintothe
timeratthebottomrightwhenthefrontplateiso.Usea
suitable screwdriver to hold the unlock button down while
tting(Fig.10).Whendisassembling,releasethelatchwith
a suitable screwdriver, and pull the plug out of the housing
(Fig.11).
Thefunctionofthesensor,and
adjustingthesunandtwilightpa-
rameter:
Sunprotectionfunction
Ameanlightvalueof40,correspondingtoabout25thou-
sand lux, is factory set for the intensity of sunshine. If the
brightness of the sunshine stays above the set value, then
aDOWNcommandisissuedafterawaitingperiodof1.5
minutes. The roller shutter travels to the level of the sen-
sor, stops and then clears it, so that the light intensity can
continuetobemeasured.Atrackingfunctionensuresthat
the sensor is cleared again if the sensor is shaded by the
roller shutter when the sun's position changes.
If the intensity of the sunshine stays below the set value
aftertherollershutterhaslowered,thenanUPcommand
isexecutedafterawaitingperiodofabout15minutes.
Twilightfunction
Ameantwilightvalueof20issetatthefactory.Thiscor-
responds to about 60 lux. When the brightness falls below
this value, a DOWN command is executed after 15 min-
utes.ItispossiblethattheDOWNcommandresultingfrom
the onset of twilight is issued before the time programmed
for closing the roller shutter. The roller shutter opens again
on the following day at the set switching time.
Changingthepresetsunandtwi-
lightvalues:
If a sensor is connected to the timer, it is possible to enter
the"Adjustsettings"modebybrieypressingthe"S"but-
ton(onlypossiblewhenthefrontplateiso).Thepreset
threshold value for the light intensity ( ) appearson
thedisplay.Anindicatorbarshowswhetherthelightvalue
currentlybeingmeasuredissmallerthan( ,Fig.12),
equalto( )orlargerthan( )thanthesetvalueon
the display. The and buttons can be used to change
this value between 01 and 99. The numerical value 99 cor-
respondsapproximatelytoalightvalueof60klx(thousand
lux).
Note
Setting a high value means that the roller shutter
willnotmovedownuntilthesunshineisverybright,
whilealowvaluemeansthattherollershutterwill
movedownwardsearlier.
Achangeoverbetweensummer/wintertimeismadebyholdingthe buttondownforatleast3seconds.(Itmaybenecessarytochangeoverrepeat-
edlythersttimeinordertomakethetimesettingyouwant.)Watchwhatisshownonthedisplay!
OperationoftheU26withthesun-twilightsensor
By pressing the "S" button briefly, you now move on to
adjustment of the twilight value. The display now shows
for twilight, while the value that has just been set for
the sunshine is stored at the same time.
The indicator bar shows whether the twilight value cur-
rently being measured is smaller than ( , Fig. 13),
equalto( )orlargerthan( )thanthedisplayed
value. The indicator bar only appears when the twilight
value measured is less than 300 lux. The and buttons
can be used to change this value between 01 and 99. The
numerical value 99 corresponds to about 300 lux.
Note
Settingalowvaluedelaysclosureoftherollershut-
terattwilight,whileahighervaluecausestheroller
shuttertocloseassoonastwilightbegins.
You switch into operating mode by pressing the "S" button
again briefly. The current time appears on the display, and
the settings for the twilight function have been stored.
Note
In order to switch off the sun or twilight function,
entersettingmodeandsetthecorrespondingvalue
to"--"bypressingthe" "button.
  Attention
Donotcoverthesensorto"switchoff"thesunpro-
tection function. Shading the sensor can simulate
twilight,andtherollershutterwillthenclosewhen
youdon'twantitto.Closinginresponsetothetwi-
light sensor can be delayed or entirely inhibited if
streetlightsshineonthesensor,orthroughswitch-
ingontheroomlighting.Inthatcaseitwillclosein
responsetotheprogrammedDOWNcommand.
Note
IftheDOWNcommandisprogrammedtoalatetime
(e.g.11p.m.),therollershutterwillmovedownear-
lierin responseto the twilight setting. Thisallows
the roller shutter to be closed in response to the
twilight,independentlyoftheprogrammedswitch-
ingtime.Inwintertherollershutterclosesearlier,
andremainsopenforlongerinthesummer.
Settingsummer/wintertimeandviceversa
Fig. 13
4
Operating Instructions
4906630014003/14
The running time is the length of time that the drive stays
on.
If the "S" button is held down for longer than 3 seconds,
willappearonthedisplay(Fig.14,standardvalue
1 minute and 30 seconds). The running time can now
be changed using the and  buttons. After the run-
ning time has elapsed, electrical power is removed from
the drive, and reversal is carried out if active. By press-
ing the "S" button repeatedly, you enter the "Set reversal
time" mode. This is shown by a , and the running time
that has been set is saved at the same time. The value for
the reversal time can be varied between "01" and "99"
(Fig.13).
Changingthefactory-setrunningtime/reversaltime
Fig. 14
By pressing the " " button, the reversal time is switched
o( , Fig.13). Themaximumreversaltime("99"on
thedisplay)correspondstoabout3.2seconds.Pressthe
"S" button again to return to operating mode. If the rever-
sal time is active, then after the running time has elapsed,
thedriveisoperatedinthe"UP"directionfortheduration
of the set reversal time. Depending on the setting and on
the speed of the drive, the first slats of the roller shutter
are then cleared again to provide ventilation, for example.
When the set running time has completely elapsed, the
roller shutter can be closed completely by hand.
Technicaldata
Whattodoif...?
Problem Cause Remedy
Therollershuttermovesdownwardsabout15
minutes after it has been opened.
The set twilight value has been reached, or the
sensor is covered.
Check the twilight value and the position of the
sensor on the window. It may have become
detached from the pane.
The U26 does not carry out the set switching
commands, or does so after a delay.
The time is set to manual or holiday operation. Putthetimeinto"automaticmode".
The sun and twilight parameters that have been
set cannot be changed, or are not displayed.
Asensorisnotinserted,orelseeitherthesen-
sor or its connecting cable is faulty.
Check the sensor, the sensor cable and the
connecting plug.
Structural modifications and incorrect installation which are not in accordance with these and our other instructions can result in serious injuries, e.g.,
crushing of limbs. Therefore, structural modifications may only be carried out with our prior approval and strictly in accordance with our instructions,
particularlytheinformationcontainedintheseAssemblyandOperatingInstructions.
Anyfurtherprocessingoftheproductswhichdoesnotcomplywiththeirintendeduseisnotpermitted.
The end product manufacturer and fitter have to ensure that all the relevant current statutory, official and, in particular, EMC regulations are adhered to
during utilisation of our products, especially with regard to end product manufacture, installation and customer advice.
Warranty
Subject to technical changes without notice.
Thecontrollercanbeintegratedintoswitchingunitsfrommanyothermanufacturerswithcentralboarddimensionsof55x55mm.
Examples:
Manufacturer Type
Berker S1,B3,B7
Gira Standard, E2, Event, Esprit
Jung AS,A500,A-Creation,A-Creation-Glas,A-Plus
Merten M-Smart,M-Arc,M-Plan,M-Plan-Glas,M1,Atelier,M-Star
Switchingrange
Supplyvoltage: 230V±10%,50-60Hz
Output: Phaseconnectedviatworelaycontacts
 forUPandDOWN
Switchedpower: 5Aatcosϕ=1
Powerreserve: approx.5hrs.
Display: LCD
Ambienttemperature: 0to+55°C
Mounting: fits in a flush-mounted switch box
Connection type: plug-in screw terminals
Powerconsumption
when relay
isnotenergised: 0.7W

Other Becker Timer manuals

Becker Centronic TimeControl TC511A User manual

Becker

Becker Centronic TimeControl TC511A User manual

Becker Centronic TimeControl TC445-II User manual

Becker

Becker Centronic TimeControl TC445-II User manual

Becker Centronic TimeControl TC52 User manual

Becker

Becker Centronic TimeControl TC52 User manual

Becker Centronic TimeControl TC4410-II User manual

Becker

Becker Centronic TimeControl TC4410-II User manual

Becker Centronic TimeControl TC42 User manual

Becker

Becker Centronic TimeControl TC42 User manual

Becker Centronic TimeControl TC511 User manual

Becker

Becker Centronic TimeControl TC511 User manual

Becker Centronic TimeControl TC42 User manual

Becker

Becker Centronic TimeControl TC42 User manual

Becker Centronic TimeControl TC52 User manual

Becker

Becker Centronic TimeControl TC52 User manual

Becker Centronic TimeControl TC511 User manual

Becker

Becker Centronic TimeControl TC511 User manual

Becker Centronic TimeControl TC445-II User manual

Becker

Becker Centronic TimeControl TC445-II User manual

Becker Centronic TimeControl TC52 User manual

Becker

Becker Centronic TimeControl TC52 User manual

Becker Centronic TimeControl TC42 User manual

Becker

Becker Centronic TimeControl TC42 User manual

Popular Timer manuals by other brands

UPM ETW353 owner's manual

UPM

UPM ETW353 owner's manual

DGT North American user manual

DGT

DGT North American user manual

Pro-Elec PEL00586 instructions

Pro-Elec

Pro-Elec PEL00586 instructions

IDEAL LOGIC COMBI user guide

IDEAL

IDEAL LOGIC COMBI user guide

Pioneer DT-5 operating instructions

Pioneer

Pioneer DT-5 operating instructions

Array electronic TC-Pro480 Series user manual

Array electronic

Array electronic TC-Pro480 Series user manual

Abilia MEMO Timer user manual

Abilia

Abilia MEMO Timer user manual

Omron H3CA-A-101 instruction manual

Omron

Omron H3CA-A-101 instruction manual

Zamel EXTA ASM-03 instruction manual

Zamel

Zamel EXTA ASM-03 instruction manual

EMKO EZM-3735 instruction manual

EMKO

EMKO EZM-3735 instruction manual

Toro ECXTRA Installation and operation

Toro

Toro ECXTRA Installation and operation

Prime TNDHD002 quick start guide

Prime

Prime TNDHD002 quick start guide

WESTEK TM17DOLB instruction manual

WESTEK

WESTEK TM17DOLB instruction manual

Bosch PLN-6TMW Installation and user instructions

Bosch

Bosch PLN-6TMW Installation and user instructions

Oregon Scientific WB388 user manual

Oregon Scientific

Oregon Scientific WB388 user manual

Orbit 57932 manual 

Orbit

Orbit 57932 manual 

Eaton AT2P Technical data

Eaton

Eaton AT2P Technical data

BDH Elkay 370B-1 Instruction guide

BDH

BDH Elkay 370B-1 Instruction guide

manuals.online logo
manuals.online logoBrands
  • About & Mission
  • Contact us
  • Privacy Policy
  • Terms and Conditions

Copyright 2025 Manuals.Online. All Rights Reserved.