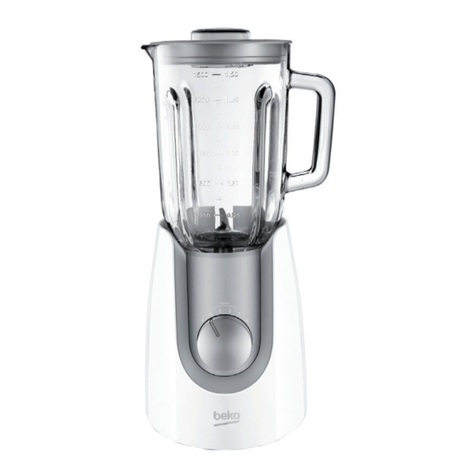
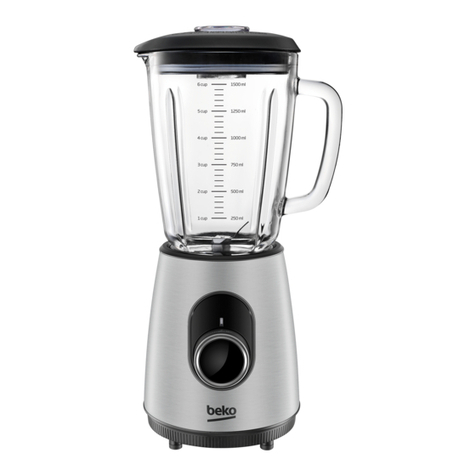
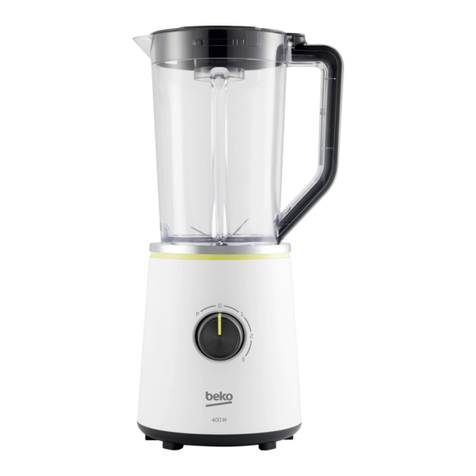
Beko TBN7400B User manual

www.beko.com
TBN7400B
Table Blender
User Manual
01M-8815233200-5118-01
EN DE FR TR ES PL IT RO

CONTENTS
ENGLISH 8-12
DEUTSCH 13-21
FRANÇAIS 22-29
TÜRKÇE 30-36
ESPAÑOL 37-45
POLSKI 46-56
ITALIANO 57-64

1
2
3
4
7
8
6
5
9
10
11

2
1
1
2
1
2
2
1
1
2
1
2
1
4 5 6
2 3
9
7 8
10 11 12

2
1
1
2
x2
2
3
2
1
x2
2
1
1
1
1
2
3
2
13
1 2 3
14 15
6a
4 5
6b 6c 6d

-
Dear Customers,
Thank you for selecting an Beko product.
We hope that you get the best results
from your product which has been
manufactured with high quality and
state-of-the-art technology. Therefore,
please read this entire user manual and all
other accompanying documents carefully
before using the product and keep it as a
reference for future use. If you handover
the product to someone else, give the
user manual as well. Follow all warnings
and information in the user manual.
Ths product has been produced n envronmentally-frendly, state-of-the-art facltes.
Comples wth the WEEE Drectve. It does not contan PCB.
Following symbols are used in the various
section of this manual:
C
Important information and useful
hints about usage.
AWARNING:
Warnings for
dangerous situations concerning
the safety of life and property.
Materials are intended to be in
contact with food.
Do not immerse the appliance,
power cord or power plug in water
or in other liquids.
Potection class against electric
shock.
EN
OPERATION CLEANING AND CARE
DE
BETRIEB REINIGUNG UND PFLEGE
FR
FONCTIONNEMENT NETTOYAGE ET ENTRETIEN
TR
KULLANIM TEMIZLEME VE BAKIM
ES
FUNCIONAMIENTO LIMPIEZA Y CUIDADOS
PL
OBSŁUGA CZYSZCZENIE I KONSERWACJA
IT
UTILIZZO PULIZIA E CURA
RO
UTILIZARE CURĂ AREA ȘI ÎNGRIJIREA
AR

The values whch are declared n the markngs axed on your applance or the other prnted documents suppled wth t repre-
sent the values whch were obtaned n the laboratores pursuant to the pertnent standards. These values may vary accordng
to the usage of the applance and ambent condtons.
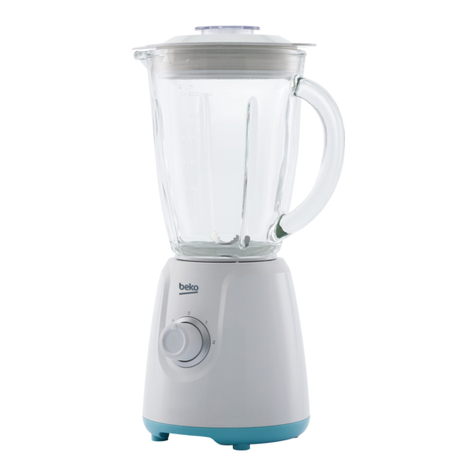
1. Cap/Measuring cup
2. Lid opening
3. Lid
4. Jug
5. Jug handle
6. Blade unit
7. Sealing ring
8. Motor housing
9. Control dial
10. Non-slip feet
11. Cable storage coil
Technical data
:
220-240 V~, 50-60 Hz
400 W
Technical and design modifications reserved.

8 / EN Table Blender / User Manual
This section contains safety
instructions that will help protect
from risk of personal injury or
property damage.
Failure to follow these instructions
invalidates the granted warranty.
• This appliance complies with the
international safety standards.
• This appliance can be used by
people who have limited physical,
sensory or mental capacity or
who do not have knowledge and
experience, provided that they are
supervised or they understand
the instructions with regard
to safe use of the product and
potential dangers.
• Do not use it if the power cable,
blades or the appliance itself is
damaged. Contact an authorised
service.
• Only use the original parts or
parts recommended by the
manufacturer.
• Do not attempt to dismantle the
appliance.
• Do not operate or place any part
of this appliance or its parts on or
near hot surfaces.
• Do not use the device for hot food.
• Your mains power supply should
comply with the information
supplied on the rating plate of the
appliance.
• Do not use the appliance with an
extension cord.
• Do not touch the plug of the
appliance with damp or wet hands.
• Do not pull the power cable when
unplugging the appliance.
• Unplug the appliance before
cleaning, disassembly, accessory
replacement and wait for it to stop
completely.
• When emptying the container,
during cleaning and grabbing
chopping blades with bare hands
serious injuries could result
due to incorrect use. Use the
plastic section trying to hold the
chopping blade.
• Nevertouchbladeswhileusingthe
appliance. There is the possibility
of injury due to incorrect usage.
• After cleaning, dry the appliance
and all parts before connecting
it to mains supply and before
attaching the parts.

9 / EN
Table Blender / User Manual
• Do not immerse the appliance,
power cable, or power plug in
water or any other liquids.
• If you keep the packaging
materials, store them out of the
reach of children.
• Children shall not use the
appliance. Keep the appliance out
of the reach of children.
This product complies with EU WEEE Directive
(2012/19/EU). This product bears a classification
symbol for waste electrical and electronic
equipment (WEEE).
This product has been manufactured
with high quality parts and materials
which can be reused and are suitable
for recycling. Do not dispose of the
waste product with normal domestic
and other wastes at the end of its service life. Take
it to the collection center for the recycling of
electrical and electronic equipment. Please
consult your local authorities to learn about these
collection centers.
Directive
The product you have purchased complies with EU
RoHS Directive (2011/65/EU). It does not contain
harmful and prohibited materials specified in the
Directive.
Packaging materials of the product are
manufactured from recyclable
materials in accordance with our
National Environment Regulations. Do
not dispose of the packaging materials together
with the domestic or other wastes. Take them to
the packaging material collection points
designated by the local authorities.
Cut the solid food into small pieces before placing
themintheapplianceas statedin theuser manual.
Follow the other instructions and times specified
in the manual. Select low speed levels if suitable
for the food to be prepared. Switch off and unplug
the appliance after using it.

10 / EN Table Blender / User Manual
2
C
•Your blender has been designed to process small amount of foods; it must not be used
for any other purpose.
•Do not use the it to chop extremely hard ingredients such as coconut, grains or bones.
Remove the stalks of plants, shells of walnuts, and bones, sinews and gristles of meats.
•Unplug the appliance when not in use.
A
WARNING:
•Switch off the appliance and disconnect from supply before changing accessories or
approaching parts that move in use.
•Do not remove the blade unit by lifting it from the blades.
•The blade unit is very sharp! Handle the blade unit with utmost care, especially during
cleaning, in order to avoid injuries.
C
•Make sure that the notches on the bottom of the jug fit those in the motor housing.
•Cut the food into small pieces before using the appliance.
1. Placethedevice onanevenanddrysurface.Thenon-slipfeet(10)ensurethestabilityoftheappliance.
2. Make sure that the power cord is disconnected from the power supply and the control dial I is on “0”
before putting food into the jug.
3. To remove the reservoir (4) from the motor unit (8), rotate it anti-clockwise and lift it. Put the reservoir
on a flat surface.
4. Rotate the measuring beaker (1) anti-clockwise and lift to remove. Rotate the lid anticlockwise and
lift to open.
5. Now put the ingredients to be blended in the jug (4). The ingredients should only be about 2-5 cm
long.
C
•Add water to ensure the jug blender functions smoothly.
•Mix 3 units of hard food and 2 units of water in order to have a smooth jug blender
experience
•(i.e: 60 gr hard food 40 ml water).

11 / EN
Table Blender / User Manual
2
A
WARNING:
•Do not put or blend hot food or liquids in the jug. If you process soup, make sure that the
liquid temperature does not exceed 40°C.
•To process crushed ice, we suggest you to start with three quarters of ice in the jug and
add 15 ml of cold potable water.
•Don´t try to crush ice without adding water to the jug.
•Never let the jug blender operate while empty (without food).
•Never let the jug blender operate without the jug on the motor housing.
•Never move or turn the jug after it is properly seated in the place.
C
•To operate the blender at the low speed, turn the control dial (9) to “1”.
•If you want to blend with a higher speed, turn the control dial (9) to the desired speed
level (2-3).
•For short pulses of blending with a high speed, turn the control dial (9) to “P”. When you
release the control dial (9), the blender will stop and return to “0” automatically.
•If ingredients are to be added during the blending process, then add them through the
opening in the lid (2). To do this, take out the cap/measuring cup (1).
A
WARNING:
•
Never run the blender for longer than 1 minute, otherwise it would overheat.
•After running the appliance for 1 minute, let it cool down before using it again.
•Be sure the motor is switched off and has completely stopped before removing the jug
(4) from the motor housing (8).
•Do not place any utensil (scraper, fork, etc.) in the jug while blender is operating.
1. To add ice cubes to mixtures while the blender is operating, add one cube at a time through the cap
(1). Wait a few seconds before adding the next ice cube so that the blender can properly blend the ice.
2. To add food while the blender is operating, remove the cap (1) and drop the ingredients through the
opening. Be sure to cut the food into about 2-5 cm pieces to fit through the opening. Replace the cap
(1) when you have finished adding ingredients.
3. When blending solid food, such as raw vegetables, cooked or uncooked meat and fruits always cut
them into no larger than 2-5 cm pieces before placing them into the jug. Blend no more than 2 cups
of these food at a time. This will speed the blending process and reduce wear on the blending blades.
4. Always place liquid ingredients in the jug first, unless a recipe specifically states otherwise.
5. To blend beverages, place all ingredients in the jug at the same time.
6. Avoid overblending. Usually, you will need to blend for a few seconds.
7. Overblending may cause food to become mushy.

12 / EN Table Blender / User Manual
3
A
WARNING:
•Never use petrol solvents, abrasive cleaners, metal objects or hard brushes to clean the
appliance.
•The blades of the cutter unit are very sharp! Handle the blades with utmost care in order
to avoid injuries.
•Never clean the appliance with your bare hands.
•Clean the jug blender after each use. Do not let any food remnants harden on and inside
the jug blender. This will make it more difficult to clean it later.
•Do not use boiling water. The blade assembly bearings have been designed with a
lifetime lubricant; exposure to boiling water may damage these bearings and shorten
the life of the blender.
C
•You can use the measuring cup (1) to remove the blender blade.
•Do not immerse the motorized base or blade unit in liquid, or place them in the
dishwasher. Only the lid and the jug may be immersed and placed in the dishwasher.
•If you do not plan to use the appliance for a long period of time, please store it carefully.
•Make sure the appliance is unplugged and completely dry.
•Store the appliance in a cool, dry place.
•Make sure the appliance is kept out of the reach of children.
•During handling and transportation, carry the appliance in its original packaging. The packaging of the
appliance protects it against physical damages.
•Do not place heavy loads on the appliance or the packaging. The appliance may be damaged.
•Dropping the appliance will render it non-operational or cause permanent damage.

-
Sehr geehrte Kundn, sehr geehrter
Kunde,
Velen Dank, dass Se sch für en Beko-
Produkt entscheden haben. Wr hoffen,
dass Se mt desem Produkt, das mt
den höchsten Qualtätsanforderungen
und der modernsten Technologe
hergestellt wurde, beste Ergebnsse
erzelen. Btte lesen Se de gesamte
Bedenungsanletung und alle anderen
Begletdokumente aufmerksam, bevor
Se das Produkt verwenden; bewahren
Se se zum künftgen Nachschlagen
scher auf. Wenn Se das Produkt an enen
Drtten wetergeben, händgen Se btte
auch dese Anletung aus. Befolgen Se
alle Warnhnwese und Informatonen n
deser Anletung.
Deses Produkt wurde n umweltfreundlchen, hochmodernen Enrchtungen hergestellt
Das Gerät erfüllt de Vorgaben
der WEEE-Rchtlne. Es enthält ken PCB.
Folgende Symbole werden n den
verschedenen Abschntten deser
Anletung verwendet:
C
Wichtige Informationen und
nützliche Tipps in Bezug auf die
Verwendung.
A
Warnhinweise zu
gefährlichen Situationen im Hinblick
auf die Sicherheit von Leib, Leben
und Eigentum.
Für den Kontakt mit Lebensmitteln
geeignet.
Gerät, Netzkabel sowie Netzstecker
nicht in Wasser oder andere Flüssig-
keiten tauchen.
Schutzklasse gegen Stromschlag.

De am Gerät oder n der Dokumentaton angegebenen Werte wurden nach maßgeblchen Standards unter Laborbedngungen
ermttelt. Dese Werte können je nach Ensatz- und Umgebungsbedngungen vareren.
1. Kappe/Messbecher
2. Deckelöffnung
3. Deckel
4. Kanne
5. Grff
6. Klngenvorrchtung
7. Dchtungsrng
8. Motorgehäuse
9. Geschwndgketsregulerung
10. Rutschfeste Füße
11. Kabelspule
220-240 V~, 50 -60Hz
400 W
Technische und optische Änderungen vorbehal-
ten

15 / DE
Standmixer / Bedienungsanleitung
Dieser Abschnitt enthält Sicher-
heitsanweisungen, die beim Schutz
vor Personen- und Sachschäden
helfen.
Bei Nichtbeachtung dieser Anwei-
sungen erlischt die gewährte Ga-
rantie.
-
• Dieses Gerät erfüllt die internatio-
nalen Sicherheitsstandards.
• Dieses Gerät kann von Personen
mit eingeschränkten körperlichen,
sensoriellen oder mentalen
Fähigkeiten oder ohne spezielles
Wissen oder Erfahrung verwendet
werden, sofern sie beaufsichtigt
werden oder die Anweisungen
zum sicheren Umgang mit dem
Produkt und dessen potenzielle
Gefahren verstehen. Kinder
dürfen nicht mit dem Gerät
spielen.
• Verwenden Sie das Produkt nicht,
falls Netzkabel, Klingen oder
Gerät selbst beschädigt sind.
Wenden Sie sich dann an einen
autorisierten Serviceanbieter.
• Nur Originalteile und vom
Hersteller empfohlene Teile
verwenden.
• Nicht versuchen, das Gerät zu de-
montieren.
• Das Gerät und dessen Zubehör
nicht auf oder in der Nähe von hei-
ßen Oberflächen betreiben oder
platzieren.
• Das Gerät nicht mit heißen Le-
bensmitteln benutzen.
• Die Stromversorgung muss mit
den Angaben am Typenschild des
Gerätes übereinstimmen.
• Das Gerät nicht mit einem Verlän-
gerungskabel verwenden.
• Berühren Sie Stecker und Gerät
nicht mit feuchten oder nassen
Händen.
• Beim Trennen des Gerätes nicht
am Netzkabel selbst ziehen.
• Ziehen Sie vor der Reinigung, De-
montage und Auswechslung von
Zubehör den Netzstecker und
warten Sie, bis das Gerät vollstän-
dig zum Stillstand gekommen ist.

16 / DE Standmixer / Bedienungsanleitung
Dieses Produkt erfüllt die Vorgaben der EU-WEEE-
Direktive (2012/19/EU). Das Produkt wurde mit
einem Klassifizierungssymbol für elektrische und
elektronische Altgeräte (WEEE) gekennzeichnet.
Dieses Gerät wurde aus hochwertigen
Materialien hergestellt, die wiederver-
wendet und recycelt werden können.
Entsorgen Sie das Gerät am Ende sei-
ner Einsatzzeit nicht mit dem regulären
Hausmüll; geben Sie es stattdessen bei einer
Sammelstelle zur Wiederverwertung von elektri-
schen und elektronischen Altgeräten ab.
Ihre Stadtverwaltung informiert Sie gerne über
geeignete Sammelstellen in Ihrer Nähe.
Das von Ihnen erworbene Produkt erfüllt die Vor-
gaben der EU-RoHS Direktive (2011/65/EU). Es
enthält keine in der Direktive angegebenen ge-
fährlichen und unzulässigen Materialien.
Die Verpackung des Produkts wurde
gemäß unserer nationalen Gesetzge-
bung aus recyclingfähigen Materialien
hergestellt. Entsorgen Sie die Verpa-
ckungsmaterialien nicht mit dem Hausmüll oder
anderem Müll. Bringen Sie sie zu einer von der
Stadtverwaltung bereitgestellten Sammelstelle
für Verpackungsmaterial.
• Beim Leeren des Behälters, wäh-
rend der Reinigung und bei der
Handhabung der Klingen mit
bloßen Händen können in Folge
unsachgemäßer Benutzung
ernsthafte Verletzungen auftre-
ten. Halten Sie die Klinge nur am
Kunststoffteil.
• Berühren Sie die Klingen niemals,
während das Gerät in Betrieb ist.
Bei unsachgemäßer Verwendung
besteht Verletzungsgefahr.
• Das Gerät und sämtliche
Zubehörteile nach der Reinigung
gründlich trocknen, bevor es mit
der Stromversorgung verbunden
wird und bevor Teile abgenommen
oder angebracht werden.
• Gerät, Netzkabel sowie
Netzstecker nicht in Wasser oder
andere Flüssigkeiten tauchen.
• Falls Sie die Verpackungsmateria-
lien aufheben möchten, bewahren
Sie sie außerhalb der Reichweite
von Kindern auf.
• Kinder dürfen das Gerät nicht
benutzen. Halten Sie das Gerät
von Kindern fern.

17 / DE
Standmixer / Bedienungsanleitung
Feste Lebensmittel in kleine Stücke schneiden
und wie in der Bedienungsanleitung angegeben
in das Gerät geben. Befolgen Sie die in der An-
leitung angegebenen Anweisungen und Zeiten.
Wählen Sie immer nur die jeweils erforderliche
höchste Geschwindigkeitsstufe. Schalten Sie das
Gerät nach der Benutzung aus und ziehen Sie den
Netzstecker.

18 / DE Standmixer / Bedienungsanleitung
C
•Der Mxer wurde zur Zuberetung klener Spesemengen entwckelt und darf ncht zu
anderen Zwecken engesetzt werden.
•Kene extrem harten Zutaten, we Kokosnüsse, Getrede oder Knochen mt dem Gerät
zerklenern. Entfernen Se de Stängel von Pflanzen, Schalen von Walnüssen und
Knochen, Sehnen und Knorpel aus Flesch.
•Gerät be Nchtbenutzung von der Stromversorgung trennen.
A
•Gerät vor dem Wechsel oder dem Entfernen von Telen, de während der Benutzung n
Bewegung snd, ausschalten und von der Stromversorgung trennen.
•Klngenvorrchtung ncht durch Anheben an
•den Klngen entfernen.
•De Klngenvorrchtung st sehr scharf! Be der Handhabung der Klngenvorrchtung st
zur Vermedung von Verletzungen äußerste Vorscht geboten, vor allem bem Rengen.
C
•Stellen Se scher, dass de Kerben an der unteren Sete des Glasbehälters den
entsprechenden m Motorgehäuse gegenüberlegen.
•Lebensmttel vor Ensatz des Gerätes n klene Stücke schneden.
C
•Zur Scherstellung enes rebungslosen Mxbetrebs Wasser hnzugeben.
•Zur Erzelung guter Ergebnsse 3 Enheten harter Zutaten und 2 Enheten Wasser
vermschen (d. h. 60 g harte Zutaten zu 40 ml Wasser)
A
•Kene heßen Lebensmttel oder Flüssgketen n den Glasbehälter geben bzw.
vermschen. Be der Verarbetung von Suppen scherstellen, dass de Temperatur der
Flüssgket 40 °C ncht überschretet.
•Zur Herstellung von zerstoßenem Es Behälter zu dre Vertel mt Es befüllen und 15 ml
kaltes Trnkwasser hnzugeben.
•Ken Es ohne Hnzugabe von Wasser zerklenern.
•Standmxer nemals leer (ohne Lebensmttel) n Betreb nehmen.
•Standmxer nemals ohne Glasbehälter am Motorgehäuse n Betreb nehmen.
•Glasbehälter ncht mehr bewegen oder drehen, nachdem er rchtg platzert st.

19 / DE
Standmixer / Bedienungsanleitung
C
•ZumBetreben des Mxersbegernger Geschwndgket deGeschwndgketsregulerung
(9) auf „1“ enstellen.
•Zum Vermschen mt höherer Geschwndgket de Geschwndgketsregulerung (9) auf
de gewünschte Geschwndgketsstufe (2 bs 3) enstellen.
•Zum kurzen Pulseren be hoher Geschwndgket de Geschwndgketsregulerung (9)
auf „P“ enstellen. Be Loslassen der Geschwndgketsregulerung (9) stoppt der Mxer
und kehrt automatsch auf „0“ zurück.
•Falls Zutaten während des Betrebs hnzugegeben werden sollen: Zutaten durch de
Öffnung m Deckel (2) hnzugeben. Dazu Kappe/Messbecher (1) herausnehmen.
A
•Mxer nemals länger als 1 Mnute benutzen; andernfalls droht ene Überhtzung.
•Be enem Betreb von mehr als 1 Mnute vor erneuter Nutzung abkühlen lassen.
•Vor Entfernen des Glasbehälters D vom Motorgehäuse (8) scherstellen, dass der Motor
ausgeschaltet und zum vollständgen Stllstand gekommen st.
•Während des Betrebs kene Utenslen (Schaber, Gabel etc.) n den Glasbehälter stecken.
1. Eiswürfel können während des Mixerbetriebs über die Kappe (1) hinzugegeben werden. Vor
Hinzugabe des nächsten Eiswürfels einige Sekunden warten, damit der Standmixer das Eis richtig
vermischen kann.
2. Lebensmttel während des Mxerbetrebs durch Entfernen der Kappe (1) und Engeben der Zutaten
durch de Öffnung hnzugeben. Darauf achten, de Lebensmttel n ca. 2 bs 5 cm große Stücke zu
zerklenern, damt se durch de Öffnung passen. Kappe (1) nach Abschluss der Zugabe von Zutaten
weder anbrngen.
3. Bem Mxen fester Lebensmttel, we z. B. rohem Gemüse, gekochten oder ungekochten Fleschs und
Obstes, de Zutaten vor der Engabe n den Glasbehälter mmer n ncht mehr als 2 bs 5 cm große
Stücke zerklenern. Ncht mehr als 2 Tassen derartger Zutaten glechzetg mxen. Des beschleungt
das Mxen und reduzert den Verschleß der Klngen.
4. Immer zuerst flüssge Zutaten n den Glasbehälter geben, sofern ncht explzt anders m Rezept
angegeben.
5. Zum Vermschen von Getränken alle Zutaten glechzetg n den Glasbehälter geben.
6. Übermäßges Mschen meden. Normalerwese snd wenge Sekunden erforderlch.
7. Übermäßges Vermschen kann de Lebensmttel breg machen.

20 / DE Standmixer / Bedienungsanleitung
A
•Zur Rengung des Gerätes nemals Benzn, Lösungsmttel, Scheuermttel oder harte
Bürsten verwenden.
•De Klngen snd sehr scharf! Klngen zur Vermedung von Verletzungen besonders
vorschtg handhaben.
•Gerät nemals mt bloßen Händen rengen.
•Standmxer nach jedem Ensatz rengen. Darauf achten, dass kene Lebensmttelreste
am oder m Standmxer antrocknen. Andernfalls kann des später de Rengung
erschweren.
•Ken kochendes Wasser verwenden. De Klngenmontagelager snd mt ener
Lebensdauerschmerung versehen; kochendes Wasser kann dese Lager beschädgen
und de Lebenszet des Mxers verkürzen.
C
•Zur lechteren Rengung können Se de Klngenvorrchtung (6) aus dem Glasbehälter
(4) entfernen. Nutzen Se herzu den Messbecher (1).
•Motorserte Bass und Klngenvorrchtung ncht n Flüssgketen entauchen oder m
Geschrrspüler rengen. Nur Deckel und Glasbehälter können n Flüssgketen getaucht
und m Geschrrspüler gerengt werden.
•Wenn das Gerät längere Zet ncht benutzt wrd, sollte es sorgfältg aufbewahrt werden.
•Darauf achten, dass der Netzstecker gezogen wrd und das Gerät komplett trocken st.
•Das Gerät an enem kühlen, trockenen Ort lagern.
•Das Gerät sollte sch mmer außerhalb der Rechwete von Kndern befnden.
•Transporteren Se das Gerät n sener Orgnalverpackung. De Verpackung schützt das Gerät vor
Beschädgungen.
•Legen Se kene schweren Gegenstände auf dem Gerät oder der Verpackung ab. Andernfalls könnte
das Gerät beschädgt werden.
•Falls das Gerät herunterfällt, st es möglcherwese ncht mehr funktonsfähg oder west dauerhafte
Schäden auf.
Table of contents
Languages:
Other Beko Blender manuals

Beko
Beko TBP5301X User manual

Beko
Beko TBN5400 User manual

Beko
Beko TBN 7802 X User manual

Beko
Beko 01M-8816073200-2619-01 User manual

Beko
Beko HBA7752X User manual

Beko
Beko HBS5550W User manual

Beko
Beko 01M-8833963200-1847-05 User manual

Beko
Beko SMM888BX User manual

Beko
Beko HBA 81762 BX User manual

Beko
Beko BBK 3030 TB User manual