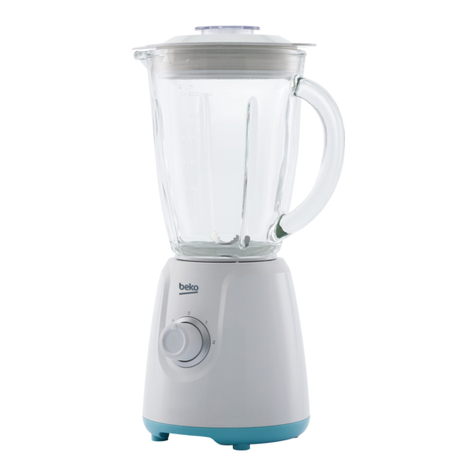
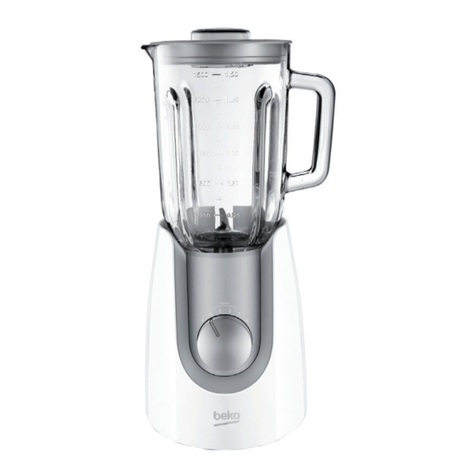
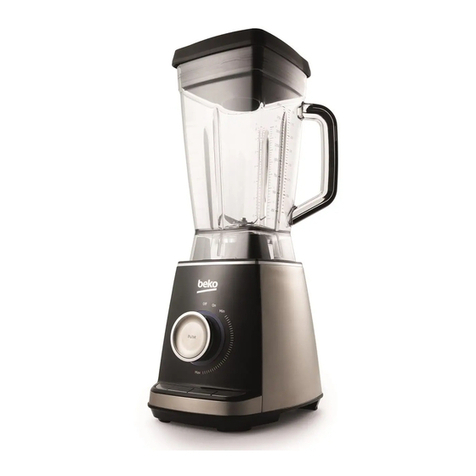
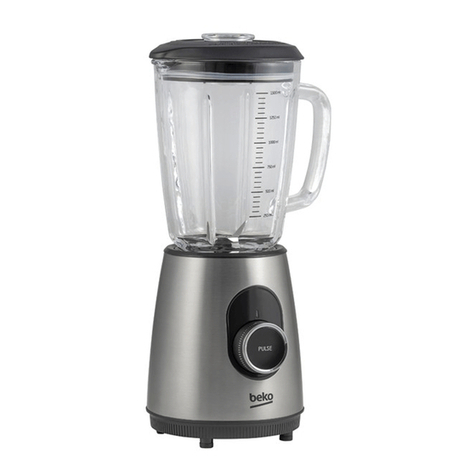
Beko TBS3164X User manual

www.beko.co.uk
TBS3164X
01M-8839563200-4617-01
Power Blender
User Manual
EN FR ES TR
DE PL RO IT

Please read this manual first!
Dear Valued Customer,
Thank you for preferring this Beko appliance. We hope that you get the best
results from your appliance which has been manufactured with high quality
and state-of-the-art technology. For this reason, please read this user man-
ual and all other provided documents carefully before using the appliance
and keep it as a reference for future use. If you hand over the appliance to
someone else, give the user manual as well. Follow the instructions by paying
attention to all the information and warnings in the user manual.
Meanings of the symbols
Following symbols are used in various sections of this manual:
Important information and useful hints about
usage.
WARNING:
Warnings for dangerous situa-
tions concerning the safety of life and prop-
erty.
Suitable for contact with food.
Do not immerse the appliance, the power
cable, or the power plug in water or any other
liquid.
Protection class for electric shock.
www.beko.co.uk
This product has been produced in environmentally-friendly, state-of-the-art facilities.
Conforms to the WEEE Directive. Made in P.R.C.

The values which are declared in the markings affixed on your appliance or the other printed documents supplied with it repre-
sent the values which were obtained in the laboratories pursuant to the pertinent standards. These values may vary according
to the usage of the appliance and ambient conditions.
1. Measuring cap
2. Lid
3. Leak-proof gasket
4. Measuring jug
5. Blending shaft
6. Jug placement feet
7. Motor unit
8. On(I) / OFF(O) Speed adjust-
ment knob
9. Pulse button
10. Non-slip feet
11. Cable winding bay
12. Smoothie button
13. Ice button
14. Sauce button
15. Auto clean button
16. Blending accessory
1
2
3
6
5
7
8
9
10
11
4
12
13
14
15
16

4 / EN
In case of lose, break or need re-
placement for the parts below:
•Jug with top cover – complete set
(2,3,4)
•Plunger – black part that you use
to shovel fruits/veggies in to the
jug from top cover hole (1)
•Set of 4 rubber feet (10)
Technical data
Voltage:
220-240V~ 50/60 Hz
Power consumption:
1600 W
Rights to make technical and de-
sign changes are reserved.

5 / EN
CONTENTS
ENGLISH 6-18
FRANÇAIS 19-33
ESPAÑOL 34-50
TÜRKÇE 51-63
DEUTSCH 64-80
POLSKI 81-100
ITALIANO 118-134

6 / EN
This section contains safety instructions that will
help protect from risk of personal injury or material
damage.
Failure to follow these instructions voids any grant-
ed warranty.
1.1 General safety
•Read all instructions.
•This appliance may be used by people whose
physical, perceptive or mental skills are impaired or
who are inexperienced or not knowledgeable about
the appliance as long as they are supervised or
informed and made understood the safe use of the
appliance and the encountered dangers. Children
should not play with the appliance.
•Do not operate any appliance with a damaged cord
or plug or after the appliance malfunctions, or is
dropped or damaged in any manner. Contact the
manufacturer at their customer service telephone
number for information on examination, repair, or
adjustment.
1 Important safety and
environmental instructions

7 / EN
•The use of attachments, including canning jars, not
recommended by the manufacturer may cause a
risk of injury to persons.
•Do not attempt to dismantle the appliance.
•Do not operate or place any part of this appliance or
its parts on or near hot surfaces.
•Do not use the device for hot food.
•Your mains power supply should comply with the
information supplied on the rating plate of the
appliance.
•Do not use the appliance with an extension cable.
•Do not touch the plug of the appliance with damp
or wet hands.
•Unplug from outlet when not in use, before putting
on or taking off parts, and before cleaning.
•Hold the blending shaft of the appliance carefully
during transportation and cleaning.
•Never touch blades while using the appliance.
There is the possibility of injury due to incorrect
usage.
•Avoid contacting moving parts.
1 Important safety and
environmental instructions
8 / EN
•Do not use outdoors.
•Do not let cord hang over edge of table or counter.
•Keep hands and utensils out of container while
blending to reduce the risk of severe injury to
persons or damage to the blender. A scraper may
be used but must be used only when the blender
is not running
•Blades are sharp. Handle carefully.
•Always operate blender with cover in place.
•Do not blend hot liquids.
•This appliance has a polarized plug (one blade is
wider than the other). To reduce the risk of electric
shock, this plug will fit in a polarized outlet only
one way. If the plug does not fit fully in the outlet,
reverse the plug. If it still does not fit, contact a
qualified electrician. Do not modify the plug in any
way.
•After cleaning, dry the appliance and all parts
before connecting it to mains supply and before
attaching the parts.
1 Important safety and
environmental instructions
9 / EN
•Do not immerse the appliance, the power cable, or
the power plug in water or any other liquid.
•If you keep the packaging materials, store them out
of the reach of children.
•Children shall not use the appliance. Keep the
appliance out of the reach of children.
•SAVE THESE INSTRUCTIONS
1.2 Compliance with the WEEE Directive and
Disposing of the Waste Product:
This product complies with EU WEEE Directive (2012/19/EU). This prod-
uct bears a classification symbol for waste electrical and electronic equip-
ment (WEEE).
This product has been manufactured with high quality parts
and materials which can be reused and are suitable for recy-
cling. Do not dispose of the waste product with normal domes-
tic and other wastes at the end of its service life. Take it to the
collection center for the recycling of electrical and electronic
equipment. Please consult your local authorities to learn about these col-
lection centers.
1 Important safety and
environmental instructions
10 / EN
1 Important safety and
environmental instructions
1.3 Compliance with RoHS Directive
The product you have purchased complies with EU RoHS Directive
(2011/65/EU). It does not contain harmful and prohibited materials speci-
fied in the Directive.
1.4 Package information
Packaging materials of the product are manufactured from re-
cyclable materials in accordance with our National Environment
Regulations. Do not dispose of the packaging materials togeth-
er with the domestic or other wastes. Take them to the packag-
ing material collection points designated by the local authorities.

11 / EN
2.1 Initial use
Clean the parts of the appliance prior to initial use (see 3.1).
2.2 Operation
WARNING:
Do not operate the appliance when empty.
Maximum temperature allowed inside the appliance is 60°C.
Place your appliance on a
solid and flat surface.
Put the ingredient you want
to process into the jug (4)
and place the lid (2) on it.
Place the measuring cap (1)
on the lid (2) so that the tab
on it seats on the slots of
the lid, turn it to the "Lock"
position and secure.
Put soft foods or liquids before adding hard foods or ice.
2 Use

12 / EN
2 Use
Adding some water into the appliance will allow it run smoothly
(e.g. 40ml water for 60gr solid food). Add the water before the
ingredients.
If you want to add food into the jug (4) during the blending pro-
cess, use the measuring cap (1) inlet. Raise this cap and feed
the food in through this opening.
WARNING:
Do not insert any foreign objects into the jug
(4) when the appliance is in use.
1
1
2
2
3
1
2
Plug in the appliance and
rotate the ON/OFF button
(8) to ON (I) position.
Process the ingredients at
the desired speed using the
speed adjustment knob (8).
When the process is com-
plete, rotate the ON/OFF
button (8) OFF (O) position
and unplug the appliance.
Pull up the jug (4) without
turning it to remove it from
the motor unit (7). Open the
lid (2) and take out the food.

13 / EN
You can use the measuring cap (1) or the measuring cap inlet to
add ingredients into the jug (4) during the process. To remove
the measuring cap, slightly turn it to the "Open" direction and
pull gently.
WARNING:
Gradually increase the speed of the appliance.
Do not operate it at the highest speed suddenly. Otherwise the
motor may overheat.
WARNING:
Do not run the appliance continuously for more
than 2 minutes. Let it cool for 5 minutes before operating it
again.
2 Use

14 / EN
2.2.1 Automatic programs
The appliance is equipped with three automatic programs that you can
use: Smoothie (12), Ice (13), Sauce (14) and Auto Clean (15).
1
1
22
3
Put the ingredients in the
jug (4) and close the lid (2).
Rotate the ON/OFF button
(8) to ON (I) position.
Select the desired automatic
program. The selected pro-
gram will turn on and the
program will start to operate
at dierent speeds. It will stop
about 26 or 42 seconds later.
The light will blink.
When the process is com-
plete, rotate the ON/OFF
knob (8) to OFF (O) posi-
tion and unplug the appli-
ance.
2.3 "Pulse" position
Press “Pulse” (9) while the speed adjustment knob (9) is in ON (I) position
for mixing with high-speed short pulses. The appliance will stop when you
release the button.
2.4 Blending accessory
You can use this accessory to put in the jug (4) the ingredients that remain
on the sides and have not been blended in the blending process.
2 Use

15 / EN
2 Use
WARNING:
Make sure that the appliance is in OFF (8) OFF
(O) position and at full stop while using the blending accessory
(16).
If you want to stop the appliance at any time during the opera-
tion, rotate the ON/OFF button (8) to OFF (O) position.
2.5 Motor protection
Automatic motor protection will get activated and stop the appliance
when the appliance overheats. In this case;
1. Rotate the ON/OFF button (8) to OFF (O) position.
2. Unplug the appliance.
3. Let it cool for 15-20 minutes.
4. Pull up and remove the jug (4).
5. Turn the motor unit (7) upside down and press the "Reset" button on
the bottom side of it.

16 / EN
2 Use
If the "Reset" button does not work, let the appliance cool for a
bit longer time and try again.
After using the "Reset" button, you can set up and resume using the ap-
pliance again.

17 / EN
3.1 Cleaning
Add 1 or 1 ½ cups of luke-
warm water and some drops
of dish-washing liquid into
the jug (4) and use Auto
Clean program to operate it
for 26 seconds .
Unplug the appliance before
cleaning.
Wait for the accessories
used to stop completely.
Pull up the jug (4) to remove
it from the motor unit (7).
Then rinse it.
You can wash the jug (4) and the caps/lids (2) in your dishwash-
er. It is recommended to clean the appliance immediately after
using.
3 Cleaning and care

18 / EN
3 Cleaning and care
WARNING:
Do not immerse the motor unit (7) in water.
You can wipe it with a damp cloth.
3.2 Storage
•If you do not intend to use the appliance for a long time, store it carefully.
•Unplug the appliance and wait for it to cool completely before storing it.
•Keep the appliance and its accessories in their original packages.
•Store it in a cool, dry place.
•Always keep the appliance out of the reach of children.
3.3 Handling and transportation
•During handling and transportation, carry the appliance in its original
packaging. The packaging of the appliance protects it against physical
damages.
•Do not place heavy loads on the appliance or on the packaging. The ap-
pliance may get damaged.
•Dropping the appliance may render it non-operational or cause perma-
nent damage.

Veuillez d’abord lire ce manuel d’utilisation !
Chère cliente, cher client,
Nous vous remercions d’avoir porté votre choix sur un produit BEKO. Nous espérons
que ce produit vous apportera entière satisfaction. Tous nos produits sont fabriqués
dans une usine moderne et ont fait l’objet d’un contrôle de qualité minutieux.
A cet effet, veuillez lire en intégralité le présent manuel avant d’utiliser cet appareil, et
conservez-le soigneusement pour une utilisation ultérieure. Si vous cédez ce produit
à une tierce personne, n’oubliez pas de lui fournir le manuel d’utilisation également.
Veillez à bien respecter les consignes et les instructions figurants dans le manuel
d’utilisation.
Signification des pictogrammes
Vous trouverez les symboles suivants dans ce manuel d’utilisation :
Informations importantes et conseils utiles
concernant l’utilisation de l’appareil.
AVERTISSEMENT :
Avertissements relatifs
aux situations dangereuses en matière de sécu-
rité des biens et des personnes.
Adapté à entrer en contact avec des aliments.
Ne plongez pas l'appareil, le câble d'alimentation
ou la prise d'alimentation électrique dans de l'eau
ou tout autre liquide.
Classe de protection pour le choc électrique.
Ce produit a été fabriqué dans des usines écologiques et ultramodernes.
Cet appareil est conforme à la
directive DEEE.
Fabriqué en P.R.C.

20 / FR
1. Bouchon doseur
2. Couvercle
3. Joint étanche
4. Bol mixeur gradué
5. Lames
6. Pied de positionnement du bol
7. Bloc-moteur
8. Commande de vitesse variable
Marche(I)/Arrêt(O)
9. Bouton pulse
10. Pieds antidérapants
11. Range cordon
12. Bouton Smoothie
13. Bouton glace pillée
14. Bouton Sauce
15. Nettoyage automatique
16. Accessoire de mélange
En cas de perte, cassure ou besoin
de rechange des pièces ci-dessous :
•Bol avec couvercle - ensemble
complet (2, 3, 4)
•Piston - partie noire qui vous
permet de pelleter des fruits ou
légumes dans le bol à partir du
bouchon de remplissage (1)
•Jeu de 4 pieds souples (10)
Données techniques
Alimentation :
220-240V~
50/60 Hz
Puissance :
1600 W
Droits de modifications techniques
ou de conception réservés.
Les valeurs indiquées sur les inscriptions apposées sur votre appareil ou les autres documents fournis avec le produit sont
des valeurs obtenues en conditions de laboratoire, conformément aux normes en vigueur. Ces valeurs peuvent varier selon
l’utilisation de l’appareil et les conditions ambiantes.
Other manuals for TBS3164X
1
Table of contents
Languages:
Other Beko Blender manuals

Beko
Beko SMM888BX User manual

Beko
Beko 01M-8832833200-5015-01 User manual

Beko
Beko HBA5550W User manual

Beko
Beko 01M-8834013200-3216-04 User manual

Beko
Beko SMM888BX User manual

Beko
Beko HBS7750X User manual

Beko
Beko TBN 7802 X User manual

Beko
Beko HBS7600W User manual

Beko
Beko HBS7600W User manual

Beko
Beko BKK 2152 User manual