800-543-9038 USA 866-805-7089 CANADA 203-791-8396 LATIN AMERICA / CARIBBEAN
Installation
1.
nspect shippin
packa
e, valve, linka
e, and actuator
or physical dama
e. I
hipping damage has occurred notify appropriate carrier. Do not install
2.
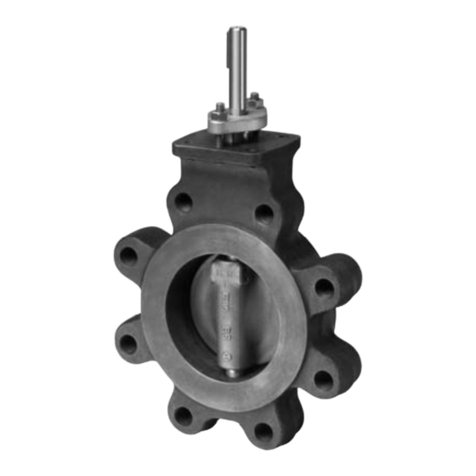
nstall valve with the proper ports as inlets and outlets. Check that inlet and outlet
f 2-way valves are correct. Flow direction arrows must be correct.
.
low out all piping and thoroughly clean before valve installation
4.
lean male pipe threads with wire brush and ra
. If threads have been dama
ed
r exposed to weather, runnin
a tap or die over the threads may strai
hten them.
lean pipes, threads, and valve threads before installation; check for any forei
n
aterial that can become lod
ed in trim components. Strainers should be cleaned
fter initial startup
.
ipe sealing compound should be applied sparingly a
ter cleaning and may not be
pplied to the two lead threads o
a screwed pipe, which are innermost inside the
alve. Sealing compound is to be placed on male threads only. The purpose is to
u
r
cate t
e p
pes w
en t
g
ten
ng.
.
alve must be installed with the stem towards the vertical, not below horizontal.
7.
tart the connection by turnin
the valve or pipe by hand as far as possible. Be
ertain the threads mate by the “feel” of the connection.
8.
se wrenches to ti
hten the valve to the pipe. Do not over ti
hten or strip the
hreads. Two wrenches are necessary to avoid dama
in
the valve.
.
wo-way valve Normally Open or Closed confi
urations must be verified by
xaminin
both the mechanical drawin
s and the valve and actuator.
Warning!
• Valve should not be used for combustible
as applications. Gas leaks and explosions
may result. Do not install in systems, which exceed the ratin
s o
the valve
vo
nsta
at
ons w
ere va
ve may
e expose
to excess
ve mo
sture, corros
ve
umes, vibration, hi
h ambient temperatures, elements, or hi
h tra
c areas with
potential
or mechanical dama
e
Valve assembly location must be within ambient ratings o
actuator. I
temperature is
e
ow -22°
a
eater
s requ
re
.
• The valve assembly will require heat shieldin
, thermal isolation, or coolin
i
combined e
ect o
medium and ambient temperatures – conduction, convection, and
adiation – is above 122°F
or prolon
ed time periods at the actuator.
• Followin
standard procedure, a strainer should be installed be
ore the coil and valve
or in another a
ro
riate
lace in the s
stem.
Visual access must be
rovided. Assembl
must be accessible
or routine schedule
service. Contractor should
rovide unions for removal from line and isolation valves
vo
excess
ve stresses.
ec
an
ca
support must
e prov
e
w
ere re
ucers
ave
been used and the pipin
system may have less structural inte
rity than
ull pipe sizes.
•
ufficient upstream and downstream pipin
runs must be provided to ensure proper
alve ca
acit
and flow res
onse. Five diameters in each direction are recommended
• Life span of valve stems and O-rin
s is dependent on maintainin
non-dama
in
conditions. Poor water treatment or filtration, corrosion, scale, other
articulate can
esult in dama
e to trim components. A water treatment specialist should be consulted.
orma
t
rea
engagement
etween ma
e p
pe t
rea
an
va
ve
o
y s
ou
e
observed. Pipe run that is in too far will damage the valve.
The flan
e allows the actuator to be either parallel or perpendicular to the pipe; there
are four orientations possible
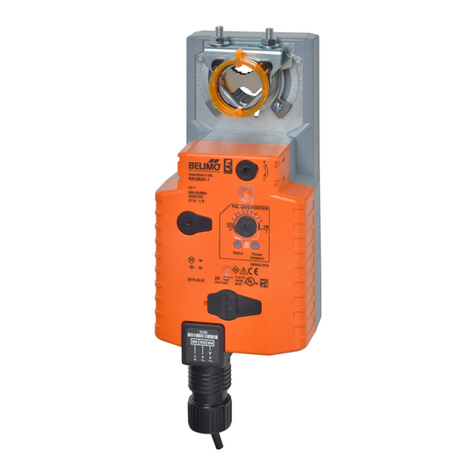
If field installing a spring return actuator, disconnect power and allow actuator to spring
closed. Flip actuator over if necessary to achieve proper rotation direction. DO NOT
U
E THE REVER
IN
WIT
H T
D
THI
Two-way Valves Mounting
For NORMALLY CLOSED operation:
The ball of the valve must be rotated so that the ball is
L
ED to flow. The actuator
should be mounted with the clamp fully rotated
W (R).
pring return actuators will
show the
W (R) symbol near the clamp and position indicator. Depressing the gear
release to move the clamp rotates non-spring return actuators
For NORMALLY OPEN o
eration:
The ball of the valve must be rotated so that the ball is
PEN to flow. The actuator should
be mounted with the clamp fully rotated
W (L).
pring return actuators will show the
W (L) symbol near the clamp and position indicator. Depressing the gear release to
move the clamp rotates non-spring return actuators. There are marks on the top o
the
valve stem, which indicate the
ort directions
Mounting
e va
ves can
e mounte
n an
os
t
on, exce
t stem
e
ow
or
zonta
Mounting and Installation Instructions
v
Tech.Doc - 04/17 - Subject to change. © Belimo Aircontrols
USA
, Inc


