manuals.online logo
Brands
  1. Home
  2. •
  3. Brands
  4. •
  5. bemodern
  6. •
  7. Indoor Fireplace
  8. •
  9. bemodern Pryzm 750 User manual

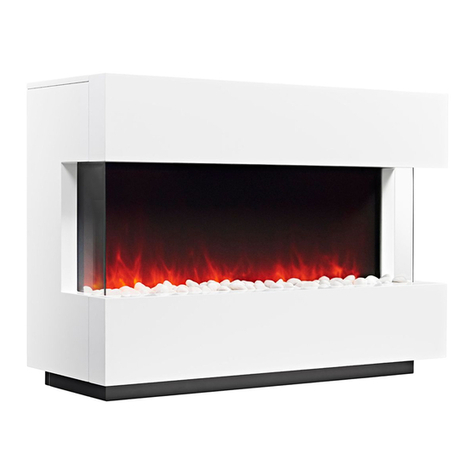
bemodern Pryzm 750 User manual

1
Instructions for installation and use
Patent pending
UK Registered Design
R2 Aug 2019 601227_2
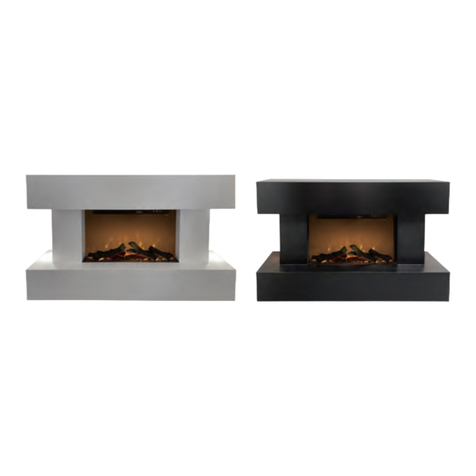
Vardo & Huxton Timber Suites
Pryzm 750 & 1000
2
Contents
Tech Specs 3
What’s in the Box 4
Installation –Timber 5-6
Maintenance 7
601227_2
3
Technical Specification
Fire Description Logs
Dimensions
A B C D
57” VARDO
PRYZM 5D 1000
Timber
Wall mounted &
floor standing: with
optional plinth
4 LRG 1320mm 810 / 609
mm 277mm 1450mm
53” VARDO
PRYZM 5D 750 4 SML 1220mm 810 / 609
mm 277mm 1350mm
47” VARDO
PRYZM 5D 750 4 SML 1070mm 810 / 609
mm 277mm 1200mm
51” HUXTON
PRYZM 5D 1000 Timber
Wall mounted
4 LRG 1154mm 588mm 277mm 1284mm
41” HUXTON
PRYZM 5D 750 4 SML 904mm 588mm 277mm 1034mm
601227_2
4
What’s in the box(s)
Mantle Hooks (x2)
Pre-installed Fire
Wall Bracket –Suite support bracket (x1)
Attached to the back of the fire
Screws (x2) Batteries (x2)
Logs
4 Logs Located under the
surround or in the leg of surround
(dependent on model)
Installation Booklet x2
Remote control
601227_2
or
Where applicable
Timber Plinth supplied separately
Cams, Pins and Dowels
x7 x4
Timber only
750 1000
AAA
5
Installation - Timber
1. Remove Rear Bracket
2. Fit Wall Brackets
Unpack your new suite and remove the rear
wall mount bracket which has been screwed
to the rear of the fire for transit. See diagram 1.
Please discard the screws
The first step to installation will be the fitment of the wall mount bracket in the desired
position in the room. Decide whether the suite will be floor mounted with the optional
plinth or wall mounted. If the suite is planned to be floor mounted (with plinth
positioned below the suite) the wall mount bracket must be positioned 205mm from
the floor as indicated in diagram 2. Alternatively if the suite is planned to be
positioned as a wall mounted model the wall mount bracket may be positioned at
the desired height on the wall. Using a spirit level mark a line equal to the length of
the wall mount bracket, at either 205mm (for floor standing) or the desired base
position of the wall mounted suite. Position the wall mount bracket level on the line
and mark the appropriate screw fixing points.
We advise a minimum of 6-off fixings must be used (see ‘Important Note’ on page 7).
Screw the wall mount bracket securely to the wall using the marked positions.
Diagram 1
Diagram 2 (all dimension in mm)
601227_2
This is a 2 adult person lift.
Do not attempt to lift from the centre
of the top panel, lift from under the
hearth and underside of the trim as
shown below.
6
Installation –Timber continued
3. Hang the fire
Mantel hooks must be fitted for both floor standing and wall mounted models. Fix the
mantel hooks securely in position as indicated in diagram 2 with the correct fixings for
your wall material (fixings not supplied). See ‘Important Note’ on page 7.
Carefully lift the suite and position the pre
installed angle brackets, over the pre-
mounted mantel hook brackets. Then lower
the suite down to rest on the wall mount
bracket. Great care must be taken to route
the fire power cable correctly as indicated in
diagram 3, confirming the cable is not crushed
or damaged on installation.
4. Secure the fire
The suite should now be correctly
positioned. To secure the suite to the
wall mount bracket fix with the
provided screws through the base of
the wall mount bracket up into the suite
(see diagram 4). This will lock the suite in
position.
This completes the wall mounted
installation option. For dressing the logs
and fire operation, please refer to the
separate fire instructions.
5. Assemble the plinth
For the floor mounted suite design. The base
plinth will need to be unpacked and
assembled. The base plinth comprises of four
main parts which should be built up and fixed
together with the provided 7-off cam fixings
and 4-off dowels (see diagram 5). Once
assembled the base plinth can be positioned
centrally under the suite to complete the floor
mounted suite installation. Should you require a
permanent fix use the mantle hooks and angle
brackets provided.
Diagram 3
Diagram 4
Diagram 5
601227_2
7
Maintenance
WARNING: Before any maintenance or whilst cleaning the exterior of the fireplace, the
unit should be disconnected from the power supply until it has cooled down.
Cleaning the Fire
Cleaning or polishing products are not recommended. Fingerprints or other marks on
the front glass panel can be removed by a piece of soft, damp, lint-free cloth with a
good quality household glass cleaner. The front glass panel should always be
completely dried with a clean, lint-free cloth or paper towel.
CAUTION: Abrasive cleaners should not be used on the glass panel. Liquids should not
be sprayed directly onto any surface of the unit.
601227_2
Troubleshooting
Should you have any queries regarding this product please contact Customer Services
on 0191 4300901 or email us at customerservices@bemodern.co.uk
Recycling
All cardboard packing is recyclable
IMPORTANT NOTE:
Wall fixings (i.e. screws/wall plugs etc.) are not supplied as these are crucially
dependent upon the type of wall and surface the surround is going to be fixed too.
The installer is therefore responsible for ensuring that suitable fittings are used according
to the particular model to be installed as well as individual fitting situations and
environments. All mechanical fixings, for holding the suite in position, must be secured
to a solid wall or structure.

Other manuals for Pryzm 750

2

This manual suits for next models

11

Other bemodern Indoor Fireplace manuals
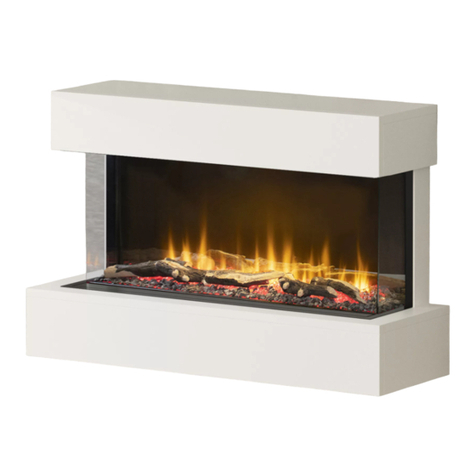
bemodern ELSIE 960 User manual

bemodern

bemodern ELSIE 960 User manual

bemodern 600CF User manual

bemodern

bemodern 600CF User manual

bemodern BM-06 2 SLIDE Series User manual

bemodern

bemodern BM-06 2 SLIDE Series User manual

bemodern Elgin & Hall Mounting instructions

bemodern

bemodern Elgin & Hall Mounting instructions

bemodern 2100 User manual

bemodern

bemodern 2100 User manual

bemodern Juliette Assembly instructions

bemodern

bemodern Juliette Assembly instructions

bemodern 2668 User manual

bemodern

bemodern 2668 User manual

bemodern 2599R User manual

bemodern

bemodern 2599R User manual

bemodern 2599M User manual

bemodern

bemodern 2599M User manual

bemodern Arteon Pryzm 10003SL Guide

bemodern

bemodern Arteon Pryzm 10003SL Guide

bemodern Pryzm 1000 User manual

bemodern

bemodern Pryzm 1000 User manual

bemodern Pryzm Volta 42 Guide

bemodern

bemodern Pryzm Volta 42 Guide

bemodern HANSFORD GRANDE Programming manual

bemodern

bemodern HANSFORD GRANDE Programming manual

bemodern 2893 User manual

bemodern

bemodern 2893 User manual

bemodern Pryzm 750 Guide

bemodern

bemodern Pryzm 750 Guide
bemodern 580 Deluxe Inset User manual

bemodern

bemodern 580 Deluxe Inset User manual

bemodern BM-121 2 Series User manual

bemodern

bemodern BM-121 2 Series User manual

bemodern Arteon 4119 User manual

bemodern

bemodern Arteon 4119 User manual

bemodern BM-091 2 Series User manual

bemodern

bemodern BM-091 2 Series User manual

bemodern Arteon Pryzm 10003SL Guide

bemodern

bemodern Arteon Pryzm 10003SL Guide
bemodern BM-05XXX1 User manual

bemodern

bemodern BM-05XXX1 User manual

bemodern EVOLV GAS FIRES 520 Slimline Inset User guide

bemodern

bemodern EVOLV GAS FIRES 520 Slimline Inset User guide

bemodern BM-10 User manual

bemodern

bemodern BM-10 User manual

bemodern BM-081 2 Series User manual

bemodern

bemodern BM-081 2 Series User manual

Popular Indoor Fireplace manuals by other brands
metrofires Tiny Rad Woody installation & owner's operation manual

metrofires

metrofires Tiny Rad Woody installation & owner's operation manual

Heat & Glo Dakota 42-B owner's manual

Heat & Glo

Heat & Glo Dakota 42-B owner's manual

ModaFlame GF102100 user manual

ModaFlame

ModaFlame GF102100 user manual

HAMPTON BAY MEF2823CBWLG Use and care guide

HAMPTON BAY

HAMPTON BAY MEF2823CBWLG Use and care guide

Pur Line Biochimenea Melibea installation instructions

Pur Line

Pur Line Biochimenea Melibea installation instructions

Focal Point EF11-36 PASADENA LIMOUSIN Installation & user's instructions

Focal Point

Focal Point EF11-36 PASADENA LIMOUSIN Installation & user's instructions

Stove Builder International FP-35 owner's manual

Stove Builder International

Stove Builder International FP-35 owner's manual

Heat & Glo SL-750TV-IPI-E owner's manual

Heat & Glo

Heat & Glo SL-750TV-IPI-E owner's manual

Lennox Brentwood LV Installation and operation instructions

Lennox

Lennox Brentwood LV Installation and operation instructions

Superior HC-3320 Installation instruction

Superior

Superior HC-3320 Installation instruction

FMI VCD36RN OWNER'S OPERATION AND INSTALLATION MANUAL

FMI

FMI VCD36RN OWNER'S OPERATION AND INSTALLATION MANUAL

Heat & Glo COSMO-I30AU owner's manual

Heat & Glo

Heat & Glo COSMO-I30AU owner's manual

Lopi Radiant Plus GSB2 Small installation manual

Lopi

Lopi Radiant Plus GSB2 Small installation manual

Astria VILLA VISTA Installation and operation instructions

Astria

Astria VILLA VISTA Installation and operation instructions

Monessen Hearth DEB30 Installation and operating instructions
Monessen Hearth

Monessen Hearth DEB30 Installation and operating instructions

Muskoka Gold MFB42WSC Use and care guide

Muskoka

Muskoka Gold MFB42WSC Use and care guide

Hearth & Home GO24SP-NG installation instructions

Hearth & Home

Hearth & Home GO24SP-NG installation instructions

Montigo 38BVM Installing and operating instructions

Montigo

Montigo 38BVM Installing and operating instructions

manuals.online logo
manuals.online logoBrands
  • About & Mission
  • Contact us
  • Privacy Policy
  • Terms and Conditions

Copyright 2025 Manuals.Online. All Rights Reserved.