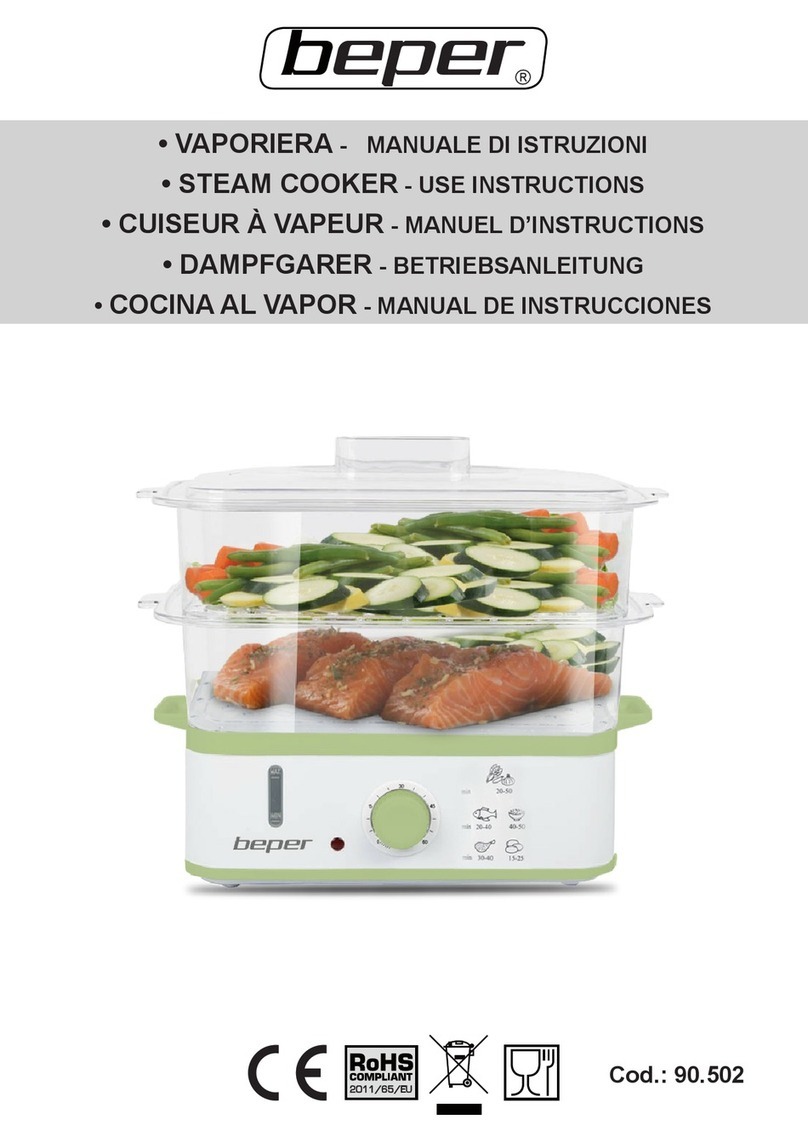
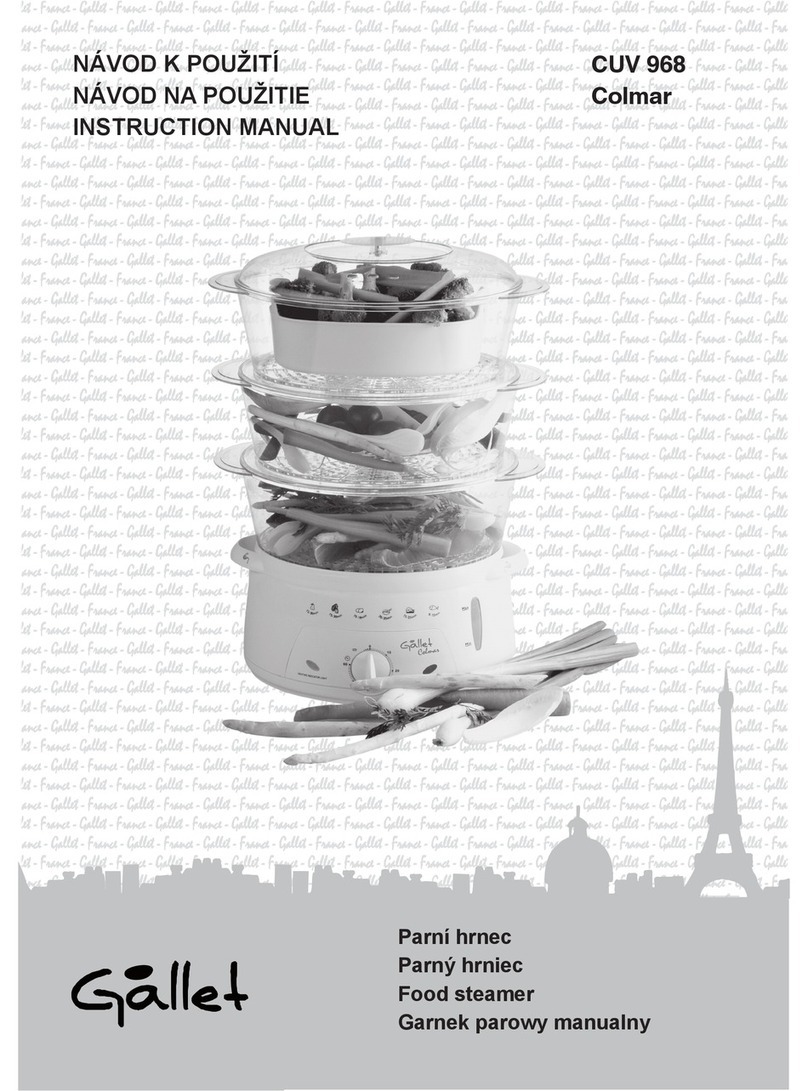
Beper 90.541 Quick guide

• VAPORIERA - MANUALE DI ISTRUZIONI
• STEAM COOKER - USE INSTRUCTIONS
• CUISEUR À VAPEUR - MANUEL D’INSTRUCTIONS
• DAMPFKOCHER - BETRIEBSANLEITUNG
• COCINA AL VAPOR - MANUAL DE INSTRUCCIONES
• ΘΑΤΜΟΜΑΓΕΙΡΑΣ - ΕΓΧΕΙΡΊΔΙΟ ΟΔΗΓΙΏΝ
Cod.: 90.541
Cod.: 90.541

ITALIANO
ENGLISH
FRANÇAIS
DEUTSCH
ESPAÑOL
ΕΛΛΗΝΙΚΗ
pag. 3
pag. 10
pag. 17
pag. 25
pag. 33
pag. 41
For further information and/or for instructions for use in other languages, please visit:
beper.com

3
Vaporiera Manuale di istruzioni
IT
AVVERTENZE GENERALI
LEGGERE QUESTE ISTRUZIONI PRIMA DI USARE L’APPAREC-
CHIO.
Prima e durante l’uso dell’apparecchio è necessario seguire alcune
precauzioni elementari.
Dopo aver tolto l’imballaggio assicurarsi dell’integrità dell’apparec-
chio. In caso di dubbio non utilizzare l’apparecchio e rivolgersi a per-
sonale professionalmente qualicato. Gli elementi dell’imbal laggio
(sacchetti di plastica, polistirolo, ecc.) non devono essere lasciati alla
portata dei bambini, in quanto potenziali fonti di pericolo.
Assicurarsi sempre che la tensione di rete elettrica sia uguale a quel-
la indicata nell’etichetta dati tecnici e che l’impianto sia compatibile
con la potenza dell’apparecchio.
Non tirare mai il cavo per scollegarlo dalla presa di corrente elettrica.
Assicurarsi che il cavo non sia in contatto con superci calde o ta-
glienti.
Non utilizzare l’apparecchio con il cavo danneggiato.
Se il cavo di alimentazione è danneggiato, esso deve essere sostitu-
ito dal Costruttore o dal suo Servizio Assistenza Tecnica o comunque
da una persona con qualica similare, in modo da pre venire ogni
rischio.
Collegare l’apparecchio esclusivamente ad una presa di corrente
elettrica alternata.
In generale è sconsigliabile l’uso di adattatori, prese multiple e/o pro-
lunghe. Qualora il loro uso si rendesse indispensabile è necessario
utilizzare solamente adattatori e prolunghe conformi alle vigenti nor-
me di sicurezza.
Questo apparecchio dovrà essere destinato solo all’uso per il quale
è stato espressamente concepito. Ogni altro uso è da considerarsi
improprio e quindi pericoloso, nonché far decadere la garanzia. Il
costruttore non può essere considerato responsabile per eventuali
danni derivati da usi impropri, erronei ed irragionevoli.
Per evitare surriscaldamenti pericolosi si raccomanda di svolgere in
tutta la sua lunghezza il cavo di alimentazione.
Prima di effettuare qualsiasi operazione di cambio degli accessori o
di pulizia disinserire l’apparecchio dalla rete di alimentazione elettri-
ca.
Non lasciare esposto l’apparecchio ad agenti atmosferici (pioggia,
sole, etc.).

4
Vaporiera Manuale di istruzioni
Non tenere l’apparecchio vicino a fonti di calore (es. termosifone).
QUESTO APPARECCHIO NON DEVE ESSERE UTI-
LIZZATO DA PERSONE (COMPRESI I BAMBINI) CON
CAPACITÀ FISICHE, SENSORIALI O MENTALI RIDOT-
TE; DA PERSONE CHE MANCHINO DI ESPERIEN-
ZA E CONOSCENZA DELL’APPARECCHIO, A MENO
CHE SIANO ATTENTAMENTE SORVEGLIATE O BEN
ISTRUITE RELATIVAMENTE ALL’UTILIZZO DELL’AP-
PARECCHIO STESSO DA PARTE DI UNA PERSONA
RESPONSABILE DELLA LORO SICUREZZA.
ASSICURARSI CHE I BAMBINI NON GIOCHINO CON
L’APPARECCHIO.
Allorché si decida di smaltire come riuto questo apparecchio, si rac-
comanda di renderlo inoperante.
SI RACCOMANDA INOLTRE DI RENDERE INNOCUE
QUELLE PARTI DELL’APPARECCHIO SUSCETTIBI-
LI DI COSTITUIRE UN PERICOLO, SPECIALMEN-
TE PER I BAMBINI CHE POTREBBERO SERVIRSI
DELL’APPARECCHIO PER I PROPRI GIOCHI.
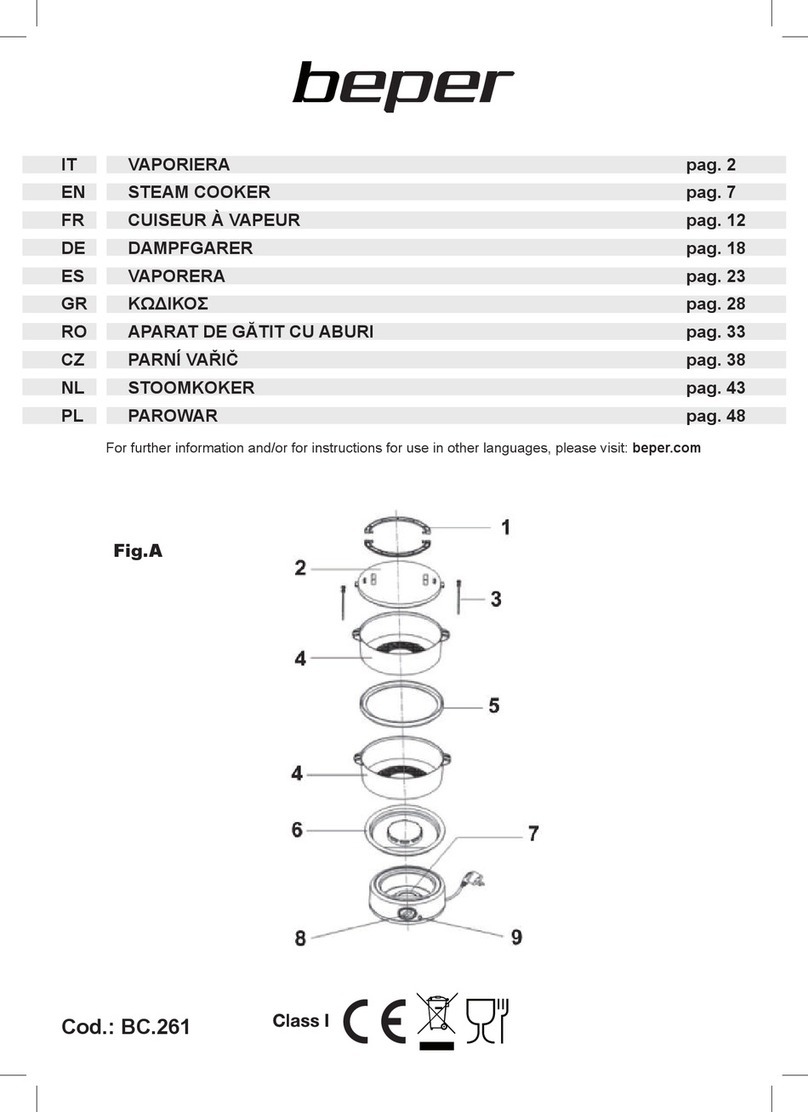
DESCRIZIONE PRODOTTO
1. Coperchio
2. Vaschetta di raccolta
3. Contenitore del riso
4. Indicatore livello dell’acqua
5. Contenitore superiore
6. Contenitore intermedio
7. Contenitore inferiore
8. Serbatoio
9. Pannello di controllo

5
Vaporiera Manuale di istruzioni
IT
PANNELLO DI CONTROLLO
1. On/Off: Per accendere e spegnere la vaporiera
2. Mode: Premere tale pulsante per selezionare il programma desiderato ( 5 programmi);
3. “+/-“: Per stabilire il tempo di cottura a vapore del cibo (max 90 minuti)
4. Hr/min: La vaporiera ha la funzione di accensione automatica; premere tale pulsante per cambia-
re da “ore” a “minuti” e per stabilire il tempo di accensione automatica
5. Display: Indica le modalità di funzionamento ed il tempo.
PRIMA DEL PRIMO UTILIZZO
Prima di utilizzare la vaporiera per la prima volta, si prega di pulirla completamente, di porre gli
accessori, quali i contenitori per la cottura a vapore, la vaschetta di raccolta, il coperchio ecc… in
acqua e detergente per stoviglie, e di lavarli quindi meticolosamente. In seguito, riempire il serbatoio
con dell’acqua, sino al raggiungimento del livello più alto.
Assemblare tutte le componenti della vaporiera. I contenitori sono numerati da 1 a 3 e vanno posi-
zionati in quest’ordine (1 in basso; 2 in mezzo; 3 in alto).
Azionare la vaporiera e farla funzionare a vuoto, dopo di che buttare via l’acqua
Note: Assemblare tutte le componenti, posizionare la vaschetta di raccolta nel serbatoio ed assicu-
rarsi che sia ssata nella posizione corretta e che sia in posizione piana. Durante l’uso, assicurarsi
che il livello dell’acqua nel serbatoio si posizioni fra il livello di riferimento massimo e quello minimo.
Si ricorda inoltre di non porre mai serbatoio e base della vaporiera in acqua, con l’intenzione di
pulirle.
UTILIZZO DELLA VAPORIERA
1. Posizionare la vaporiera su una supercie piana e stabile.
2. Riempire il serbatoio con tanta acqua quanta ne serve in base al tipo di cibo ed alla quantità dello
stesso. Se il cibo inserito necessita di una cottura a vapore per un tempo compreso fra i 15 ed i 60
minuti, riempire d’acqua il serbatoio sino al raggiungimento del livello di riferimento massimo; nel
caso in cui il tempo di cottura sia inferiore ai 15 minuti riempire il serbatoio d’acqua in modo tale da
raggiungere il livello di riferimento minimo. Se la vaporiera si ferma producendo vapore o se il tasso
di vapore è basso prima che il cibo sia pronto, si dovrebbe aggiungere acqua al serbatoio.
NOTE:
1). Non aggiungere sale, pepe, spezie, essenze, vino o altri tipi di liquido nell’acqua (presa dal
rubinetto) posta nel serbatoio.
2). Nell’usare l’elettrodomestico, assicurarsi che il livello dell’acqua sia fra il massimo ed il minimo.
3. L’elettrodomestico può essere utilizzato in tre modi:
1). Usando solamente il contenitore inferiore della vaporiera: posizionare il cibo nel contenitore
inferiore della vaporiera e poi il tutto sulla base della vaporiera.

6
Vaporiera Manuale di istruzioni
2). Usando i tre contenitori della vaporiera assieme: posizionare ogni contenitore della vaporiera nel
posto giusto, in base alla suddetta numerazione. Si prega di mantenere l’ordine descritto, poiché in
caso contrario i contenitori della vaporiera non si posizionano piani.
3). Usando due contenitori: solo il contenitore intermedio della vaporiera può essere ssato al con-
tenitore inferiore della stessa.
NOTE: Durante la cottura a vapore dei cibi con due o tre contenitori, il cibo in cottura nel contenitore
inferiore viene cotto più rapidamente di quello posto in una contenitore superiore; si potrebbe porre
quindi i cibi caratterizzati da una cottura più difcoltosa nel contenitore inferiore.
4. Coprire con il coperchio della vaporiera.
5. Inserire la spina nella presa elettrica.
NOTE: Non azionare la vaporiera se i contenitori o il coperchio non sono in posizione.
6. Inserendo la presa di corrente, si udirà un lungo segnale sonoro, il display mostrerà “0:00” dopo
un secondo di tempo e solo il pulsante “Mode” potrà essere attivato.
7. Premendo quindi il pulsante “Mode”, il display mostrerà ripetutamente i programmi: a. pane cotto
a vapore; b. riso cotto a vapore; c. pesce cotto al vapore; d. carne rossa o pollo cotti al vapore; e.
verdure al vapore. Selezionato quindi il programma che preferisci, lo schermo LCD mostrerà il tem-
po di cottura predenito per tale programma, il quale potrà essere modicato premendo i pulsanti
“+” e “-“.
8. La vaporiera ha una funzione automatica di inizio dell’attività ed il massimo tempo di ritardo nella
programmazione di tale inizio è di 12 ore e 59 minuti. Se non si vuole iniziare l’operazione di cottura
a vapore immediatamente, è possibile quindi ssare un inizio automatico premendo il pulsante “Min”
come segue.
Ad esempio, per stabilire un inizio dell’operazione di cottura dopo 2 ore e 30 minuti:
1). Eseguite le suddette fasi da 1 a 8, premete il pulsante “Min” una volta ed un’icona di sveglia
comparirà alla sinistra dello schermo, mentre uno “00” inizierà a lampeggiare.
2). Cambiare “00” con “30” premendo i pulsanti “+” e “-“; premere poi nuovamente il pulsante “Min”
ed il tal modo inizierà a lampeggiare lo “0”. Cambiare quindi “0” con “2” premendo nuovamente i
pulsanti “+” e “-“ e confermare inne la scelta con il tasto “Min”.
3). Premendo il pulsante “On/Off”, si udirà un lungo segnale sonoro. In seguito, l’indicatore lam-
peggerà, mentre lo schermo LCD indicherà il conto alla rovescia. Quando il tempo sarà esaurito e
si arriverà a “00”, l’icona di sveglia scomparirà, e smetterà di lampeggiare e, di seguito, la vaporiera
inizierà a lavorare.
4). Quando l’operazione di cottura è terminata, verrà emesso un suono.
NOTE: Il minimo tempo di operazione di ogni modalità è predenito, il massimo è 90 minuti. Durante
ogni operazione, è possibile cancellare la congurazione scelta premendo il pulsante “On/Off” per
2 secondi.
Cancellazione di un programma di inizio automatico: Premere il pulsante “On/Off” per 2 secondi, si
udirà un lungo segnale sonoro; l’icona della sveglia quindi scomparirà, il tempo ritornerà a zero e
tutte le impostazioni scelte in precedenza verranno cancellate.
9. Durante l’operazione di cottura, non toccare la base della vaporiera, il contenitore del riso ed i
contenitori della vaporiera, ricordandosi di usare sempre dei guanti nell’atto di maneggiare la va-
poriera.
10.Dopo aver terminato la cottura a vapore, staccare la spina dell’elettrodomestico dalla presa
elettrica e lasciare che si raffreddi completamente, prima di procedere all’estrazione del serbatoio.
NOTE: Prestare attenzione durante la rimozione della vaschetta di raccolta poiché, mentre le altre
parti della vaporiera potrebbero essersi raffreddate, l’acqua nel serbatoio e nella vaschetta di rac-
colta potrebbe essere ancora bollente.
7
Vaporiera Manuale di istruzioni
IT
11.Gettare quindi l’acqua al termine di ogni utilizzo e riempire con nuova acqua al ciclo successivo.
12.Mettere da parte la vaporiera quando tutte le sue parti si sono completamente raffreddate, po-
nendola in un luogo asciutto quale ad esempio la sommità di un tavolo o di un bancone, o sulla
mensola di un armadio. Il cavo di alimentazione potrebbe essere avvolto al di sotto della base della
vaporiera.
PULIZIA E MANUTENZIONE
1. Far sì che l’elettrodomestico si sia completamente raffreddato prima di procedere alla sua pulizia.
2. Lavare i contenitori della vaporiera, il coperchio, la vaschetta di raccolta, il contenitore del riso in
acqua calda saponata; poi risciacquare e asciugare completamente.
3. Non pulire le parti con mezzi pulitori abrasivi, quali ad esempio spugnette abrasive metalliche, e
detergenti abrasivi.
4. Non immergere il serbatoio in acqua, ma versare prima di tutto acqua calda nel serbatoio, in se-
guito risciacquare meticolosamente e gettare l’acqua, inne asciugare con un panno morbido. Tutte
le parti, ad eccezione del serbatoio, possono essere pulite in lavastoviglie, ma si ricorda che una
continua pulizia in lavastoviglie potrebbe comportare una leggera perdita di lucentezza.
5. Mettere via la vaporiera dopo che tutte le sue parti si siano raffreddate completamente, riponen-
dola in un luogo asciutto, quale ad esempio la sommità di un tavolo o di un bancone o sulla mensola
di un armadio.
PROTEZIONE CONTRO IL FUNZIONAMENTO A SECCO
Durante il funzionamento, si verichi se l’acqua nel serbatoio sia sufciente; se non vi è acqua o
se il livello della stessa è al minimo, il funzionamento protettivo a secco interromperà la corrente, si
udiranno dei segnali sonori e lo schermo LCD mostrerà
RIMOZIONE DI DEPOSITI MINERALI
Dopo un utilizzo pari a circa 2-3 mesi, si potrebbero sviluppare alcuni depositi di calcare nel serba-
toio o sull’elemento riscaldante, tale fatto è del tutto normale.
1. Riempire il serbatoio con una miscela di aceto e acqua no al livello di riferimento più elevato,
senza utilizzare un qualunque altro tipo di prodotto chimico o di disincrostante.
2. Inserire la spina elettrica nella presa di corrente
3. Impostare il timer su 20-25 minuti. Terminato questo tempo la pulizia anti-calcare è terminata. A
quel punto, staccare la spina dalla presa di corrente, attendere che tutte le parti si siano raffreddate
e svuotare l’eventuale residuo di acqua e aceto bianco.
4. Risciacquare con cura tutti i contenitori trasparenti e il serbatoio dell’acqua.
N.B. NON IMMERGERE LA PARTE ELETTRICA DEL PRODOTTO DURANTE LA PULIZIA
SUGGERIMENTI
1. In caso di utilizzo dell’elettrodomestico ad elevate altitudini, il tempo di cottura a vapore potrebbe
aumentare e variare in base all’altitudine
2. Il tempo di cottura a vapore indicato nelle ricette è solo di riferimento, poiché esso dipende anche
dalla misura dei cibi, dall’ubicazione, dalla freschezza e dal gusto. Se si è familiari all’argomento, il
tempo può essere impostato facilmente.
3. Per singolo strato, il cibo è cotto a vapore più rapidamente rispetto ad uno multistrato, perciò il
tempo di cottura a vapore in presenza di un grande quantitativo di cibo è molto più lungo.
4. Per avere risultati migliori, selezionare la corretta misura del cibo da cuocere a vapore; nel caso
in cui la misura dei cibi sia notevolmente differente, si consiglia di porre i cibi più piccoli in sommità.

8
Vaporiera Manuale di istruzioni
5. Non riempire con troppo cibo i contenitori della vaporiera, poiché dovrebbe esserci spazio suf-
ciente fra i vari cibi, in modo tale da consentire il massimo usso di vapore.
6. Quando si cuoce a vapore una grande quantità di cibi, rimuovere il coperchio e mescolare i cibi
nel mezzo attraverso un cucchiaio a manico lungo.
7. Conservare i liquidi nella vaschetta di raccolta per fare zuppa, salsa o sugo.
8. Nel caso di carne rossa o bianca congelate, si consiglia di scongelarle prima di cuocerle a vapore.
9. Il tempo di cottura a vapore indicato nelle ricette si basa sul fatto che si faccia utilizzo di acqua
fredda.
10. I contenitori interni della vaporiera sono utilizzati anche per la cottura a vapore di altri cibi, quali
frutta, verdure, pudding, pane pronto ecc…
11. Nel caso di utilizzo di due contenitori, riporre sempre il cibo che necessita di una lunga cottura
a vapore nel contenitore inferiore.
12. Il tempo di cottura a vapore nel contenitore superiore è solitamente di 5 minuti superiore.
RICETTE
TIPOLOGIA QUANTITA’ TEMPO COTTURA
Riso 400g riso, 500 ml acqua 45-50 minuti
Patate 900 g 40 minuti
Carote 550 g 40 minuti
Uova 6 uova 15-20 minuti
Pollo 550 g 40 minuti
Il tempo o la quantità sopra menzionate sono solo di riferimento, possono essere regolate a
seconda del peso dei cibi, dello spessore e del sapore per avere risultati migliori.
DATI TECNICI
Potenza 1000W
Alimentazione 220-240V ~ 50/60Hz
In un ottica di miglioramento continuo Beper si riserva la facoltà di apportare modiche e
migliorie al prodotto in oggetto senza previo preavviso.
Il simbolo del cestino barrato riportato sull’apparecchio indica che il prodotto, alla ne
della propria vita utile, dovendo essere trattato separatamente dai riuti domestici, deve
essere conferito in un centro di raccolta differenziata per apparecchiature elettriche ed
elettroniche oppure riconsegnato al rivenditore al momento dell’acquisto di una nuova ap-
parecchiatura equivalente.
L’adeguata raccolta differenziata per l’avvio successivo dell’apparecchio al riciclaggio, al trattamen-
to e allo smaltimento ambientalmente compatibile contribuisce ad evitare possibili effetti negativi
sull’ambiente e sulla salute e favorisce il recupero dei materiali di cui è composto.
L’utente è responsabile del conferimento dell’apparecchio a ne vita alle appropriate strutture di
raccolta. Per informazioni più dettagliate inerenti i sistemi di raccolta disponibili, rivolgersi al servizio
locale di smaltimento riuti, o al negozio dove è stato effettuato l’acquisto.
Chiunque abbandona o cestina questo apparecchio e non lo riporta in un centro di raccolta differen-
ziata per riuti elettrici-elettronici è punito con la sanzione amministrativa pecuniaria prevista dalla
normativa vigente in materia di smaltimento abusivo di riuti

9
Vaporiera Manuale di istruzioni
IT
CERTIFICATO DI GARANZIA
La garanzia di applicazione è valida 24 mesi dalla data di acquisto per difetti di materiale o di fab-
bricazione.
La garanzia è valida unicamente presentando il certicato di garanzia e il documento di
acquisto (scontrino scale) che certichi la data di acquisto e il nome del modello dell’appa-
recchio acquistato.
Se l’apparecchio dovesse richiedere assistenza tecnica rivolgersi al venditore o presso la nostra
sede. Questo per conservare inalterata l’efcienza del vostro apparecchio e per NON invalidare la
garanzia. Eventuali manomissioni dell’apparecchio da parte di personale non autorizzato invalide-
ranno automaticamente la garanzia.
Condizioni di garanzia
Se ci sono guasti a causa di difetti di materiale e/o fabbricazione durante il periodo di garanzia,
garantiamo la riparazione del prodotto gratuitamente.
Non sono coperte dalla garanzia tutte le parti che dovessero risultare difettose a causa di:
a. Danni da trasporto o da cadute accidentali,
b. Errata installazione o inadeguatezza impianto elettrico,
c. Riparazioni o modiche operate da personale non autorizzato,
d. Mancata o non corretta manutenzione e pulizia,
e. Prodotto e/o parti di prodotto soggette a usura e/o consumabili (es.: lampade, batterie, lame)
f. Mancata osservanza delle istruzioni per il funzionamento dell’apparecchio, negligenza
o trascuratezza nell’uso.
L’elenco di cui sopra è a titolo meramente esemplicativo e non esaustivo, in quanto la presente
garanzia è comunque esclusa per tutte quelle circostanze che non possono farsi risalire a difetti di
fabbricazione dell’apparecchio.
La garanzia è inoltre esclusa in tutti i casi di uso improprio dell’apparecchio ed in caso di uso pro-
fessionale.
Beper Srl declina ogni responsabilità per eventuali danni che possano direttamente o indirettamente
derivare a persone, cose ed animali domestici in conseguenza della mancata osservanza di tutte le
prescrizioni indicate nell’apposito “Libretto Istruzioni ed avvertenze” in tema di installazione, uso e
manutenzione dell’apparecchio.
Assistenza tecnica
Per l’assistenza tecnica e/o riparazioni fuori dal periodo di garanzia ci si può rivolgere direttamente
all’indirizzo sottostante.
BEPER SRL
Via Salieri, 30
37050 - Vallese di Oppeano - Verona
Tel. 045/7134674 – Fax 045/6984019
e-mail: assistenza@beper.com

10
Steam cooker Use instructions
GENERAL SAFETY ADVICE
READ THE OPERATING INSTRUCTIONS CAREFULLY BEFORE
FIRST USE OF THE APPLIANCE.
Read the following instructions carefully, since they give you useful
safety information about installation, use and maintenance and help
you avoid mishaps and possible accidents.
Remove the packing and make sure that the appliance is intact, with
special attention to the supply cable. The elements of the packing
(plastic bags, polystyrene, etc) do not have to be accessible to the
children, in order to preserve them from danger sources.
It is recommended not to throw these packing material in the dome-
stic waste, but to deliver them to the appropriate station of collection
or destruction refusals, asking eventually information to the manager
of the Sanitation Department of your own municipality.
Before connecting the appliance make sure that the mains voltage
corresponds to the data specied on the label.
If the plug does not suit the socket, let it be replaced with another
suitable plug by qualied personnel only, which shall also ensure that
the section of the socket cables is suitable for your appliance power
absorption.
Never pull the supply cord to unplug the appliance.
Make sure that the supply cord never comes into contact with hot or
cutting surfaces
Do not use this appliance if the supply cord is damaged. In case of
damage, it must be replaced by the manufacturer, its service agent
or similarly qualied persons in order to avoid a hazard.
Only connect this appliance on alternating current
Generally, the use adaptors multiple plugs and/or extensions is not
recommended; should they be necessary, please use only simple or
multiple adaptors and extensions in compliance with the safety rules
in force, making sure that the capacity absorption limit marked on the
simple adaptors and the extensions and the maximum power limit
marked on the multiple adaptor are not exceeded.
This appliance is to be destined to its special purpose only.
Any other use is to be considered as improper and thus dangerous.
The manufacturer cannot be responsible for any damages deriving
from improper, wrong or incautious use.
To avoid any heating risk, it is recommended to unroll completely the
supply cord and to unplug the appliance, when not used.

11
Steam cooker Use instructions
EN
Before cleaning, always unplug the appliance.
To protect against electric shock, do not immerse cord, plug or any
parts of the appliance into water or other uids.
Do not hold the appliance with wet hands or feet.
Do not hold the appliance with naked feet.
Do not expose the appliance to atmospheric agents such as rain,
wind, snow, hail.
Do not use the appliance near explosives, highly ammable mate-
rials, gases, burning ames, heaters.
DO NOT ALLOW CHILDREN, DISABLED PEOPLE OR
EVERY PEOPLE WITHOUT EXPERIENCE OR TECH-
NICAL ABILITY TO USE THE APPLIANCE IF THEY
ARE NOT PROPERLY WATCHED OVER. CLOSE SU-
PERVISION IS NECESSARY WHEN ANY APPLIANCE
USED BY OR NEAR CHILDREN.
MAKE SURE THAT CHILDREN DO NOT PLAY WITH
THIS APPLIANCE.
IF YOU DECIDE NOT TO USE THE APPLIANCE ANY
LONGER, MAKE IT UNSERVICEABLE BY SIMPLY
CUTTING THE SUPPLY CABLE AFTER DISCONNEC-
TING THE PLUG FROM THE SOCKET.
ALSO MAKE ANY DANGEROUS PARTS UNSERVICE-
ABLE, ESPECIALLY FOR CHILDREN WHO COULD
PLAY WITH THE APPLIANCE.
PRODUCT DESCRIPTION
1. Steamer lid
2. Drip Tray
3. Rice Pan
4. Water Gauge
5. Upper Steamer Column
6. Middle Steamer Column
7. Lower Steamer Column
8. Reservoir
9. Control Panel

12
Steam cooker Use instructions
CONTROL PANEL
1. On/Off: Press the button to turn on and turn off the steam cooker
2. Mode: Press the button to select your desired program (5 programs); see the following gure.
3. “+/
”: Set the steaming food time (maximum 90 minutes)
4. Hr/min: The unit has the automatic start function, press the button to change between the “hour”
and “minute” and set the automatic start time.
5. Display: Indicate the working mode and time.
BEFORE THE FIRST USE
Before using the food steamer at the rst, please clean the food steamer completely, put the attach-
ments such as steam plates, drip tray, steamer lid etc into water and a proper cleanser and clean
them thoroughly. Fill the reservoir with water to the max mark. Assemble all parts. The columns are
numbered from 1 to 3: place them according to this order (1 at the bottom; 2 in the middle; 3 at the
top).
Activate the steam cooker and let it operate free of load, then discard the water.
Note: Assemble all parts, place drip tray in reservoir, make sure it is xed to the correct position
and it sits at. When using, make sure the water level in the reservoir is between the maximum and
minimum mark. Never put reservoir and base in the water for cleaning.
USING FOOD STEAMER
1. Place the food steamer on a stable and level surface.
2. Fill the reservoir with water according to food type and quantity. If the food needs steaming for
15-60 minutes, add water to the maximum mark, but if the steaming time is less the 15 minutes, add
water to the minimum mark. If food steamer stops producing steam or steam rate is obviously slow
before the food is ready, it indicates you should add water to the reservoir.
NOTE:
1). Don’t add any salt, pepper, avoring, essence, wine or other liquids in tap water in the reservoir.
2). While using the appliance, ensure the water level between the minimum and maximum.
3. The appliance can be used in three ways:
1) Only using lower steamer column: Put food in lower steamer column, then position them on the
base.
2) Using three steamer columns together: Position each steamer column in place according to the
number. Please keep the order otherwise the steamer column cannot sit at.
3) Using two steamer columns: Only the middle steamer column can x with the lower one.
NOTE: During steaming food with two or three steamer columns, the food of cooking in the lower
steamer column is more rapid than in the upper steamer column, so you may put the difcult cooked
food in the lower steamer column.

13
Steam cooker Use instructions
EN
4. Cover with the steamer lid.
5. Plug into the outlet.
NOTE: Don’t operate it without steamer columns and lid in place.
6. Plug the power outlet, a long buzzers will be heard, the display will display “0:00” after 1s, only
the “Mode” button can be activated.
7. Press the “Mode” button, the display will display continuously: a. steamed bread b. steam rice c.
steam sh d. steam chicken or meat e. steam vegetable. Select your desired program, the LCD will
display the default steaming time, and the steaming time can be changed by pressing the “+” and “
” button.
8. The unit has automatic start function, the max delay time is 12 hours and 59 minutes. If you do
not want to the steamer start operation immediately, you may set the automatic start function by
pressing the “Min” as follows:
For example: Set the unit begins working after 2 hours and 30minutes.
1). Operate according to the above 1-8 steps, press “Min” button once, a icon of alarm clock will
display in the left of display, and the “00” begin to ash.
2). Adjust the “00” to the “30” by pressing the “+” and “
” button, then press the “Min” button again and “0” begin to ashing, adjust the “0” to “2” by pressing
“+” and “
” button, conrm the setting by pressing “Min”.
3). Press the “On/Off” button, a long buzzers will be heard, the indicator will ash while the LCD will
count down.
When the time is “0:00”, the icon of alarm clock will disappear, the indicator will stop ashing and
then the unit will begin working.
4). When the operation is nished, the buzzer will beep.
NOTE: The minimum operation time of every mode is them default time, the maximum is 90 mi-
nutes. During operation, you can cancel the setting by pressing the “On/Off” button for 2 seconds.
Cancellation of the automatic start program: Press the “On/Off” for 2 seconds and a long buzzer will
be heard, the icon of alarm clock will disappear, the time return to zero and cancel all the setting.
9. During work, don’t touch the base, rice pan and steamer columns, always use groves when
handling the food steamer.
10. After nishing steaming, unplug the appliance from the outlet and let it cool completely before
removing the reservoir.
NOTE: Be careful when removing the drip tray, while other parts of the unit may cool down, water in
the reservoir and drip tray is still very hot.
11. Discard the water after each using, next cycle pour the tap water again.
12. Store the food steamer after all parts cool down completely and place it at the dry location such
as a table top or counter top or a cupboard shelf. The power cord may be wound under the bottom
of steamer.
CLEANING AND MAINTENANCE
1. Allow the appliance to cool down completely before cleaning.
2. Wash the steamer columns, steamer lid, drip tray, rice pan in hot soapy water, rinse and dry
completely.
3. Don’t clean any part with abrasive cleaners such as metal scouring pads, and scouring powder.
4. Don’t immerse the reservoir in water, whereas pour the warm water into the reservoir rstly, then
rinse thoroughly and discard water, nally dry it with soft cloth. All parts except the reservoir can be
cleaned in dishwasher, however, continual cleaning in a dishwasher may result in a slight loss of
polish.

14
Steam cooker Use instructions
5. Store the food steamer after all parts cool down completely and place it at the dry location such
as a table top or counter top or a cupboard shelf.
BOIL-DRY PROTECTION
During working, please note the water in the reservoir whether is enough, if it has no water or the
water level is lower in the reservoir, the operating dry protective will shut off the power and buzzers
will be heard, the LCD will display
REMOVEL OF MINAL DEPOSITS
After using about 2-3 months, some chemical deposits may build up in the reservoir or on the hea-
ting element, this is normal case.
1. Fill the reservoir with the mixture of vinegar and water to the maximum mark, not to use any other
chemical or descaler.
2. Plug into the outlet.
3. Set timer for 20-25 minutes to start steaming. After this period, the descaler cleaning is comple-
ted. Now, unplug from the outlet, await the total cooling of all its parts and, nally, pour the remaining
water and white vinegar out.
4. Rinse the reservoir and all transparent containers several times with water.
N.B. DO NOT IMMERSE IN WATER THE ELECTRICAL PART OF THE PRODUCT DURING CLE-
ANING
TIPS
1. When using the appliance at high altitude, steaming time may need to be increased and vary by
altitude
2. Steaming time stated in recipes is only referenced, also it depends on food size, location,
freshness and taste. If you are familiar with it, the time can be set easily.
3. For single layer, the food is steamed faster than multiplayer, therefore, steaming time for a large
quantity of food is much longer.
4. For better results, select proper size food to steam, if food size is different greatly, advise you to
place the small food on the top.
5. Don’t ll steamer columns with full food, as there should be enough space between foods to allow
for the maximum steam ow.
6. When steaming a large quantity of food, remove steamer lid and stir the food halfway by a long
handled tool.
7. Save liquids in drip tray for making soup, sauces or gravy.
8. Please defrost it rst before steaming frozen meat or poultry.
9. Steaming time stated in recipes is based on the use of cold water.
10. Inner steamer column is also used for steaming other food such as fruits, vegetables, pudding,
quick bread etc.
11. When using two steamer columns, always place the food in need of long steaming time in lower
steamer column.
12. Steaming time for food in the upper steamer column is usually longer 5 minutes.

15
Steam cooker Use instructions
EN
RECIPES
The time or weight above mentioned is only referenced, you can adjust them according to
food weight, thickness or taste for better results.
TECHNICAL DATA:
Power: 1000W
Power supply: 220-240V ~ 50/60Hz
For any improvement reasons, Beper reserves the right to modify or improve the product
without any notice.
TYPE WEIGHT STEAMING TIME
Rice 400g riso, 500 ml of water 45-50 min
Potatoes 900 g 40 min
Carrots 550 g 40 min
Eggs 6 eggs 15-20 min
Chicken 550 g 40 min
The European directive 2011/65/EU on Waste Electrical and Electronic Equipment (WEEE),
requires that old household electrical appliances must not be disposed of in the normal
unsorted municipal waste stream. Old appliances must be collected separately in order to
optimize the recovery and recycling of the materials they contain, and reduce the impact on
human health and the environment. The crossed out “wheeled bin” symbol on the product
reminds you of your obligation, that when you dispose of the appliance, it must be separa-
tely collected.

16
Steam cooker Use instructions
GUARANTEE CERTIFICATE
This appliance has been checked in the factory. From the date of original purchase a 24 month
guarantee applies to material and production defects. The purchase receipt and the guarantee cer-
ticate must be submitted together in case of claim to guarantee.
The guarantee is valid only with a guaranty certicate and proof of purchase (scal receipt)
indicating the date of purchase and the model of the appliance
For any technical assistance, please contact directly the seller or our head ofce in order to preserve
the appliance’s efciency and NOT TO void the guarantee. Any intervention on this appliance by
non-authorized persons will automatically void the guarantee.
GUARANTEE CONDITIONS
If the appliance shows defects as a result of faulty material and/or production during the period of
guarantee, we guarantee repair free of charge on condition that:
- The appliance has been used properly and for the purpose for which it has been intended.
- The appliance has not been tampered with, otherwise it is not maintainable.
- The purchase receipt shall be presented.
- The appliance showing a fair wear and tear shall not be covered by this guarantee.
Therefore, any part that could be accidentally broken or having visible signs of use in consumable
products (such as lamps, batteries, heating elements…) the aesthetic parts are excluded from the
guarantee, and any defect whatsoever resulting from non-respect of the rules for use, negligence in
usage and/or maintenance of the appliance, carelessness, wrong or improper installation, damage
during transport and any other damage not attributable the supplier.
For every defect that could not be repaired within the guarantee period, the appliance will be repla-
ced free of charge.
In any case, if the part to be replaced for defect, breakage or malfunction is an accessory and/or a
detachable part of the product, Beper reserves the right to replace only the very part in question and
not the entire product
TECHNICAL ASSISTANCE
Even after the guarantee period we will always pay attention to repairs for defected appliances.
For technical assistance and/or repairs after the guarantee period you can directly contact the below
address:
CONTACT YOUR DISTRIBUTOR IN YOUR COUNTRY OR ATER SALES DEPARTMENT BEPER.
E-MAIL assistenza@beper.com WHICH WILL FORWARD YOUR ENQUIRIES TO YOUR DISTRI-
BUTOR.

ES
17
Cuiseur à vapeur Manuel d’instructions
FR
PRECAUTIONS GENERALES
LIRE ATTENTIVEMENT LES INSTRUCTIONS SUIVANTES AVANT
LA PREMIERE UTILISATION DE L’APPAREIL.
Avant et durant l’utilisation de cet appareil il est nécessaire de suivre
précautions élémentaires suivantes.
Après avoir enlever l’emballage, s’assurer de l’intégrité de l’appareil.
En cas de doute ne pas utiliser l’appareil et s’adresser à un pro-
fessionnel qualié. Les éléments d’emballage (sachets plastique,
polystyrène, etc.) ne doivent pas être laissés à la portée des enfants,
car potentiellement dangereux.
Il est recommandé de ne pas jeter les éléments d’emballage dans les
déchets ménagers, mais de les déposer dans les centres de traite-
ment des déchets appropriés, en demandant éventuellement conseil
au gérant du centre de sa commune de résidence.
Toujours s’assurer que la tension électrique soit la même que cel-
le indiquée sur l’étiquette des données techniques et que le réseau
électrique soit compatible avec la puissance de l’appareil.
En cas d’incompatibilité entre la prise électrique murale et celle de
l’appareil faire changer la prise de l’appareil par un professionnel
qualié. Ce dernier devra s’assurer que la section des câbles de la
prise soit adaptée à la puissance absorbée par l’appareil.
Ne jamais tirer sur le câble d’alimentation pour débrancher la prise
électrique.
S’assurer que le câble n’entre pas en contact avec des supercies
chaudes ou coupantes.
Ne pas utiliser l’appareil si le câble d’alimentation est abîmé.
Si le câble d’alimentation est endommagé, pour éviter tout risque, il
devra être substitué par le constructeur, par son service d’assistance
technique ou toute autre personne de même qualication.
Brancher l’appareil exclusivement sur une prise de courant alterné.
Il est en général déconseiller d’utiliser des adaptateurs, prises mul-
tiples et/ou rallonges. En cas de nécessité, utiliser seulement des
adaptateurs ou rallonges conformes aux normes de sécurité en vi-
gueur.
Cet appareil ne devra être utilisé que pour l’usage pour lequel il a été
conçu.
Tout autre usage sera considéré comme inapproprié et donc dange-
reux, et engendrera l’annulation de la garantie.

18
Cuiseur à vapeur Manuel d’instructions
Le constructeur ne peut être tenu pour responsable en cas de dom-
mages causés par une utilisation incorrecte, inappropriée et dérai-
sonnable.
Pour éviter tout risque d’échauffement il est recommandé de dérouler
entièrement le câble d’alimentation et de débrancher l’appareil de la
prise de courant en cas d’inutilisation.
Avant d’effectuer toute opération de nettoyage ou entretien, débran-
cher l’appareil de la prise de courant électrique.
Ne jamais immerger l’appareil dans l’eau ou d’autres liquides.
Ne pas toucher l’appareil avec les mains et pieds mouillés ou humi-
des.
Ne pas utiliser l’appareil si vous êtes pieds nus.
Ne pas laisser l’appareil exposé aux agents atmosphériques comme
la pluie, le soleil …
Ne pas laisser l’appareil près d’une source de chaleur (ex. Radiateur)
Ne pas laisser les enfants, les personnes avec des capacités physi-
ques, sensorielles ou mentales réduites, ou manquant d’expérience
ou de connaissance technique, utiliser cet appareil sans surveillance
S’assurer que les enfants ne jouent pas avec cet appareil.
DÈS LORS QUE L’APPAREIL DOIT ÊTRE DÉTRUIT, IL
EST RECOMMANDÉ DE COUPER LE CÂBLE D’ALI-
MENTATION, ET DE RETIRER TOUTES LES PARTIES
SUSCEPTIBLES DE PRÉSENTER UN QUELCONQUE
DANGER, EN PARTICULIER POUR LES ENFANTS
QUI POURRAIENT UTILISER CET APPAREIL COMME
UN JEU.
DESCRIPTION DU PRODUIT
1. Couvercle
2. Ramasse-gouttes
3. Récipient de riz
4. Indicateur du niveau d’eau
5. Récipient supérieur
6. Récipient intermédiaire
7. Récipient Inférieur
8. Réservoir
9. Panneau de contrôle

ES
19
Cuiseur à vapeur Manuel d’instructions
FR
PANNEAU DE CONTRÔLE
1. On/Off : Pour allumer et éteindre la cocotte-minute
2. Mode : Appuyer sur tel pulsant pour sélectionner le programme désiré (5 programmes);
3. “+/-“: Pour établir le temps de cuisson à vapeur de l’aliment (max 90 minutes)
4. Hr/min : La cocotte-minute a la fonction d’allumage automatique ; appuyer tel pulsant pour chan-
ger «d’heures» à «minutes» et pour établir le temps d’allumage automatique
5. Écran : il indique la modalité de fonctionnement et le temps.
AVANT LA PREMIÈRE UTILISATION
Avant d’utiliser la cocotte-minute pour la première fois, nous vous prions de la nettoyer complète-
ment, de mettre les accessoires, tels que les récipients pour la cuisson à vapeur, le ramasse-
gouttes, le couvercle, etc…dans de l’eau et du détergent pour la vaisselle, et de les laver donc
méticuleusement. Ensuite, remplir le réservoir avec de l’eau, jusqu’à atteindre le niveau le plus haut.
Assembler tous les éléments de la cocotte-minute. Les récipients sont énumérés de 1 à 3 et ils sont
positionnés dans cet ordre (1 en bas ; 2 au milieu ; 3 en haut).
Actionner la cocotte-minute et la faire fonctionner à vide, après jeter l’eau.
Note : Assembler tous les éléments, positionner le ramasse-gouttes dans le réservoir et s’assurer
qu’il soit xé dans la position correcte et qu’il soit sur une position plate. Pendant l’utilisation, s’as-
surer que le niveau d’eau du réservoir se positionne entre le niveau de référence maximum et celui
minimum. On vous rappelle en outre de ne jamais mettre le réservoir et la base de la cocotte-minute
dans de l’eau, avec l’intention de les nettoyer.
UTILISATION DE LA COCOTTE-MINUTE
1. Positionner la cocotte-minute sur une supercie plate et stable.
2. Remplir le réservoir avec beaucoup d’eau en fonction du type d’aliment et de la quantité du
même. Si l’aliment inséré nécessite une cuisson à vapeur pour un temps compris entre 15 et 60
minutes, remplir le réservoir d’eau jusqu’à l’obtention du niveau de référence maximum : dans le cas
où le temps de cuisson soit inférieur à 15 minutes remplir le réservoir d’eau de façon à rejoindre le
niveau de référence minimum. Si la cocotte-minute s’arrête en produisant de la vapeur ou si le taux
de vapeur est bas avant que l’aliment soit prêt, on devrait ajouter de l’eau dans le réservoir.
NOTE :
1). Ne pas ajouter de sel, poivre, épices, essence, vin ou d’autres types de liquide dans l’eau (pris
à partir du robinet) et placé dans le réservoir.
2). Dans l’utilisation de l’électroménager, s’assurer que le niveau d’eau soit entre le maximum et
le minimum.
3. L’électroménager peut être utilisé selon les trois façons :
1). En utilisant seulement le récipient inférieur de la cocotte-minute : positionner l’aliment dans le
récipient inférieur de la cocotte-minute et ensuite le tout sur la base de la cocotte-minute.

20
Cuiseur à vapeur Manuel d’instructions
2). En utilisant les trois récipients de la cocotte-minute ensemble : positionner chaque récipient de
la cocotte-minute dans la correcte position, en fonction de la numération indiquée. Nous vous prions
de maintenir l’ordre décrit, car en cas contraire les récipients de la cocotte-minute ne se positionnent
pas sur les plans.
3). En utilisant deux récipients : seulement le récipient intermédiaire de la cocotte-minute peut être
xé au récipient inférieur de la même.
NOTE : Pendant la cuisson à vapeur des aliments avec deux ou trois récipients, l’aliment en cuis-
son dans le récipient inférieur est cuit plus rapidement que celui placé dans un récipient supérieur ;
on pourrait donc placer les aliments caractérisés par une cuisson plus difcile dans le récipient
Inférieur.
4. Couvrir avec le couvercle de la cocotte-minute.
5. Insérer la che dans la prise électrique.
NOTE : Ne pas actionner la cocotte-minute si les récipients ou le couvercle ne sont pas dans leur
position.
6. En insérant la prise de courant, on entendra un long signale sonore, l’écran montrera “0 :00”
après une seconde de temps et seulement le pulsant «Mode» pourra être activé.
7. Donc en appuyant le pulsant «Mode», l’écran montrera à plusieurs reprises les programmes : a.
pain cuit à vapeur ; b. riz cuit à vapeur ; c. poisson cuit à vapeur ; d. viande rouge ou poulet cuits
à vapeur ; e. légumes à vapeur. Donc sélectionner le programme que vous préférez, l’écran LCD
montrera le temps de cuisson prédéni pour tel programme, lequel pourra être modié en appuyant
sur les pulsants “+” e “-“.
8. La cocotte-minute à une fonction automatique de début d’activité et le temps maximum de retard
dans la programmation de tel début est de 12 heures et 59 minutes. Si l’on ne veut pas commencer
l’opération de cuisson à vapeur immédiatement, il est donc possible de xer un début automatique
en appuyant sur le pulsant « Min » comme ci-dessous.
Par exemple, pour établir un début de l’opération de cuisson après 2 heures et 30 minutes :
1) Effectuez les phases suivantes de 1 à 8, appuyez sur le pulsant « Min » une fois et un icone d’a-
larme apparaîtra à la gauche de l’écran, alors que un « 00 » commencera à clignoter.
2) Changer « 00 » avec « 30 » en appuyant les pulsants « + » et « -» ; appuyer ensuite de nouveau
le pulsant « Min » et ainsi commencera à clignoter le « 0 ». Changer donc « 0 » avec « 2 » en appu-
yant de nouveau sur les pulsants « + » et « -» et conrmer ensuite le choix avec le pulsant « Min ».
3). En appuyant sur le pulsant « On/Off », on entendre un long signale sonore. Ensuite, l’indica-
teur clignotera, alors que l’écran LCD indiquera le compte à rebours. Quand le temps sera épuisé
et quand on arrivera à « 00 », l’icône d’alarme disparaîtra, et s’arrêtera de clignoter et, de suite, la
cocotte-minute commencera à travailler.
4). Quand l’opération de la cocotte-minute est terminée, un son sera diffusé.
NOTE : Le temps minimum de l’opération de chaque modalité est prédéni, le maximum est de 90
minutes. Pendant chaque opération, il est possible d’annuler la conguration choisie en appuyant
sur le pulsant « On/Off » pour 2 secondes.
Annulation d’un programme de début automatique : Appuyer sur le pulsant «On/Off » pour 2 se-
condes, on entendra un long signale sonore ; donc l’icône d’alarme disparaîtra, le temps retournera
à zéro et toutes les formulations choisies auparavant seront annulées.
9. Pendant l’opération de cuisson, ne pas toucher la base de la cocotte-minute, le récipient de riz
et les récipients de la cocotte-minute, en n’oubliant jamais d’utiliser des gants lorsque l’on utilise la
cocotte-minute.
10. Après avoir terminé la cuisson à vapeur, débrancher la che de l’électroménager de la prise
électrique et laisser qu’elle se refroidisse complètement, avant de procéder à l’extraction du réser-
voir.
Table of contents
Languages:
Other Beper Electric Steamer manuals