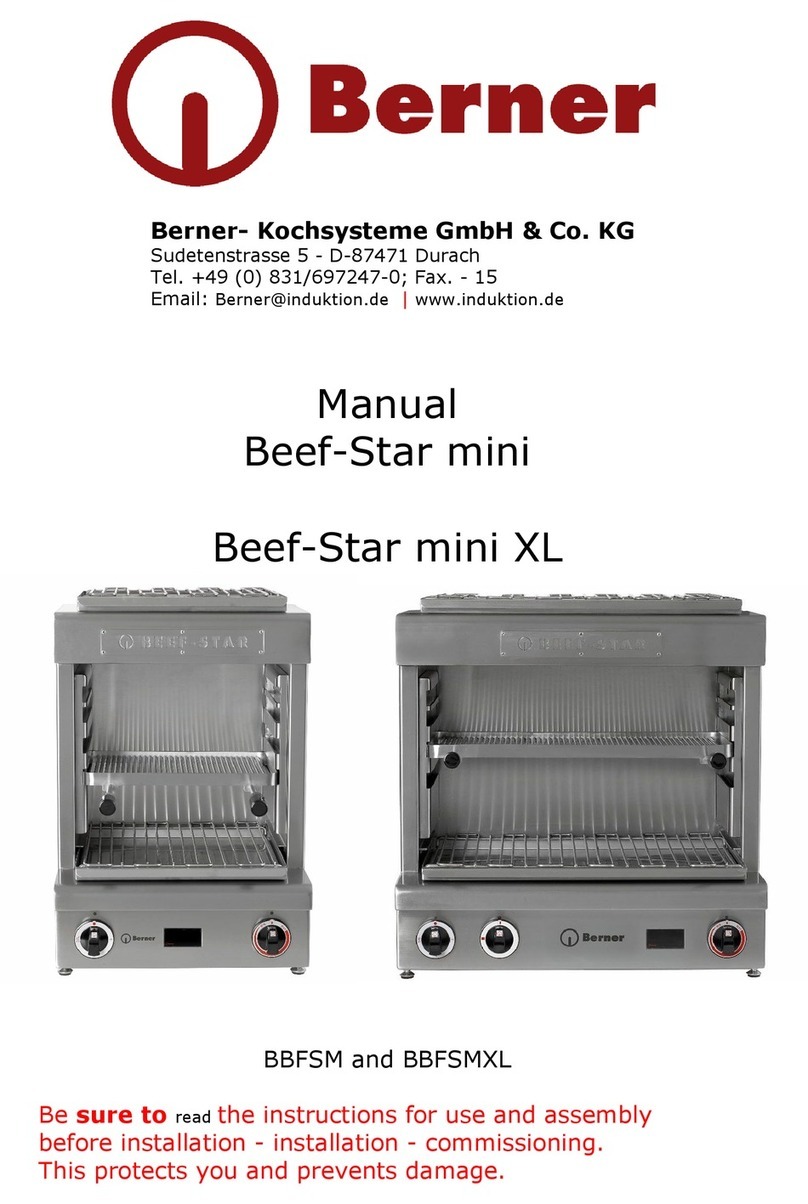
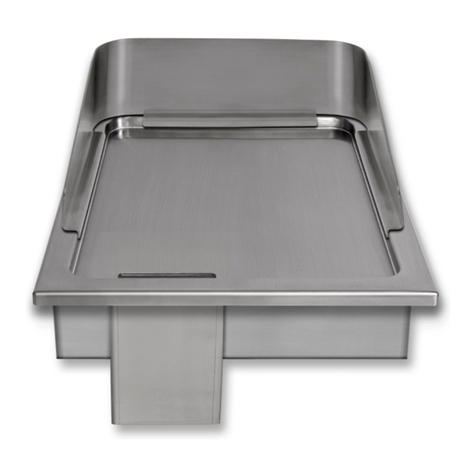
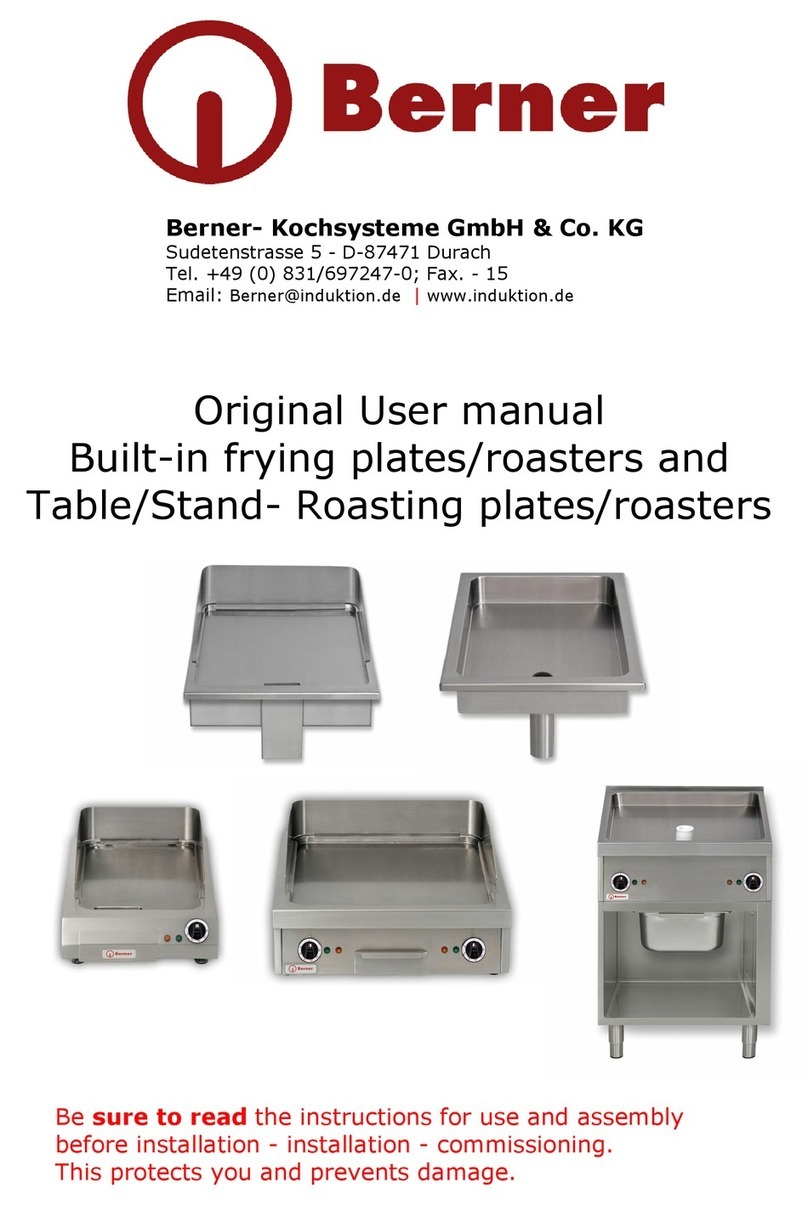
Berner BGA40 Guide

Operation and instruction manual for
built-in, table top and free standing
griddles, bratt pans and teppanyaki
It is absolutely mandatory to carefully read this operation and
instruction manual BEFORE mounting – installation – usage of
the unit. his will avoid risks of damage to you and the unit.
Berner
-
Kochsysteme GmbH & Co. KG
Sudetenstrasse 5 – D-87471 Durach
el. +49 (0) 831/697247-0; Fax. - 15
E-Mail:
Berner@induktion.de
|
www.induktion.de

Page 1 of 22 17.07.2014
Ver. 1.4 © Berner Kochsysteme 2016
Summary
Summary ....................................................................................................................1
Security indications ......................................................................................................4
Security regulations ......................................................................................................5
Description of danger symbols .......................................................................................5
Risks of the non-observance of the security regulations ....................................................5
Safe usage ..................................................................................................................5
Improper usage ...........................................................................................................6
Modifications / usage of spare parts ................................................................................6
General .......................................................................................................................6
Application ..................................................................................................................6
Description of the product .............................................................................................6
Products ......................................................................................................................6
Standard models ..........................................................................................................6
Models with electronic controls (ESRK) ............................................................................7
Models with electronic controls through digital touch panel (ESR B) ...................................7
echnical data ..............................................................................................................7
Operation and control ...................................................................................................7
Operation and control with electronic control ...................................................................7
Functional conditions ....................................................................................................7
Electrical data ..............................................................................................................7
Unit with thermostat (3,0 kW - 3,5 kW) ..........................................................................7
Unit with thermostat (4,5 kW - 19,5 kW) ........................................................................7
Unit with electronic controls (4,5 kW- 19,5 kW) ...............................................................8
Operation ....................................................................................................................8
hermostat knob ..........................................................................................................8
Potentiometer (ESRK) ...................................................................................................8
Electronic control with potentiometer and digital display with 4 digits .................................8
Digits of the electronic touch control panel ......................................................................9
Heating situations (mode digit INAC IVE) ........................................................................9
Mode digit ................................................................................................................. 10
Heating situations (mode digit AC IVE) ......................................................................... 10
Indication of residual heat ........................................................................................... 10
Functionality test ........................................................................................................ 11
For standard models ................................................................................................... 11
For models with electronic control with potentiometer and digital display with 4 digits (ESRK)11
For models with electronic control and digital touch control panel (ESR B) ........................ 11
Operation .................................................................................................................. 11
Cooking process ......................................................................................................... 11
Decommissioning ....................................................................................................... 11
Error detection ........................................................................................................... 11
roubleshooting ......................................................................................................... 12

Page 2 of 22 17.07.2014
Ver. 1.4 © Berner Kochsysteme 2016
When the security thermostat intervenes ...................................................................... 12
Status messagges and error codes ............................................................................... 13
Preparation of the cooking surface ................................................................................ 13
Cleaning .................................................................................................................... 14
Guarantee ................................................................................................................. 14
Repair during guarantee period .................................................................................... 14
Maintenance .............................................................................................................. 14
Disposal .................................................................................................................... 14
Technical documentation ......................................................................................... 15
echnical documentation II .......................................................................................... 15
Explanation ............................................................................................................... 15
Potentiometer operation for models with electronic control .............................................. 15
Optional .................................................................................................................... 16
Built-in instructions for griddles, bratt pans and ............................................................. 16
teppanyaki
................................................................................................................................ 16
Absolutely observe and carefully follow the .................................................................... 17
following guidelines for the built-in models .................................................................... 17
Built-in instructions with frame .................................................................................... 18
(Ver. A) of the digital touch panel ................................................................................. 18
Built-in instructions with frame .................................................................................... 19

Page 3 of 22 17.07.2014
Ver. 1.4 © Berner Kochsysteme 2016
(Ver. A2) of the digital touch panel ............................................................................... 19
Built-in instructions for smooth surface ......................................................................... 20
(Ver. B) of the digital touch panel ................................................................................. 20
Built-in instructions for smooth surface ......................................................................... 21
(Ver. B) of the digital display with 4 digits ..................................................................... 21

Page 4 of 22 17.07.2014
Ver. 1.4 © Berner Kochsysteme 2016
Security indications
he present operation and instruction manual must be read carefully and
completely. Keep the manual for future use by you or by a future owner. Check
the unit after unpacking. If damaged, do not connect to the mains/do not use.
ake written note and pictures of the damage ad contact technical assistance,
otherwise guarantee will be voided. Mounting/installation of the unit must be
made according to and following the indications of the present manual. he unit must be
used only for grilling and frying of food products on its surface. Surveillance during operation
must be guaranteed. Only use in interior, closed environments, unit is not suitable for
external use. Do not use with plastic containers or similar accessories as they could overheat
and/or melt. he unit is not supposed to be used with an external timer or a remote control.
-
he unit and the cooking surface as well as the surroundings of the unit get hot. Never
put any flammable objects in the surface. Never store flammable objects nearby or on top
of the unit.
Danger o ire !
-
Hot oil or grease catches fire easily. Never leave hot oil/grease unattended. Never try to
extinguish a fire with water, use a fire blanket, a lid or similar to choke the fire. urn off
the unit and completely extinguish the fire.
-
he cooking surface of the unit gets really hot. Never put or store flammable goods (spray
cans !) on or near the unit.
-
he unit must be installed or positioned on top of inflammable work tops only.
Risk o burns !
-
ake care of the high temperature of the cooking surface, never touch it.
It may cause severe burning.
-
he unit can get hot, never touch the surroundings of the unit and keep children away.
-
If the unit works and heats up, but the display is turned off/the signal lamps are not lit:
Disconnect from mains and contact technical assistance.
-
Metal objects can get hot on the surface of the unit, never put metal objects like knives,
forks, spoons or lids on the unit.
-
urn off the unit through the main switch after every use, in order to save energy and to
avoid the risk of burns.
Electric shock hazard!
-
Incorrect repairs are dangerous. Only an authorized customer service technician may carry
out repairs or replace damaged power cables. If the unit is out of order, disconnect mains
and contact technical assistance.
-
Penetrating moisture can cause an electric shock. Never use high pressure cleaners or
steam cleaners.
-
A defective unit can cause an electric shock. Never turn “on” a defective unit. Disconnect
from mains and contact technical assistance.
Attention !
-
Do not use rough detergents and abrasive sponges, as they can scratch the unit.
-
Do not use hard or pointed objects on the surface, as it may get damaged, especially on
nickel-chromed surfaces.
-
Aluminium or plastic containers could melt if put on the surface of the unit. Never use the
surface as a work top.

Page 5 of 22 17.07.2014
Ver. 1.4 © Berner Kochsysteme 2016
Security regulations
Description of danger symbols
General danger symbol
Non observance means danger ( risk o injuries )
his symbol means danger.
his symbol means dangerous voltage.
(Symbol 5036 of IEC 60417-1)
his symbol means hot surface .
BGV A8, ASR A1.3 and DIN 4844
The danger symbols that are applied directly to the unit must be care ully
respected and their readability must be ensured at all times.
Risks of the non-observance of the security regulations
Danger for people, ambient and the unit itself are caused if the security regulations are not
observed. If the security regulations are not observed, eventual claims for damages will be
rejected.
Details o the risks o the non-observance
(Examples):
- Danger to people due to electrical causes
- Danger to people due to overheated parts
Safe usage
he security regulations of the present manual, the local and national electrical regulations as
well as the work security regulations and the internal work, usage and security regulations
from the employer must be thoroughly respected and followed at all times.
-
Pay attention to hot food and liquids during the cooking process.
-
ATTENTION: ake care of the potentially slippery floor around the unit, caused by the
cooking processes. here is a serious risk of slipping and falling.
-
Never use the surface as a work top, not even temporarily!
-
During usage, also the metallic objects worn by the operator could heat up, if kept close to
the cooking surface.
-
urn off the unit through the main switch after every use, in order to save energy and to
avoid the risk of burns.
Attention
Improper usage can cause
injuries or damage!
Attention
Fully read and ollow the operation and
instruction manual be ore installation or
usage o the unit.

Page 6 of 22 17.07.2014
Ver. 1.4 © Berner Kochsysteme 2016
Improper usage
he correct functioning of the unit can be guaranteed only through proper usage. he
indicated maximum levels of the technical data must not be exceed or fall below under no
circumstances. Improper usage could void the OEM guarantee.
Modifications / usage of spare parts
Please contact the OEM-manufacturer if you intend to modify the unit. o ensure security of
the unit, please use only original spare parts and accessories from the OEM-manufacturer.
During repairs and test runs, please make sure the unit is properly standing on a
secure sur ace.
General
his operation and instruction manual contains important information regarding mounting,
installation and usage of the unit that need to be respected. It must be read carefully and
completely be ore installation and usage by the installer and also all operation personnel.
Keep this manual at hand for future consultations!
Application
he unit has been conceived for the grilling, frying and keeping warm of food products on the
cooking surface. Any other use is considered improper and could void the OEM guarantee.
Description o the product
Products
Table top griddles: BGA40; BGA40S; BGAR40; BGAR40S; BGA50; BGA60; BGA60H; BGAR60;
BGA80; BGA80H; BGA100; BGA100H; BGA40/45; BGA60/45; BGA80/45;
BGAX60C; BGAX120C; BGAX140C
System 60/20: BGAH40; BGAHS40; BGAH40R; BGAHS40R; BGAH50; BGAH60; BGAH60G;
BGAH60H; BGAH60R; BGAH80; BGAH80H; BGAH100; BGAH100H;
BGAH40 M; BGAH40 ; BGAH60
System 70/20: BGA40K H; BGA60K H; BGA80K H
System 70: BGDS40; BGDS40E; BGDS40R; BGDS40RE; BGD50; BGD50E; BGD60; BGD60E;
BGD60H; BGD60HE; BGD60R; BGD60RE; BGD80; BGD80E; BGD80H; BGD80HE; BGD100;
BGD100E; BGD100H; BGD100HE
BGHD40 ; BGHD40 E; BGHD60 ; BGHD60 E; BGH80 ; BGHD80 E;
BGAD40; BGAD40S; BGAD40R; BGADS40R; BGAD50; BGAD60; BGAD60G; BGAD60H;
BGAD60R; BGAD80; BGAD80H; BGAD100; BGAD100H;
BGAD40 ; BGAD60
Built-in griddles: BGE40; BGER40; BGE50; BGE60; BGEG60; BGEH60; BGER60; BGE80;
BGEH80; BGE100; BGEH100; BGE40M; BGE60M; BGE80M; BGE970;
BGE40C; BGE50C; BGE60C; BGE80C; BGE100C; BGE 60C; BGE 120C; BGE 140C
Built-in bratt pans: BBE40; BBE60; BBE80; BBE80/45; BBE1-100; BBE1-150; BBE1-200;
BBE2-100; BBE2-150; BBE2-200
*EOH, *ESRK, *ESR B, *= optional features
Standard models
-
Compact modules
-
Easy operation through thermostat
-
Usage security ensured through different protection features
Tmax o the models vary rom 60 - 250°C (chrome-plated sur ace) up to 60 – 300°C
(steel or compound sur ace).
Attention! Before cleaning or repairing the unit, it must be completely disconnected from
mains (pull the plug).

Page 7 of 22 17.07.2014
Ver. 1.4 © Berner Kochsysteme 2016
Models with electronic controls (ESRK)
-
Easy operation through potentiometer
-
Electronic setting and control of the temperature
-
Usage security ensured through different protection features
Models with electronic controls through digital touch panel (ESR B)
-
Easy and ergonomic operation through touch control panel
-
Electronic setting and control of the temperature
-
Usage security ensured through different protection features
Technical data
Operation and control
Signal lamp „Operation“ green Built-in griddle: ~230V
Table top/ ree st. griddle: ~400V
Signal lamp „Heating up ON“
yellow
Built-in griddle: ~230V
Table top/ ree st. griddle: ~400V
Operation and control with electronic control
LED „Operation“ 2,2V (green) only griddles with ESRK
Potentiometer 0Ohm – 10kOhm
Digital display with 4 digits „Power level and error codes“(ESRK) red digits
Digital display with 4 digits „Power level and error codes“(ESRTB) red digits
Functional conditions
o
max. tolerance of the mains voltage/nominal voltage +5%/-10%
o
Frequency 50 / 60 Hz
o
Protection class IP 11
Installation environment
-
max. environmental temperature
storage >-20°C to +70°C in function >+5°C to +50°C
-
max. relative humidity
storage > 10% to 90% in function > 30% to 90%
Electrical data
Unit with thermostat (3,0 kW - 3,5 kW)
Single phase (Tension 230Volt +5%/-10%)
El. Connection Colour Frequency Fuse
Phase Brown, black or 1 50 Hz / 60 Hz -
N Blue or 2
PE Green/yellow
Unit with thermostat (4,5 kW - 19,5 kW)
Three phase (Tension 400Volt +5%/-10%)
El. Connection Colour Frequency Fuse
Phase brown L1, black L2, grey
L3 or 1, 2, 3
50 Hz / 60 Hz B6A
N blue or 4
PE Green/yellow

Page 8 of 22 17.07.2014
Ver. 1.4 © Berner Kochsysteme 2016
Unit with electronic controls (4,5 kW- 19,5 kW)
Three phase (Tension 400Volt +5%/-10%)
El. Connection Colour Frequency Fuse
Phase brown L1, black L2, grey
L3 or 1, 2, 3
50 Hz / 60 Hz F6,3A
fast
N blue or 4
PE Green/yellow
Operation
hermostat knob
he position of the knob towards the “0” mark (o) determines the actual selection.
Position OFF: Position ON:
`0` towards the mark (ο) Any position between 60 and 300 towards the “0”
mark.
Signal lamps green and yellow OFF Signal lamps green and yellow ON
he yellow signal lamp turns off, once the selected
temperature is reached.
° °
Potentiometer (ESRK)
Position OFF: Position ON:
`0` towards the mark (ο) Any position between “MIN” and “MAX” towards the
“0” mark
Signal lamp green OFF Signal lamp green ON
° °
Electronic control with potentiometer and digital display with 4 digits
he temperature can be selected, using the knob, between 60 up to 250/300°C ( max
according to the exact model). he display will show as follows:
Selected temp 70°C, actual temp. is too low, symbol appears.
Heating ON (dot on the right of the symbol)
Actual temp. 25°C (appears every 10“ for 2“), actual temp. is too
low, symbol appears. Heating ON (dot on the right of the
symbol)
Selected temp. 70°C, actual temp. is within +/- 2°C, symbol
appears. Heating OFF
Actual temp. 105°C, actual temp. too high, symbol appears.
Heating OFF
H

Page 9 of 22 17.07.2014
Ver. 1.4 © Berner Kochsysteme 2016
Electronic control through digital touch panel (ESR B)
Digits of the electronic touch control panel
Heating situations (mode digit INAC IVE)
Heating situation "n"
he selected temperature has not yet been
reached (actual temp. too low).
Heating ON
Heating situation "H"
he selected temperature has been reached
(actual temp. = selected temp. +/- 2C°).
he unit will keep the selected temperature.
Heating situation "u"
he actual temperature is higher than the
selected one.
Heating OFF
O/I (ON / OFF)
digit
Display for the indication of the
heating situation and eventual
error codes
Digit to raise the temperature
selection
Digit to lower the temperature
selection
Display for the indication of the
temperature (actual or selected)
Mode digit to switch
between standby /operation
temperature
selection

Page 10 of 22 17.07.2014
Ver. 1.4 © Berner Kochsysteme 2016
Mode digit
If you keep touching the mode digit for at least 3 seconds, the display will show,
alternatively, two different temperature selections that can be programmed by the user itself
(i.e. standard operation temperature / standby temperature to save energy). he heating
situations will show in the display as follows " _ / ¯ / Ξ ".
Heating situations (mode digit AC IVE)
Heating situation "_"
he selected temperature has not yet been
reached (actual temp. too low).
Heating ON
Heating situation " Ξ "
he selected temperature has been reached
(actual temp. = selected temp. +/- 2C°).
he unit will keep the selected temperature.
Heating situation " ¯ "
he actual temperature is higher than the
selected one.
Heating OFF
Indication of residual heat
If the unit is turned OFF, but there’s residual heat
(≥ 45C°) on the surface, the residual heat will
show in the display with the symbol " - ".

Page 11 of 22 17.07.2014
Ver. 1.4 © Berner Kochsysteme 2016
Attention
he cooking surface heats up very much.
o avoid risk of burns,
NEVER touch the cooking surface.
Functionality test
Once the unit has been turned ON, the surface
will start to heat up and please proceed as
described further on. Select a temperature
using the knob or the touch control panel. Once
the unit reaches it, the temperature will be kept automatically until further selection.
For standard models
urn on the unit. he green signal lamp will light up. Select a temperature between 60 and
250/300°C ( max according to the exact model). he yellow signal lamp will light up until the
selected temperature has been reached.
For models with electronic control with potentiometer and digital display with 4 digits (ESRK)
urn on the unit. Select a temperature between 60 and 250/300°C ( max according to the
exact model), using the knob. he display will show, alternatively, the selected and actual
temperature with the indication of the heating situation (see previous pages).
For models with electronic control and digital touch control panel (ESR B)
urn on the unit. Select a temperature between 60 and 250/300°C ( max according to the
exact model), using the digits of the touch control panel. he display will show, alternatively,
the selected and actual temperature with the indication of the heating situation (see previous
pages).
If the digital display/touch control panel doesn’t light up, please check as follows:
- Is the unit connected to the mains correctly?
- Is the potentiometer in position ON / has the digit “O/I” on the touch control been
pressed and is the unit in position ON?
I the unit still doesn’t work, please turn to chapter “error detection /
troubleshooting”.
Operation
Cooking process
he unit is ready to use as soon as you turn it ON. he green signal lamp
indicates the functioning (mains) of the unit. he yellow signal lamp indicates
the functioning of the heating elements.
Attention: risk o burns!
position Min > minimum power level
position Max > maximum power level
Decommissioning
If the unit will not be used for a longer period, please pull the plug form the socket. Make
sure that no liquids can penetrate into the unit and never clean it with a water hose or
pressure cleaner.
Error detection
he unit must only be opened by trained and authorised personnel. Please stop any usage if
malfunctions occur or liquids are penetrated into the unit. urn it OFF immediately and pull
the plug from the socket. Never touch any part inside the unit.
Attention
Do not open the unit!
Dangerous voltage!
Attention! Before cleaning or repairing the unit, it must be completely disconnected from
mains (pull the plug).

Page 12 of 22 17.07.2014
Ver. 1.4 © Berner Kochsysteme 2016
Troubleshooting
When the security thermostat intervenes
able top unit:
Immediately disconnect the unit from mains and search for the cause. Remove fat drawer
and carefully lift the unit from the front. Unscrew the M8 screw at the centre of the bottom of
the unit. Insert the bottom part of a pencil in order to carefully press the red button and reset
the security thermostat. Place the M8 screw again and reposition the unit. A EN ION: the
reset button is delicate, if the security thermostat intervenes right after a reset, contact
technical assistance and do not use the unit.
Built-in unit:
Immediately disconnect the unit from mains and search for the cause. he security
thermostat usually is installed behind the face plate/control panel of the cabinet. Eventually
contact the wholesaler for technical assistance.
Important note for models with electronic control
he devices for the electronic control have to be installed in order for the ambient
temperature never to exceed 80°C.
Do not install directly underneath or in the immediate surroundings of the unit !
If the power cable gets damaged, it has to be replaced by an OEM-authorized and trained
technician, in order to avoid/limit any further damage to the unit.
De ect Possible cause Actions by operator
Unit doesn’t heat up.
Signal lamp doesn’t light up.
No mains power Is the unit connected to the mains power: Power
cable connected correctly? Main switch ON?
he security thermostat
intervened
If the security thermostat intervened, the cause
must be first established and the problem resolved
before resetting the same. o reset it, carefully
push the red button on the security thermostat.
he security thermostat
intervened
he security thermostat could also intervene if the
ambient temperature is below 0°C. o reset it, the
security thermostat must be heated up at least
20°C first.
Unit out of order Disconnect the unit from mains and get in contact
with technical assistance.
Insufficient heating.
Signal lamp lights up.
One phase is missing Check the fuses on the mains connection
hermostat or potentiometer out
of order
Disconnect the unit from mains and get in contact
with technical assistance.
Heating element out of order
No reaction to turning the knob
hermostat out of order
No reaction to turning the knob
Potentiometer out of order

Page 13 of 22 17.07.2014
Ver. 1.4 © Berner Kochsysteme 2016
Status messagges and error codes
Error code 1:
Potentiometer missing or out of order, value >1250 Ohm
Error code 2 4:
emperature cut-off or missing probe P 1000, value >300°C
Error code 3 5:
Short-circuit of P 1000 probe or value < -40°C
Error code 7:
Application missing
Preparation o the cooking sur ace
Before using the cooking surface, thoroughly clean it WI H WARM SOAPY WA ER !
Attention: Do NO use any specific cleaner!
Afterwards spill a good amount of oil, preferably peanut or various seed oil, and spread it on
the entire surface using a clean and soft cloth.
urn ON the unit and heat up to approx. 200°C and wait for the oil to turn yellowish (it
“sticks” to the surface. Move slightly over the layer with the spatula. Do this same procedure
three time, this will create a patina on the surface.
Please take the time of approx. one hour to do this procedure. Following that you will be able
to use the unit perfectly prepared. Our suggestion is to spill always some oil on the surface
before placing the food on it.
During operation please use the spatula we supplied together with the unit! Other
tools/products are not recommended and may not be appropriate!
During the usage of the unit, residues may build up on the surface that can be removed using
the spatula or the stainless steel cleaning sponge. In order to avoid the risk of burns, please
use the edge of the spatula to press the sponge towards the surface. Don’t use any water.
A reduced procedure of the preparation of the cooking surface should be done every day after
the last service.
Another suggestion in order to keep the cooking surface as clean as possible during usage:
each type of oil has a point of smoke (the temperature at which the oil “burns”, it
deteriorates ; usually between 180 and 220°C). According to the oil you use, keep the
temperature just below that point of smoke.
o clean the unit, turn it OFF as soon as possible after usage. With the surface still warm
(after 60-70 minutes approx.), clean it with sponge and spatula, just like during the usage,
but this time spill a little water on the surface. Please repeat the initial procedure after drying
up thoroughly the surface.

Page 14 of 22 17.07.2014
Ver. 1.4 © Berner Kochsysteme 2016
Cleaning
List of actions according to the type of dirt:
Dirt type Cleaning action
Light dirt Stainless steel sponge with spatula, with
or without water
Consistent dirt Stainless steel sponge with spatula, with
water
Encrusted, caked dirt Let sit some water overnight, then use
stainless steel sponge with spatula, with
some water. Eventually repeat. A ceran
glass scraper could also be used for
removing caked dirt (take care on hard-
chromed surfaces !)
If you use specific detergents, please make sure to remove all residues through a soft and
wet cloth or tissue (scottex ®), as they can corrode the cooking surface. A regular cleaning
together with care and maintenance of the unit are part of the proper usage of the unit.
Guarantee
Buying this BERNER product, you are now owner of a high quality product. As OEM-
manufacturers we guarantee the product for 12 months after date of purchase.
Repair during guarantee period
Please contact your wholesaler/distributor for technical assistance.
Maintenance
he user must ensure that all components that are relevant for security are functional at all
times.
Disposal
At the end of the product life cycle, the unit must be disposed of correctly.
Avoid misuse:
he unit must not be used by untrained operators. Units ready to be disposed of shall not be
taken into function again. he unit is composed of commercial electric, electromechanical and
electronic parts. No batteries are installed/used within the unit. he responsibility for the
correct and secure disposal is on the user solely.
Attention! Before cleaning or repairing the unit, it must be completely disconnected from
mains (pull the plug).
Absolutely avoid penetration o any liquid in the unit !
Attention! Before cleaning or repairing the unit, it must be completely disconnected from
mains (pull the plug).
Attention
Do not open the unit!
Dangerous voltage!

Page 15 of 22 17.07.2014
Ver. 1.4 © Berner Kochsysteme 2016
Note or disposal
Units to be disposed of can be sent back to the OEM-manufacturer for
disposal from our side. Only sufficiently stamped parcels are accepted.
Delivery address:
Technical documentation
Built-in drawings, spare part lists, operation manuals and CE-declarations can be retrieved
here:
www.induktion.de www.induktion.de/download.html
Technical documentation II
Explanation
Potentiometer operation for models with electronic control
he potentiometer controls the power infinitely and linearly (it doesn’t turn on and off at
intervals, but works like the dimmer switch in your home lighting system), connected and in
combination with a separate electronic switch board containing semiconductors and other
components. he potentiometer is linked to an “O/I” switch, just like in an induction cook
top.
he main advantages
Our griddles, bratt pans and teppanyakis have been tested thoroughly both in laboratories
and on the field and have proven their value, quality and reliability:
• Continuous regulation of the temperature
• Highly flexible thanks to fast heating up and great heat retention
• Precise temperature setting suitable for every cooking process, from strong heat for
grilling and frying down to soft heat for keeping warm
• Low power consumption thanks to power limitation on the minimum setting (stand-by)
• Overheat protection for every single zone
Perfect solution for the professional operator
he units are perfect for the preparation of fast food dishes as well as a la carte meals. he
temperature setting allows precise regulation of the requested cooking process in order to
obtain a perfect food preparation. Also low power settings are easy and ensure the
achievement of good results in delicate cooking processes.
Function of the security thermostat
Intervenes in case of extreme temperatures and in different intervals, turning OFF the zones
in order to avoid damages to the cooking surface and the unit itself. Please never use the unit
at high temperatures and empty, if not needed, at least turn down the temperature setting.
Berner
-
Kochsysteme GmbH & Co. KG
Sudetenstrasse 5 – D - 87471 Durach
el. +49 (0) 831/697247-0; Fax. - 15
E-Mail:
Berner@induktion.de
|
www.induktion.de

Page 16 of 22 17.07.2014
Ver. 1.4 © Berner Kochsysteme 2016
Optional
- WS urning spatula
- RSE Set for care and cleaning
- AS eflon plug for griddle and teppanyaki
- AS110,160,200 eflon plug for bratt pan
- ESB Face plate / control panel
- EOH Preparation for energy optimisation
- AKS Silver coloured knob
- AKG Gold coloured knob
Built-in instructions or griddles, bratt pans and
teppanyaki
Stainless steel
work top
Unit to be built
-
in
Overhang of approx. 10-
12 mm

Page 17 of 22 17.07.2014
Ver. 1.4 © Berner Kochsysteme 2016
Absolutely observe and care ully ollow the
ollowing guidelines or the built-in models
o know the exact cut-out size of the opening on the stainless
steel worktop, please download and check the relative drawing on
http://www.technik.induktion.de/index.html, selecting the correct
and necessary model.
We suggest to prepare the opening with a small overhang of 10-12
mm height around the opening itself, in order to avoid any
penetration of liquids. Apply a continuous gasket of heat resistant
silicone (i.e. Pactan 6076, available through BERNER) and also
close the outside gap between unit and worktop with the same
silicone. Please also take into consideration the expansion of the
unit, that must be compensated (i.e. unit of 600 mm wide = up to
4 mm expansion; the wider the unit, the larger the expansion). If
not properly compensated, the expansion forces will affect the unit
and cracks and breaks of the frame or the soldered part could
occur.

Page 18 of 22 17.07.2014
Ver. 1.4 © Berner Kochsysteme 2016
Built-in instructions with rame
(Ver. A) of the digital touch panel
Electronic control mounted on frame with ceramic glass (creates a 2 mm step on the surface)
Following the instructions the reliable functioning and a long product life cycle are
guaranteed. Ignoring them you may void the guarantee.
Check the built-in versions on page 210 of the 2013 price list.

Page 19 of 22 17.07.2014
Ver. 1.4 © Berner Kochsysteme 2016
Built-in instructions with rame
(Ver. A2) of the digital touch panel
Electronic control mounted on frame with ceramic glass (creates a 2 mm step on the surface)
Following the instructions the reliable functioning and a long product life cycle are
guaranteed. Ignoring them you may void the guarantee.
Check the built-in versions on page 210 of the 2013 price list.
Other manuals for BGA40
1
This manual suits for next models
110
Table of contents
Other Berner Commercial Food Equipment manuals
Popular Commercial Food Equipment manuals by other brands

Blizzard
Blizzard BZ-BPB1500-7N Series Installation, operation & maintenance manual

American Eagle
American Eagle AE-VS12NH Operation manual

EFA
EFA 620 Original operating instructions

Buffalo
Buffalo FC258 instruction manual

Casselin
Casselin CBMES75 manual

Unox
Unox BakerLux Instructions for installation, use and maintenance manual

Middleby
Middleby CROWN FOOD Market Forge 30P-STEL Installation & operation manual

Polar Electro
Polar Electro UA017-A instruction manual

Gastrodomus
Gastrodomus TR 75/E Operating and maintenance manual

Iarp
Iarp GAMMA Series Use and maintenance

Hendi
Hendi 264409 user manual

Omcan
Omcan 10839 instruction manual