BIANCHI VENDING LEI200 User manual

MODEL / DESIGNATION: HL / 50xxxxxxKCRxx
LEI200
CERT. N° 9191.BVEN
UNI EN ISO 14001:2004
CERT. N° 9105 BNVD
UNI EN ISO 9001:2008
MANUALE USO E MANUTENZIONE Istruzioni originali
USE AND MAINTENANCE MANUAL Translations of the original instructions
MANUAL DE INSTALACION Y MANTENIMENTO Traducciones de las instrucciones originales
MANUEL D’EMPLOI ET ENTRETIEN Traductions des instructions originales
HANDBUCH FÜR GEBRAUCH UND WARTUNG Übersetzung der originalen Anweisungen
MANUAL DE USO E MANUTENÇÃO Traduções das Instruções originais

Additional information can be downloaded from the new Bianchi Industry web shop at:
http://bianchiindustry.aftersalestools.com
To access the download area a USERNAME and PASSWORD are necessary, which can be requested
directly on the site by clicking on “register”.
The rst installation and warranty spare parts forms can be downloaded at the corporate website
http://bianchiindustry.com/garanzia.php
Pour tout renseignement complémentaire, téléchargez les informations sur le nouveau portail
Bianchi Industry à l’adresse http://bianchiindustry.aftersalestools.com. Pour y accéder,
vous avez cependant besoin d’avoir un IDENTIFIANT et un MOT DE PASSE, que vous pouvez
être demandé directement à partir du portail en cliquant sur “enregistrer”.
Vous pouvez télécharger les formulaires de PREMIÈRE INSTALLATION et de PIÈCES DÉTA-
CHÉES SOUS GARANTIE sur le site institutionnel:
http://bianchiindustry.com/garanzia.php
Nähere Informationen können vom neuen Web-Shop-Bereich von Bianchi Industry unter folgender
Adresse heruntergeladen werden: http://bianchiindustry.aftersalestools.com
Für den Zugriff muss jedoch der Benutzer über eine USERNAME und ein PASSWORTS verfügen,
die direkt über das Portal durch Klicken auf „einloggen“ angefragt werden können.
Die Module für die erste Installation und für die Gewährleistungs-Ersatzteile können dagegen
von der institutionellen Webseite http://bianchiindustry.com/garanzia.php heruntergeladen
werden.
Maiores informações podem ser baixadas do novo portal da Bianchi Industry no endereço:
http://bianchiindustry.aftersalestools.com. Porém, para acessar ao mesmo é necessário
possuir um USERNAME e SENHA que você pode ser solicitado diretamente no portal, clicando
em “registrar”.
Por outro lado, os módulos de PRIMEIRA INSTALAÇÃO ePEÇAS DE REPOSIÇÃO EM GA-
RANTIA podem ser baixados do site institucional:
http://bianchiindustry.com/garanzia.php
ENGLISH
ESPAÑOL
FRANÇAIS
DEUTSCH
PORTUGUÊS
Otras informaciones se pueden descargar en el nuevo portal de Bianchi Industry en la dirección
http://bianchiindustry.aftersalestools.com.
Para acceder es necesario poseer un NOMBRE DE USUARIO yuna CONTRASEÑA que puede ser solici-
tada directamente desde el portal haciendo clic en “registrarse”.
Los módulos de PRIMERA INSTALACIÓN yREPUESTOS EN GARANTÍA se pueden descargar desde la
web institucional: http://bianchiindustry.com/garanzia.php
Maggiori informazioni si possono scaricare dalla nuova area Web shop di Bianchi Industry all’in-
dirizzo : http://bianchiindustry.aftersalestools.com
Per accedervi è però necessario essere in possesso di USERNAME e PASSWORD che possono
essere richiesti direttamente sul portale cliccando su “registrati”.
I moduli di prima installazione e ricambi di garanzia possono essere invece scaricati dal sito isti-
tuzionale http://bianchiindustry.com/garanzia.php

3
ITALIANO
CLASSIFICAZIONE / CLASSIFICATION
CLASIFICACIÓN / CLASSIFICATION
KLASSIFIKATION / CLASSIFICAÇÃO
Mod. LEI200
Modello / Model
Modelo / Modèle
Modell / Modelo
Linea Bar/Horeca
Bar/Horeca line
Línea Bar/Horeca
Ligne Bar/Horeca
Bar/Horeca-Linie
Linha Bar/Horeca
>>> HL
Linea caldo, famiglia LEI
Hot line, family LEI
Línea caliente, familia LEI
Ligne chaud, famille LEI
Linie heiß, Familie LEI
Linha quente, família LEI
Designazione/Designation
Denominación / Dénomination
Bestimmung / Designação
Versione famiglia
Range version
Versión familia
Version famille
Familienversion
Versão família
>>> 500
Table top LEI200, Semi automatica
Table top LEI200, Semi automatic
Table top LEI200, semi automática
Table top LEI200,
semi-automatique
Table top LEI200,
halbautomatische
Table top LEI200, semi-automática
502
Table top LEI200, Automatica-200 bicchieri
Table top LEI200, Automatic 200 cup
Table top LEI200, Automática 200 vaso
Table top LEI200, Automatique gobelet 200
Table top LEI200, Automatische 200 becher
Table top LEI200, Automática 200 copos
Caratteristiche tensione di alimentazione
Power supply carachteristics
Características tensión de alimentación
Caractéristiques tension d’alimentation
Versorgungsspannung
Características tensão dei alimentação
>>> 0 230V; 50Hz OR 2 220V; 50Hz OR 3 220-230V; 50Hz
OR 4 220 V ; 60Hz
Caratteristiche caldaia
Boiler caratheristics
Características caldera
Caractéristiques chaudière
Kesseleigenschaften
Características da caldeira
>>> ES
Monocaldaia Espresso
Espresso single boiler
Mono caldera Expreso
Chaudière individuelle Expresso
Einzelkessel Espresso
Mono caldeira Expresso
OR DS
Espresso + caldaia SMALL
Espresso + SMALL boiler
Expreso + Caldera SMALL
Expresso +
Chaudière SMALL
Espresso + Kessel SMALL
Expresso + Caldeira SMALL
OR PO
Caldaia instant (polisulfone)
Instant boiler
Caldera istantánea
Chaudière instantanée
Instant-Kessel
Caldeira instant
Gruppi macinadosatori installati
Installed coffee grinder groups
Grupos moledores dosicadores instalados
Groupe moulins doseurs installés
Installierte Dosierungsmühlengruppen
Conjuntos moinho dosadores instalados
>>> G1
Nr. 1 Gruppo
Nr. 1 Group
1 grupo
1 groupe
Nr. 1 Gruppe
1 Conjunto
OR --
NULL (solubile)
NULL (instant)
NULL (istantánea)
NULL (instantanée)
NULL (Instant)
NULL (instant)
Caratteristiche pulsantiera
Keyboard caratheristics
Características teclado
Caractéristiques clavier
Tastatur-Eigenschaften
Características da botoeira
>>> KC
Pulsantiera capacitiva st
Capacitive keyboard
Teclado capacitiva
Clavier capacitive
kapazitives Tastatur
Botoeira capacitiva
Alimentazione idrica
Water supply
Suministro de agua
Alimentation en eau
Wasserversorgung
Alimentação hídrica
>>> R
Rete idrica
Water mains
Red de suministro
Réseau général
Wassernetz
Rede hídrica
Predisposizione monitor
Monitor predisposition
Preparación del monitor
Préparation du moniteur
Monitor Vorbereitung
Preparação do monitor
MP
Monitor 7”
Monitor 7”
Monitor 7”
Moniteur 7”
Monitor 7”
Monitor 7”
OR -- NULL

4
ITALIANO
DICHIARAZIONE DI CONFORMITA’
La BIANCHI INDUSTRY S.p.A.
Corso Africa, 2/3/9 - 24040 Zingonia di VERDELLINO (BG) Italia
Dichiara sotto la propria responsabilità che la famiglia dei distributori automatici:
Marchi: BIANCHI INDUSTRY / BRASILIA
Fabbricante: BIANCHI INDUSTRY S.p.A.
Mod.: HL Des.: 50xyvwKCRz
x=0 o2 >>> S/Automatica o Automatica; y=0 o2 o3 o4 >>>tensione di alimentazione; v= ES oDS oPO >>> tipologia caldaia;
w=G1 o-- >>>n°/tipo gruppi macinadosatori; z=-- oMP >>> presenza monitor
Nome commerciale: LEI 200; LEI 200 Monitor Distributore semiautomatico di bevande calde
Anno di costruzione: 2017
FASCICOLO TECNICO costituito e custodito presso Ufcio Tecnico BIANCHI INDUSTRY Spa Sede.
E’ conforme ai Requisiti Essenziali delle Legislazioni/Direttive/Regolamenti di seguito indicati.
Direttiva 2014/35/UE (LVD) Concernente l’armonizzazione delle legislazioni degli Stati membri relative alla messa a disposizione sul mercato del materiale
elettrico destinato a essere adoperato entro taluni limiti di tensione.
Direttiva 2006/42/UE (MD) Requisiti essenziali di sicurezza e di tutela della salute relativi alla progettazione e alla costruzione delle macchine.
Direttiva 2014/30/UE (EMC) Concernente il ravvicinamento delle legislazioni degli Stati membri relative alla compatibilità elettromagnetica.
Le prove/veriche sono state eseguite in accordo alle vigenti Norme Armonizzate Europee.
SICUREZZA (LVD – MD) EN 60335-1:2012 +A11:2014 >>>
Sicurezza degli apparecchi elettrici d’uso domestico e similare - Norma generale.
EN 60335-2-75:2004+ A1:2005 +A11:2006 + A2:2008 +A12:2010 >>>
Norme particolari per distributori commerciali e apparecchi automatici per la vendita.
EN 62233:2008 >>>
Metodi di misurazione dei campi elettromagnetici di elettrodomestici e apparecchi simili per quanto riguarda l’esposizione umana.
EN ISO 11201:2010 + EN ISO 3744:2010 >>>
Misurazione del rumore acustico.
COMPATIBILITA’
ELETTROMAGNETICA (EMC):
EN 55014-1:2006 +A1:2009 +A2:2011 >>>
Limiti e metodi di misura delle caratteristiche di radiodisturbo degli apparecchi elettrodomestici, e similari a motore o termici,
degli utensili e degli apparecchi elettrici similari.
EN 55014-2:1997 +A1:2001 +A2:2008 >>>
Requisiti di immunità per apparecchi elettrodomestici, utensili e degli apparecchi elettrici similari.
EN 61000-3-2:2014 >>>
Limiti per le emissioni di corrente armonica (apparecchiature con corrente di ingresso <=16A per fase).
EN 61000-3-3:2013 >>>
Limitazione delle variazioni di tensioni, uttuazioni di tensione e del icker in sistemi di alimentazione in bassa tensione per
apparecchiature con corrente nominale <=16A per fase e non soggette ad allacciamento su condizione.
Idoneità dei materiali impiegati al contatto con sostanze alimentari.
Regolamento (UE) N. 1935/2004 Par-
lamento EU e Consiglio del 27/10/2004
Riguardante i materiali e gli oggetti destinati a venire a contatto con i prodotti alimentari.
Regolamento (UE) N. 10/2011
COMMISSIONE del 14/01/2011
Riguardante i materiali e gli oggetti di materia plastica destinati a venire a contatto con i prodotti alimentari e successivi ag-
giornamenti.
Regolamento (CE) N. 1895/2005
COMMISSIONE del 18/11/2005
Relativo alla restrizione dell’uso di alcuni derivati epossidici in materiali e oggetti destinati a entrare in contatto con prodotti
alimentari e successivi aggiornamenti.
Decreto Ministeriale del 21/03/1973
e successivi aggiornamenti
Disciplina igienica degli imballaggi, recipienti, utensili, destinati a venire in contatto con le sostanze alimentari o con sostanze
d’uso personale.
Completamento normativo Direttive Europee: 82/711/CEE, 85/572/CEE, 93/8/CEE, 97/48/CE, 2004/13/CE, 2004/19/CE, 2005/79/CE.
NOTA Utilizzo dei distributori automatici in oggetto di dichiarazione e relativi accessori secondo le procedure descritte nei manuali
d’uso e manutenzione.
Zingonia di Verdellino (BG), Gennaio 2017 Bianchi Industry SpA
President & CEO
Massimo Trapletti
Bianchi Industry SpA
President & CEO
Massimo Trapletti
DICHIARAZIONE DI CONFORMITA’
La BIANCHI INDUSTRY S.p.A.
Corso Africa, 2/3/9 - 24040 Zingonia di VERDELLINO (BG) Italia
Dichiara sotto la propria responsabilità che le famiglie di prodotto:
Distributori automatici di bevande calde e fredde
Distributori automatici a spirali per prodotti freddi
Macchine per caffè ad uso professionale
Marchi: BIANCHI INDUSTRY / BRASILIA
Fabbricante: BIANCHI INDUSTRY S.p.A.
Anno di costruzione: 2017
Sono conformi alla Direttiva: RoHS 2
RoHS 2 - Direttiva 2011/65/UE del Parlamento Europeo e del Consiglio del 8 giugno 2011, sulla restrizione dell’uso di determinate sostanze pericolose nelle apparecchiature
elettriche ed elettroniche (AEE).
Si dichiara inoltre che, dal 3 gennaio 2013, qualsiasi prodotto BIANCHI INDUSTRY S.p.A. immesso nello Spazio Economico Europeo (UE+Liechteinstein + Islanda + Norve-
gia) è conforme alla Direttiva RoHS 2, quindi non contiene sostanze con concentrazioni superiori ai limiti sotto elencati (*):
• Piombo [Pb] 0,1%
• Mercurio [Hg] 0,1%
• Cadmio [Cd] 0,01%
• Cromo esavalente [Cr(VI)] 0,1%
• Bifenili polibromurati [PBB] 0,1%
• Eteri di difenile polibromurato [PBDE] 0,1%
(*) Allegato II - Sostanze con restrizione di cui all’Articolo 4 (1) e valori di concentrazione massima tollerata,
in peso, di materiali omogenei.
Zingonia di Verdellino (BG), Gennaio 2017

5
ITALIANO
1.0 PREMESSA
I - Avvertenze per l’operatore
Questo distributore automatico è stato progettato e costruito nel pieno ri-
spetto delle normative vigenti concernenti la sicurezza e risulta essere sicuro
per le persone che seguano le istruzioni di caricamento e pulizia ordinaria
riportate in questo manuale.
L’utente non deve per alcun motivo rimuovere le protezioni che richie-
dano un utensile per essere asportate.
Alcune operazioni di manutenzione (da effettuarsi ad opera solamente di
tecnici specializzati ed indicate in questo manuale da un pittogramma appo-
sito) richiedono un deliberato aggiramento di alcune protezioni di sicurezza
del distributore.
Nel rispetto delle normative di sicurezza, alcune operazioni sono di esclu-
siva competenza del tecnico installatore e solo su specica autorizzazione
anche l’operatore addetto alla manutenzione ordinaria può avere accesso
ad operazioni speciche.
La conoscenza ed il rispetto assoluto, dal punto di vista tecnico delle av-
vertenze di sicurezza e degli avvisi di pericolo contenuti in questo manuale,
costituiscono il presupposto per l’esecuzione, in condizione di minimo rischio,
dell’installazione, la messa in esercizio, la conduzione e la manutenzione
della macchina.
II - Avvertenze generali
Prima di utilizzare il distributore automatico, leggere attenta-
mente in tutte le sue parti, il presente manuale.
La conoscenza delle informazioni e delle prescrizioni contenute nel presente
manuale è essenziale per un corretto uso del distributore automatico, da
parte dell’utente.
Il tecnico installatore deve essere precedentemente addestrato ed istruito
sugli interventi da eseguire sul distributore automatico e limitarli a quanto
di sua competenza.
Il tecnico installatore deve essere a conoscenza dei meccanismi di funziona-
mento del distributore automatico.
– E’ responsabilità dell’acquirente, accertarsi che i tecnici installatori siano
addestrati ed a conoscenza di tutte le informazioni e prescrizioni indicate
nella documentazione tecnica fornita.
Nonostante la piena osservanza del costruttore delle normative di sicurezza,
coloro che operano sul distributore automatico devono essere perfettamente
coscienti dei rischi potenziali che tuttavia sussistono intervenendo sulla
macchina.
– Questo manuale è parte integrante del distributore automatico e come
tale deve sempre rimanere all’interno della stessa, per consentire ulteriori
consultazioni da parte dei vari operatori, sino allo smantellamento e/o
rottamazione del distributore automatico.
– In caso di smarrimento o danneggiamento del presente manuale, è possibile
riceverne una nuova copia facendone richiesta al costruttore, previo segna-
lazione dei dati riportati sulla matricola del distributore automatico stesso.
– Solomediantel’utilizzodiricambioriginaliègarantital’afdabilitàfun-
zionale e l’ottimizzazione delle prestazioni del distributore automatico.
– Modicheallamacchinanonprecedentementeconcordateconilladitta
costruttrice ed eseguite dal tecnico installatore e/o gestore, devono con-
siderarsi a totale responsabilità dello stesso.
Sono a carico del tecnico / gestore tutte le operazioni necessarie per
mantenereinefcienzalamacchinaprimaeduranteilsuouso.
– Qualsiasimanomissioneomodicadellamacchinanonpreventivamente
autorizzate dal costruttore sollevano, quest’ultimo da danni derivati o
riferibili agli atti suddetti e fanno decadere automaticamente le respon-
sabilità di garanzia della macchina stessa.
– Il presente manuale rispecchia lo stato dell’arte, al momento della im-
missione sul mercato, del distributore automatico; eventuali modiche,
miglioramenti, adeguamenti che venissero apportate alle macchine com-
mercializzate successivamente, non obbligano Bianchi Industry ne ad
intervenire sul distributore automatico fornito precedentemente, né ad
aggiornare la relativa documentazione tecnica fornita a corredo.
– E’ comunque facoltà della Bianchi Industry, quando lo ritenesse op-
portuno e per qualicati motivi, aggiornare i manuali già presenti sul
mercato, inviando ai propri clienti i fogli di aggiornamento che devono
essere conservanti nel manuale.
INDICE CAPITOLI
1.0 PREMESSA
2.0 CARATTERISTICHE TECNICHE
3.0 MOVIMENTAZIONE DEL DISTRIBUTORE AUTOMATICO
4.0 INSTALLAZIONE
5.0 ISTRUZIONI SOFTWARE
6.0 MANUTENZIONE E INATTIVITÀ
7.0 ACCESSORI
PE
SIMBOLOGIA DI SICUREZZA
PITTOGRAMMI
ATTENZIONE: Importanti indica-
zioni per la sicurezza!
LEGGERE attentamente il manua-
le di istruzioni prima della messa
in servizio
PRIMA DI UTILIZZARE LA MACCHINA, LEGGERE ATTENTAMENTE QUESTO MANUALE PER UN IMPIEGO CORRETTO IN CONFORMITA’ AI REQUISITI ESSENZIALI DI SICUREZZA.
Per ogni intervento di manuten-
zione, togliere l’alimentazione
elettrica
ATTENZIONE: macchina in ten-
sione
ATTENZIONE: parti calde a contatto!
ATTENZIONE! Organi in movimento
Indicazione di messa a terra
CHIAVI A TUBO
n° 5,5 - n° 7 - n° 8 - n° 10 - n° 20 - n° 22
CHIAVI FISSE (a forchetta)
n° 7 - n° 8 - n° 10 - n° 12 - n° 14
CACCIAVITI
Taglio piccolo
Taglio medio
Taglio grande
Croce normale
Croce piccolo
Croce medio
Croce grande
In Teon a taglio piccolo per tarare Trimmer
CHIAVE CRICK n° 14
TESTER
FORBICI ELETTRICISTA
KIT DI PROGRAMMAZIONE
Utensili necessari per poter fare interventi nel distributore automatico.
Chiavi a disposizione del
MANUTENTORE e del
TECNICO INSTALLATORE
N° 1 Chiave
AVVERTENZE IMPORTANTI
MANUTENTORE (CARICATORE)
Vienedenitomanutentorelapersonaaddettaallaricaricadeicontenitoridiprodottosolubile,zucchero,caffè,paletteebicchieri.
Il manutentore inoltre deve provvedere alla pulizia del distributore (vedere le operazioni indicate al capitolo 7.0). Nel caso di guasto, il manutentore
è tenuto a chiamare il tecnico installatore.
UTENTE (TECNICO INSTALLATORE)
Vienedenitoutente/tecnicoinstallatore,lapersonaaddettaall’installazionedeldistributoreautomatico,allamessainfunzioneedallaprogram-
mazione delle funzioni. Ogni operazione di taratura, è di esclusiva competenza dell’installatore che è inoltre depositario della password di accesso
alla programmazione.
INFORMAZIONE AGLI UTENTI
Ai sensi del Decreto Legislativo 25 settembre 2007, n. 185 e dell’ art. 13 del Decreto Legislativo 25 luglio 2005, n. 151” Attuazione delle Direttive 2002/95/CE, 2002/96/CE e 2003/108/CE,
relative alla riduzione dell’uso di sostanze pericolose nelle apparecchiature elettriche ed elettroniche, nonché allo smaltimento dei riuti”.
Il simbolo del cassonetto barrato riportato sull’apparecchiatura indica che il prodotto alla ne della propria vita utile deve essere raccolto separatamente dagli altri riuti.
L’utente dovrà, pertanto, conferire l’apparecchiatura giunta a ne vita, agli idonei centri di raccolta differenziata dei riuti elettronici ed elettrotecnici, oppure riconsegnarla al rivenditore al
momento dell’acquisto di una nuova apparecchiatura di tipo equivalente. L’adeguata raccolta differenziata per l’avvio successivo dell’apparecchiatura dimessa al riciclaggio, al trattamento e
allo smaltimento ambientalmente compatibile, contribuisce ad evitare possibili effetti negativi sull’ambiente e sulla salute e favorisce il riciclo dei materiali di cui è composta l’apparecchiatura.
Lo smaltimento abusivo del prodotto da parte dell’utente, comporta l’applicazione delle sanzioni amministrative di cui al D.Lgs. n. 22/1997 (articolo 50 e seguenti del D.Lgs. n. 22/1997).

6
ITALIANO
2.0 CARATTERISTICHE TECNICHE (Fig.2.1)
CAPACITÀ CONTENITORI
Contenitore per Caffè in grani kg 1,7
Caffè solubile kg 0,45
Orzo Kg 0,85
Latte kg 0,55
Creamer kg 1,20
Cioccolata kg 3,00
Tè al limone kg 2,00
Tè naturale kg 1,00
Brodo kg 1,25
Zucchero kg 1,7
Bicchieri (solo nelle versioni AUTOMATICHE) N° 200
Palette (solo nelle versioni AUTOMATICHE) N° 200
Altezza mm 745
Larghezza mm 510
Profondità mm 600
Peso kg 45
Attacco rete idrica 3/4” gas
Tensione d’alimentazione 220-230V; 50Hz
Tensione d’alimentazione * 220V; 60Hz
Attacco rete elettrica Spina CEE 7/7
Attacco rete elettrica * Spina NBR 14136:2001
Attacco rete elettrica * Spina IRAM 2073 10A
2.1 CONOSCERE IL DISTRIBUTORE
Descrizione della macchina
Versioni SEMIAUTOMATICHE (Fig.2.2A)
1 Gruppo caffè e macina caffè
2 Gruppo contenitori bevande solubili
3 Contenitore caffè in grani
4 Gettoniera
5 Switching
6 Fuse T 3,15A
7 Scheda MASTER
8 Caldaia espresso
9Seconda caldaia (solo mod.LEI200 E5S DC PD A/R SEMIAUTO-LEI200 E5S
DC PD A/R SEMIAUTO LCD)
10 Vano erogazione
11 Monitor LCD (solo mod. LEI200 E5S MC PD A/R SEMIAUTO LCD -LEI200
E5S DC PD A/R SEMIAUTO LCD )
12 Pulsantiera
13 Scheda tastiera
14 Scheda controllo display
15 Contenitore fondi caffè
16 Supporto bicchiere
Versioni AUTOMATICHE (Fig.2.2B)
1 Gruppo caffè e macina caffè
2 Gruppo contenitori bevande solubili
3 Contenitore caffè in grani
4 Gettoniera
5 Switching
6 Fuse T 3,15A
7 Scheda MASTER
8 Caldaia espresso
9Seconda caldaia (solo mod.LEI200 E4S DC PD A/R AUTO-LEI200 E4S DC
PD A/R AUTO LCD)
10 Vano erogazione
11 Monitor LCD (solo mod.LEI200 E4S MC PD A/R AUTO LCD-LEI200 E4S
DC PD A/R AUTO LCD)
12 Pulsantiera
13 Scheda tastiera
14 Scheda controllo display
15 Contenitore fondi caffè
16 Colonna palette
17 Colonna bicchieri
2.2 Modelli
Viene utilizzata la seguente terminologia per distinguere i vari modelli di
distributore automatico:
LEI200 E4S MC PD A/R AUTO (Automatico monocaldaia senza LCD)
LEI200 E4S DC PD A/R AUTO (Automatico doppia caldaia senza LCD)
LEI200 E5S MC PD A/R SEMIAUTO (Semiautomatico monocaldaia senza LCD)
LEI200 E5S DC PD A/R SEMIAUTO (Semiautomatico doppia caldaia senza LCD)
LEI200 E4S MC PD A/R AUTO LCD (Automatico monocaldaia con LCD)
LEI200 E4S DC PD A/R AUTO LCD (Automatico doppia caldaia con LCD)
LEI200 E5S MC PD A/R SEMIAUTO LCD (Semiautomatico monocaldaia con LCD)
LEI200 E5S DC PD A/R SEMIAUTO LCD (Semiautomatico doppia caldaia con LCD)
Il manuale è redatto per il modello più completo: è possibile, quindi,
trovare descrizioni o spiegazioni non attinenti alla propria macchina.
Gli schemi elettrici e idraulici sono all’interno del distributore.
III - Norme per la sicurezza
Prima di utilizzare il distributore automatico, leggere attenta-
mente in tutte le sue parti, il presente manuale.
– Le operazioni di installazione e manutenzione, devono essere eseguite
esclusivamente da personale tecnico qualicato.
– L’utente non deve in alcun modo poter accedere a quelle parti del distri-
butore automatico le cui protezioni sono bloccate da mezzi che richiedano
un utensile per essere liberati.
– La conoscenza ed il rispetto assoluto, delle avvertenze di sicurezza e degli
avvisi di pericolo contenuti in questo manuale, costituiscono il presupposto
per l’esecuzione, in condizione di minimo rischio, dell’installazione, della
messa in esercizio e della manutenzione della macchina.
Staccare sempre il CAVO DI ALIMENTAZIONE prima di interventi
di manutenzione o di pulizia.
NON INTERVENIRE ASSOLUTAMENTE SULLA MACCHINA E NON RI-
MUOVERE ALCUNA PROTEZIONE PRIMA DELL’AVVENUTO RAFFRED-
DAMENTO DELLE PARTI CALDE!
– Solo mediante l’utilizzo di ricambi originali è garantita l’afdabilità fun-
zionale e l’ottimizzazione delle prestazioni del distributore automatico.
– Per garantire il normale esercizio, l’apparecchio deve essere installato in
luoghi in cui la temperatura ambiente sia compresa tra una temperatura
minima di +1°C ed una temperatura massima di +50°C e l’umidità relativa
assoluta non superi l’ 85%.
– Per garantire un funzionamento regolare, mantenere sempre il distributore
automatico in perfette condizioni di pulizia.
– Nel caso in cui all’atto dell’installazione venissero riscontrate condizioni
d’uso diverse da quelle riportate nel presente manuale, o le stesse doves-
sero subire variazioni nel tempo, dovrà essere immediatamente contattato
il costruttore prima dell’uso del distributore automatico.
- Vericare inoltre che vengano recepite ed applicate ulteriori ed eventuali
norme stabilite da legislazioni nazionali o locali.
Bianchi Industry declina ogni responsabilità per danni causati a persone
o cose in conseguenza a:
installazione non corretta
alimentazione elettrica e/o idrica non appropriata
pulizia e manutenzione non adeguate
modichenonautorizzate
uso improprio del distributore
ricambi non originali
– In nessun caso Bianchi Industry è tenuta a risarcire eventuali danni
dovuti ad interruzioni forzate delle erogazioni del distributore a causa di
guasti.
– Le operazioni d’installazione e manutenzione, devono essere eseguite esclu-
sivamentedapersonaletecnicoqualicatoeprecedentementeaddestrato
allo svolgimento di queste mansioni.
– Perlaricarica,utilizzareesclusivamenteprodottialimentarispeciciper
l’uso in distributori automatici.
– Il distributore automatico non è idoneo per essere installato all’esterno,
deve essere allocato in locali asciutti, con temperature che non scendano
mai sotto 1°C, non può essere installato in locali dove vengano utilizzati
getti di acqua per la pulizia (es. grandi cucine ....). Non utilizzare il getto
d’acqua direttamente sul distributore.
L’accesso all’area di service è permessa solo a persona-
le dotato di specica conoscenza ed esperienza pratica
dell’apparecchio.
Questo apparecchio non è inteso per uso da parte di persone (inclusi bam-
bini)con ridottecapacitàsiche, sensorialiomentali, osenzaesperienze
e conoscenza, a meno che abbiano ricevuto istruzioni relativamente all’uso
dell’apparecchio e siano controllati da una persona responsabile per la loro
sicurezza. I bambini devono essere controllati in modo di assicurare che
non giochino con l’apparecchio.
In caso di chiamata è bene sapere indicare:
i dati riportati sulla matricola (Fig.1.1)
versione del programma contenuto nel microprocessore (targhetta adesiva
sul componente montato sulla scheda Master) (Fig.1.2)
Gli eventuali problemi tecnici che si possono vericare sono facilmente risol-
vibili consultando il presente manuale; per ulteriori informazioni, contattare
il concessionario presso il quale il distributore automatico è stato acquistato,
oppure contattare il Servizio Tecnico ai seguenti numeri:
+039. 035.45.02.111
ALIMENTAZIONE IDRICA
da rete con pressione compresa tra 0,05 e 0,65 MPa (0.5 e 6.5 bar)
Le caratteristiche elettriche dei modelli sono indicate nella targa
dati posta all’esterno dei distributori.
*Versioninazionalispeciche

7
ITALIANO
3.0 MOVIMENTAZIONE DEL DISTRIBUTORE
AUTOMATICO
3.1 Movimentazione e Trasporto (Fig.3.1)
Il trasporto del distributore deve essere effettuato da personale competente.
Il distributore è fornito su pallet; per lo spostamento utilizzare un carrello
elevatore adatto a sostenerne il peso e movimentarlo a velocità ridotta al
ne d’evitare ribaltamenti o pericolosi ondeggiamenti.
Evitare:
– di trascinare il distributore
– di rovesciare o coricare il distributore per il trasporto
– di dare scossoni al distributore
Evitare che il distributore:
– subisca urti
– sia sovraccaricato da altri colli
– sia esposto alla pioggia, al gelo o a fonti di calore
– sia giacente in luoghi umidi
La ditta costruttrice non è responsabile per eventuali danni causati dall’inos-
servanza parziale o totale delle avvertenze sopra riportate.
3.2 Stoccaggio
Per eventuale stoccaggio, evitare di sovrapporre più macchine, mantenerle in
posizione verticale, in ambienti asciutti con temperature non inferiori a 1°C .
3.3 Imballaggio
Il distributore è protetto da angolari in polistirolo o cartone e da una pellicola
trasparente in polipropilene (Fig.3.2).
Il distributore automatico verrà consegnato imballato, assicurando allo stesso
tempo una protezione meccanica ed una protezione contro l’aggressione
dell’ambiente esterno.
Sull’imballo sono applicate delle etichette indicanti:
manovrare con cura
non capovolgere
proteggere dalla pioggia
non sovrapporre
proteggere da fonti di calore
non resistente agli urti
tipo di distributore e numero di matricola
2.8 CAFFE’ ESPRESSO
Questo processo avviene solo per i modelli dotati di gruppo caffè espresso.
– Il macinino viene attivato no a raggiungere la dose di caffè macinato
ssato dal dosatore (Fig.2.15).
– Viene attivato l’elettromagnete del dosatore, provocandone l’apertura del
portello e conseguente caduta del caffè nel bicchiere di infusione.
– Si attiva il motoriduttore rotazione gruppo per portarlo in posizione di
erogazione e contemporaneamente comprimere la pastiglia (Fig.2.16).
– Si attiva la pompa che eroga la quantità di acqua programmata, e control-
lata da apposito dispositivo elettronico (contatore volumetrico) (Fig.2.17).
– Viene attivato nuovamente il motoriduttore gruppo caffè per riportarlo in
posizione di riposo; durante questo movimento viene anche espulsa la
pastiglia di caffè usata (Fig.2.18)
La sequenza di queste operazioni (macinatura e sgancio caffè) può avvenire
in ordine inverso a seconda del tipo di programmazione utilizzata.
2.5.2 EROGAZIONE ZUCCHERO
I distributori Semiautomatici serie LEI200, non prevedono l’erogazione dello
zucchero, quindi, l’utente, dovrà provvedere in modo autonomo a zuccherare
le bevande.
2.5.1 PRELIEVO BICCHIERE E PALETTA
I distributori Semiautomatici serie LEI200 non dispongono di distributore
automatico dei bicchieri e palette.
L’utente quindi provvederà in modo autonomo a fornirsene dagli appositi
distributori messi a disposizione nei pressi del distributore, provvedendo a
posizionarli correttamente nel vano di erogazione.
Portare in posizione il supporto bicchiere come indicato in gura 2.3, inserire
il bicchiere (g. 2.4) ed attendere l’erogazione.
Al termine dell’erogazione riportare il supporto bicchieri in posizione come
indicato in gura 2.5.
È possibile, richiedere il bricco, che deve essere posizionato nel vano eroga-
zione come indicato in Fig. 2.6.
2.3 Uso previsto
I distributori della serie LEI200 sono da adibirsi esclusivamente all’erogazione
di bevande, preparate miscelando prodotti alimentari con acqua (per infusione
per quanto concerne caffè espresso).
Per lo scopo utilizzare prodotti alimentari dichiarati dal fabbricante idonei alla
distribuzione automatica in contenitori aperti.
Le erogazioni devono essere consumate immediatamente ed in nessun caso
vanno conservate per un successivo consumo.
2.4 Concetti di base sul funzionamento
Nel normale funzionamento il distributore si pone in stato di attesa.
Introducendo l’importo necessario, secondo il prezzo impostato e premendo
il tasto relativo alla bevanda voluta, si attiva il ciclo di erogazione che può
essere suddiviso in diversi processi:
2.5 Versioni SEMIAUTOMATICHE:
LEI200 E5S MC PD A/R SEMIAUTO (Semiautomatico monocaldaia senza LCD)
LEI200 E5S DC PD A/R SEMIAUTO (Semiautomatico doppia caldaia senza LCD)
LEI200 E5S MC PD A/R SEMIAUTO LCD (Semiautomatico monocaldaia con LCD)
LEI200 E5S DC PD A/R SEMIAUTO LCD (Semiautomatico doppia caldaia con LCD)
Per i distributori della versione Semiautomatica, lo zucchero, i bicchieri di
plastica e le palette per la miscelazione dello zucchero verranno messe a
disposizione dell’utente in quanto non distribuite automaticamente.
2.6 Versioni AUTOMATICHE:
LEI200 E4S MC PD A/R AUTO (Automatico monocaldaia senza LCD)
LEI200 E4S DC PD A/R AUTO (Automatico doppia caldaia senza LCD)
LEI200 E4S MC PD A/R AUTO LCD (Automatico monocaldaia con LCD)
LEI200 E4S DC PD A/R AUTO LCD (Automatico doppia caldaia con LCD)
2.6.1 DISTRIBUZIONE BICCHIERE
– Il traslatore bicchieri si sposta dalla posizione riposo / erogazione alla
stazione “cup dispenser” (Fig. 2.7)
– il motore all’interno del cup dispenser movimenta le chiocciole per separare
e far cadere il bicchiere nell’apposita forcella di sostegno all’interno del
vano erogazione / prelievo (Fig.2.8).
– il traslatore bicchieri, si sposta ancora per prendere lo zucchero.
– il traslatore bicchieri, a questo punto, si sposta e torna alla stazione di
riposo.
– La presenza del bicchiere viene rilevata attraverso un sensore che da il
consenso all’avvio delle operazioni di erogazione.
2.6.2 EROGAZIONE ZUCCHERO
Dove previsto e richiesto, viene erogata una quantità di zucchero pressata
nella dose massima, con possibilità di blocco raggiunta la dose desiderata.
Lo zucchero viene erogato direttamente nel bicchiere.
Il procedimento di erogazione avviene secondo queste fasi:
1 il motoriduttore aziona la coclea del contenitore zucchero, riversando la
quantità desiderata all’interno del tubo di convogliamento (Fig.2.9)
2 si attiva l’elettromagnete che permette lo scarico dello zucchero dalla
angia allo scivolo che lo porterà nel bicchiere (Fig.2.9).
Note su gestione Zucchero:
TUTTE LE BEVANDE SARANNO DI DEFAULT AMARE (senza pressione della
preselezione DOLCE)
Per quanto riguarda la gestione della preselezione DOLCE (zucchero misce-
lato attiva ovviamente solo su caffè espresso e caffè decaffeinato solubile)
dobbiamo tarare la macchina in questo modo:
DECAFFEIANTO SOLUBILE: la bevanda zuccerata o amara avrà sempre la
stessa dose di acqua erogata dal mixer/ev del deca.
2.6.3 EROGAZIONE PALETTA
Questo processo viene attivato solo sulle versioni dove è previsto il distribu-
tore palette; è possibile opzionare la paletta su qualsiasi bevanda a seconda
delle esigenze.
– viene attivato il motoriduttore che aziona il dispositivo di sgancio paletta,
facendola scivolare nel bicchiere (Fig.2.10).
2.7 Selezione della bevanda (SOLUBILE)
A seconda del tipo di bevanda richiesta e del modello di distributore, per
la preparazione della bevanda possono attivarsi più processi sottodescritti.
– L’elettrovalvola ssata sulla caldaia espresso (Fig.2.11) viene attivata per
immettere nel frullatore la quantità di acqua programmata.
- Si attiva la pompa che eroga la quantità di acqua programmata, e con-
trollata da un apposito dispositivo elettronico (contatore volumetrico).
- Il motoriduttore del prodotto solubile, attiva la coclea per riversare la
quantità di prodotto programmato nel frullatore (in alcune versioni, più
prodotti possono essere convogliati nello stesso miscelatore) (Fig. 2.12).
– Erogata la quantità di acqua e di polvere pressata, viene disattivato il
frullatore.
Fig. 2.13 - Caldaia di preriscaldamento.
Fig. 2.14 - Caldaia solubili in polisulfone.
CAFFE’ ESPRESSO : su tutte le bevande espresso , sia dolci che amare
verrà attivato il mixer /ev deca per qualche secondo , per ottenere quindi
una bevande dolce o amara con lo stesso volume in CC. Se premo dolce ,
verrà miscelato dello zucchero. Se non lo premo verrà erogata solo acqua.

8
ITALIANO
3.4 Ricevimento
All’atto del ricevimento del distributore automatico occorre controllare che
lo stesso non abbia subito danni durante il trasporto.
Se si dovessero notare danni di qualsiasi natura si faccia immediatamente
reclamo al trasportatore.
Allanedeltrasportol’imballodeverisultareintegro,valeadirenon
deve:
– Presentare ammaccature, segni di urti, deformazioni o rotture dell’invo-
lucro contenitore.
– Presentare zone bagnate o segni che possano condurre a supporre che
l’involucro sia stato esposto alla pioggia, al gelo o al calore.
– Presentare segni di manomissione.
3.5 Disimballaggio
– Liberare il distributore dal suo imballo, tagliando il lm protettivo in cui
è avvolto, lungo uno degli angolari di protezione.
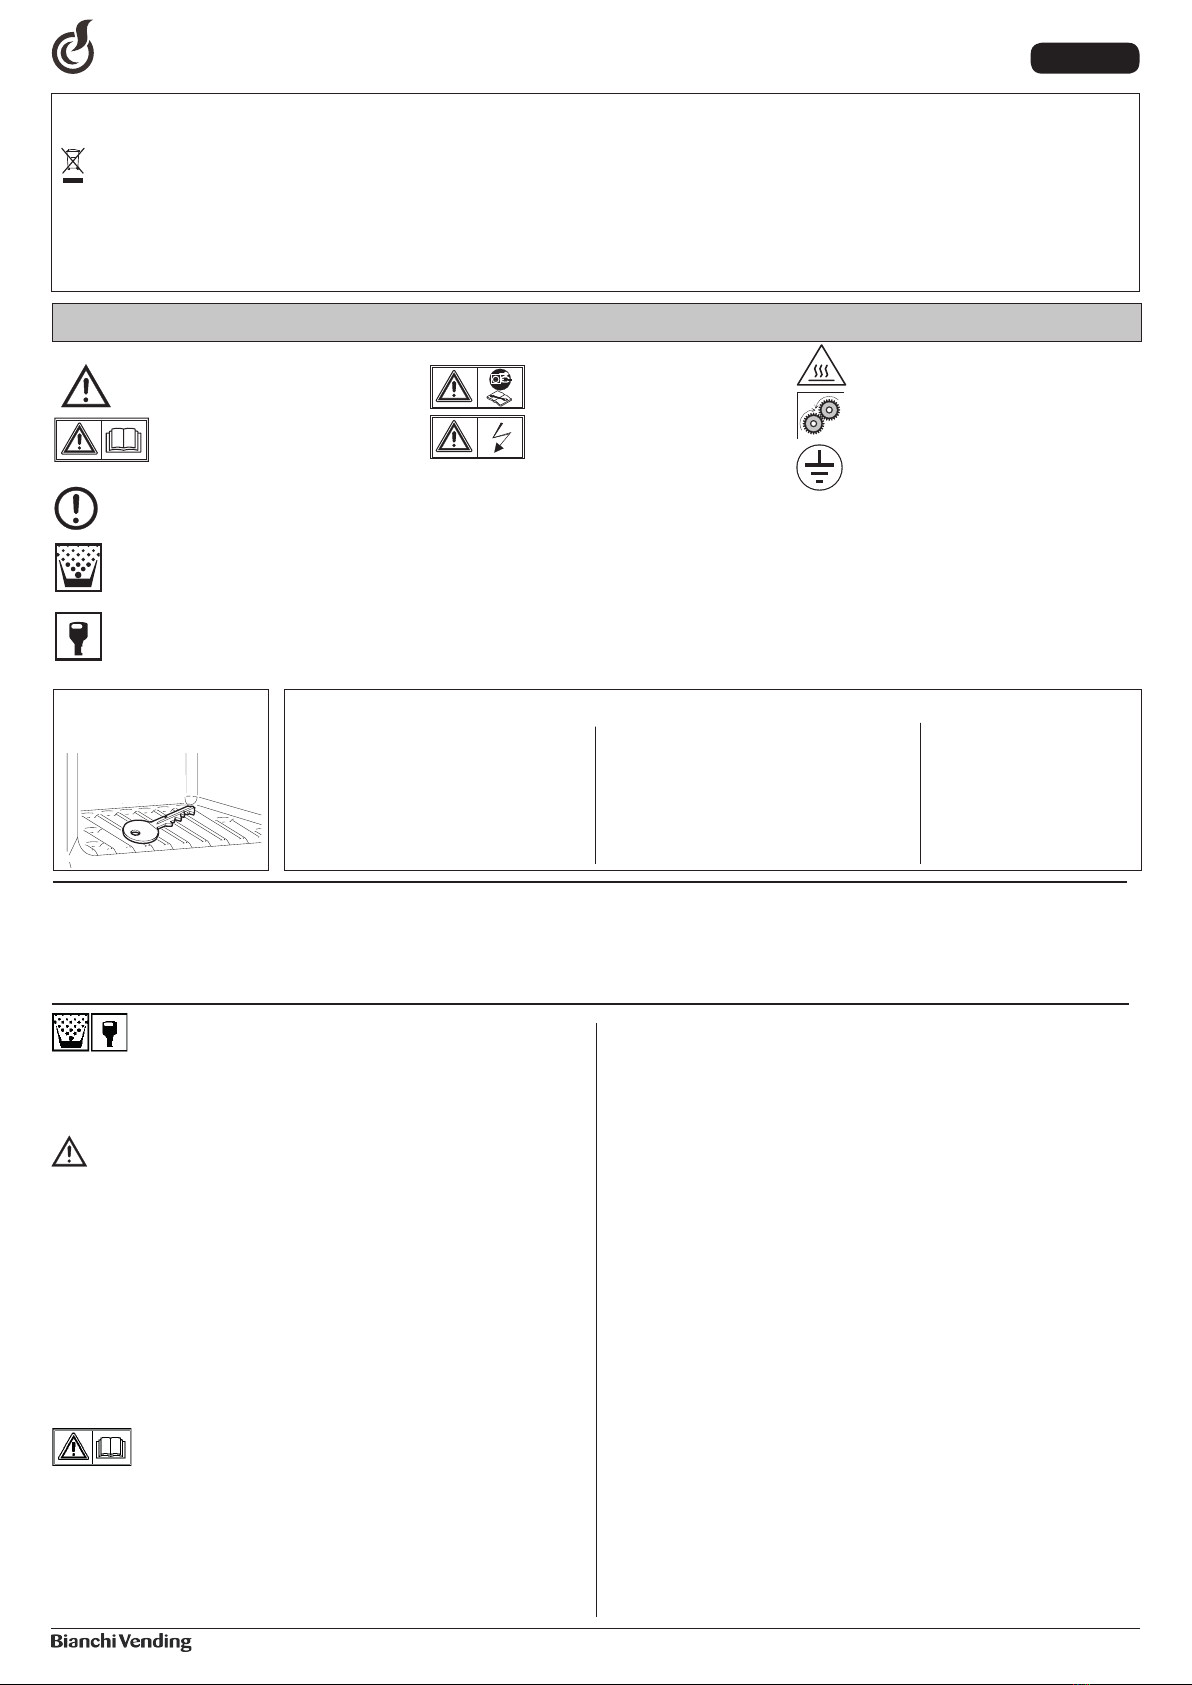
– Togliere la chiave dal vano erogazione (Fig.3.3).
Aprire la porta del distributore e togliere il nastro adesivo dai componenti
di seguito elencati:
Copertura vano gettoniere/scheda tastiera
Contenitori prodotti.
I materiali di imballaggio non devono essere lasciati alla portata di per-
sone estranee, perchè potenziali fonti di inquinamento per l’ambiente.
Perlosmaltimentoafdarsiadaziendeautorizzate.
4.0 INSTALLAZIONE
4.1 Posizionamento
– Come già specicato nel paragrafo “III Norme per la sicurezza”, il distri-
butore automatico non è idoneo per essere installato all’esterno, deve
essere collocato in locali asciutti, con temperature che non scendano mai
sotto 1°C, non può essere installato in locali dove vengano utilizzati getti
di acqua per la pulizia (es. grandi cucine ...).
– Se posizionato vicino ad una parete, lo schienale deve avere una distanza
minima di 5 cm dalla stessa (Fig.4.1), per permettere la regolare venti-
lazione. In nessun caso coprire il distributore con panni o similari.
ATTENZIONE! Non posizionare l’apparecchio vicino ad oggetti inam-
mabili, rispettando una distanza minima di sicurezza di 30 cm.
La Bianchi Industry declina ogni responsabilità per inconvenienti dovuti
all’inosservanza delle norme di posizionamento.
Se l’installazione avviene in corridoi di evacuazione di sicurezza assicurarsi
che con il distributore a porta aperta rimanga comunque spazio sufciente
al passaggio (Fig.4.1).
Per evitare che il pavimento si sporchi, causa cadute accidentali di prodotti,
utilizzare, se necessario, sotto il distributore, una protezione sufcientemente
larga a coprire il raggio d’azione dello stesso.
4.2 Collegamento rete elettrica
Accertarsi che l’alimentazione di rete corrisponda a quella indicata sul distri-
butore.
All’interno del distributore è presente 1 fusibile di protezione,
ubicato sulla scheda di alimentazione: T3,15A.
Si consiglia di controllare che:
– La tensione di rete di 230 V non abbia uno scostamento maggiore del ±
10%.
– La linea di alimentazione sia adatta a sopportare il carico del distributore
automatico.
– Utilizzare un sistema di protezione tecnico-differenziale.
– Posizionare l’apparecchio in modo tale che la spina rimanga accessibile.
L’apparecchio deve essere collegato ad una presa di terra in ottemperanza
alle vigenti norme.
Vericare in tal senso il collegamento del lo di terra dell’impianto afnchè sia
efciente e risponda alle normative nazionali ed europee di sicurezza elettrica.
Se necessario richiedere l’intervento di personale professionalmente quali-
cato per la verica dell’impianto.
– Il distributore è dotato di cavo di alimentazione H05VV-F 3x1,5mm², con
spina CEE 7/7 (Spina NBR 14136:2001 – Spina Iram 2073 10A)* (Fig.4.2).
– Le prese non compatibili con la spina dell’apparecchio devono essere
sostituite (Fig.4.3).
– E’ vietato l’uso di prolunghe, adattatori e/o prese multiple.
La Bianchi Industry declina ogni responsabilità per danni causati dall’inos-
servanza parziale o totale delle suddette avvertenze.
Se il cavo di alimentazione dovesse risultare danneggiato, scollegare imme-
diatamente dall’alimentazione elettrica
La sostituzione dei cavi di alimentazione deve essere effettuata
da personale qualicato
*Versioninazionalispeciche
4.3 Messa in servizio
Il distributore è dotato di interruttore di sicurezza (Fig.4.4) che toglie tensio-
ne a tutti gli utilizzatori, ogni qualvolta viene aperta la porta (vedi schema
elettrico).
In caso di necessità, quindi, aprire la porta o scollegare la spina dalla presa
dell’impianto.
4.4 Installazione
4.4.1 Riempimento circuito idraulico
L’apparecchio provvede in maniera automatica al riempimento del circuito
idraulico.
La sequenza delle operazioni sarà:
– Accensione distributore
- Modalita’ prima installazione
Al primo avviamento della macchina verrà effettuata una auto-installazione
che riempirà la caldaia espresso erogando 300cc
– Al termine verrà richiesto l’inserimen-
to della data.
– Al termine del riempimento (Fig.4.5),
effettuare dei lavaggi del gruppo
mixer per riempire tutti i circuiti e
rimuovere eventuali residui dalla caldaia.
Prima di dare tensione, accertarsi di avere collegato il distributore
alla rete idrica e di avere provveduto ad aprire il rubinetto dell’acqua.
Effettuare la prima installazione per distributori con serbatoio autonomo
rimuovendol’eventualeltrodalserbatoiostesso.
4.4.2 Lavaggio parti a contatto con alimenti
A distributore acceso effettuare dei lavaggi dei miscelatori premendo i pulsanti
secondo quanto riportato alle funzioni di servizio al ne di eliminare ogni
possibile residuo di sporco dalla caldaia caffè e caldaia solubili.
– Lavarsi accuratamente le mani
– Preparare una soluzione disinfettante antibatterica a base di cloro (pro-
dotti reperibili presso negozi farmaceutici) seguendo scrupolosamente le
indicazioni riportate sul prodotto stesso.
- Prima di rimuovere il contenitore provvedere ad abbassare lo
sportellino per evitare una fuoriuscita accidentale del prodotto solubile
in esso contenuto (g. 4.6).
– Rimuovere tutti i contenitori prodotti dal distributore (Fig.4.7).
– Rimuovere dagli stessi i coperchi e gli scivoli prodotti (Fig.4.8). Immergere
tutto nella soluzione precedentemente preparata.
– Rimuovere tutti i convogliatori polveri, imbuti acqua, camere e ventole
di frullatura, tubi al silicone ed immergere anche questi particolari nella
soluzione preparata (Fig.4.9).
– Con un panno imbevuto della soluzione pulire anche le basi dei frullatori
(Fig.4.10).
Modalita’ prima auto-installazione
Per Mono caldaia Espresso:
All’accensione del distributore l’acqua riempie l’airbreack.
Quando il galleggiante sarà in posizione alta la macchina inizierà un carico
automatico di acqua che continuerà nchè il ventolino non avrà contato il
passaggio di 300cc di acqua (verrà quindi erogata acqua tramite l’elettro-
valvola caffè).
La procedura verrà eseguita con la resistenza spenta.
Al termine verrà richiesto l’inserimento della data.
Per Caldaia Solubile :
All’ accensione del distributore si riempie la caldaia in polisulfone no al rag-
giungimento livello massimo della sonda; parte la pompa per 5 sec., richiesto
inserimento della data, inizia il riscaldamento.
Restano sotto tensione, la morsettiera del cavo di alimentazione.
– Per alcune operazioni è però necessario operare con porta aperta, ma
distributore attivo.
E’ possibile, per il tecnico installatore, operare in questo modo, inserendo
la speciale chiavetta in plastica (riarmo clixon) (fornita in dotazione nel
corredo del distributore automatico) nell’interruttore porta, ruotandola di
90° (Fig.4.4).
L’apertura e l’eventuale attivazione a porta aperta del distributore, devono
essereafdateesclusivamenteapersonaleautorizzatoall’esecuzionedi
queste operazioni.
Non lasciare incustodito il distributore aperto.
La chiave di esclusione delle sicurezze è custodita sotto l’esclusiva respon-
sabilità del tecnico installatore.
Ad ogni accensione del distributore avviene un ciclo di diagnosi per vericare la
posizione delle parti in movimento e la presenza dell’acqua e di alcuni prodotti.
ATTENZIONE
Il distributore non può essere installato in locali denominati “cucine
industriali”.
4.3.1 Allacciamento alla rete idrica
Adottare solo ed esclusivamente il tubo in dotazione rispondente alla nor-
mativa “EN 61770” ed assicurarsi che la rete abbia una pressione compresa
tra 0,5 e 6,5 bar (in caso contrario utilizzare una pompa o un riduttore di
pressione, a seconda del caso).
16 / 02 / 2017

9
ITALIANO
4.5 Caricamento prodotti (a macchina spenta)
4.5.1 Caricamento contenitori
Il caricamento può essere effettuato lasciando i contenitori inseriti, sollevando
lo sportello superiore del distributore (Fig. 4.12), oppure slando ciascun
contenitore.
In particolare, per il caffè in grani, è necessario chiudere la piastra di chiusura
prima di slare il contenitore (Fig. 4.13).
– Sollevare i coperchi di ciascun contenitore ed inserirvi il prodotto secondo
quanto riportato dalla targhetta stessa (Fig. 4.14).
– Fare attenzione che non vi siano grumi, evitare di comprimere il prodotto
e di utilizzarne una quantità eccessiva per evitarne l’invecchiamento.
Controllare le capacità di ciascun contenitore alla sezione CARATTERISTICHE
TECNICHE.
4.5.2 Installazione sistemi di pagamento
Il distributore viene fornito privo del sistema di pagamento:
L’installazione del sistema di pagamento è a cura e responsabilità del tecnico
installatore.
Di serie predisposizione Validatore 12-24V.
Per Sistemi Executive/MdB kit sistemi di pagamento.
La Bianchi Industry non si ritiene corresponsabile per eventuali danni alla
macchina stessa e/o a cose e/o persone dovuti ad una errata installazione.
I selettori vanno connessi direttamente sulla scheda tastiera, i sistemi seriali
executive necessitano del KIT sistemi di pagamento fornito a parte.
Accedere poi alla programmazione per le giuste tarature.
Consultare il capitolo “5.0 ISTRUZIONI SOFTWARE” per vericare l’imposta-
zione dei parametri, coerenti con il sistema usato.
5.0 ISTRUZIONI SOFTWARE
STATO NORMALE
PULSANTIERE
I pulsanti assumeranno i seguenti signicati:
Tasto 1: Selezione 1
Tasto 2: Selezione 2
Tasto 3: Selezione 3
Tasto 4: Selezione 4
Tasto 5: Selezione 5
Tasto 6: Selezione 6
Tasto 7: Selezione 7
Tasto 8: Selezione 8
Tasto 9: Selezione 9
Tasto 10: Selezione 10
Tasto 11: Selezione 11
Tasto 12: Selezione 12
Tutti i tasti possono diventare anche preselezione.
Sulla scheda SF0519A:
Tasto P: Programmazione
Tasto M: Manutenzione
Si veda descrizione sottostante per l’utilizzo delle preselezioni DP1 e DP2.
4.5.3 Caricamento bicchieri
Utilizzare solo bicchieri idonei alla distribuzione automatica, con diametro
superiore di 70-74 mm, evitare di comprimerli tra loro durante il caricamento.
Non cercare di ruotare manualmente la colonna.
Il caricamento deve avvenire a macchina spenta.
In fase di installazione o con distributore bicchieri completamente vuoto,
operare come segue:
- sollevare la staffa (Fig. 4.15)
- sollevare il coperchio della colonna bicchieri (Fig.4.16)
- caricare i bicchieri nei quattro tubi della colonna bicchieri (Fig.4.17)
- rimontare il coperchio e abbassare la staffa (Fig. 4.18)
4.5.4 Caricamento palette
Attenzione!
Utilizzare solo palette adatte ad essere utilizzate in distributori auto-
matici.
– Togliere il pesetto in metallo dall’incolonnatore (Fig.4.19)
– Inserire le palette, con la loro fascetta di imballo, nella parte superiore
della colonna e posizionarle sul fondo, quindi tagliare e slare la fascetta
(Fig.4.20).
– Fare attenzione che le palette siano esenti da bave, non siano incurvate
e che siano disposte tutte orizzontalmente.
– Completato il caricamento reinserire il pesetto (Fig.4.21).
– I particolari vanno lasciati immersi nella soluzione secondo il tempo ri-
portato sulla confezione stessa.
– recuperare tutti i particolari, risciacquarli abbondantemente, asciugarli
perfettamente e procedere al rimontaggio nel distributore.
-Dopo aver riposizionato il contenitore provvedere ad alzare lo sportellino
per ripristinare il corretto funzionamento (g. 4.11).
Per maggiore sicurezza è consigliabile effettuare dopo il rimontag-
gio dei particolari smontati, alcuni lavaggi automatici per eliminare
eventuali residui.
In programmazione i tasti assumono i seguenti signicati:
Tasto 1: Incrementa valore o voce di menù
Tasto 2: Escape
Tasto 3: Decrementa valore o voce di menù
Tasto 5: Muovi cursore
Tasto 7: Enter
Numero tasto LEI200
DP1 + Tasto 1
DP1 + Tasto 2
DP1 + Tasto 3 Selezione 13
DP1 + Tasto 4 Selezione 14
DP1 + Tasto 5 Selezione 15
DP1 + Tasto 6 Selezione 16
DP1 + Tasto 7 Selezione 17
DP1 + Tasto 8 Selezione 18
DP1 + Tasto 9
DP1 + Tasto 10
DP1 + Tasto 11
DP1 + Tasto 12
DP2 + Tasto 1
DP2 + Tasto 2
DP2 + Tasto 3 Selezione 19
DP2 + Tasto 4 Selezione 20
DP2 + Tasto 5 Selezione 21
DP2 + Tasto 6 Selezione 22
DP2 + Tasto 7 Selezione 23
DP2 + Tasto 8 Selezione 24
DP2 + Tasto 9
DP2 + Tasto 10
DP2 + Tasto 11
DP2 + Tasto 12
Nota: sui tasti programmati come preselezioni non saranno ovviamente
disponibili le relative selezioni.
Programmando su uno dei tasti P1 o P2 la preselezione DP1 o DP2, premendo
il tasto DP1 o DP2 di preselezione e successivamente un secondo tasto, si
andranno ad attivare le selezioni da 13 a 24 secondo la seguente tabella:

10
ITALIANO
6.0 MANUTENZIONE E INATTIVITÀ
6.1 Pulizia e caricamento
Per garantire il corretto funzionamento del distributore nel tempo, è
necessario eseguire con periodicità delle operazioni, alcune delle quali
indispensabili per ottemperare alle norme sanitarie vigenti.
Queste operazioni, salvo diverse indicazioni, vanno eseguite a distri-
butore aperto e spento; le operazioni di pulizia devono essere eseguite
prima del caricamento dei prodotti.
Per garantire il normale esercizio, l’apparecchio deve essere installato in luoghi
in cui la temperatura ambiente sia compresa tra una temperatura minima di
+1°C ed una temperatura massima di +32°C e l’umidità non superi il 70%.
Il distributore non può essere installato in locali dove vengano utilizzati getti
d’acqua per la pulizia (es. grandi cucine ...) e non utilizzare il getto d’acqua
direttamente sul distributore.
6.1.1 Procedure per la pulizia del distributore
6.1.3 Pulizia quotidiana consigliata
Lo scopo è quello di prevenire la formazione di batteri nelle zone a contatto
con alimenti.
Per tutte le operazioni di pulizia attenersi alle disposizioni riportate al
paragrafo 6.1.1
Operare come segue:
– pulire tutte le parti in vista della zona di erogazione (Fig.6.1 e Fig.6.2)
asportare e lavare accuratamente:
– convogliatori e scivoli polveri (Fig.6.3-pos.1)
– convogliatore acqua (2), camera miscelazione (3) e ventola di frullatura (4)
– tubi di erogazione al silicone
– vano erogazione (Fig.6.4)
– scivolo e imbuto caffè (Fig.6.5)
Prima di effettuare le operazioni di rimontaggio asciugare accuratamente
tutti i particolari
– Pulire dai residui di polvere di caffè il gruppo; per facilitare il compito si
può estrarre il gruppo dalla sede (Fig.6.6).
– Vuotare i secchi fondi liquidi, pulirli e/o sostituirli (Fig.6.7).
– Svuotare il contenitore dei fondi caffè (versioni caffè in grani) (Fig.6.8).
Ultima operazione: raccolta della moneta.
In manutenzione i pulsanti assumeranno i seguenti signicati:
Tasto 1: Scorrimento allarmi
2° funzione
Tasto 2: Reset allarmi
Reset allarmi
Tasto 3: Prova completa
Storico allarmi
Tasto 4: Prova solo acqua
-
Tasto 5: Prova mixer
-
Tasto 6: Movimentazione gruppo
Ricarica decontatori
Tasto 7: Visualizza battute totali
Riempimento tubi MDB
Tasto 8: Lavaggio
Svuotamento tubi MDB
Equipaggiamento ideale:
Per gli addetti al caricamento e alla manutenzione l’equipaggiamento ideale
dovrebbe essere così composto:
- Valigetta porta strumenti
- Divisa pulita
- Guanti usa e getta
- Morsetto per chiudere le cannucce
- Rotolo di carta alimentare
- Bastoncino in legno o plastica
- Confezione di detergente
- Confezione di disinfettante
- Cartello “Distributore fuori servizio”
- Tavolino di appoggio (facoltativo)
Non utilizzare mai:
- Spugne, spugnette, stracci di stoffa
- Pennelli
- Cacciaviti od oggetti metallici
Come ottenere l’igiene:
La pulizia del distributore, ed in particolare del monitor, si ottiene con acqua
calda e panno umido.
In caso di utilizzo di detergenti, questi devono essere appositamente dedicati.
Esistono in commercio prodotti che sono contemporaneamente detergenti/
disinfettanti. Normalmente reperibili i farmacia.
Con l’applicazione dell’HACCP vengono ssate alcune regole igieniche per
sistemi di autocontrollo aziendali riguardanti:
- Pulizia dei locali
- Trasporto prodotti
- Manutenzione macchinari
- Smaltimento riuti
- Approvvigionamento acqua potabile
- Igiene del personale
- Caratteristiche prodotti alimentari
- Formazione del personale
- (direttiva 93/43/CEE)
Le operazioni di pulizia possono avvenire:
1 sul posto in cui è installato il distributore automatico
2 presso l’azienda che gestisce il servizio
Esempio di procedura di pulizia ideale di un distributore automatico
di bevande calde:
L’addetto all’igiene dell’impianto, prima di aprire il distributore, deve accertarsi
dello stato di pulizia dell’ambiente circostante e porre un cartello, che indichi
ai potenziali consumatori che:
- “l’apparecchiatura è fuori servizio per manutenzione”
- è importante che durante le operazioni di pulizia e sanicazione, l’addetto
non debba mai sospendere il suo lavoro per far funzionare il distributore.
6.1.2 Pulizia periodica a cura del manutentore
Prima operazione. Smaltimento dei riuti presenti nei bidoni dell’immondizia
(bicchieri sporchi, palette, carta, fazzoletti, ecc.). Dopo lo smaltimento dei
riuti possono iniziare le pulizie dell’ambiente.
- eliminazione dello sporco più grossolano
- sanicazione dei pavimenti e delle pareti dell’ambiente circostante nel
raggio di 1 metro intorno al distributore automatico
- al termine si passa all’apertura del distributore
6.1.4 Pulizia settimanale
Slare tutti i contenitori e pulire con un panno umido tutte le parti di appoggio
dei contenitori, nonchè il fondo del distributore e l’esterno del distributore in
particolare la zona erogazione (Fig.6.1-6.2).
6.1.5 Caricamento prodotti
Quando necessario provvedere al caricamento dei prodotti e/o materiali di
consumo del distributore automatico.
Per queste operazioni fare riferimento alle operazioni di prima installazione
capitolo 4.6.
6.2 Manutenzione consigliata
La Bianchi Industry garantisce il buon funzionamento nel tempo
del proprio distributore solo a fronte di una manutenzione pre-
ventiva eseguita rispettando le modalità riportate nella tabella
sottostante:
TIPOLOGIA DI
INTERVENTO
TEMPO / N° DI BATTUTE
OGNI
GIORNO
OGNI
SETTIMANA
20.000
BATTUTE O
MAX OGNI
MESE
Asportare e lavare tutte le parti in
vista nella zona di erogazione con
liquido sanitizzante
Vuotare la vaschetta fondi liquidi e
pulirla con sanitizzante
Vuotare il contenitore fondi caffè e
lavarlo con sanitizzante
Slare tutti i contenitori e pulire
con un panno umido tutte le parti di
appoggio dei contenitori, nonché il
fondo del distributore e l’esterno del
distributore, in particolare la zona di
erogazione, procedere poi con la sa-
nitizzazione

11
ITALIANO
PROCEDURA DI CONTROLLO DELLA FASATURA DEL GRUPPO CAFFÈ
Assicurarsi che, nella fase di riposo, l’indice rotante sia allineato all’indice di
fase (vedi Fig. 6.13).
Assicurarsi che in fase di erogazione l’indice rotante sia in anticipo di non
più di 1,5 mm dal punto di riferimento di erogazione (l’indice rotante deve
essere in posizione di erogazione tra 0 e 1,5 mm dal punto di erogazione).
6.4 Inattività
Per una prolungata inattività del distributore è necessario effettuare delle
operazioni preventive:
– Scollegare elettricamente ed idraulicamente il distributore.
– Vuotare completamente la caldaia solubili e la vaschetta galleggianti,
togliendo il tappo posto sul tubo lungo lo scivolo scarico. Rimontare il
tappo a svuotamento avvenuto.
– Scaricare tutti i prodotti dai contenitori (Fig.6.16).
– Provvedere al lavaggio di tutte le parti a contatto con alimenti secondo
quanto già descritto.
– Svuotare il secchio fondi e pulirlo accuratamente.
– Eliminare il sacco raccogli fondi.
– Pulire con un panno tutte le superci interne ed esterne del distributore
automatico
– Proteggere l’esterno con un lm o sacco in cellopan.
– Immagazzinare in locali asciutti, riparati e con temperature non inferiori
a 1°C
6.3 Regolazioni
6.3.1 Regolazione dose e macinatura
Il distributore viene consegnato tarato su dei valori standard cioè:
– Temperatura caffè nel bicchiere di circa 78°C per 38 cc di prodotto erogato.
– Temperatura prodotti solubili nel bicchiere di circa 73°C.
– Grammatura polvere di caffè circa 7,0 grammi.
– Grammatura polveri solubili secondo quanto indicato sulle confezioni dei
prodotti.
Per ottenere i migliori risultati con i prodotto utilizzato si consiglia di con-
trollare:
– Grammatura del caffè macinato. Variare la quantità agendo sul pomolo
posto sul dosatore (Fig.6.14).
Ogni scatto del pomolo di regolazione corrisponde ad un valore di 0,05
grammi.
Ruotando in senso orario la dose diminuisce.
Ruotando in senso antiorario la dose aumenta.
La variazione di prodotto è controllabile mediante delle tacche di riferi-
mento poste sul corpo dosatore (vedi gura 6.14).
La pastiglia di caffè, normalmente, deve presentarsi compatta e legger-
mente umida.
– Regolazione del grado di macinatura. Ruotare la vite (Fig.6.15) per otte-
nere i risultati desiderati.
Ruotando in senso orario si ottiene una macinatura ne, ruotando in senso
antiorario si ottiene una macinatura grossa.
Dopo la regolazione devono esere effettuate 3 regolazioni di prodotto
per vericare la bontà della regolazione, più la granulometria risulta ne,
maggiore sarà il tempo impiegato di erogazione del prodotto.
6.3.2 Regolazione portata acqua elettrovalvole solubili (Solo ver-
sione solubili)
Nei prodotti solubili potete regolare la quantità di acqua e la dose della polvere
elettronicamente variando i parametri standard, la procedura è illustrata al
capitolo 5.0 ISTRUZIONI SOFTWARE.
Per problemi legati alla formazione di calcare si possono avere riduzioni sulla
portata di acqua delle elettrovalvole solubili.
6.2.2 Manutenzione Gruppo Caffè
Mensilmente si consiglia di slare il gruppo e lavarlo abbondantemente in
acqua calda.
Presupposto di questa operazione, è che il gruppo caffè, si trovi in posizione
di riposo.
Successivamente staccare il tubetto indicato in g.6.9, svitare il pomolo A,
ruotare la levetta B(g.6.10) e quindi slare tutto il gruppo caffè.
Ogni 5000 battute e comunque mensilmente è consigliabile lubricare tutte
le parti in movimento del gruppo, utilizzando del grasso al silicone per uso
alimentare (Fig.6.11):
– asta ltro inferiore (1)
– biella (2)
– Aste guida (3)
Ogni 10000 battute si consiglia di sotituire le guarnizioni di tenuta e i ltri:
– guarnizioni.
– Svitare la vite (Fig.6.12), lavare il ltro e all’occorrenza sostituirlo.
– rimontare tutto in ordine inverso.
7.0 ACCESSORI
7.1 Kit mobili base
È disponibile, a richiesta, un mobile base a cui sovrapporre il distributore
automatico modello LEI200.
Nel kit sono contenuti:
- scivolo di scarico fondi caffè
- secchi raccolta liquidi di scarico (2)
- microinterruttore e galleggiante “Troppo pieno”
Per il montaggio e l’abbinamento del mobile con il distributore procedere
nel modo seguente:
- sovrapporre il distributore al mobiletto (Fig.7.1)
- avvitare i 4 piedini in dotazione al distributore (Fig.7.2)
7.1.1 Inserimento scivolo di scarico fondi caffè
Togliere la vaschetta fondi liquidi e la vaschetta raccogli fondi caffè.
Ricordarsi di:
- Asportare il dischetto sul fondo del distributore rompendo le alette che lo
tengono unito (Fig.7.3).
- Inserire il tubo convogliatore nella sede che si è appena creata (Fig.7.4).
- Reinserire la vaschetta raccogli fondi caffè.
7.1.2 Raccolta fondi liquidi
- Togliere la vaschetta e forare lo scarico come viene indicato nella gura
7.5.
- Inserire il tubo al silicone nell’apposita sede della vaschetta.
- A questo punto reinserire la vaschetta raccogli fondi liquidi vericando la
presenza del secchio nell’alloggiamento inferiore (Fig.7.6).
- Inserire nel secchio il galleggiante che segnala il massimo livello di liquido.
- Qualora il distributore sia collegato alla rete idrica, montare il microin-
terruttore sulla squadretta indicata (Fig.7.7-pos.A), staccare i li rosso e
giallo (Fig. 7.8) e collegarli ai li neri (Fig.7.9) del micro del galleggiante,
posto all’interno del mobiletto sopra il secchio.
6.2.1 Manutenzione ordinaria e straordinaria
Le operazioni descritte in questa sezione sono puramente indicative perchè
legate a diverse variabili quali: durezza dell’acqua, umidità, prodotti usati,
condizioni e mole di lavoro, etc.
Per tutte le operazioni che richiedono lo smontaggio di com-
ponenti del distributore, assicurarsi che lo stesso sia spento.
Afdare le operazioni sottodescritte a personale competente.
Se le operazioni richiedono il distributore acceso afdarle a personale ad-
destrato.
Per interventi più complessi, come ad esempio la disincrostazione delle caldaie,
necessita la buona conoscenza dell’apparecchiatura.
Mensilmente eseguire la disinfezione di tutte le parti a contatto con alimenti
utilizzando prodotti a base di cloro seguendo quanto gia descritto.

ENGLISH
12
Bianchi Industry SpA
President & CEO
Massimo Trapletti
DECLARATION OF CONFIRMITY
BIANCHI INDUSTRY S.p.A.
Corso Africa, 2-3-9 - 24040 Zingonia di VERDELLINO (BG) Italia
declares under its own responsibility that the product families:
Semi/Automatic Hot & Cold Beverages Dispenser
Automatic Vending Machines with Spirals for Cold Products
Coffee Machines for professional use
Brands: BIANCHI INDUSTRY / BRASILIA
Manufacture: BIANCHI INDUSTRY S.p.A.
Construction Year: 2017
Is in compliance with the Directive: RoHS 2
RoHS 2 - Directive 2011/65/UE of the European Parliament and of the Council of 8 June 2011, on the restriction of the use of certain hazardous sustances in electrical and
electronic equipment (EEE).
It also States that by January 3, 2013, any product BIANCHI INDUSTRY S.p.A. entered in the European Economic Area (UE+Iceland-Norway + Lichteinstein) is in complian-
ce with RoHS directive 2, therefore does not contain substances with concentrations exceeding the limits listed below (*):
• Lead [Pb] 0,1%
• Mercury [Hg] 0,1%
• Cadmium [Cd] 0,01%
• Hexavalent chromium [Cr(VI)] 0,1%
• Polybrominated biphenyls [PBB] 0,1%
• Polybrominated diphenyl ethers [PBDE] 0,1%
(*) ANNEX II - Restricted substances referred to in Article 4(1) end maximum concentration vales tolerated
by weight in homogeneous materials.
Zingonia di Verdellino (BG), January 2017
Bianchi Industry SpA
President & CEO
Massimo Trapletti
DECLARATION OF CONFORMITY
BIANCHI INDUSTRY S.p.A.
Corso Africa, 2/3/9 - 24040 Zingonia di VERDELLINO (BG) Italia
hereby declares under its own responsibility that the family of automatic vending machines
Trademarks: BIANCHI INDUSTRY / BRASILIA
Manufacturer by : BIANCHI INDUSTRY S.p.A.
Mod.: HL Des.: 50xyvwKCRz
x=0 or 2 >>> Semiautomatic or Automatic; y=0 or 2 or 3 or 4 >>>voltage category; v= ES or DS or PO >>> Boiler Group typology;
w= G1 or -- >>> nr. type coffee grinder groups; z=-- or MP >>> Monitor presence
Trade name: LEI 200; LEI 200 Monitor Semiautomatic Hot Beverages Dispenser
Year of built: 2017
TECHNICAL FOLDER prepared and kept at the Technical Ofce of BIANCHI INDUSTRY S.p.A. headquarters
complies with the Basic Requirements of the laws/directives/regulations set out below.
Directive 2014/35/EU (LVD) On the harmonisation of the laws of Member States relating to the making available on the market of electrical equipment
designed for use within certain voltage limits.
Directive 2006/42/EU (MD) Basic safety and health requirements in machinery design and construction.
Directive 2014/30/EU (EMC) On the harmonisation of the laws of Member States relating to electromagnetic compatibility.
Tests and inspections were carried out in accordance with the current European Harmonised Regulations.
SAFETY (LVD – MD) EN 60335-1:2012 +A11:2014 >>>
Safety of household electrical appliances and similar apparatus– General requirements.
EN 60335-2-75:2004+ A1:2005 +A11:2006 + A2:2008 +A12:2010 >>>
Special requirements for commercial dispensing appliances and vending machines.
EN 62233:2008 >>>
Measurement methods for electromagnetic elds of household appliances and similar apparatus with regard to human exposure.
EN ISO 11201:2010 + EN ISO 3744:2010 >>>
Determination of emission sound pressure levels.
ELECTROMAGNETIC
COMPATIBILITY (EMC):
EN 55014-1:2006 +A1:2009 +A2:2011 >>>
Limits and methods of measurement of radio disturbance characteristics of electrical and thermal appliances for household
and similar purposes, power tools and similar electric apparatus.
EN 55014-2:1997 +A1:2001 +A2:2008 >>>
Requirements for household appliances, electric tools and similar apparatus.
EN 61000-3-2:2014 >>>
Limits for harmonic current emissions (equipment with input current <=16A per phase).
EN 61000-3-3:2013 >>>
Limitation of voltage changes, voltage uctuations and icker in public low-voltage supply systems, for equipment with rated
current < 16A per phase and not subject to conditional connection.
Suitability of the materials in contact with food.
EU Parliament and Council Regulation
(EU) No. 1935/2004 of 27/10/2004
On materials and articles intended to come into contact with food, and following updates.
European Commission Regulation
(EU) No. 10/2011 of 14/01/2011
on plastic materials and articles intended to come into contact with food
on plastic materials and articles intended to come into contact with food, and following updates.
European Commission Regulation
(EC) No. 1895/2005 of 18/11/2005
on the restriction of use of certain epoxy derivatives in materials and articles intended to come into contact with food, and
following updates.
Ministerial Decree of 21/03/1973
as amended
Hygienic discipline of packaging, containers, and articles intended to come into contact with food or with substances for per-
sonal use.
Regulatory completion European Directives: 82/711/CEE, 85/572/CEE, 93/8/CEE, 97/48/CE, 2004/13/CE, 2004/19/CE, 2005/79/CE.
NOTE Use of the automatic vending machines covered by this declaration and associated accessories according to the procedures
described in the operating and maintenance manuals.
Zingonia di Verdellino (BG), January 2017

ENGLISH
13
1.0 PREMISE
I - Important notices for operator
This automatic distributor has been designed and constructed in full accor-
dance with current safety regulations and is therefore safe for those who
follow the ordinary lling and cleaning instructions as indicated in this manual.
The user must not under any circumstances remove the guards that
require a tool for removal.
Some maintenance operations (to be done solely by specialized technicians
and indicated in this manual with a special symbol) require that specic
safety protections of the machine must be switched off .
In accordance with the current safety regulations, certain operations are
the exclusive responsibility of the installation technician, and the ordinary
maintenance technician may have access to specic operations on with
specic authorization.
The acquaintance and absolute respect, from a technical point of view, of
the safety instructions and of the danger notices contained in this manual,
are fundamental for the execution, in conditions of minimum risk, for the
installation, use and maintenance of this machine.
II - General Instructions
Knowledge of the information and instructions contained in the
present manual is essential for a correct use of the automatic
vending machine on the part of the user .
– Interventions by the user on the automatic vending machine are allowed
only if they are of his competence and if he has been duly trained.
The installation technician must be fully acquainted with all the mecha-
nisms necessary for the correct operation of the machine.
– It is the buyer’s responsibility to ascertain that the users have been trained
and are informed and regulations indicated in the technical documentation
supplied.
INDEX
1.0 PREMISE
2.0 TECHNICAL CHARACTERISTICS
3.0 MOVING AN AUTOMATIC VENDING MACHINE
Despite the full observance of the safety regulations by the constructor,
those who operate on the automatic dispensers must be fully aware of
the potential risks involved in operations on the machine.
– This manual is an integral part of the equipment and as such must always
remain inside of the same, so as to allow further consultations on the
part of the various operators, until the dismantlement and/or scrapping
of the machine.
– In case of loss or damage of the present manual it is possible receive a
new copy making application to the manufacturer, with prior indication
of the data registered on machines’ serial number.
– The functional reliability and optimization of machine’s services are
guaranteed only if original parts are used.
– Modicationstothemachinenotpreviouslyagreedonwiththeconstruction
company and undertaken by the installation technician and/or manager,
are considered to be under his entire responsibility.
Alltheoperationsnecessarytomaintainthemachine’sefciency,before
and during it’s use are at the users charge.
– Anymanipulationsormodicationsmadeto the machine that are not
previously authorized by the manufacturer, relieve the latter from any
responsibility for damages deriving from, and will automatically result
in the cancellation of the machine guarantee terms.
– This manual reects the status at the moment of the emission of the
automaticvendingmachineonthemarket;possiblemodications,upgra-
ding, adaptments that are done the machine and that are subsequently
commercialized do not oblige Bianchi Industry neither to intervene
on the machine previously supplied, nor, neither to update the relative
technical documentation supplied together with the machine.
– It is however Bianchi Industry‘s faculty, when deemed opportune and
for valid motives, to adjourn the manuals already present on the market,
sending to their customers adjournment sheets that must be kept in the
original manual.
4.0 INSTALLATION
5.0 SOFTWARE INSTRUCTIONS
6.0 MAINTENANCE AND INACTIVITY
7.0 ACCESSORIES
PE
ATTENTION: Important safety
indications
READ the instruction manual
machine carefully before using
the machine
BEFORE USING THE MACHINE, READ THIS MANUAL CAREFULLY FOR ITS CORRECT USE IN ACCORDANCE WITH THE CURRENT SAFETY STANDARDS.
For any service or maintenance
switch off the machine
ATTENTION:
machine switched on
ATTENTION: hot parts in contact!
CAUTION! Parts in motion
Earthing indication
SOCKET SPANNERS
n° 5,5 - n° 7 - n° 8 - n° 10 - n° 20 - n° 22
SPANNERS (fork type)
n° 7 - n° 8 - n° 10 - n° 12 - n° 14
Keys at the disposal of
the MAINTENANCE and
INSTALLATION technicians SCREWDRIVERS
Small size
Medium size
Large size
Normal cross
Small cross
Medium cross
Large cross
Of Teon, small size for Trimmer regulation
N° 1 Key
RATCHET SPANNER no.14
TESTER
ELECTRICIAN’S SCISSORS
PROGRAMMING KIT
Tools necessary for undertaking interventions on the automatic dispenser.
INFORMATION TO THE USERS
Under Legislative Decree 25 September 2007, no.185 and art. 13, Legislative Decree 25 July 2005, no.151 “Implementation of Directives 2002/95/EC, 2002/96/EC and 2003/108/
EC, regarding the reduction of use of hazardous substances in electrical and electronic equipment as well as waste disposal”.
The barred waste container symbol on the equipment means that the product, at the end of its service life, must be disposed of separately from the other types of waste.
The user must therefore convey the equipment, at the end of its service life, to the appropriate separate collection centres for electronic/electrotechnical waste products or return
it to the dealer when purchasing a new equivalent equipment.
The appropriate separate collection and the following sending of the used equipment to recycling, treatment and eco-friendly disposal will help avoid negative effects on the envi-
ronment as well as on health along with an easier recycling of the materials forming the equipment.
Any unauthorized disposal of the product by the user will imply the enforcement of the administrative sanctions as set out in Legislative Decree no. 22/1997 (article 50 and fol-
lowing articles, Legislative Decree no. 22/1997).
IMPORTANT NOTICES
MAINTENANCE TECHNICIEN (LOADER)
Themaintenancetechnicianisdenedasbeingthepersonresponsibleforllingupthecontainerswithsolubleproducts,sugar,coffee,stirrers
and cups. The maintenance technician is also responsible for cleaning the distributor (see operations indicated in chapter 7.0). In the event of a
fault the maintenance technician must call the installation technician.
USER (FITTER)
theuser/tterisdenedasthepersonresponsiblefortheinstallationoftheautomaticdistributor,thestartingupoperationsandthefunction
settings. Each regulation operation is the exclusive responsibility of the installation technician who also holds the programming access password.

ENGLISH
14
CONTAINER CAPACITY
Coffee bean container kg 1,7
Instant coffee kg 0,45
Barley Kg 0,85
Milk kg 0,55
Creamer kg 1,20
Chocolate kg 3,00
Tea kg 2,00
Frozen-dry tea kg 1,00
Broth kg 1,25
Sugar kg 1,7
Caps (In the AUTOMATIC version only) N° 200
Spoons (In the AUTOMATIC version only) N° 200
Height mm 745
Width mm 510
Depth mm 600
Weight kg 50
Power frequency 220-230V; 50Hz
Power frequency * 220V; 60Hz
Water supply connection 3/4” gas
Electrical supply connection CEE 7/7 plug
Electrical supply connection * NBR 14136:2001 plug
Electrical supply connection * IRAM 2073 10A plug
2.1 KNOWING THE DISTRIBUTOR
Machine description
SEMI-AUTOMATIC versions (Fig.2.2A)
1 Coffee group and grinder
2 Container units for soluble drinks
3 Coffee bean container
4 Coin mechanism
5 Switching
6 Fuse T 3,15A
7 Master board
8 Espresso boiler
9Second boiler (only mod.LEI200 E5S DC PD A/R SEMIAUTO-LEI200 E5S
DC PD A/R SEMIAUTO LCD)
10 Dispensing chamber
11 Monitor LCD (only mod. LEI200 E5S MC PD A/R SEMIAUTO LCD -LEI200
E5S DC PD A/R SEMIAUTO LCD )
12 Keyboard
13 Keyboard cards
14 Display control board
15 Coffee grounds container
16 Cup holder
AUTOMATIC versions (Fig.2.2B)
1 Coffee group and grinder
2 Container units for soluble drinks
3 Coffee bean container
4 Coin mechanism
5 Switching
6 Fuse T 3,15A
7 Master board
8 Espresso boiler
9Second boiler (only mod.LEI200 E4S DC PD A/R AUTO-LEI200 E4S DC PD
A/R AUTO LCD)
10 Dispensing chamber
11 Monitor LCD (only mod.LEI200 E4S MC PD A/R AUTO LCD-LEI200 E4S
DC PD A/R AUTO LCD)
12 Keyboard
13 Keyboard cards
14 Display control board
15 Coffee grounds container
16 Spoons column
17 Cup column
2.2 Modelli
The following terms are used to identify the various models of automatic
vending machine:
LEI200 E4S MC PD A/R AUTO (Automatic single boiler without LCD)
LEI200 E4S DC PD A/R AUTO (Automatic double boiler without LCD)
LEI200 E5S MC PD A/R SEMIAUTO (Semiautomatic single boiler without LCD)
LEI200 E5S DC PD A/R SEMIAUTO (Semiautomatic double boiler without LCD)
LEI200 E4S MC PD A/R AUTO LCD (Automatic single boiler with LCD)
LEI200 E4S DC PD A/R AUTO LCD (Automatic double boiler with LCD)
LEI200 E5S MC PD A/R SEMIAUTO LCD (Semiautomatic single boiler with LCD)
LEI200 E5S DC PD A/R SEMIAUTO LCD (Semiautomatic double boiler with LCD)
The manual is compiled for the most complete model: it is therefo-
repossible,tonddescriptionsorexplanationsnotrelatedtoyour
machine.
The wiring and hydraulic diagrams are inside the vending machine.
III - SAFETY NORMS
Before using the automatic distributor, read this manual care-
fully.
– The installation and maintenance operations must be performed exclusi-
vely by qualied technical personnel.
– The user must not in any circumstance be able accede to those parts of
the automatic distributor that are protected and require a tool in order
to be accessible.
– The knowledge and the absolute respect, from a technical point of view of
the safety instructions and of the danger notices contained in this manual,
constitute the basis for the operation , in conditions of minimum risk, of
the installation, starting and maintenance of the machine.
Always disconnect the POWER CABLE before maintenance or
cleaning interventions.
ABSOLUTELY DO NOT INTERVENE ON THE MACHINE AND DO NOT
REMOVE ANY PROTECTION BEFORE THE COOLING OF THE HOT PARTS!
– The functional reliability and optimization of machine’s services are
guaranteed only if original parts are used.
– In order to guarantee normal operation, the machine must be installed
in areas that the environmental temperature is between a minimum of
+1°C and a maximum of +50°C end humidity of not over 85%.
– In order to guarantee a regular operation, always maintain the automatic
distributor in perfect cleaning conditions
– If at the moment of the installation, if conditions differing from those
indicated in the present manual, or should the same undergo changes
in time, the manufacturer must be immediately contacted before use of
the machine.
– Also check that any other eventual norms or regulations as laid down by
national or local legislation are taken into account and applied.
When calling it is advisable to be able to give the following information:
The data registered on the serial number label (Fig.1.1)
version of program contained in the microprocessor (Adhesive label on
the component installed on board) (Fig.1.2).
Bianchi Industry declines any responsibility for damages caused to people
or belongings in consequence to:
Incorrect installation
Inappropriate electrical and/or water connection.
Inadequate cleaning and maintenance
Notauthorizedmodications
Improper use of the distributor
Not original spare parts
– Under no circumstances is Bianchi Industry obliged to compensate for
eventual damage resulting from the forced suspension of drink deliveries
as the result of faults.
– Installation and maintenance operations , must be done exclusively by
qualiedtechnicalpersonnelwithpriortrainingforcarryingoutthese
duties.
– Forrellinguseonlyfoodproductsthatarespecicforautomaticvending
machines.
– The automatic distributor is not suitable for external installation. The
machine must be installed in dry places, with temperatures that never
go below 1°C it must not be installed in places where cleaning is done
with water hoses (ex. big kitchens.).
Do not use water jets to clean the machine.
This device is not intended for use by individuals (including children) with
reduced physical, sensorial or mental capacities, or by individuals without
the required knowledge and experience, unless said individuals have been
instructed on the use of the device and are duly supervised by a person
responsible for their safety.
Children must be monitored to ensure that they do not play with the device,
or use it as though it were a toy.
Access to the service area is allowed only by personnel that have
been specically trained accordingly and that have acquired
practical experience on the devices.
+039. 035.45.02.111
* Special versions for the domestic market
Possible technical problems that could occur are easily resolvable consulting
this manual ; For further information, contact the distributor from whom
the machine has been purchased, or contact Bianchi Industry’s Technical
Service at the following numbers:
WATER SUPPLY
from main supply with pressure between 0,05 and 0,65 MPa (0.5 and 6.5 bar)
2.0 TECHNICAL CHARACTERISTICS (Fig.2.1)
The electrical characteristics of the models are outlined on the
rating plates inside the vending machines.

ENGLISH
15
2.8 ESPRESSO COFFEE
This process only occurs for the versions provided with an express coffee
group.
– the grinder is activated until it reaches the dose of ground coffee set by
the doser (Fig.2.15)
– the doser electromagnet is activated , causing the opening of the door
and consequent fall of the coffee into the brew chamber
– the rotation group geared motor brings it into the dispensing position and
simultaneously compresses the ground coffee (Fig.2.16).
– the pump that dispenses the quantity of programmed water and that is
controlled by a specic electronic device, (volume meter), withdrawing
the water from the coffee boiler (Fig.2.17).
– the coffee group geared motor is activated again so as to bring again
into standby position; during this movement the used coffee grounds are
expelled (Fig.2.18).
The operational sequence (coffee grinding and release) may occur in an
inverse order according to the type of programming involved.
3.0 MOVING AN AUTOMATIC VENDING MACHINE
3.1 Moving and transport (Fig.3.1)
The transport of the distributor must be effected by competent personnel.
The distributor is delivered on a pallet; for the shifting use a trolley and move
it slowly in order to avoid capsizing or dangerous movements.
Avoid :
– dragging the distributor
– upset or lay down the distributor during transport
– give jolts to the distributor
Prevent the distributor from:
– being knocked
– Stacking other objects on it
– Being exposed to the elements
– Positioned in damp places
The construction company is not liable for any damage which may be caused
for the partial or complete non-observance of the warning notices indicated
above.
3.2 Stocking
For eventual stocking, avoid laying several machines over each other,
maintain it in vertical position, in dry places with temperatures not inferior
to 1°C (Fig.3.2).
3.3 Packing
The distributor is supplied in a cardboard box protected by polystyrene
packaging (Fig.3.2).
The automatic distributor will be delivered packed, assuring both a me-
chanical protection and protection against damages from the external
environment.
On the package labels are applied indicating:
maneouver with care
don’t turn upside-down
protect from the rain
don’t superimpose
protect from sources of heat
not resistant against bumps
type of distributor and serial number.
2.5.2 SUGAR DISPENSER
LEI200 semiautomatic vending machines do not deliver sugar, so the
user must sugar the drink himself.
2.5.1 CUP AND SPOON COLLECTION
LEI200 semiautomatic vending machines do not have an automatic cup and
stirrer dispenser.
This means the user must take his own from the dispensers provided nearby
and position them in the delivery area.
Pull down the cup holder as shown in Fig. 2.3, place the cup on it (Fig. 2.4)
and wait for the liquid to be delivered.
Then push the cup holder up, as shown in Fig. 2.5.
If a jug is used, place it in the delivery area as shown in Fig. 2.6.
2.3 Foreseen use
The distributor is exclusively for the dispensing of drinks, prepared mixing
food substances with water (by infusion as far as concerns coffee).
For this purpose use products declared as suitable by the manufacturer for
automatic distribution in open containers.
The drinks must be consumed immediately and in no case are to be kept for
subsequent consumption.
2.4 Basic operation concepts
During the normal functioning the distributor remains in standby status.
Introducing the necessary amount, according to the set price, and after
pressing the key relative to the desired drink, the drink dispensing cycle is
activated and can be divided different processes:
2.5 SEMI-AUTOMATIC versions:
LEI200 E5S MC PD A/R SEMIAUTO (Semiautomatic single boiler without LCD)
LEI200 E5S DC PD A/R SEMIAUTO (Semiautomatic double boiler without LCD)
LEI200 E5S MC PD A/R SEMIAUTO LCD (Semiautomatic single boiler with LCD)
LEI200 E5S DC PD A/R SEMIAUTO LCD (Semiautomatic double boiler with LCD)
With semiautomatic machines, the sugar, plastic cups and stirrers must be
provided separately as they are not distributed automatically.
2.6 AUTOMATIC versions:
LEI200 E4S MC PD A/R AUTO (Automatic single boiler without LCD )
LEI200 E4S DC PD A/R AUTO (Automatic double boiler without LCD)
LEI200 E4S MC PD A/R AUTO LCD (Automatic single boiler with LCD)
LEI200 E4S DC PD A/R AUTO LCD (Automatic double boiler with LCD)
2.6.1 CUP DISTRIBUTION
- the cup translation device shifts from idle/dispensing position to the “cup
dispenser” station (Fig. 2.7)
- the motor inside the cup dispenser moves the volutes which separates
the cup making it fall into the special holder fork (Fig. 2.8).
- the cup translation device shifts again to collect the sugar
- the cup translation device then moves to return to idle position.
- The presence of the cup is detected by a sensor that enables the dispensing
operations.
2.6.2 SUGAR DISPENSER
Where set and requested , an amount of sugar in the preset maximum dose
is dispensed with the possibility of stopping the latter at the desired dose.
The sugar is dispensed directly in the cup.
The dispensing procedure occurs according to the following phases:
1. the geared motor activates the helicoidal screw conveyor of the sugar
product container, dispensing the desired quantity into the product chutes
(Fig.2.9).
2. The electromagnet is engaged which will empty the sugar from the ange
into the chute which will deliver it to the cup (Fig.2.9).
Notes on sugar:
ALL DRINKS ARE DELIVERED WITHOUT SUGAR BY DEFAULT (without pressing
the WITH SUGAR button).
With regard to the WITH SUGAR option (valid only for espresso and soluble
decaffeinated coffee), the machine needs to be calibrated as follows:
SOLUBLE DECAFFEINATED: the amount of water delivered by the mixer /
decaf. SV is the same, regardless of whether the drink is with or without sugar.
ESPRESSO: with all express drinks, with or without sugar, the mixer / decaf.
SV activates for a few seconds, giving the a drink with the same volume in cc.
If you press WITH SUGAR, sugar is added, otherwise only water is delivered.
2.6.3 SPOON DISPENSER
This process is activated only in the versions where the spoon dispenser is
foreseen; In these versions it is possible to select the spoon in the selections
without sugar and/ or in the instant selections.
- the geared motor that operates the spoon release device is activated
making the spoon fall into the cup. (Fig. 2.10).
2.7 Drink selection (SOLUBLE)
According to the type drink requested and to the distributor model, several
of the various processes described here below can be activated.
– The solenoid valve xed to the espresso boiler is engaged in order to
deliver the required quantity of water into the mixer (g.2.11).
– The pump that dispenses the quantity of programmed water is activated
and is controlled by an appropriate electronic device (volumetric counter).
– The instant product geared motor activates the helicoidal screw conveyor
so as to dispense the quantity of product programmed into the mixer (in
some versions more than one product can be conveyed into the same
mixer) (Fig.2.12)
– once the preset quantity of water and powder is dispensed, the whipper
motor is switched off.
Fig. 2.13 - Pre-heating boiler
Fig. 2.14 - Instant powder boiler in polysulfone.

ENGLISH
16
4.2 Main Power supply connection
Make sure the mains supply corresponds to the value shown on the vending
machine.
Inside the vending machine is a T3 15A safety fuse, located on
the power board.
We suggest to check that:
– the tension of net of 230 V doesn’t have a difference of more than ± 10%
– The power supply output is able to bear the power load of the machine.
– use a system of diversied protection
– position the machine in such a way as to ensure that the plug remains
accessible
The machine must be connected to earth in observance with the current
safety norms.
For this reason, verify the plant’s earth wire connection to ascertain that it
is efcient and it answers national and European safety electric standards.
If necessary require the intervention qualied personnel for the verication
of the plant.
– The distributor is equipped with a power supply cable of H05VV-F 3x1
mm², with CEE 7/7 plug (NBR 14136:2001 plug - IRAM 2073 10A plug)*
(Fig.4.2).
– The sockets that are not compatible with that of the machine must be
replaced. (Fig.4.3).
– The use of extension, adapters and/ or multiple plugs is forbidden.
Bianchi Industry declines all responsibility for damages deriving for the
complete or partial failure to observe these warnings.
Should the power cable be found to be damaged, immediately disconnect
from the power socket.
The power supply cables are to be replaced by skilled personnel.
* Special versions for the domestic market
4.0 INSTALLATION
4.1 Positioning
– As already specied in paragraph “Safety regulations”, the distributor is
not suitable for external installation. The machine must be connect in dry
places, with temperatures that never go below 1°C it must not be installed
in places where cleaning is done with water hoses(ex. big kitchens.).
It must be installed in places without danger of explosions or res.
– If positioned near to a wall, there must be a minimum distance from the
wall of at least 5 cm. (Fig.4.1) so as to allow a regular ventilation. In no
case cover the distributor with cloths or similar.
WARNING!Donotpositionthedevicenearinammableobjects,keep
a minimum safety distance of 30 cm.
Bianchi Industry declines all responsibility for inconveniences due to the
non observance of the above mentioned installation norms.
If the installation is made in safety evacuation corridors make sure that with
the distributor door open there is anyhow sufcient space to pass by (Fig.4.1).
So as to avoid that the oor gets dirty, due to accidental spilling of the pro-
ducts, use, if necessary, under the distributor, a protection sufciently wide
to cover the distributors’ operating space.
3.4 Reception
Upon reception of the automatic distributor you need to check that the same
has not suffered damages during the transport.
If damages of any nature are noticed place a claim with the forwarder im-
mediately.
At the end of the transport the packing must result without damages
which means it must not :
– present dents, signs of bumps, deformations or damages of the external
packaging
– present wet zones or signs that could lead to suppose that the packing
has been exposed to rain, cold or heat.
– present signs of tampering
3.5 Unpacking
Remove the distributor from its packaging, lifting the polysterene panels and
removing it from the box (Fig.3.2)
– remove the key from the drink dispensing chamber (Fig.3.3)
– open the door of the distributor and remove the adhesive tape from the
components listed here below:
coin mechanism cover / keyboard cards
product containers
The packing material must not be left accessible to others, as it is a
potential environmental pollution sources. For the disposal contact
qualiedcompaniesauthorized.
4.3 Starting up of the unit
The distributor is equipped with safety switch (Fig.4.4) that disconnects the
machine whenever the door is opened ( see electric schema).
In case of necessity, therefore, open the door or remove the plug of the
machine from the power supply.
The clamp of the power cable junction box under tension.
– For some operations is however necessary operate with the door open
but with the distributor connected.
It is possible for qualied technical personnel, to operate in this way, by
inserting the special plastic key (clixon), supplied with the distributor ,
into the door switch and rotating it 90° (Fig. 4.4).
The opening and the possible connection with the distributor’s door
openmustbeperformedonlybyauthorizedandtechnicallyqualied
personnel.
Don’t leave the distributor open and unguarded.
Give the key only to qualied personnel.
Each time the distributor is switched on a diagnosis cycle is performed in
order to verify the position of the mobile parts and the presence of water and
of some products.
IMPORTANT
Thevendingmachinemustnotbeinstalledinaplaceclassiedasan
industrial kitchen.
4.4 Installation
4.4.1 Filling the water circuit
The appliance undertakes automatic lling of the water supply circuit.
The sequence:
- Machine starting up.
- First self installation mode.
At rst machine start-up, the system will perform an auto-installation run
that will also ll-up the espresso boiler with 300cc.
- At the end of said auto-installation and ll-up, the system will request
entry of the date.
– at the end of the water lling (Fig.4.5),
effect a cleaning cycle of the mixer
group so as to ll all the circuits and
remove eventual residues from the
boiler.
First self installation mode
For Espresso single boiler:
When the distributor is started up the airbreak is lled with water.
When the oater is in the upper position the machine will start loading water
automatically and this will go on until 300cc of water are counted by the fan
(coffee will therefore be dispensed via the coffee electro valve).
The procedure will be carried out with resistance off.
At the end a date will be shown on the display.
For Instant boiler :
Upon switching on of the dispenser, the polysulfone boiler starts lling up
until it reaches the probe’s maximum level.
The pump starts up for 5 sec, the system requests entry of the date, then
the heat-up process begins.
Before connecting up the machine’s power supply, check to ensure
that you have connected the dispenser up to the water supply mains
and that you have opened the water supply tap.
4.4.2 Cleaning of the parts in contact with food substances
With distributor switched on effect a cleaning of the mixers pressing the
buttons according to what is described in the service functions so as to eli-
minate any dirt from the coffee boiler and the instant boiler.
– wash your hands carefully
– prepare an anti-bacterial cleaning solution with a chlorine base (products
that can be purchased in pharmacies) following the concentrations given
on the product instruction labels.
Before removing the container lower the ap in order to prevent the
accidental escape of the soluble product inside the same (g. 4.6).
– remove all the product containers from the distributor (g. 4.7).
– remove the lids from the product containers covers and product chutes
(Fig.4.8). Dip all in the solution previously prepared.
– remove all the powder chutes, water funnels, mixing bowls and whippers
and silicone tubes and dip these parts also in the prepared solution
(Fig.4.9)
4.3.1 Connection to the main water supply
Adopt only and exclusively the supplied tube corresponding to the rules “EN
61770” and make sure that the network has a pressure between 0.5 and 6.5
bar (if not use a pump or a pressure reducer, as the case ).
16 / 02 / 2017

ENGLISH
17
4.5.4 Stirrer lling
Use only stirrers specically designed for automatic dispenser ma-
chines.
- remove the metal weight from the column device (Fig. 4.19)
- Insert spoons, with their packaging band, into the upper section of the
column and place them on the bottom, then cut and remove the band
(Fig.4.20).
– Check that the spoon are cut burr-free, that they are not bent and that
they are all placed horizontally.
- complete lling and replace the small weight (Fig. 4.21)
– with a cloth soaked with the solution clean the whipper assembly base
(Fig.4.10)
– the parts must soak in the solution for the time indicated on the solutions’
instruction label.
– Recover all the parts, rinse them abundantly, dry them perfectly and
proceed with the re-assembly in the distributor.
After re-positioning the container undertake to raise the ap in order to reset
the correct function (g. 4.11).
For further safety after the assembly of the parts, effect some auto-
matic cleaning cycles so as to eliminate any eventual residues.
5.0 SOFTWARE INSTRUCTIONS
STANDARD MODE
PUSHBUTTON PANEL
The pushbuttons provided are meant for:
Key 1: Selection 1
Key 2: Selection 2
Key 3: Selection 3
Key 4: Selection 4
Key 5: Selection 5
Key 6: Selection 6
Key 7: Selection 7
Key 8: Selection 8
Key 9: Selection 9
Key 10: Selection 10
Key 11: Selection 11
Key 12: Selection 12
All the keys can also be used for the pre-selection functions.
On the SF0519A circuit board:
Key P: Programming
Key M: Maintenance
Please consult the description hereunder concerning the use of the DP1 and
DP2 pre-selection functions.
In the programming mode the keys have the following meaning:
Key 1: Increase value
Key 2: Escape
Key 3: Decrease value
Key 5: Move cursor
key 7: Enter
By programming either the DP1 or DP2 pre-selection function on one of the
P1 or P2 keys, then pressing on either the DP1 or DP2 pre-selection keys
followed by a second key, will activate selection options numbered 13 to 24
according to the following table:
Key number LEI 200
DP1 + Key 1
DP1 + Key 2
DP1 + Key 3 Selection 13
DP1 + Key 4 Selection 14
DP1 + Key 5 Selection 15
DP1 + Key 6 Selection 16
DP1 + Key 7 Selection 17
DP1 + Key 8 Selection 18
DP1 + Key 9
DP1 + Key 10
DP1 + Key 11
DP1 + Key 12
DP2 + Key 1
DP2 + Key 2
DP2 + Key 3 Selection 19
DP2 + Key 4 Selection 20
DP2 + Key 5 Selection 21
DP2 + Key 6 Selection 22
DP2 + Key 7 Selection 23
DP2 + Key 8 Selection 24
DP2 + Key 9
DP2 + Key 10
DP2 + Key 11
DP2 + Key 12
Nota: sui tasti programmati come preselezioni non saranno ovviamente
disponibili le relative selezioni.
4.5.2 Payment system installation
The distributor does not have a payment system; any possible damages to
the distributor itself and/or objects and/or people deriving from its incorrect
installation are responsibility of who installs the payment system.
In-series arrangement for connection of the validator unit, 12-24 V.
For Executive/MdB kit payment systems.
The switches are to be directly connected to the keyboard card, the executive
serial systems require the payment system kit supplied separately.
Then go into programming for the correct settings.
Consult chapter ”5.0 SOFTWARE INSTRUCTIONS” so as to verify setting of
the parameters, that must be coherent with the system used.
4.5 Product container loading (with machine off)
4.5.1 Loading containers
Filling is possible keeping the containers inserted, and by raising the upper
ap of the distributor (Fig. 4.12) or by extracting each container.
For granulated coffee in particular it is necessary to close the closure plat
before extracting the container.(Fig.4.13).
– remove the covers of each container and load the product according to
the product indicated on the label (Fig.4.14).
– pay attention that they there are no clots, avoid pressing the product
and using an excessive quantity, so as to avoid its aging in relation to the
consumption forseen in the time period between two loadings.
Check the container product capacity in the section TECHNICAL CHARACTE-
RISTICS.
4.5.3 Cup loading
Use only cups designed for automatic vending machines, with a diameter
of more than 70-74 mm, avoid compressing the cups between themselves
during the loading.
Loading must be carried out with machine off.
In installation phase with the cup dispenser completely empty, operate as
follows:
- Lift the bracket (Fig.4.15)
- Lift the cup column cover (Fig.4.16)
- Load the cups in the four tubes of the cup column (Fig.4.17)
- replace the cover and lower the bracket (Fig.4.18)

ENGLISH
18
6.1.2 Periodic cleaning by the maintenance technician
First step: disposal of the waste inside the waste bins (used cups, stirrers,
paper, tissues etc).Once the waste has been disposed of it is possible to
clean the surrounding area.
- elimination of the coarse dirt
- disinfecting of the ooring and walls of the area surrounding the machine
up to a radius of 1 metre around the distributor
- once this is complete proceed with opening the distributor.
6.1.3 Daily cleaning recommended
The objective is that to avoid the creation of bacteria in the food zone areas.
For all cleaning operations follow the instructions indicated in paragraph 6.1.1.
Operate as follows:
- clean all the visible parts in the dispensing area. (Fig. 6.1 e Fig. 6.2)
remove and clean carefully:
– funnels and powder chutes (Fig. 6.3-pos.1)
– water funnel (2), mixing bowls (3) whipper assembly (4)
– silicone water dispensing tubes.
– dispensing chamber (Fig. 6.4)
– coffee funnel and chute (Fig. 6.5)
Before effecting the re-assembly operations clean all the elements carefully.
– remove all coffee powder residue; the unit can be removed from its hou-
sing to make the task easier (Fig. 6.6)
– empty the waste liquids bin clean it and/or substitute it (Fig. 6.7).
– substitute the coffee spent grounds container (coffee in beans versions)
(Fig. 6.8).
Last step: coin collection.
6.1.4 Weekly cleaning
Remove all the containers and clean with a wet cloth all the container sup-
port parts, as well as the bottom of the distributor and the outside of the
distributor, in particular the dispensing area. (Fig. 6.1-6.2).
6.0 MAINTENANCE AND INACTIVITY
6.1 Cleaning and Loading
So as to guarantee the cor rect functioning of the distributor during time
it is necessary to effect some operations periodically, some of which
are indispensable for the observance of the health standard norms.
These operations must be done with the distributor open and switched
off. The cleaning operations must be effected before the loading of
the products.
In order to guarantee normal operation, the machine must be installed in
areas that the environmental temperature is between a minimum of -1°C
and a maximum of +32°C end humidity of not over 70%.
Must not be installed in places where cleaning is done with water hoses(ex.
big kitchens.).
Do not use water jets to clean the machine.
6.1.1 Procedure for distributor cleaning
Recommended equipment:
For those responsible for lling up and maintenance of the machine the
recommended equipment is as follows:
- Tool carrier case
- Clean uniform
- Disposable gloves
- Clamp for closing the
- Roll of kitchen paper
- Wood or plastic stick
- Bottle of detergent
- Bottle of disinfectant
- “Distributor out of action” sign
- Small table for resting items (optional)
Never use:
- Sponges, scourers, cloths
- Brushes
- Screwdrivers or metallic objects.
To ensure hygiene:
The LCD and the other parts of the machine can be cleaned using warm
water and a soft cloth.
A mild detergent can also be used if necessary.
Products exist on the market which are both detergents/disinfectants and
are usually sold at the chemist’s.
On application of the HACCP certain hygienic regulations are laid down
for company self-checking procedures concerning :
- Cleaning of the premises
- Product transportation
- Machinery maintenance
- Waste disposal
- Drinking water procurement
- Personnel hygiene
- Food product characteristics
- Personnel training
- (Directive 93/43 CEE)
The cleaning operations may be undertaken:
1 at the site of installation of the automatic distributor
2 at the premises of the company that provides the service
Example of a recommended cleaning procedure of a hot drink auto-
matic distributor:
The person responsible for machine hygiene, before opening the distributor
must check the cleanliness of the surrounding environment and put up a sign
to tell any potential consumers that:
- the machine is “out of use as maintenance is in progress”
- it is important that the person responsible for cleaning never has to in-
terrupt his work in order to operate the machine.
In the maintenance mode the keys have the following meaning:
Key 1: Alarms scroll-down
2nd level function
Key 2: Alarm reset
Alarm reset
Key 3: Test run complete
Alarm history
Key 4: Only water test
-
Key 5: Mixer test
-
Key 6: Group movements
Decounter recharge
Key 7: View total selections
MDB tube lling
Key 8: Cleaning
MDB tube emptying
Bianchi Industry guarantees the proper operation of its distri-
butor over time only with a preventive maintenance carried out
in compliance with the provisions listed below:
6.2 Recommended maintenance
TYPE OF INTERVENTION
TIME / No.of COUN
EVERY
DAY
EVERY
WEEK
20000 COUN
OR MAX
EVERY
MONTH
Remove and wash all visible parts in
the delivery area with sanitizing liquid.
Empty the liquid ground collecting
buckets and clean them with sani-
tizing liquid.
Empty the coffee ground collecting
tank and wash it with sanitizing liquid
Remove all containers and clean
with a wet cloth all container sup-
porting parts, as well as the bottom
and the outside of the distributor,
in particular the delivery area; then
proceed to sanitization.
6.1.5 Product loading
When necessary provide for the loading of the products and/or consumption
materials of the automatic vending machine. For these operations please refer
to the operations described under chapter 4.6 (rst installation).

ENGLISH
19
COFFEE MACHINE TIMING CHECK PROCEDURE
Ensure that during the idle state, the rotating index is aligned with the stage
index (see g.6.13)
Ensure that during the delivery stage that the rotating index is not more than
1.5 mm in advance of the delivery reference point (the rotating index must
be at a delivery position of between 0 and 1.5 mm from the delivery point).
6.3 Regulations
6.3.1 Dosage and grinding regulations
The distributor is supplied regulated with standard values and i.e.:
– TEMPERATURE of the coffee in the cup of about 78°C for 38 cc of dispensed
product
– TEMPERATURE of the instant products in the of about 73°C
– grams of coffee powder, about 7,0 grams
– Soluble powder basic weight according to what is stated on product pack-
aging.
In order to obtain the best results with the product used we advise to check:
- Ground coffee gram weighting: vary the quantity using the knob positioned
on the measuring device (Fig.6.14).
Each notch of the regulation knob corresponds to a value of 0.05 grams.
By turning in a clockwise sense the amount decreases.
By turning in an anti-clockwise sense the amount increases.
The variation in the product can be controlled by means of the reference
notches on the body of the measuring unit (see gure 6.14)
Coffee pellets must be have a compact consistency and be slightly damp.
– Regulation of the degree of grinding. Turn the screw (g.6.15) to obtain
the desired results.
Turn clockwise for ne grinding, turn anti-clockwise for coarser grinding.
After regulation, three product regulations must be carried out in order to
assess the efciency of the regulation, the ner the granules the greater
the time required for product delivery.
6.3.2 Regulation of the instant solenoid water delivery valves (version
soluble only)
In the case of soluble products you can regulate the quantity of water and
the powder dosage electronically by varying the standard parameter, accor-
ding to the procedure indicated in chapter 5.0 SOFTWARE INSTRUCTIONS.
Due to problems caused by the formation of lime scale the instant solenoid
valves can have a reduced water delivery.
6.4 Inactivity
If the automatic vending machine remains inactive for a long time it is ne-
cessary to perform some prevention operations:
– disconnect the machine electrically and hydraulically.
– empty completely the instant boiler and the oater reservoir removing
the plug located on the hose along the drain chute.
– Put the plug back in once the draining has been done.
– unload all the product from the containers (Fig. 6.16)
– perform a thorough cleaning of all the parts in contact with food substances
according to what has already been described.
– empty the liquid waste bin carefully
– eliminate the spent grounds bag
– clean with a cloth all the internal and external surfaces of the machine.
– protect the outisde of the machine with a plastic lm wrapping or bag.
– stock in a dry and protected place where the temperature is not less than
1° C.
6.2.1 Ordinary and Extraordinary Maintenance
The operations described in this section are purely indicative as they are
tied to variable factors such as the water hardness, humidity, products
used and workload, etc.
For all operations that require the disassembly of the distri-
butors’ components, make sure that the latter is switched off.
Entrust the operations mentioned here below to qualied personnel.
If the operations require that the distributor be switched on, entrust them
to specially trained personnel.
For more complicated interventions, such as removing the lime build-up in
the boilers a good knowledge of the equipment is necessary.
Monthly effect the debacterisation of all the parts in contact with food substan-
ces using chlorine based solutions following the operations already described.
6.2.2 Coffee group maintenance
Monthly extraction of the unit and thorough rinsing in hot water is recom-
mended.
The necessary requirement for this operation is that the coffee unit is in
idle position.
Then detach the pipe indicated in Fig. 6.9, unscrew knob A, rotate lever B
(Fig. 6.10) and then remove the entire coffee unit.
Every 5000 vends and anyhow monthly, it is advisable to lubricate all the
mobile parts of the group, using silicone grease for alimentary use Fig. 6.11):
– lower lter piston (1)
– connecting bar (2)
– piston guide (3)
Every 10000 vends we advise to substitute the gaskets and the lters.
– gaskets
– Loosen the screw (Fig. 6.12), wash the lter and replace if necessary.
– re-assemble everything in the inverse order.
7.0 ACCESSORIES
7.1 Base unit kit
A base unit is available on request, on which to stand the LEI200 automatic
distributor machine.
The kit contains:
- coffee dregs discharge chute
- discharge water collection buckets (2)
- “Too full” microswitch and oat
For assembly and mounting of distributor on base unit proceed as follows:
- Place the vending machine on a supporting cabinet (Fig. 7.1).
- Screw in the 4 legs provided (Fig. 7.2).
7.1.1 How to mount the coffee grounds discharge chute
- Remove the waste liquid tank and the coffee grounds tank.
- Break the tabs securing the disc to the bottom of the machine and remove
the disc (Fig.7.3).
- Insert the tube in the open slot (Fig. 7.4).
- Mount the coffee grounds tank.
7.1.2 Waste liquid tank
- Remove the tank and make a hole as shown (Fig. 7.5).
- Insert the silicone tube in the hole.
- Remount the tank and make sure there is a bucket in the lower com-
partment (Fig.7.6).
- Place the maximum level oat in the bucket.
- If the machine is connected to the water mains, install the microswitch
on the bracket indicated (Fig.7.7 - posn. A), detach the red and yellow
wires (Fig. 7.8) and connect them to the black wires (Fig.7.9) of the oat
microswitch in the bucket in the cabinet.

ESPAÑOL
20
DECLARACIÓN DE CONFORMIDAD
BIANCHI INDUSTRY S.p.A.
Corso Africa, 2-3-9 - 24040 Zingonia di VERDELLINO (BG) Italia
Declara bajo su propia y exclusiva responsabilidad que las familias de producto:
Dispensadores automáticos de bebidas calientes y frías
Dispensadores automáticos de espirales para productos fríos
Máquinas de café para uso profesional
Marcas: BIANCHI INDUSTRY / BRASILIA
Fabricante: BIANCHI INDUSTRY S.p.A.
Año de fabricación: 2017
son conformes a la directiva: RoHS 2
RoHS 2 - Directiva 2011/65/UE del Parlamento Europeo y del Consejo de 8 de junio de 2011 sobre restricciones a la utilización de determinadas sustancias peligrosas en
aparatos eléctricos y electrónicos (AEE).
Declaramos además que desde el 3 de enero de 2013, cualquier producto de BIANCHI INDUSTRY S.p.A. que se introduce en el Espacio Económico Europeo (UE + Liechtenstein
+ Islandia + Noruega) se ajusta a la Directiva RoHS 2, y por lo tanto no contiene concentraciones que rebasen los límites permitidos con relación a las siguientes sustancias
(*)
:
• Plomo [Pb] 0,1%
• Mercurio [Hg] 0,1%
• Cadmio [Cd] 0,01%
• Cromo hexavalente [Cr(VI)] 0,1%
• Bifenil polibrominados [PBB] 0,1%
• Éteres de difeniles polibrominados [PBDE] 0,1%
(*) Anexo II - Sustancias sometidas a restricciones de acuerdo con el artículo 4(1) y valores de concentración máxima tolerada
en peso de materiales homogéneos.
Zingonia di Verdellino (BG), Enero 2017
Bianchi Industry SpA
President & CEO
Massimo Trapletti
DECLARACIÓN DE CONFORMIDAD
La BIANCHI INDUSTRY S.p.A.
Corso Africa, 2/3/9 - 24040 Zingonia di VERDELLINO (BG) Italia
Declara bajo su responsabilidad que la familia de los distribuidores automáticos modelo:
Marcas: BIANCHI INDUSTRY / BRASILIA
Fabricante: BIANCHI INDUSTRY S.p.A.
Mod.: HL Des.: 50xyvwKCRz
x=0 o2 >>> Semiautomático o Automático; y= 0 o2 o3 o4 >>> alimentación de tensión; v=ES oDS oPO >>> Tipología caldera
w= G1 o-- >>> n°/tipo Grupos moledores dosicadores; z=-- o MP >>> opción monitor
Nombre comercial: LEI 200; LEI 200 Monitor Dispensador semiautomático de bebidas calientes
Año de fabricación: 2017
EXPEDIENTE TÉCNICO constituido y conservado en el Departamento Técnico BIANCHI INDUSTRY Spa en la sede de la empresa.
Cumple los Requisitos esenciales de las Legislaciones/Directivas/Reglamentos que se indican a continuación.
Directiva 2014/35/UE (LVD) Sobre la armonización de las legislaciones de los Estados miembros en materia de comercialización de material eléctrico
destinado a utilizarse con determinados límites de tensión
Directiva 2006/42/UE (MD) Requisitos esenciales de seguridad y salud en el diseño y fabricación de una máquina.
Directiva 2014/30/UE (EMC) Relativa a la aproximación de las legislaciones de los Estados miembros en materia de compatibilidad electromagnética.
Las pruebas/comprobaciones han sido realizadas con arreglo a las vigentes Normas armonizadas europeas.
SEGURIDAD (LVD – MD) EN 60335-1:2012 +A11:2014 >>>
Seguridad de los aparatos electrodomésticos y análogos - Norma general.
EN 60335-2-75:2004+ A1:2005 +A11:2006 + A2:2008 +A12:2010 >>>
Requisitos particulares para dispensadores comerciales y máquinas de venta.
EN 62233:2008 >>>
Métodos de medida para los campos electromagnéticos de electrodomésticos y aparatos análogos en relación con la expo-
sición humana.
EN ISO 11201:2010 + EN ISO 3744:2010 >>>
Medición de los niveles de presión acústico
COMPATIBILIDAD
ELECTROMAGNÉTICA (EMC):
EN 55014-1:2006 +A1:2009 +A2:2011 >>>
Límites y métodos de medida de las características de las perturbaciones radioeléctricas para aparatos electrodomésticos,
herramientas eléctricas y aparatos análogos.
EN 55014-2:1997 +A1:2001 +A2:2008 >>>
Requisitos de inmunidad para los aparatos electrodomésticos, herramientas eléctricas y aparatos análogos.
EN 61000-3-2:2014 >>>
Límites para las emisiones de corriente armónica (equipos con corriente de entrada <= 16 A por fase).
EN 61000-3-3:2013 >>>
Limitación de las variaciones de tensiones, uctuaciones de tensión y del icker en sistemas de alimentación de baja tensión
para equipos con corriente nominal = 16 A por fase y no sujetos a conexión bajo condición.
Idoneidad de los materiales empleados al contacto con productos alimenticios.
Reglamento (UE) N. 1935/2004 del Parla-
mento de la UE y del Consejo de 27/10/2004
Sobre los materiales y objetos destinados a entrar en contacto con productos alimenticios.
Reglamento (UE) N. 10/2011 de la
Comisión de 14/01/2011
Sobre los materiales y objetos de material plástico destinados a entrar en contacto con productos alimenticios y sus poste-
riores actualizaciones.
Reglamento (UE) N. 1895/2005 de
la Comisión de 18/11/2005
Relativo a la restricción en el uso de determinados derivados epoxídicos en materiales y objetos destinados a entrar en contacto
con productos alimenticios y sus posteriores actualizaciones.
Decreto Ministerial de 21/03/1973
y sus posteriores actualizaciones
Disciplina higiénica de los embalajes, recipientes y objetos destinados a estar en contacto con sustancias alimenticias o con
sustancias de uso personal.
Complemento normativo Directivas europeas: 82/711/CEE, 85/572/CEE, 93/8/CEE, 97/48/97/48/CE, 2004/13/CE, 2004/19/CE, 2005/79/CE.
NOTA Uso de los distribuidores automáticos objeto de la declaración y sus accesorios según los procedimientos descritos en el
manual de uso y mantenimiento.
Zingonia di Verdellino (BG), Enero 2017 Bianchi Industry SpA
President & CEO
Massimo Trapletti
This manual suits for next models
8
Table of contents
Languages:
Other BIANCHI VENDING Vending Machine manuals

BIANCHI VENDING
BIANCHI VENDING LEI300 User manual

BIANCHI VENDING
BIANCHI VENDING LEI600 User manual

BIANCHI VENDING
BIANCHI VENDING LEIsa User manual

BIANCHI VENDING
BIANCHI VENDING ANE23BL Manual

BIANCHI VENDING
BIANCHI VENDING Gaia Fresh Milk User manual

BIANCHI VENDING
BIANCHI VENDING brasilia GAIA STYLE RY - AUREA User manual

BIANCHI VENDING
BIANCHI VENDING BVM972 User manual

BIANCHI VENDING
BIANCHI VENDING SIRIO FRESH BREW User manual