BigTimeClocks 150 User manual

EZCLOCKS LLC.,
8565 S Eastern ave, Suite 150, Las Vegas NV 89123
Tel: (702) 726 9030
www.bigtimeclocks.biz
TIME OF DAY
COUNTDOWN / UP
DIGITAL WALL CLOCK
MODEL 150MODEL 150
USER MANUALUSER MANUAL

What’s in the box
NOTE: Model 150 is a plug-in digital clock. A small battery is included in the clock for backup purposes
in order to maintain clock functions in the background. The battery will however not illuminate the display.
The clock will remain on time when power resumes. Model 150 is exclusively operated with the remote
control supplied with the clock.
1. Overview
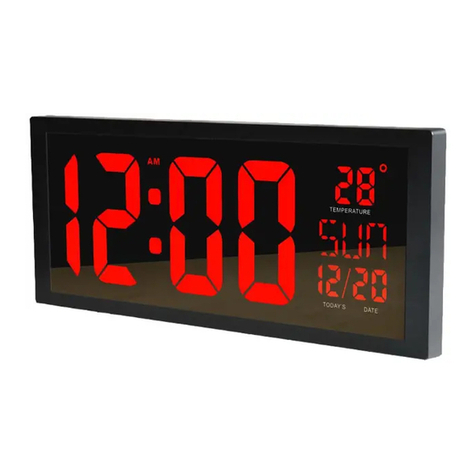
BigTimeClocks® model 150 are 5”numerals / 6 digits indoor wall clock which displays time of day in hours,
minutes and seconds and also features countdown, count up, stopwatch and interval functions. The clock
must not be permanently installed outdoors but can however be used for outdoor events if not exposed to
water/rain.
Model 150 is operated only with the supplied remote control model REM-150 (spare remote controls are
available on demand, please contact Customer Service- see page 6 for contact details).
Model 150 is designed to be either wall mounted or mounted onto tripod model #300 (download our
installation manual online).
1x1x
2
BigTimeClocks®BigTimeClocks®
• Model 150 features Time of day, Countdown, Count Up, Interval Timing and Stopwatch functions.
• Model 150 can store up to 8 programs as a combination of Countdown, Count Up, or Interval
Timing.
• Model 150 includes a backup battery to keep the time running, for 10 years+ in case of a power loss
( the battery will however not illuminate the display)
• Please use the remote control keys to operate the clock (see section 5/page 7, “Remote Control”)
2. Setup
2.1 General instructions
Press the power key to turn the clock on. HH:MM:SS time format is the default display.
Press the “Set” key to set the time: the hour digits will start to blink. Press the number key to assign a
value and press the left or right arrows keys to navigate to the minutes and seconds digits and change in
the same way. Press the “Set” key again to save data and exit setting mode. Or press the “exit” key to exit
without saving.
Note:
• The time format can be changed from 12-hours to 24-hours (military time) by pressing the “shift” key to
move from one format to the other.
• The time of day display can be accessed at any point by pressing the “Clock” button on your remote
control.
2.2 Time of day
Models 150 Model 150
3
Remote controlPower supply 1xDigital clock 1xUser’s guide
Figure 1
Clock dimensions
35”
5”
10.5”
1.57”
Figure 2
Rear view of clock
Key hole
Clock rear panel

BigTimeClocks®BigTimeClocks®
Model 150 Model 150
4 5
When in time of day mode, press the DOWN arrow key to enter the countdown function and the clock
displays 99:59:59 or the previous time that was set. If the timer displays the last set time, press the
“RESET” key to re-set the time.
• Press the “SET” key to set time: Press the number keys to change the blinking digits values and
press the left or right arrow key to move between hours, minutes, seconds.
• Press the “SET” key again to save data and exit setting mode. Or press the “EXIT” key to exit setting
without saving.
• Press one of the F5~F9 keys to save the dened program
• If required, press F4 to set or cancel the automatic repeat of the program
• If required, press F3 to set or cancel a 10 second countdown preparation time
• Press the “OK” key to start the function or to stop/pause it.
• When the program has nished and the digits are ashing, press the OK key again to stop ashing
immediately
• While the countdown function is in progress, press the “SHIFT” key to view the time of day display for
3 seconds ( the countdown function continues to run in the background)
2.3 Countdown
When in time of day mode, press the UP arrow key to enter the count up function and the clock displays
00:00:00 or the previous time that was set. If the timer displays the last set time, press the “Reset” key to
re-set time.
• Press the “SET” key to set time: Press the number keys to change the blinking digits values and
press the left or right arrow key to move between hours, minutes, seconds.
• Press the “SET” key again to save data and exit setting mode. Or press the “EXIT” key to exit setting
without saving.
• Press one of the F5~F12 to save the dened program.
• If required, press F4 to set or cancel the automatic repeat of the program
• If required, press F3 to set or cancel a 10 second countdown preparation time
• Press the “OK” key to start the function or to stop/pause it.
• When the program has nished and the digits are ashing, press the OK arrow key again to stop
ashing immediately.
• While the count up function is in progress, press the “SHIFT” key to view the time of day display for 3
seconds ( the count up function continues to run in the background)
2.4 Count Up
Press F1 to enter the Stopwatch function and the clock displays 00:00:00.
• Press the “Reset” key or F1 key to clear data when the stopwatch stops
• Press the “OK” key to start the stopwatch or pause.
• While the stopwatch is in progress, you can press the “SHIFT” key to view the time of day for 3
seconds ( the stopwatch continues to run in the background)
2.5 Stopwatch
Sometimes it is necessary to start the count up timing from a value other than zero. To do this:
• Set the normal clock time to 24 hour time
• Set the time you wish to start from --(say) 20 minutes so the timer displays 00: 20:00
• Press OK and the timer will start to count up. The maximum count up time will be 23:59:59.
2.6 Race Clock Count Up Timer
The Interval Timer mode uses 3 sequential programs. H1 is the working time for your exercise, H2 is the
resting time and H3 is the number of times you want to repeat the exercise.
• Press the F2 key to access the interval timer function and the clock displays H1 00 00
• Press the “SET” key and the clock displays H1 XX XX where “XX XX” represent minutes and seconds.
The XX blink. Change the values by pressing the number keys on the remote control and press the
left or right arrow keys to move between minutes and seconds. This is the working time.
• Press the “SET” key a second time and the clock displays H2 XX XX and the XX blinks. Change the
MM:SS time values to set the rest time.
• Press the “SET” key a third time and the clock displays H3 XX XX. XX blink. Enter the number of
times you want the program to repeat.
• Press the “SET” key a fourth time to save data and exit setting mode
• Press F5~F9 to save the customized program if necessary
• Press the “OK” key to start or pause the program.
• When the program has nished and the digits are ashing press the OK key again to stop ashing
immediately
• While the interval timer function is in progress, you can press the “SHIFT” key to view the time of day
for 3 seconds (the interval timer function continues to run in the background)
2.7 Interval Timer
• Press the “MUTE” key on the remote control and a single digit will display.
• This digit represents the number of beeps at the end of any given function.
• Set the number of beeps required by entering a value from 0 to 9 and press “SET” key to save the
value. If the value is set to “0”, this means the sound is muted. If the value is set to 1, then the buzzer
beeps once. Set it to two and the buzzer beeps twice and so on. If the light on the bottom right hand
corner of the clock is not on, then the sound is muted. The light will stay on when a number of beeps
is set.
2.8 Buzzer, number of beeps and Mute control

4. Wall mounting
5. Remote control
3. Notes
6 7
Model 150/170/240
BigTimeClocks®BigTimeClocks®Model 150/170/240
Side view
of clock
Screw in wall
Wall
Display On/O
Numerical keypad to
set and recall saved
functions
Exit key to exit setup
without saving data
Moves selection left
Auto repeat key
Remote sound On/O
Enters editing mode
OK key starts/stops/resumes any function
10 second “pre” countdown/ up
Moves selection right
Press F3 to add or cancel a 10 second countdown preparation for any Countdown, count up or
Interval timing prorgam. When selected, a light on the right of the unit turns on. (If you use the program
preparation function and the overall sound is muted you will still hear a beep sound for the last 3 seconds
of the preparation when it beeps 3-2-1- start.)
2.9 Program Preparation Function
When AUTO REPEAT is selected (KEY F4), the countdown or count up program nishes and then ashes
and beeps for 6 seconds before automatically repeating. When selected, a light on the right of the unit
lights up.
2.10 Auto Repeat
To access a stored program, just press the F5-12 KEY in which it is stored. The clock will switch
automatically to whatever function the stored program applies to.
2.11 Stored Program Access
• Please stop any function in progress before switching to another timer function
• The remote control requires 2 x AAA batteries
• Please use the original power adapter supplied with the clock to avoid any damage. If the power
adapter must be replaced, please use an identical power specication or reach out to BigTimeClocks® to
order a replacement power adapter.

EZCLOCKS LLC.,
8565 S Eastern ave, Suite 150,
Las Vegas NV 89123
Tel: (702) 726 9030
www.bigtimeclocks.biz
Table of contents
Other BigTimeClocks Clock manuals
Popular Clock manuals by other brands
Eichmüller
Eichmüller J818P Installation instruction
Oregon Scientific
Oregon Scientific BAR368P user manual
Icon Time Systems
Icon Time Systems RTC-1000 2.0 quick start guide
Bodet
Bodet Cristalys Ellipse quick start guide
Jaeger-leCoultre
Jaeger-leCoultre CLASSIC MOON manual
Oregon Scientific
Oregon Scientific JM889N user manual
