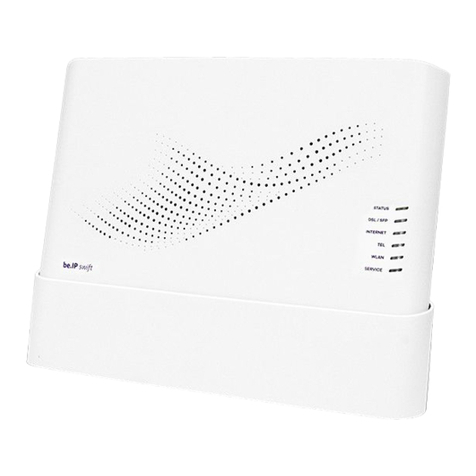
bintec elmeg be.IP swift User manual

USER MANUAL

2
Contents
Welcome!.........................................................................................6
1.1 Scope of delivery.............................................................................6
Router installation...........................................................................8
2.1 Standing (table)...............................................................................8
2.2 Wall mounting .................................................................................9
Putting be.IP swift into operation ............................................... 10
3.1 Connecting devices to the WLAN ............................................... 11
3.2 Meaning of the LEDs.................................................................... 13
3.3 Reset button ................................................................................. 14
Areas of application for your be.IP swift .................................... 15
4.1 be.IP swift IP router with integrated telephone system ............ 15
4.2 be.IP swift as IP router with separate ISDN telephone system 16
4.3 Changing the operation mode..................................................... 16
be.IP swift login............................................................................ 18
Home menu.................................................................................. 19
6.1 Home menu / System settings ................................................... 19
6.2 Home / Password menu.............................................................. 20
6.3 Home / Date and time menu ....................................................... 21
6.4 Home / Check for updates menu................................................ 22
Menu for telephony in operation as a telephone system .......... 23
7.1 Telephony / Connections menu .................................................. 23
7.1.1 Configuration of MagentaZuhause DeutschlandLAN IP
Voice/Data.................................................................................... 25
7.1.2 Configuration of DeutschlandLAN SIP Trunk.............. 26

3
7.1.3 Configuration of CompanyFlex SIP Trunk................... 27
7.1.4 Setting up a Cloud PBX port......................................... 29
7.1.5 Setting up a MagentaZuhause-Regio port................... 30
7.1.6 Configuration of a user-defined VoIP provider (single
number) 30
7.1.7 Configuration of a user-defined VoIP provider (direct
dial-in) 32
7.2 Telephony / User menu ............................................................... 32
7.3 Telephony / Internal Numbers menu .......................................... 34
7.4 Telephony / Terminals menu ...................................................... 35
7.4.1 Connecting a new analog telephone ........................... 36
7.4.2 Adding a new ISDN telephone...................................... 37
7.4.3 Connecting a VoIP telephone....................................... 38
7.5 Telephony / Calendar menu ........................................................ 40
7.6 Telephony / Call distribution menu............................................. 41
7.7 Telephony / Options menu .......................................................... 42
7.8 CompanyFlex Converter .............................................................. 43
Telephony Menu in Operation as a Media Gateway .................. 45
8.1 Telephony menu / First steps ..................................................... 45
8.2 Telephony menu / ports .............................................................. 46
8.2.1 Configuration of MagentaZuhause and
DeutschlandLAN Voice/Data ...................................................... 49
8.2.2 Configuration of DeutschlandLAN SIP Trunk.............. 50
8.2.3 Configuration of CompanyFlex SIP Trunk................... 51
8.2.4 Setting up a Cloud PBX port......................................... 53
8.2.5 Setting up a MagentaZuhause-Regio port................... 54
8.2.6 Configuration of a user-defined VoIP provider (SIP
single number) ............................................................................. 54

4
8.2.7 Configuration of a user-defined VoIP provider
(SIP Direct dial-in) ........................................................................ 56
8.3 Swyx IP ......................................................................................... 56
8.4 CompanyFlex Converter .............................................................. 58
WLAN menu ................................................................................. 60
9.1 WLAN menu / WLAN settings ..................................................... 60
9.2 WLAN / WLAN Timer menu......................................................... 62
9.3 WLAN guest network ................................................................... 62
Internet & Network menu............................................................. 65
10.1Internet & Network / Local Network menu ................................. 66
10.2Internet & Network / Internet Connections menu ...................... 67
10.2.1 Creating a new connection........................................... 68
10.2.2 WANoE backup ............................................................. 71
10.3Setting up VPN menu................................................................... 73
10.3.1 Scenario: Client to Site ................................................. 74
10.3.2 Scenario: Site to Site..................................................... 76
10.4Setting up port forwardings menu .............................................. 77
10.4.1 Port forwarding with Ipv6 addresses........................... 79
10.5IP/MAC Binding menu ................................................................. 80
Video instructions ........................................................................ 82
Licenses and conformity ............................................................. 83
12.1Open Source Code Licensing Notice .......................................... 83
12.2EU Conformity .............................................................................. 83
12.3Safety-related data....................................................................... 83
12.3.1 Interfaces ...................................................................... 83
12.3.2 Mains connection ......................................................... 83
12.3.3 Ambient conditions....................................................... 84
5
12.3.4 European regulations.................................................... 84
12.3.5 Disposal......................................................................... 84
Running services and their ports ................................................ 86
Safety instructions ....................................................................... 88

Welcome! 6
User manual
be.IP
swift
Welcome!
These instructions describe with examples the installation and initial
setup of the be.IP swift for operation on a Telecom DSL port with the
help of configuration wizards.
Additionally the following documents are available at
archive.bintec-elmeg.com:
•Advanced configuration: This manual describes the
configuration options for the menus that you can access via
the Show more link in the main menu.
•Operation via the telephone: This document explains how,
when operating as a telephone system, you can also control
many functions using shortcuts on a connected telephone.
Video instructions for special setup tasks can be found at
helpcenter.bintec-elmeg.com.
Important
Read these instructions carefully before using the router and
keep them for future reference. If necessary, pass these instructions
on to a new owner of the device.
Observe the safety instructions at the end of this document!
1.1 Scope of delivery
Unpack your be.IP swift and check the package contents for any
missing parts:

Welcome! 7
•be.IP swift
•Stand
•Plug-in power supply unit
•DSL cable RJ45-TAE
•Network cable RJ45-RJ45
•Wall mounting bracket
Check whether the components have been damaged during
shipping. If this is the case, do not put the router into operation and
contact your supplier.

Router installation 8
Router installation
2.1 Standing (table)

Router installation 9
2.2 Wall mounting
1. Attach the wall mounting bracket.
2. Attach the dowels and mount the router.
Dimensions in mm

Putting be.IP swift into operation 10
Putting be.IP swift into operation
Ports on the bottom
Ports at the rear
1. Connecting DSL
Take the gray DSL cable (RJ45-TAE) and plug the RJ45
connector into the gray socket labeled DSL on your be.IP swift.
Insert the TAE plug of the cable into the middle socket labeled
For on the telephone home connection (telephone socket).
2. Connecting analog telephones
Take the telephone plug (TAE plug) of your DECT base station
(or analog telephones) and plug it into the socket labeled TEL1 or
TEL2 on the back of the router. Alternatively, you can also
connect telephones via the black RJ11 sockets labeled TEL1 or
TEL2.
3. Connecting ISDN terminals
You connect your ISDN telephones or your existing ISDN
telephone system via the black RJ45 sockets labeled ISDN. To
connect up to eight ISDN terminals (including a maximum of four
telephones), please use an additional ISDN distributor.
4. Connecting IP telephones
Wired IP telephones are connected via the yellow LAN sockets.
5. Connecting computers via LAN sockets

Putting be.IP swift into operation 11
6. Take the network cable included in the scope of delivery and use
it to connect your terminal device, such as notebook, media
receiver or NAS, with the be.IP swift.
7. Connecting the power supply
Insert the plug of the supplied power supply unit into the socket
labeled Power on the be.IP swift and the power supply unit into
a 230 V mains socket. The STATUS LED initially lights up red for
25 seconds and then starts flashing green. A steady green
indicates completion of the startup process.
3.1 Connecting devices to the WLAN
The WLAN function of the be.IP swift must be switched on. Check
the WLAN LED on the front panel. It must light up green
continuously. If it is not lit, briefly press the WLAN button on the
be.IP swift. The WLAN LED starts to flash green and lights up
permanently after approx. 15 seconds.
Position of the WLAN and WPS buttons on the side of the router
Activating the WPS button
For security reasons, the WPS button, which facilitates quick
connection of WLAN devices, is disabled when the device is
delivered. To enable it, go to the WLAN > Show more > Advanced
WLAN settings > WLAN > 2.4 GHZ / 5 GHz menu in the configuration
interface and confirm the Enable WPS Push Button option. You have
to make a setting for each frequency band.

Putting be.IP swift into operation 12
Connecting devices under Windows 10/OS X
1. Click on the WLAN icon in the start bar.
2. Select the WLAN name of your router and click Connect.
3. Enter the WLAN password in the Enter network key input field or
press the WPS button.
Connecting devices running Android or iOS
For smart phones and tablets running Android 5.x or iOS 11.x and
above operating systems, you can simply scan the QR code on the
enclosed router pass and the router will automatically connect to the
WLAN.
Router pass

Putting be.IP swift into operation 13
3.2 Meaning of the LEDs
STATUS
green
on
Router in operation
green
rapid
flashing
WAN auto detection
green
slow
flashing
System software starting
red
on
The router is booting (approx. 25 s)
or a router error has been detected
(>60 s)
red
flashing
New system software is being
loaded or reset
off
No power supply available
DSL/SFP
green
on
DSL connection successfully
established
green
rapid
flashing
Executing DSL synchronization
green
slow
flashing
DSL connection established
yellow
on
SFP link detected
off
DSL interface not activated, no SFP
link
INTERNET
green
on
Internet connection successfully
established
red
on
Error while establishing the Internet
connection
off
No Internet connection
TEL
green
on
All telephone numbers registered
red
on
At least one telephone number not
registered
off
Internet telephony not activated
WLAN
green
on
WLAN activated
green
flashing
WLAN activating or deactivating
yellow
flashing
WPS button pressed, waiting for
client connection
off
WLAN deactivated
SERVICE
off
Remote maintenance service off /
Automatic configuration (TR-069)
inactive

Putting be.IP swift into operation 14
3.3 Reset button
The Reset button can be used to trigger various actions. Which
action is initiated is determined by how long the button is pressed.
You will find the button on the connection side of the be.IP swift:
You can initiate the following actions with the button:
1. 0 sec. to 2 sec. actuation: no action
2. >10 sec. to 15 sec. actuation: Router restarts; the Service LED
lights up first and goes out as soon as 10 seconds have passed.
3. >15 sec. actuation: Restores factory settings; the Status LED
starts flashing green as soon as 15 seconds have passed.

Areas of application for your be.IP swift 15
Areas of application for your be.IP swift
The be.IP swift is an outstanding all-in-one communications
solution. Ideal for new connections or bandwidth upgrades. The
be.IP swift is the next generation of routers and offers improved
performance combined with greater ease of use.
Advantages at a glance
•Business routing functions with DSL, FTTH and Ethernet,
dual stack (IPv4/6) Internet access
•VPN with 10 active IPSec tunnels, e.g. for home office or
connecting mobile employees
•Individual adaptation to security requirements for voice and
data networks
•Quality of Service (QoS) and bandwidth management
•Magenta TV compatibility: Supports multiple high-resolution
streams, use of media receivers
•Flexible mounting: Wall, desktop or optional 19" rack
mounting
•Continued use of existing PBX
Technology at a glance
•VDSL2 SuperVectoring up to 250 Mbit/s, G.fast support up to
1 Gbit/s
•WiFi 6 (802.11ax) dual-band WLAN with 4 x 4 2.4 GHz and
4 x 4 5 GHz with a total of up to 5.9 Gbit/s, WPA3 and WPA2
encryption
•Integrated telephone system for max. 30 users
•SFP module slot for GPON applications (module optional).
4.1 be.IP swift IP router with integrated telephone
system
You will not need any other access device apart from the be.IP swift:
Internet access and telephony functions are both provided by be.IP

Areas of application for your be.IP swift 16
swift, so you can connect your computer network as well as your
telephones directly to be.IP swift.
4.2 be.IP swift as IP router with separate ISDN
telephone system
You already operate an ISDN telephone system, but want to switch to
an All-IP connection and therefore need a device that connects your
ALL-IP connection to your existing infrastructure.
In this case, the be.IP swift works as a so-called media gateway that
translates telephone calls transmitted from a separate system to the
All-IP infrastructure. For this purpose, you may have to switch the
operation mode of your be.IP swift to operation as a media gateway.
Please refer to the instructions in the section
Changing the Operation Mode.
4.3 Changing the operation mode
You can use the be.IP swift in one of two different operation modes:
As a PBX, be.IP swift provides a wide range of different telephony
functions itself, while a so-called media gateway serves primarily as
a switching point for switching between different target Interfaces
(ISDN, analog, or IP) and a purely IP-based connection. Extensive
telephony functions can then be provided by the telephone system
that already exists in your network. So if you are already operating
a telephone system with your own customized configuration, using
be.IP swift as a media gateway can greatly simplify the transition to
a purely IP-based connection.
Note
Your settings are retained when you switch between operation
modes, so you do not have to reconfigure them when you switch
again. Likewise, when you first change the operation mode, all relevant
settings are transferred to the new operation mode.

Areas of application for your be.IP swift 17
You can change the operation mode in the Home menu System
settings:
Select the desired operation mode and click on the OK button, the
current configuration is prepared for the new operation mode and
this is then switched over. You will receive a corresponding
message:

be.IP swift login 18
be.IP swift login
You will find access data for your be.IP swift on the enclosed router
passport or on the nameplate of your router. Open a browser and log
in to the be.IP swift with the default IP address 192.168.0.251:
1. Enter the user name “admin”.
2. Enter the password (you can find it on the router passport).
3. Click the Login button.

Home menu 19
Home menu
An overview shows you the most important system information.
For example, you can see if there is a working Internet connection
and if the wireless network (WLAN) is active.
6.1 Home menu / System settings
Here you can enter or change the basic system data of your
be.IP swift .

Home menu 20
1. Under System name, enter a unique name for your router.
2. Under Location, enter where your router is located.
3. For Contact, enter the responsible contact person (e.g. the email
address of the system administrator).
4. You can operate your router as a telephone system or as a media
gateway. The current Operation mode is displayed. To change it,
activate the required option.
In the Show more section, you can use the Expert navigation tree
option to display a menu tree on the left side, which you can use to
quickly navigate through the menus for advanced configuration.
6.2 Home / Password menu
All routers are shipped with the same user name, but with an
individual password printed on the nameplate or router passport.
You can change the password to prevent unauthorized access to the
router.
1. Enter your self-selected Password for the user “admin”.
2. Confirm your Password by entering it again.
Click on OK.
Other manuals for be.IP swift
1
Table of contents
Other bintec elmeg Network Router manuals

bintec elmeg
bintec elmeg M2 User manual

bintec elmeg
bintec elmeg bintec 4Ge-LE User manual

bintec elmeg
bintec elmeg RS300 Series User manual

bintec elmeg
bintec elmeg RM3000 User manual

bintec elmeg
bintec elmeg RS123 User manual

bintec elmeg
bintec elmeg W2022ax User manual

bintec elmeg
bintec elmeg RXM7000 User manual

bintec elmeg
bintec elmeg RM3000 User manual

bintec elmeg
bintec elmeg RM7000 User manual

bintec elmeg
bintec elmeg H2 Automotive+ User manual