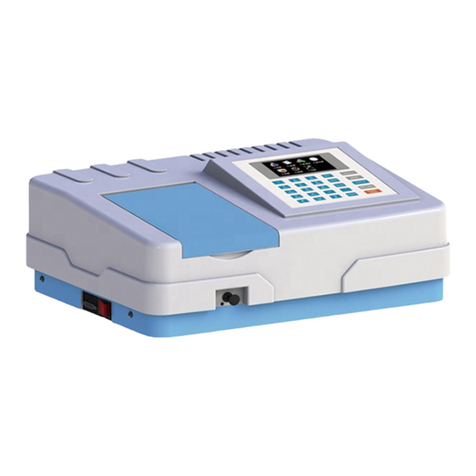
Biobase BK-S430 NIR User manual

BK-S430 NIR
SPECTROPHOTOMETER
User Manual

Preface
Thank you for purchasing this instrument.
This manual will show you how to use the
instrument and software.
Please read this manual carefully before
using Prolab.
Prolab is suitable for:
BK-S430 NIR Spectrophotometer
The model “BK-S430” will be abbreviated
as “S430”

S430 User Manual
2
Special Statement
Please read this manual carefully before
installation or operation. The company will not
take responsible for any trouble or damage due to
unproper use.
The company has the final interpretation of
this manual. Modifications of the manual due to
improvements of the instrument will not be
announced.
The company will conduct 12 months free
repair from the date of delivery if the instrument is
in strict accordance with the instructions and the
transport safety specification. (Vulnerability and
consumable parts are not included)
Please use our original packaging when
returning the instrument for service with
accessories and the warranty card.
Any chapteror images of this manual are not
allowed to borrow, copy and translate to other
languages without permission of the company.

S430 User Manual
3
Notice
1.The instrument is suitable for analysis in laboratory. If the
instrument is needed outside the lab, please make the field
work environment meets the environmental requirements of
the laboratory.
2.Pleaseuse the original package when moving the
instrument.
3.Pleasewait 30 minutes after turning on the instrument to
make it stable.
4.When the instrument is on, the temperature of the vents on
top left corner is high. Please keep the air circulating and
away from the vents surface.
5. When the instrument is on, the temperature of the vents on
top left corner is high. Please keep the air circulating and
away from the vents surface.
6. Please make sure the fans on the left side and top left
corner operate normally. If the fans are not functioning,
please turn off the instrument for repairs.
7.When an error occurred by wrong operation or other
machine or instrument error, shut down the instrument
immediately. When the software is not operating properly,
Start TaskManager to end the "Prolab.exe" process, then
restart the software and the instrument.
8.DO NOT loose the screws in the monochromator. Keep the
environment clean.
9.Cut the power before opening the instrument. Pay attention
to the high-voltage electrical components on the left rear of
the instrument.
10.Cover the instrument with dust proof if the instrument is not
used for a long time.

S430 User Manual
4
MENU
Preface .............................................................................................................................. 1
Special Statement ............................................................................................................. 2
Notice ................................................................................................................................ 3
MENU ............................................................................................................................... 4
1 Instrument Overview .................................................................................................. 6
1.1 Theory ......................................................................................................... 6
1.2 Appearance ................................................................................................. 7
1.3 Performance ................................................................................................ 8
1.4 Packing List ................................................................................................. 8
2 Environmental Requirements of Software .................................................................. 9
2.1 PC Requirements ........................................................................................ 9
2.1.1 Hardware Requirements ....................................................................... 9
2.2 Install Prolab ................................................................................................ 9
3 Before Use ............................................................................................................... 13
3.1 Connect to PC ........................................................................................... 13
3.2 How To Connect ........................................................................................ 13
4 Functions ................................................................................................................. 14
4.1 Modes ........................................................................................................ 14
4.2 Interface ..................................................................................................... 15
4.2.1 Modules .............................................................................................. 15
4.2.2 Modules intro ...................................................................................... 15
4.2.3 Icons ................................................................................................... 17
5 Software Operation .................................................................................................. 19
5.1 Photometric ............................................................................................... 19
5.1.1 Create Measurement .......................................................................... 19
5.1.2 Start a Measurement .......................................................................... 23
5.1.3 Data Processing ................................................................................. 23
5.2 Wavelength Scan ....................................................................................... 24
5.2.1 Create a Measurement ....................................................................... 25
5.2.2 Start a wavelength scan ..................................................................... 29
5.2.3 Data Processing ................................................................................. 29
5.2.4 Model .................................................................................................. 30
5.3 Time Scan .................................................................................................. 31
5.3.1 Create a new measurement ............................................................... 31
5.3.2 Start a Time Scan ............................................................................... 36
5.3.3 Data Processing ................................................................................. 36
5.4 Quantitation ............................................................................................... 38
5.4.1 Create a measurement ....................................................................... 39
5.4.2 Biuld Calibration Curve ....................................................................... 41
5.4.3 Measuring unknown samples ............................................................. 43
5.4.4 Data Processing ................................................................................. 44

S430 User Manual
5
5.5 General Operation ..................................................................................... 45
5.5.1 Wavelength ......................................................................................... 45
5.5.2 Set 100% ............................................................................................ 45
5.5.3 Set 0% ................................................................................................ 45
5.5.4 Move sample rack .............................................................................. 45
5.5.5 Switch T/A .......................................................................................... 46
5.5.6 Locate file ........................................................................................... 47
5.5.7 Data management .............................................................................. 47
5.5.8 Characteristic Peak ............................................................................ 48
5.5.9 Arithmetic ........................................................................................... 48
5.5.10 Spectrum Compare ............................................................................ 49
5.5.11 Find Peak ........................................................................................... 51
5.5.12 Smooth ............................................................................................... 51
5.5.13 Derivative ........................................................................................... 51
5.5.14 Instrument Parameter ......................................................................... 52
5.5.15 Rename & Delete Files ....................................................................... 54
6 Appendix .................................................................................................................. 55
6.1 Quantitative analysis wavelength method .................................................. 55
6.1.1 Single Wavelength .............................................................................. 55
6.1.2 Double Wavelengths ........................................................................... 55
6.1.3 Triple Wavelengths ............................................................................. 56
6.2 DETAILS ON QUANTITATIVE .................................................................. 56
6.2.1 Linear Working Curve (1st order) ....................................................... 56
6.2.2 Quadratic Working Curve (2nd order) ................................................. 57
6.2.3 The correlation coefficient ................................................................... 57
6.3 Derivative Operation on Spectrum ............................................................. 58
6.4 Smoothing ................................................................................................. 59
6.4.1 Savitzky–Golay ................................................................................... 59
6.4.2 Mean smoothing ................................................................................. 59
6.4.3 Median smoothing .............................................................................. 59

S430 User Manual
6
1 Instrument Overview
1.1 Theory
The principle of spectrophotometric analysis is to show the substances absorb
phenomenon on different wavelengths and do qualitative and quantitative analysis of the
substances.
This instrument is measuring base on relative measurement. Choose a certain
substance (Distilled water, air or the sample) as reference solution, set its transmittance
to 100%. The transmittance of the sample being tested is relative to the reference
solution. The transmittance and concentration of the test substance is related. Within a
certain range, it is consistent with Lambert - Beer law.
T=I/Io
A=KCL=‐㏒I/Io
T :Transmittance
A: Absorbance
C: Concentration
K: Absorption coefficient of the solution
L: Length of the liquid layer in the optical path
I: Intensity of light transmitted through the test sample on the photoelectric
converter
Io: Intensity of light transmitted through the reference sample on the photoelectric
converter
This instrument is widely used in medicine and health, clinical testing,
biochemical, petrochemical, environmental monitoring, food production and
quality control departments for qualitative and quantitative analysis. It is also
as a teaching demonstration and laboratory equipment, and post-secondary
institutions and related courses.
The S430 Near-Infrared Spectrometer is a grating-type near-infrared
spectrometer. Wavelength range is 1000nm-1800nm. This instrument is
mainly used for non-destructive testing of liquid samples. The analysis
process is very convenient, Just put the cuvette filled with samplesinto the
instrument sample compartment, click on the PC software to get the sample
spectral data. The spectrum data files can be opened in other analysis
softwares.
S430NIR spectrophotometer can be widely used in oil, alcohol,
beverages and other liquid quality of fast nondestructive analysis.

S430 User Manual
7
1.2 Appearance
Fig 1.2.1Appearance
1. Sample compartment lid 2.Power switch 3. Fuse 4.Power socket 5.USB Port
Fig 1.2.2Left view
5

S430 User Manual
8
1.3 Performance
Wavelength Range 900-2500 nm
Wavelength Accuracy ±0.2nm
Wavelength Reproducbility ≤0.05nm
Absorbance Noise <50uA
Baseline flatness 0.001A
Resolution 8nm
Stray Light <0.1%
Light Source >10000 hours
Scanning time <1 minute
Communicate Port USB2.0
Size 360×460×240mm
Weight 12kg
1.4 Packing List
Main body 1 pc
Power cable 1 pc
User manual 1 copy
Certification 1 copy
Fuse(2A) 2 pcs
10mm Quartz rectangular cuvette 1 set (2 pcs)
2mm Quartz rectangular cuvette 1 set (2 pcs)
Warranty 1 copy
Flash disk 1 pc
Software copy(in the flash disk ) 1 copy
USB cable 1 pc
Dust cover 1 pc

S430 User Manual
9
2 Environmental Requirements of Software
Please read the manual of Windows XP or higher version before
reading this section. Windows XP is recommended.
When the operating system is Windows Vista or higher version,
....................................................
please run the software under administrator account. Otherwise the
..........................................................
software may not run properly.
..........................
Please change the setting in Power Options“Put
........................................
the computer to
.............
sleep” to “Never”. Otherwise it may cause an error while running
......................................................
Prolab.
.......
2.1 PC Requirements
2.1.1 Hardware Requirements
Hardware Requirements
CPU Intel 2.5GHz or same level CPU
Memory No less than 2G
Hard drive No less than 1G space
USB port USB2.0
Monitor Resolution 1024*768 or above
Color 16bit or above
2.2 Install Prolab
Boot your computer.
Insert the Prolab disk, then open “My computer”.
Select your CD Rom in the browser.
Double click “Setup” to install.
Follow the steps and finish setup, then restart the computer.

S430 User Manual
10
Click “Next” to continue.
Input name and company, then click “Next” to continue.

S430 User Manual
11
Click “Change” to change the install path. Click “Next” to confirm.

S430 User Manual
12

S430 User Manual
13
3 Before Use
3.1 Connect to PC
Please use the USB cable to connect the instrument and PC. Driver installation will
automatically start when first time connecting. Please run the software after driver
installation is done.
3.2 How To Connect
1. Plug in USB cable
Connect the instrument and PC with USB cable while the PC is on.
2. Turn on the instrument.
Turn on the instrument then run Prolab. The instrument will check if connected.
There will be a dialog pop out as below if not connected or connection error.
“Abort”:Exit the software.
“Retry”:Check again.
“Ignore”:Continue running Prolab. Other functions are available.
3. Initialization
The software will automatically start initializing and adjusting.
4. Interface.
Click above to create a new measurement. Then select “Photometric”,
“Wavelength Scan”, “Time Scan” or “Quantitaion” mode.
5. Shutting down
Close the software first, then turn off the instrument.
If you turn off the instrument first, there will be an error in Prolab.
You need to run task manager to end the software.
!

S430 User Manual
14
4 Functions
4.1 Modes
There are 4 modes:
1. Photometric
(1) Measure the photometric data of the sample.
(2) Data display as Trans./Abs..
(3) Photometric data supports up to 26 wavelengths.
(4) support up to 10 user-defined calculation formula.
(5) Data printout available.
2. Wavelength Scan
(1) Get the spectrum of the sample.
(2) Display as Trans./Abs..
(3) Repeat scan available.
(4) Spectrum processing.
(5) Data printout available.
3. Time Scan
(1) Get the spectrum of sample varying by time.
(2) Display as Trans./Abs..
(3) Repeat scan available.
(4) Spectrum processing.
(5) Data printout available.
4. Quantitation
(1) Supports single-wavelength, dual wavelength and three-wavelength
quantitative analysis.
(2) Supports 1 to 3 times curve fitting.
(3) Data decimal can be changed.
(4) Programmable optical gate control.
(5) Supports data printout.

S430 User Manual
15
4.2 Interface
4.2.1 Modules
4.2.2 Modules Intro
1. Menu & Toolbar
Status Information
Menu Tool bar
File
browser
Menu & Toolbar

S430 User Manual
16
1) Provides instrument controls and settings.
2) Tool bar are shortcuts for common features.
2. Document Browser
Document Brower shows files saved in Wavelength Scan, Time Scan and
Quantitative Analysis mode. Double click to open a file.
1) Double click a file to open/reset spectrum.
2) Right click a file to open, rename or delete.
3) Input keywords to search.
3. Spectrum Window & Information Window
1) Information window shows current data and settings of the instrument.
2) In spectrum window, you can use mouse to zoom in and out. Press the left
mouse button, drag the mouse from top left to bottom right to draw a square,
then release the button. Spectrum in that square will be zoomed in. Drag the
mouse the opposite way to zoom out.
3) Click “Peaks” to show the peaks in the spectrum.
4. Status Window
Status window shows the current status of the instrument.

4.
2
2
.3 Icon
s
s
Icon
/
Functi
o
New
M
Open
S
Show/
H
Show/
H
Wavel
e
Photo
m
Quanti
t
Back t
o
Auto c
o
Y-axis
e
Y-axis
Get/C
a
Zoom I
Show/
H
Show/
H
Start/S
17
o
n
M
easuremen
t
S
pectrum
H
ide Status
H
ide Spectr
u
e
ngth scan
/
m
etric wind
o
t
ation wind
o
o
original co
o
ordinate
e
nlarge 2 ti
m
reduce 2 ti
m
a
ncel Axis D
n/Out
H
ide Peaks
H
ide Grid
top
t
u
m Informa
t
/
Time scan
o
w
o
w
ordinate
m
es
m
es
ata
S
t
ion
S
430 User M
a
a
nual

S430 User Manual
18
Set wavelength
Set 100%
0%
Set baseline
Spectrum Properties
Print Data
Trans. / Abs.
Move sample rack to “Sample” position
Move sample rack to “Reference” position
Current status online/offline

S430 User Manual
19
5 Software Operation
5.1 Photometric
5.1.1 Create Measurement
Create a new measurement.
Select “Files”->“Create Method” or click to enter Create Method Window.
Photometric work flow
Photometric work flow
Power on
Run software
Create new measurement
Initialize
Set parameters
Start
Input file name
Finish
Select “Photometric”
Confirm paremeters
Measure samples
Print out data
Table of contents
Other Biobase Measuring Instrument manuals
Popular Measuring Instrument manuals by other brands
Diagnoptics
Diagnoptics AGE Scanner user manual

Endress+Hauser
Endress+Hauser Liquiline System CA80CR Brief operating instructions

TESTO
TESTO 435 instruction manual
LASER COMPONENTS
LASER COMPONENTS Viavi HP3-60-P4 quick start guide
DARLEY
DARLEY FireHUD BioTrac Device Getting started
Mastech
Mastech MS6252B Operation manual

Thermo Scientific
Thermo Scientific Orion Versa Star Pro user manual
Sontex
Sontex Supercal 5 installation guide

SIGRIST-PHOTOMETER
SIGRIST-PHOTOMETER AquaMaster instruction manual
ELGO Electric
ELGO Electric Z54 Series manual
PCB Piezotronics
PCB Piezotronics IMI SENSORS Y646B01 Installation and operating manual

PHYWE
PHYWE Cobra SMARTsense manual
