Bischoff & Bischoff GmbH | 08.08.2017
EN
1312
RL-120 / SL | Rollator Rollator | RL-120 / SL|
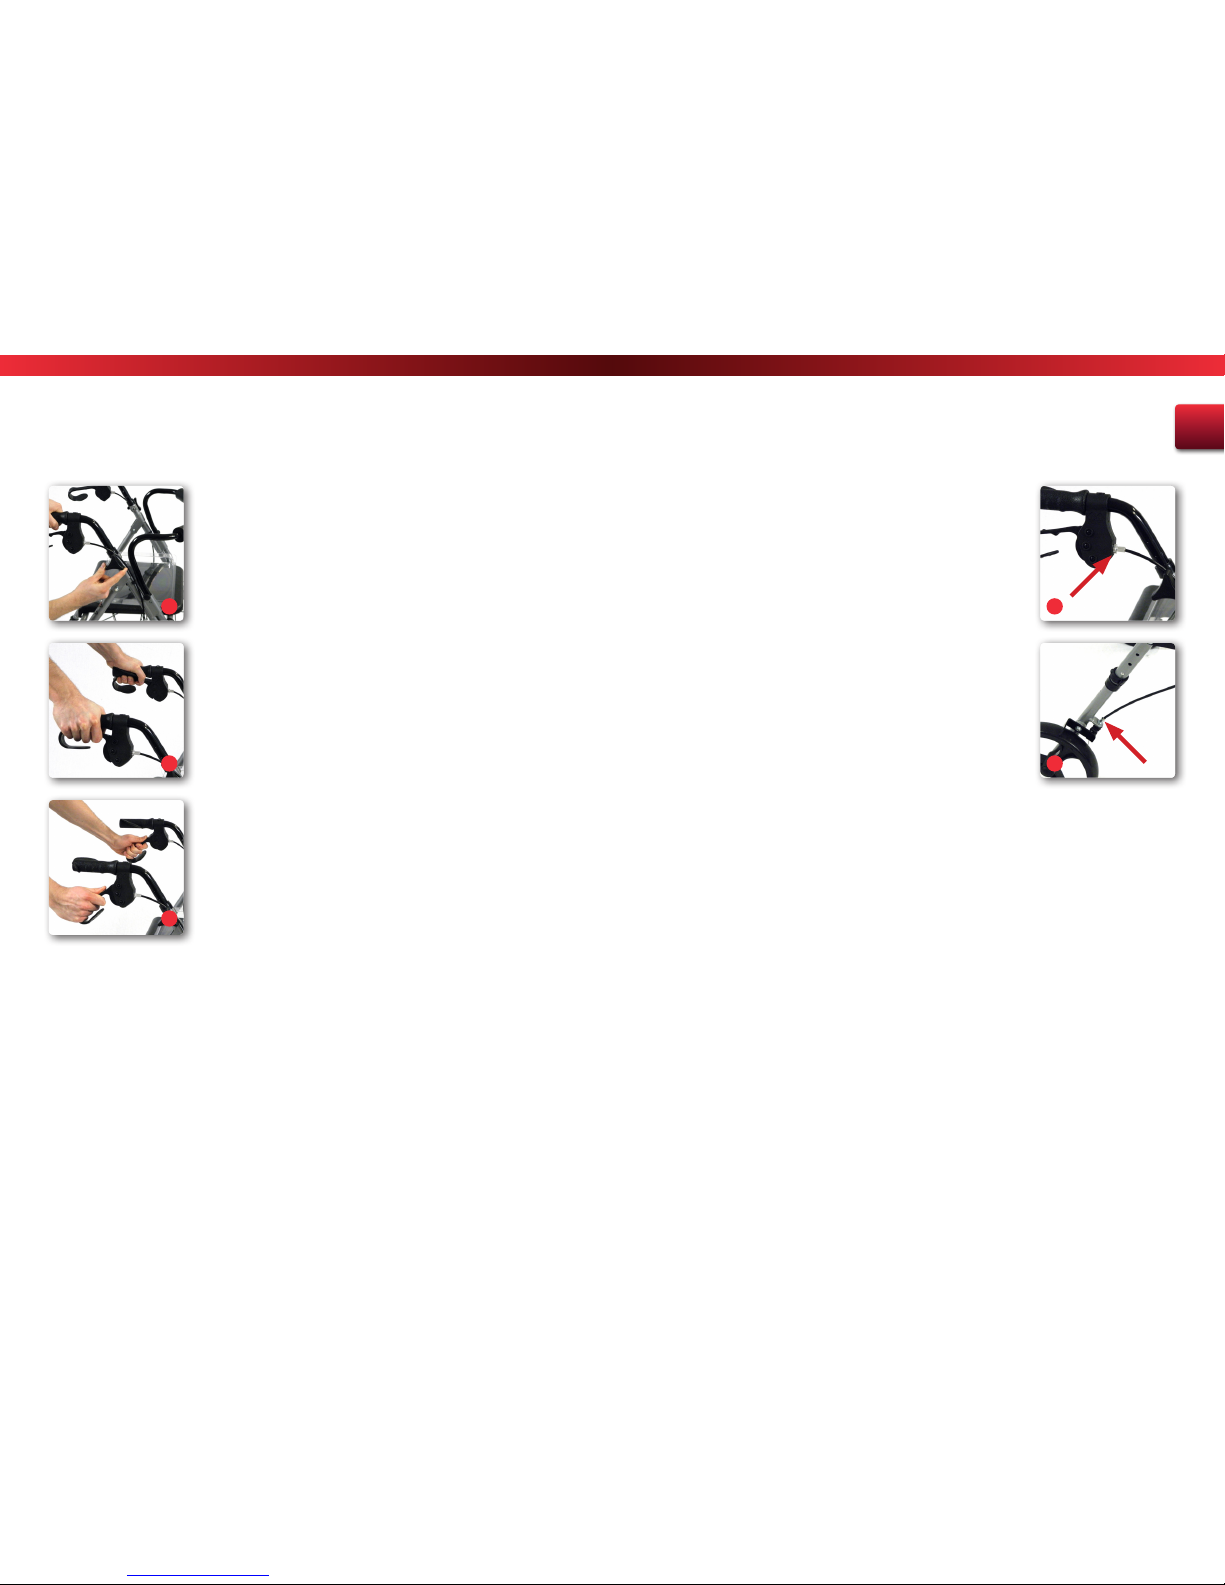
4.6. Adjusting the push handles
• The rollator is unfolded. Activate the locking brakes.
• Turn the plastic screws on the handholds until the handles move
freely (Fig. 11).
• Position yourself behind the B+B rollator and allow your arms to
hang loosely downwards.
• Now adjust the push handles so that they are located at the height
of your wrists. Select the nearest hole in the push tube.
• Retighten the plastic screws after the adjustment procedure.
Observe the minimum insertion depth.
• Repeat this procedure on the other side.
• Check to make sure that both the push handles are at the same
height.
4.7.Adjusting / activating the
brakes
Service brake
To activate the service brake, pull both handbrake levers on the push
handles upward (Fig. 12). Service and locking brake act on the fixed
wheels.
Locking brake
• Press down on both brake levers to activate the locking device
(Fig. 13).
• To release the locking brake pull both brake levers back into middle
position.
Adjusting the brakes
We recommend adjusting the brakes together with your mobility
dealer. If you have the necessary technical knowledge, you can do this
yourself as well.
The brake is set properly, if the brake pins do not touch the wheel and
the locking brake can be activated easily.
• Loosen the locknut (Fig. 14, arrow) at the top of the brake handle,
so the adjustment nut can turn.
• Now turn the wide adjustment nut further inwards or outwards to
increase or decrease the braking effect.
• Retighten the locknut.
• Repeat the procedure on the other brake if necessary.
• Further settings can also be carried out on the locknut at the
bottom of the fixed wheels (Fig 15).
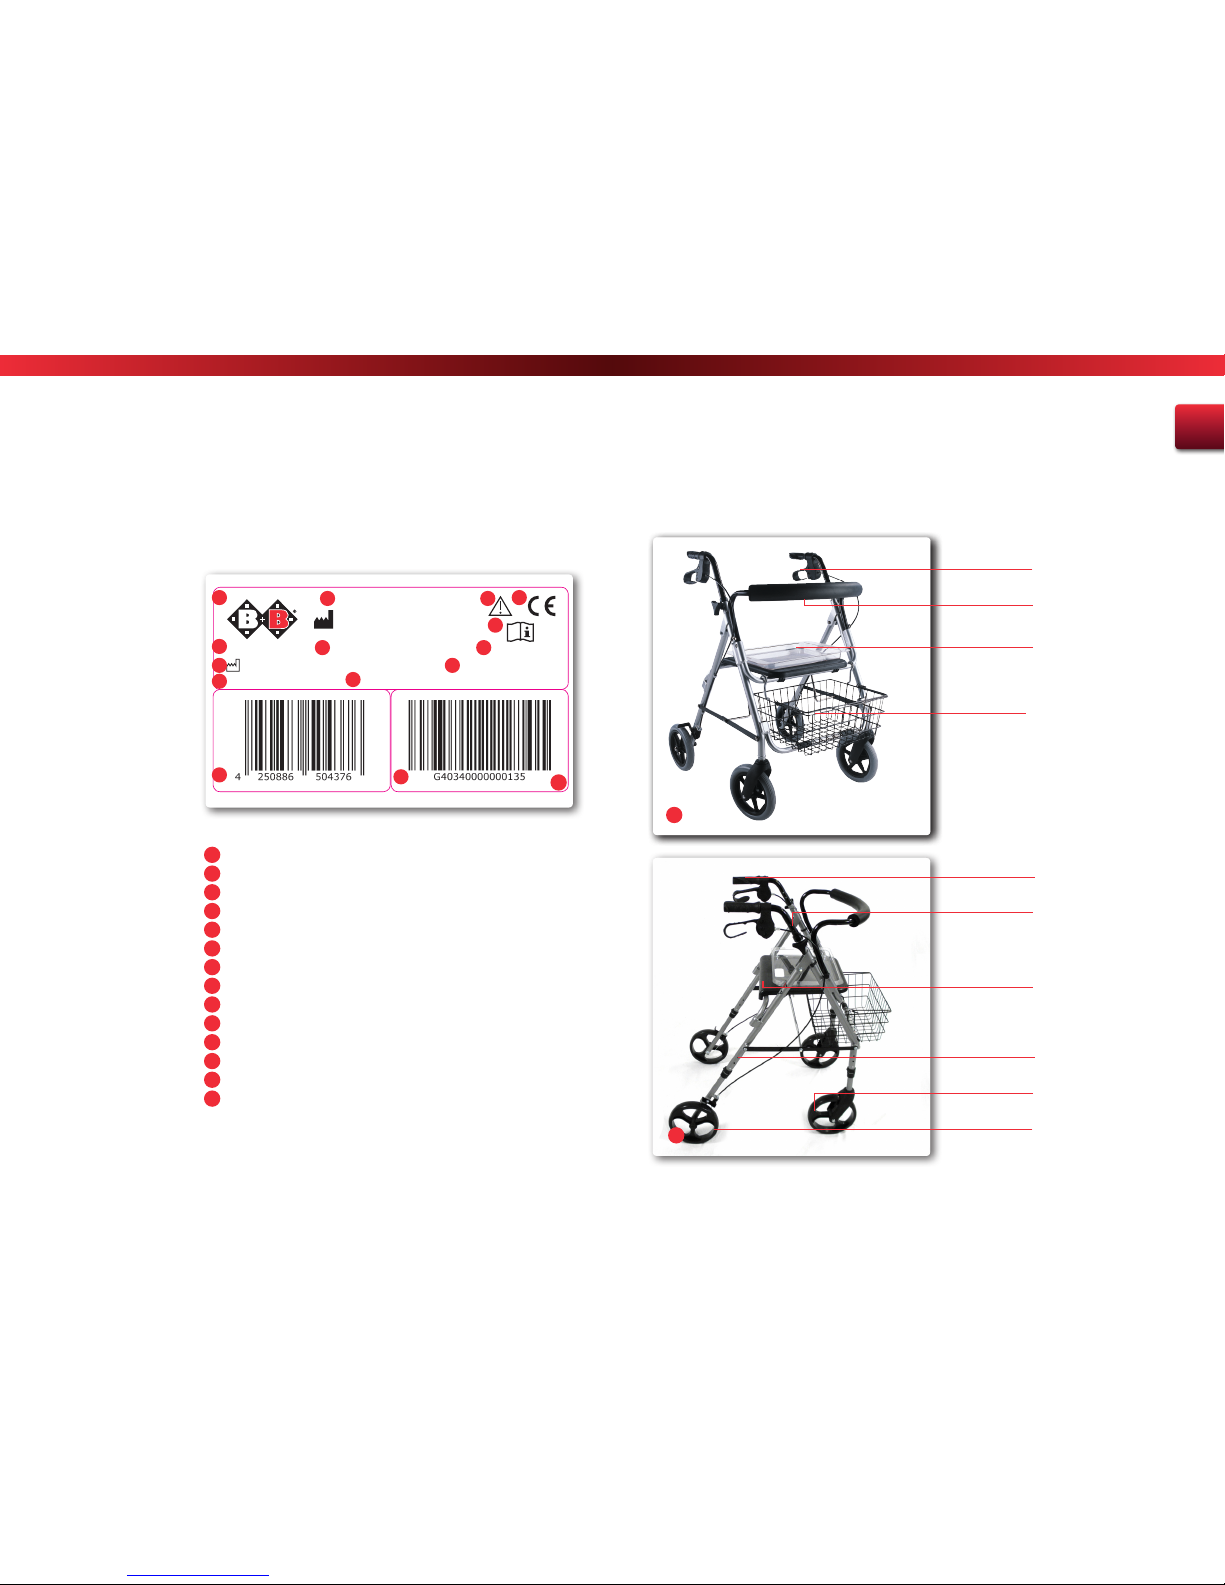
4.8.Wheels and tyres
Your rollator is equipped with flat-proof PU wheels 200 x 50 mm.
5. Use
Walking
Make your first attempts to walk with the rollator on a flat, firm surface.
Familiarise yourself with the function of the brakes. Let someone
accompany you during this initial period.
For an anatomically correct gait, the push handles must be set at
proper height (see sec. 4.6).
• Place yourself in the rollator so that your ankles are at the height of
the rear wheels.
• Stand with good posture.
• Grasp the push handles with both hands and your arms bent at a
slight angle.
When walking with the rollator try to stay as close as possible with
the body to the push handles. This increases the stability and safety
against tipping over; in addition, avoid a crooked back. Try to generally
walk in the rollator and not behind it. Take small steps and do not push
the rollator too far ahead.
You can determine the change of direction and speed by pushing
12
13
11 14
15