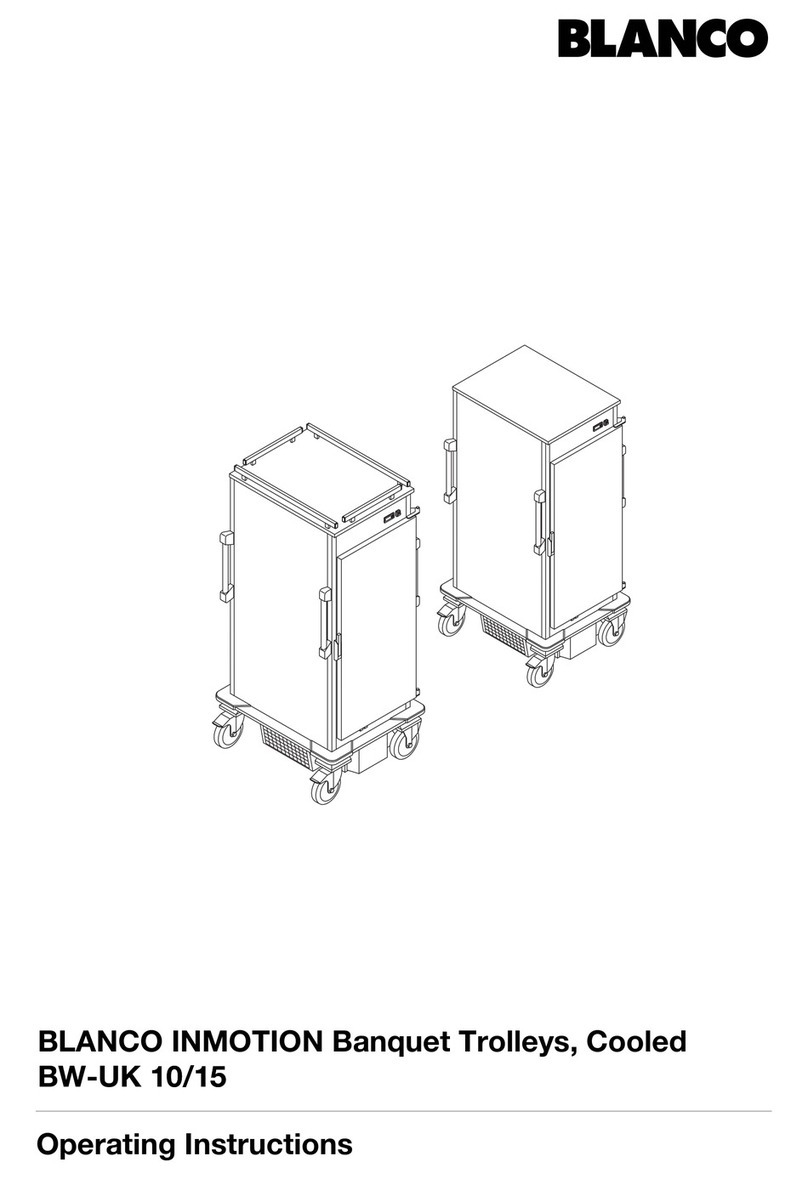
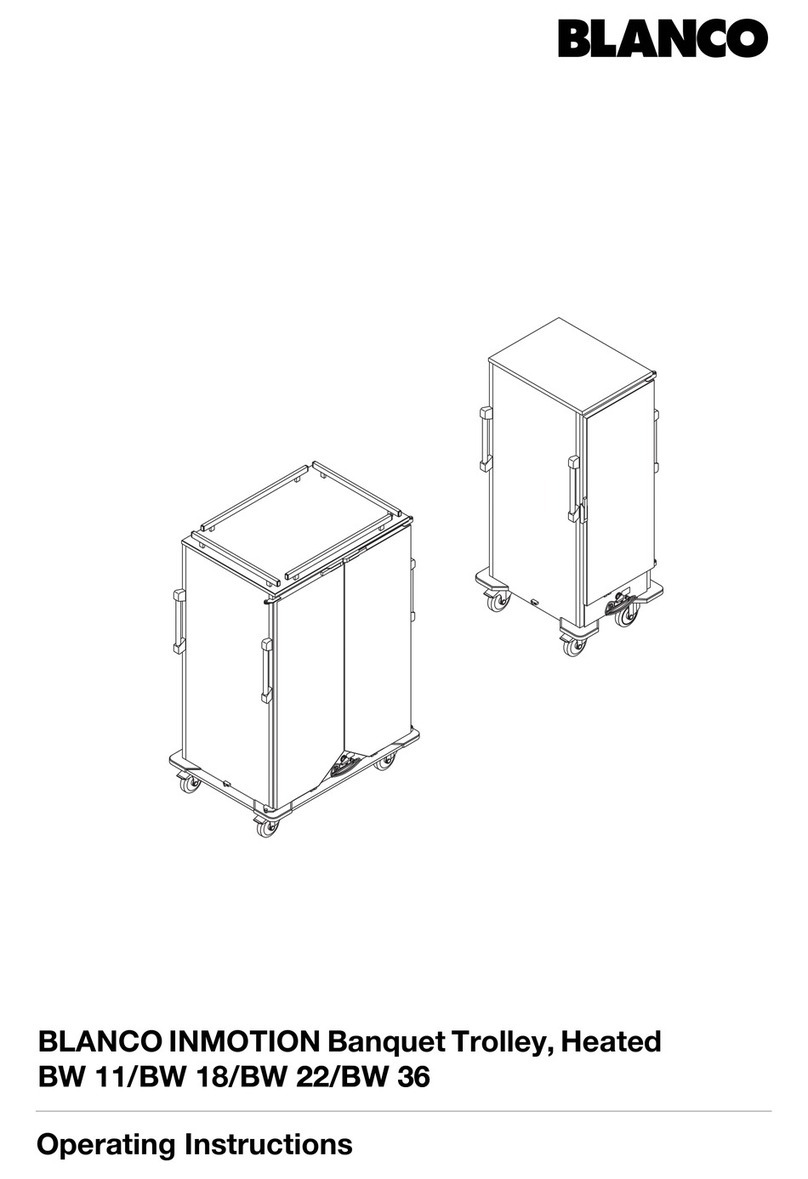
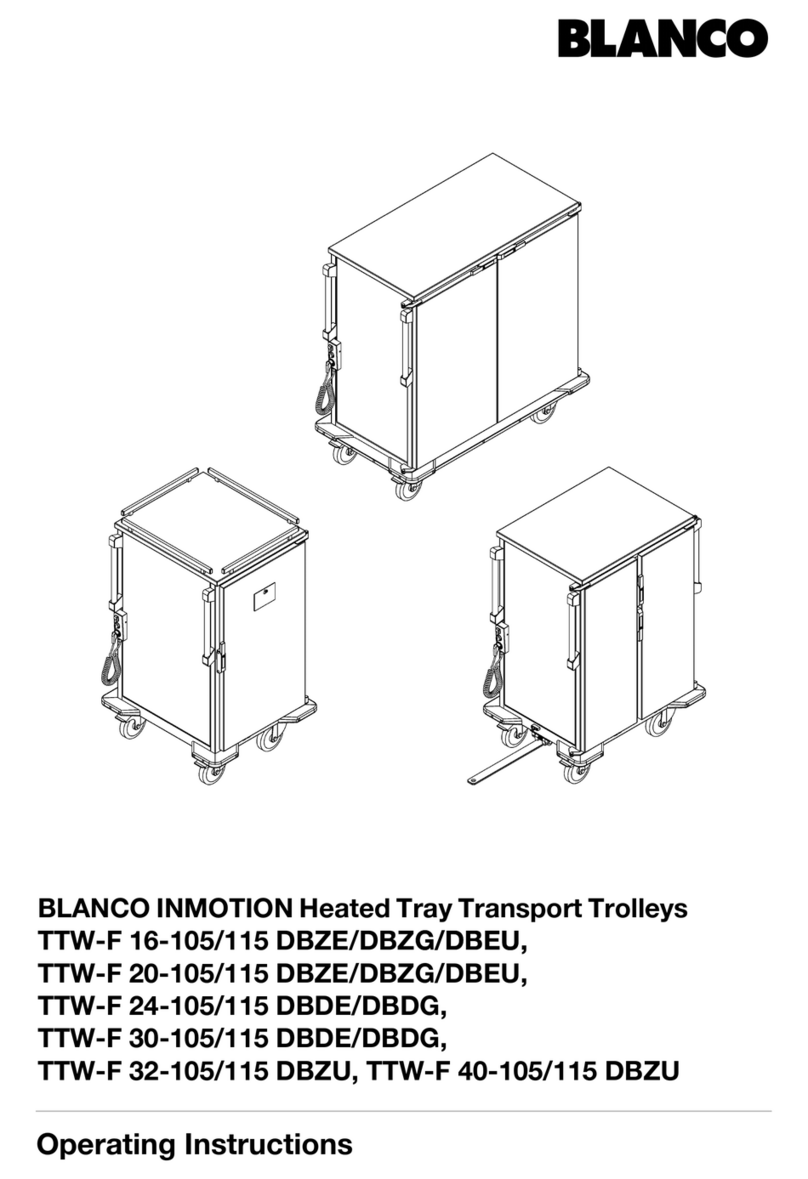
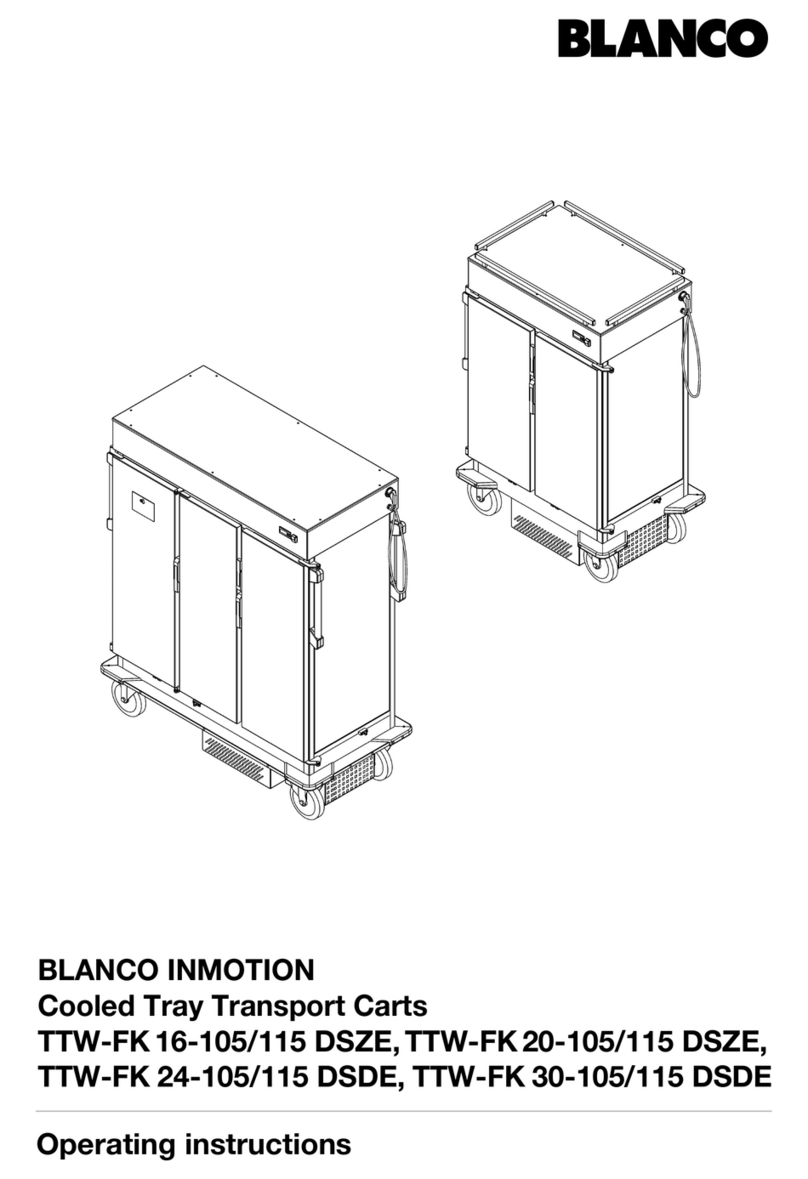
Blanco INMOTION TTW-F 16-105 ESZE User manual

BLANCO INMOTION Tray Transport Trolley
TTW-F/FPK 16-105/115 ESZE/DSZE/ESZG/DSZG/ESEU/DSEU,
TTW-F/FPK 20-105/115 ESZE/DSZE/ESZG/DSZG/ESEU/DSEU,
TTW-F/FPK 24-105/115 ESDE/DSDE/ESDG/DSDG,
TTW-F/FPK 30-105/115 ESDE/DSDE/ESDG/DSDG,
TTW-F 32-105/115 ESZU/DSZU,
TTW-F 40-105/115 ESZU/DSZU
Operating Manual
BA 154 315 -en- 3.1-12/11

BLANCO INMOTION Tray Transport Trolley
General Information
Copyright These instructions are protected by copyright. None of this information may
be reproduced, distributed, used to the advantage of our competitors or
made accessible to third parties either completely or in part.
Technical changes Subject to modifications for the purpose of technical improvement.
Product documentation These instructions are the original operating instructions;
target group: operating personnel, kitchen directors.
Typographical conventions )Important note on special features or special cases.
IExplanatory information in chapters or sections containing instructions.
ªCross reference to a chapter, section or external document.
9Requirement which must be fulfilled before the subsequent steps can be
carried out.
Action or activity which must be carried out.
Unit variant XYZ
A section identified in this way applies only to a particular unitvariant or unit
option.
Warnings
Signal word!
Type and source of danger
Possible consequences of non-compliance with the warnings.
Measures to avoid dangers and the consequences thereof.
The signal word (caution, warning, danger) informs of the level of danger.
Caution
warns of possible light bodily injuries and damage to property.
Warning warns of possible serious bodily injuries.
Danger warns of possible most severe/fatal bodily injuries.
BA 154 315 -en- 3.1-12/11

BLANCO INMOTION Tray Transport Trolley
Contents
About this product Application . . . . . . . . . . . . . . . . . . . . . . . . . . . . . . . . . . . . . . . . . . . . . . . . 1
Conditions of use . . . . . . . . . . . . . . . . . . . . . . . . . . . . . . . . . . . . . . . . . . . 1
Product features . . . . . . . . . . . . . . . . . . . . . . . . . . . . . . . . . . . . . . . . . . . 1
Standard model . . . . . . . . . . . . . . . . . . . . . . . . . . . . . . . . . . . . . . . . . . . . 3
Options and accessories. . . . . . . . . . . . . . . . . . . . . . . . . . . . . . . . . . . . . . 3
Safety General Information . . . . . . . . . . . . . . . . . . . . . . . . . . . . . . . . . . . . . . . . . 4
About this product . . . . . . . . . . . . . . . . . . . . . . . . . . . . . . . . . . . . . . . . . . 4
Transport . . . . . . . . . . . . . . . . . . . . . . . . . . . . . . . . . . . . . . . . . . . . . . . . . 4
Operation . . . . . . . . . . . . . . . . . . . . . . . . . . . . . . . . . . . . . . . . . . . . . . . . . 4
Cleaning and care. . . . . . . . . . . . . . . . . . . . . . . . . . . . . . . . . . . . . . . . . . . 6
Maintenance . . . . . . . . . . . . . . . . . . . . . . . . . . . . . . . . . . . . . . . . . . . . . . . 6
Repairs . . . . . . . . . . . . . . . . . . . . . . . . . . . . . . . . . . . . . . . . . . . . . . . . . . . 6
Standards, guidelines . . . . . . . . . . . . . . . . . . . . . . . . . . . . . . . . . . . . . . . . 6
Product marking . . . . . . . . . . . . . . . . . . . . . . . . . . . . . . . . . . . . . . . . . . . 6
Transport Checking for/reporting on damage incurred during transportation. . . . . . . 7
Scope of delivery . . . . . . . . . . . . . . . . . . . . . . . . . . . . . . . . . . . . . . . . . . . 7
Unpacking . . . . . . . . . . . . . . . . . . . . . . . . . . . . . . . . . . . . . . . . . . . . . . . . 7
Disposing of packaging material . . . . . . . . . . . . . . . . . . . . . . . . . . . . . . . . 7
Operation Unit overview . . . . . . . . . . . . . . . . . . . . . . . . . . . . . . . . . . . . . . . . . . . . . . 8
Opening a unit door . . . . . . . . . . . . . . . . . . . . . . . . . . . . . . . . . . . . . . . . . 9
Closing the unit door . . . . . . . . . . . . . . . . . . . . . . . . . . . . . . . . . . . . . . . 10
Emptying condensation-water catch tray . . . . . . . . . . . . . . . . . . . . . . . . 10
Inserting coolant accumulators . . . . . . . . . . . . . . . . . . . . . . . . . . . . . . . . 10
Loading the unit . . . . . . . . . . . . . . . . . . . . . . . . . . . . . . . . . . . . . . . . . . . 11
Coupling trolleys together . . . . . . . . . . . . . . . . . . . . . . . . . . . . . . . . . . . 11
Moving the unit to a new location . . . . . . . . . . . . . . . . . . . . . . . . . . . . . . 12
Traversing ramps, recesses, slanted surfaces . . . . . . . . . . . . . . . . . . . . 13
Refrigerating food . . . . . . . . . . . . . . . . . . . . . . . . . . . . . . . . . . . . . . . . . 14
Keeping food warm . . . . . . . . . . . . . . . . . . . . . . . . . . . . . . . . . . . . . . . . 14
Distributing food . . . . . . . . . . . . . . . . . . . . . . . . . . . . . . . . . . . . . . . . . . . 15
Shutting down Shutting unit down . . . . . . . . . . . . . . . . . . . . . . . . . . . . . . . . . . . . . . . . . 16
Help in the event of problems Corrosion of stainless steel parts. . . . . . . . . . . . . . . . . . . . . . . . . . . . . . . 17
The unit has external damage . . . . . . . . . . . . . . . . . . . . . . . . . . . . . . . . 17
Cleaning and care Stainless steel. . . . . . . . . . . . . . . . . . . . . . . . . . . . . . . . . . . . . . . . . . . . . 18
Cleaning frequency . . . . . . . . . . . . . . . . . . . . . . . . . . . . . . . . . . . . . . . . 18
Cleaning methods . . . . . . . . . . . . . . . . . . . . . . . . . . . . . . . . . . . . . . . . . 18
Cleaning agents . . . . . . . . . . . . . . . . . . . . . . . . . . . . . . . . . . . . . . . . . . . 18
Performing maintenance on stainless steel . . . . . . . . . . . . . . . . . . . . . . . 19
Cleaning the unit . . . . . . . . . . . . . . . . . . . . . . . . . . . . . . . . . . . . . . . . . . 19
Cleaning interior body . . . . . . . . . . . . . . . . . . . . . . . . . . . . . . . . . . . . . . . 20
Maintenance Having unit regularly maintained . . . . . . . . . . . . . . . . . . . . . . . . . . . . . . . 22
Checking castor brakes . . . . . . . . . . . . . . . . . . . . . . . . . . . . . . . . . . . . . 22
Removing areas of corrosion on stainless steel . . . . . . . . . . . . . . . . . . . 22
BA 154 315 -en- 3.1-12/11

BLANCO INMOTION Tray Transport Trolley
Repairs Authorised persons . . . . . . . . . . . . . . . . . . . . . . . . . . . . . . . . . . . . . . . . . 23
Description of problem . . . . . . . . . . . . . . . . . . . . . . . . . . . . . . . . . . . . . . 23
Replacing components . . . . . . . . . . . . . . . . . . . . . . . . . . . . . . . . . . . . . . 23
Spare parts . . . . . . . . . . . . . . . . . . . . . . . . . . . . . . . . . . . . . . . . . . . . . . . 23
Address . . . . . . . . . . . . . . . . . . . . . . . . . . . . . . . . . . . . . . . . . . . . . . . . . 24
Disposal Disposing of unit . . . . . . . . . . . . . . . . . . . . . . . . . . . . . . . . . . . . . . . . . . . 24
Technical data General data . . . . . . . . . . . . . . . . . . . . . . . . . . . . . . . . . . . . . . . . . . . . . 25
Environment . . . . . . . . . . . . . . . . . . . . . . . . . . . . . . . . . . . . . . . . . . . . . . 29
Ordering information Unit variants . . . . . . . . . . . . . . . . . . . . . . . . . . . . . . . . . . . . . . . . . . . . . . 30
Operating Manual . . . . . . . . . . . . . . . . . . . . . . . . . . . . . . . . . . . . . . . . . . 32
Accessories Gastronorm/Euronorm/compact trays . . . . . . . . . . . . . . . . . . . . . . . . . . . 33
Dishes . . . . . . . . . . . . . . . . . . . . . . . . . . . . . . . . . . . . . . . . . . . . . . . . . . . 33
Cloches . . . . . . . . . . . . . . . . . . . . . . . . . . . . . . . . . . . . . . . . . . . . . . . . . 33
Eutectic plates . . . . . . . . . . . . . . . . . . . . . . . . . . . . . . . . . . . . . . . . . . . . 33
Menu cards . . . . . . . . . . . . . . . . . . . . . . . . . . . . . . . . . . . . . . . . . . . . . . . 33
BLANCO microfibre cleaning cloth . . . . . . . . . . . . . . . . . . . . . . . . . . . . . 33
BLANCOPOLISH stainless steel cleaning and care agent . . . . . . . . . . . . 33
BA 154 315 -en- 3.1-12/11

BLANCO INMOTION Tray Transport Trolley
– 1 –
About this product
Application The BLANCO INMOTION tray transport trolley is used to transport food on
Gastronorm, Euronorm and compact trays.
The BLANCO INMOTION tray transport trolley is not suitable for transporting
food not covered or for cooling food or keeping it hot for longer periods.
In combination with pre-cooled eutectic plates (coolant accumulators), the
double-walled BLANCO INMOTION tray transport trolley can be used to keep
food cold for short periods.
The BLANCO INMOTION tray transport trolley is particularly suitable for use
in social facilities (clinics, retirement homes, day care centres), hotels, the
food service industry (banquets, party services) and in cafeterias (canteens,
dining halls).
Conditions of use Environment
Environmental conditions usually found in kitchens.
Instruction of third parties
If the unit is lent to third parties, these persons must be instructed in the safe
handling of the unit and possible dangers must be pointed out.
Product features General information
The BLANCO INMOTION tray transport trolley is made of stainless steel as
standard.
Single and double-walled unit models are available. With the doublewalled
model the unit body and the unit door(s) are insulated.
The front of the unit is closed via one or two unit doors. The unit door(s) has/
have been provided with a snap-in lock. Units with one compartment have
one unit door, while units with two or three compartments have two unit
doors.
As standard, the transportation mechanism of the tray transport trolley with
two or three compartments consists of two fixed castors and two steering
castors with castor brakes. The models with only one compartment have a
transportation mechanism with four steering castors. Two of the steering
castors have castor brakes.
BA 154 315 -en- 3.1-12/11

BLANCO INMOTION Tray Transport Trolley
– 2 –
The unit designation contains an abbreviation of the unit model. TTW stands
for tray transport trolley, F for hinged door, PK for passive cooling. The
subsequent numbers and letters have the following meaning:
yThe first and second digit refer to the tray capacity (16, 20, 24, 30, 32, 40
trays), e.g. TTW-F 16-105 ESZG.
yThe third, fourth and fifth digit specify the spacing of the support ledges
(105, 115 mm), e.g. TTW-F 16-105 ESZG.
yThe first letter indicates the design of the walls (E = single-walled, D =
double-walled), e. g. TTW-F 16-105 ESZG.
yThe second letter stands for ledges (S =
ledges), e.g. TTW-F 16-105 ESZG.
yThe third letter stands for the number of compartments (E = 1
compartment, Z = 2 compartments, D = 3 compartments), e. g.
TTW-F 16-105 ESZG.
yThe last letter stands for the tray type (G = Gastronorm trays,
E= Euronorm trays or U = Gastronorm and Euronorm trays). The models
for compact trays have no more exact marking.
– Gastronorm trays
(TTW-F/FPK 16-105/115 ESZG/DSZG,
TTW-F/FPK 20-105/115 ESZG/DSZG,
TTW-F/FPK 24-105/115 ESDG/DSDG,
TTW-F/FPK 30-105/115 ESDG/DSDG)
The trays are inserted with the short sides toward the back and front.
– Euronorm trays
(TTW-F/FPK 16-105/115 ESZE/DSZE,
TTW-F/FPK 20-105/115 ESZE/DSZE,
TTW-F/FPK 24-105/115 ESDE/DSDE,
TTW-F/FPK 30-105/115 ESDE/DSDE)
The trays are inserted with the short sides toward the back and front.
– Gastronorm and Euronorm trays
(TTW-F/FPK 16-105/115 ESEU/DSEU,
TTW-F/FPK 20-105/115 ESEU/DSEU,
TTW-F/FPK 32-105/115 ESZU/DSZU,
TTW-F/FPK 40-105/115 ESZU/DSZU)
The trays are inserted with the long sides toward the back and front.
Two trays per ledge fit in a unit compartment.
– Compact trays
(TTW-F/FPK 16-115 ESZE/DSZE,
TTW-F/FPK 20-115 ESZE/DSZE,
TTW-F/FPK 24-115 ESDE/DSDE,
TTW-F/FPK 30-115 ESDE/DSDE)
The trays are inserted with the short sides toward the back and front.
(TTW-F/FPK 16-115 ESEU/DSEU,
TTW-F/FPK 20-115 ESEU/DSEU,
TTW-F 32-115 ESZU/DSZU,
TTW-F 40-115 ESZU/DSZU)
The trays are inserted with the long sides toward the back and front.
Two trays per ledge fit in a unit compartment.
Operation
Vertical push handles allow easy movement of the unit. Stable corner guards
protect the unit from damage. Circumferential bumper rails are available as
an option.
The unit door(s) can be locked on the short sides.
BA 154 315 -en- 3.1-12/11

BLANCO INMOTION Tray Transport Trolley
– 3 –
The inner side walls are designed with support ledges for accepting trays. On
unit models for Gastronorm and Euronorm trays, two indentations each are
provided above the support ledges. They prevent accidental tipping when
removing the trays.
Standard model The standard model of the BLANCO INMOTION tray transport trolley
includes:
yStainless-steel, single-walled unit body
yUp to three compartments, depending on the model
yDistance between ledges: 115 mm
yFour corner guards
yTwo push handles on the left short unit side (seen from the operator side)
yFour steering castors, two with castor brakes (units with one
compartment)
yTwo steering castors with castor brakes and two fixed castors (units with
two or three compartments)
yCastor arrangement "A": castors at the unit corners
Options and accessories The BLANCO INMOTION tray transport trolley is available with the following
optional equipment:
yStainless-steel, double-walled unit body
yAll-around railing
yDistance between ledges: 105 mm
yAll-round bumper rail
yLockable unit doors
yTwo additional push handles on the right short unit side (seen from the
operator side)
yHitch and coupling (units with two or three compartments)
yMenu card holder
yEutectic plates (coolant accumulators); suitable only for unit
compartments with Gastronorm tray dimensions and double-walled
design
– or –
Unit model with passive cooling (TTW-FPK)
yWaste system
yCastor arrangement "D": Steering castors on the unit corners and two
additional fixed castors on both long unit sides
yCastor model available in different materials and diameters
BA 154 315 -en- 3.1-12/11

BLANCO INMOTION Tray Transport Trolley
– 4 –
Safety
General Information The unit has been built using state-of-the-art technology. Accordingly, all the
requirements necessary for safe operation have been fulfilled. Additional
dangers do nevertheless exist when the unit is operating. The safety
precautions and warnings in these operating instructions are there to help
you protect yourself against these sources of danger.
Safety precautions
Thoroughly read and observe the safety precautions in this chapter.
The operator is responsible for the observance of the safety precautions in
these operating instructions.
Warnings
Observe the warnings with the danger symbol (warning triangle) in the text.
Operating Manual
These operating instructions must be read carefully before the initial use.
The operator is responsible for ensuring that all users have read these
instructions before using the unit.
Store these operating instructions in a location which is always accessible to
operating personnel.
About this product Application
The unit may only be used for the applications specified.
The operator is responsible for the appropriate and proper use of the unit.
Conditions of use
The unit is only to be operated under the appropriate environmental
conditions.
The users of the unit must be instructed in its operation and must have read
and understood these operating instructions.
Transport Upright transport position
Transport the unit in an upright position only.
Transporting with a truck or delivery vehicle
The unit is only to be transported in a truck or delivery vehicle with a loading
ramp.
Secure against shifting of the unit. Just locking the castor brakes is
insufficient transport security. Do not place tension belts around the push
handles. There is a danger of the push handles being bent.
Secure the unit against vertical movement during transport. Use padded
locking bars.
Operation General Information
The user must know of the dangers involved with the unit and be able to
assess them.
The unit is only to be used when it is in proper working order.
The unit may only be used by persons, whose physical, sensory or mental
abilities are not subject to any relevant restrictions for operating the unit.
BA 154 315 -en- 3.1-12/11

BLANCO INMOTION Tray Transport Trolley
– 5 –
If damage is present, secure the unit against accidental use and have repairs
carried out immediately at one of the following locations:
yIn-house, by BLANCO-trained experts
yExternally, by BLANCO-trained customer service
yBLANCO Service
Always secure the unit from rolling away by setting the castor brakes. The unit
can cause injuries and damage to property if allowed to roll away accidentally.
When keeping food warm or cool, only open the unit briefly to remove food.
Always keep cloches on food in Gastronorm/Euronorm trays.
Eutectic plates (coolant accumulators)
Remove eutectic plates from the unit when keeping food warm.
Only handle cooled eutectic plates with protection (e.g. with gloves).
A danger of slipping exists if collected condensation water runs out of the unit
at eutectic plates. Completely wipe up any condensation water which has run
out.
Loadability of unit top
Do not place items with an area load exceeding 25 kg on top of the unit.
Hygiene regulations
When keeping food warm or cool, observe the corresponding regulations on
foodstuffs as well as the characteristics of the food in question.
Danger of children being trapped inside
Secure empty unit from access by children. Children who climb into an empty
unit and close the unit door cannot get out unassisted.
Store the empty unit in an area inaccessible to children.
Change of location
Remove any objects from the unit top before changing its location. Objects
can slide off the unit top when pushing the unit.
Hold unit door(s) closed while changing its location. Trays can fall out of the
unit when it is pushed.
With the unit door(s) closed, the unit can be tilted to an angle of 10°. Only
slanted surfaces with an incline <10° may be crossed.
If the unit is on a slanted surface, it must be secured against rolling away with
further measures (e.g. wedges) in addition to locking the castor brakes.
To minimize the danger of damage to the castors, avoid overloading the
castors:
yDo not move the unit when the castor brakes are locked
yAvoid impacts
yDo not traverse bumps or steps
yDo not traverse uneven floors
The unit is to be pushed only, never pulled.
When moving the unit, ensure that no persons or objects which are located
in the way of the trolley are overlooked.
If the person who is pushing the trolley cannot see over it, a second person
must walk in front of the trolley when it is being moved to ensure that it can
be moved forward safely.
BA 154 315 -en- 3.1-12/11

BLANCO INMOTION Tray Transport Trolley
– 6 –
Always push the unit using both hands. Depending on the weight of the unit,
if you push it with just one hand it is possible you would not be able to apply
the brakes quickly enough.
Be careful to ensure that your hands are not pinched (danger of crushing)
between the push handles and walls or other objects (e.g. cabinets).
Two people (one at each short side of the unit) are required to move the unit
over ramps or recesses.
Cleaning and care Hygiene
The regulations of the hygiene guidelines 93/43/EEC as well as your national
hygiene regulations must be complied with.
The unit fulfills the requirements of the hygienic type HS.
Cleaning frequency
Clean the unit thoroughly after each use.
Cleaning methods
Use only approved cleaning methods.
Do not use a steam jet unit or high-pressure cleaner.
Cleaning water
Thoroughly dry the unit after cleaning. Remove cleaning water from the floor
of the unit interior.
A danger of slipping exists if cleaning water runs out of the unit during or after
cleaning. Completely wipe up any water which runs out of the unit.
Maintenance Castor brakes
Regularly check the effectiveness of the castor brakes.
If the effectiveness of the brakes is not sufficient, have the defective castor(s)
replaced by one of the following:
yIn-house, by BLANCO-trained experts
yExternally, by BLANCO-trained customer service
yBLANCO Service
Repairs Authorised persons
The unit may only be repaired by the following service points:
yIn-house, by BLANCO-trained experts
yExternally, by BLANCO-trained customer service
yBLANCO Service
Repairs during the warranty period must be reported to BLANCO and
commissioned by BLANCO before starting.
The warranty will be invalidated if the unit is repaired by anyone else or without
being commissioned.
Standards, guidelines Observe the applicable standards, guidelines and safety regulations.
The operator is responsible for compliance with the applicable standards,
guidelines and safety regulations.
Product marking The warranty is voided if the product marking (rating plate) is removed.
BA 154 315 -en- 3.1-12/11

BLANCO INMOTION Tray Transport Trolley
– 7 –
Transport
Checking for/reporting
on damage incurred during
transportation
)It is imperative that the unit be checked immediately after delivery for
damage incurred during transport (visual inspection).
Document (description of defect) any damage incurred during transport
on the waybill in the presence of the carrier.
Have the carrier confirm the damage (signature).
Retain the unit and notify BLANCO of the damages with the waybill.
– or –
Do not accept the unit and return it to BLANCO via the carrier.
)This procedure will ensure correct processing of claims. If transport
damage is reported later the consignee must provide evidence of this.
Scope of delivery
(1) BLANCO INMOTION tray transport trolleys
(2) Operating Manual
The scope of delivery and model of the BLANCO INMOTION tray transport
trolley are to be taken from the delivery documentation.
Unpacking Open the transport packaging at the places provided. Do not rip or cut it!
Check the scope of delivery.
Disposing of packaging material )Packaging materials are recyclable.
Recycle packaging materials in a proper, environmentally friendly manner
in accordance with the respectively applicable legal requirements.
Tablett-Transportwagen unbeheizt
2
1
1
1
BA 154 315 -en- 3.1-12/11

BLANCO INMOTION Tray Transport Trolley
– 8 –
Operation
Unit overview
(1) Railing (optional)
(2) Push handle (optional)
(3) Tip safety (only on model for Euronorm and Gastronorm trays)
(4) Support ledge
(5) Unit door: locked at side wall
(6) Corner guard
(7) Fixed castor (for unit with only one compartment: steering castors)
(8) Condensation-water catch tray (optional)
(9) Steering castor
(10) Door lock and ball catch (for locking the unit door to the side wall)
(11) Hitch (optional)
(12) Castor brakes
(13) Dividing wall/dividing wall for mounting eutectic plates (optional)
(14) Unit door
(15) Menu card holder on side wall (optional)
(16) Door handle
BA 154 315 -en- 3.1-12/11

BLANCO INMOTION Tray Transport Trolley
– 9 –
Opening a unit door
Caution!
Hand can be pinched!
Your hands can be pinched to the side walls and injured when locking the unit
door.
Do not put your hand between the unit door and the unit or hold it there
when locking.
Carefully open and lock the unit door (without momentum).
Unit model with lockable doors
If the unit door is locked, unlock the lock with a key.
Pull the door handle on the door lock in the direction of the arrow and
open the unit door.
Open the unit door completely (270°) and press onto the short side of the
unit.
The door catch (1.) is felt to engage in the door lock (2.).
1.
2.
BA 154 315 -en- 3.1-12/11

BLANCO INMOTION Tray Transport Trolley
– 10 –
Closing the unit door
Caution!
Hand can be pinched!
Your hands can be pinched and injured when the unit door is being closed.
Do not put your hand between the unit door and the unit or hold it there
when closing.
Carefully close the unit door (without momentum).
Pull the unit door out of the door lock.
Close unit door without momentum.
Press the unit door into the lock until it is felt to engage.
Emptying condensation-water
catch tray
Unit model TTW-FPK
ICondensation water forms on cooled eutectic plates due to cooling of the
surrounding area. The unit is equipped with a catch tray for holding the
resulting condensation water. The amount of condensation water is
highly dependent on the ambient conditions (temperature, humidity).
Caution!
Danger of slipping due to condensation water leaking out!
A danger of slipping exists if condensation water runs out of the unit.
Empty catch tray regularly.
Completely wipe up any condensation water which has run out.
Open the unit doors.
ªSection "Opening a unit door" on page 9.
Slowly pull catch tray out of unit by moulded handle (1).
Empty catch tray.
Slide catch tray into dividing wall in bottom positon.
Inserting coolant accumulators IThe dividing wall of the unit is designed for accepting eutectic plates of
the size GN 1/1.
Caution!
Local freezing!
Longer contact with precooled eutectic plates can result in freezing.
Protection (e.g. with gloves) must be used when handling pre-cooled
eutectic plates.
1.
BA 154 315 -en- 3.1-12/11

BLANCO INMOTION Tray Transport Trolley
– 11 –
9Pre-cooled eutectic plates
9Empty condesation water catch tray mounted in dividing wall
Open the unit doors.
ªSection "Opening a unit door" on page 9.
Slide eutectic plates into dividing wall from bottom upward with short side
first.
Close the unit doors.
Loading the unit 9With Gastronorm/Euronorm trays, food is covered with cloches
9With compact tray, lower and upper tray section is locked with slide lock
Open unit door(s).
ªChapter "Opening a unit door" on page 9.
To prevent shifting of the centre of gravity to the unit top, load the unit
from the bottom up when loading partially.
Insert the tray so that the tray edges lie on the ledges. With Gastronorm
and Euronorm trays, make sure that the try edges do not rest on the
indentations for the tip safety.
Close unit door(s).
ªChapter "Closing the unit door" on page 10.
Coupling trolleys together Tray transport trolley with hitch
IWhen changing the location, units which are equipped accordingly can
be coupled together with the hitch and coupling. A single unit or
interconnected units can be connected to a towing vehicle with the hitch
(a maximum of 4 units on one towing vehicle). Take the specifications
from the towing vehicle manufacturer into account here (e.g. the
permissible trailing load)
IThe speed when transporting the units in a train may be a maximum of
6km/h.
IIn the rest position, the hitch is pressed up against the side wall of the unit
with a spring. For connection of the hitch to the fastening bolt of the other
unit, the hitch is folded down.
Warning!
Hitch can fly up
Danger of injury from unchecked flying up of the springloaded hitch.
Make sure that no extremities are located in the swinging area of the
hitch.
Always secure the coupled hitch with the locking cotter pin.
Warning!
Automatic decoupling!
The connection of the units can become detached by itself due to uneven
spots during transport.
Always secure the coupled hitch with the locking cotter pin.
Position the trolleys in such a way that the hitch-side of one trolley faces
the bolt-side of the other trolley.
BA 154 315 -en- 3.1-12/11

BLANCO INMOTION Tray Transport Trolley
– 12 –
Pull the locking cotter pin out of the bolt (the locking cotter pin is attached
to the trolley via a chain).
Fold the hitch down and guide it under the bolt of the other trolley.
Release hitch.
The spring pushes the hitch upward (1.). The hitch locks into the bolt.
Insert the locking cotter pin into the corresponding hole of the bolt (2.).
The hitch is secured.
IThe locking cotter pin secures the coupled hitch to the bolt of the trolley
being pulled. After decoupling, reinsert the locking cotter pin into the
corresponding hole of the bolt. This ensures that the locking cotter pin
does not rub against the floor and is not lost.
Moving the unit to a new location )If the driving route is uneven, measures must be taken.
ªChapter "Traversing ramps, recesses, slanted surfaces" on page 14.
9Do not place objects on top of the unit
9The unit door(s) is/are closed
Caution!
Be careful not to pinch your foot!
The foot can be pinched and injured when the castor brakes are released and
locked.
Be careful not to place your foot between the castor brake and the corner
guard.
2.
1.
BA 154 315 -en- 3.1-12/11

BLANCO INMOTION Tray Transport Trolley
– 13 –
Warning!
Limited field of vision!
When pushing the unit, a person in front of the unit can be overlooked and
injured. The unit or an object before the unit can be damaged due to limited
field of vision.
Make sure that another person walks ahead of the unit when pushing.
Always push the unit using both hands.
Push the unit so that your hands on the push handles are a sufficient
distance from the wall or other objects and cannot be crushed.
Release castor brakes.
Using two hands, carefully push the unit to its new location.
Lock castor brakes.
BA 154 315 -en- 3.1-12/11

BLANCO INMOTION Tray Transport Trolley
– 14 –
Traversing ramps, recesses,
slanted surfaces
9Two people
9Load the unit from the bottom up when loading partially
Warning!
The trolley can tip!
The unit can tip over when traversing a slanted surface.
Never move the unit across a surface (e.g. ramp) with an incline >10°.
Warning!
Insufficient holding effect of castor brakes!
The braking effect of the castor brakes is not guaranteed on ramps. The unit
can start to move and cause injuries.
Lock the unit on a ramp with the castor brakes and also secure it against
rolling away (e.g. with wedges).
Unit models with four steering castors and two fixed castors
Warning!
The trolley can swerve sideways!
The fixed castors can hover in the air in a recess or the lower area of a ramp.
In this case, the unit can swerve sideways and cause injuries.
Two people should always be used to move the unit across ramps and
recesses.
Move the unit across ramps and recesses with extreme caution.
Ensure that the trolley does not swerve sideways when moving across
ramps and recesses.
First check whether the trolley can be safely pushed across the ramp,
recess or slanted surface.
Carefully push the trolley across the ramp, recess or slanted surface with
two people (one at each end of the unit).
Refrigerating food Double-walled, insulated unit model
IIn combination with pre-cooled eutectic plates (coolant accumulators),
the unit can be used for the short-term refrigeration of food.
)The unit is in no way suitable for long-term refrigeration of food. Comply
with the respective standards.
Insert pre-cooled eutectic plate(s) in the top ledges.
BA 154 315 -en- 3.1-12/11

BLANCO INMOTION Tray Transport Trolley
– 15 –
Unit model with passive cooling
IIn combination with pre-cooled eutectic plates (coolant accumulators),
the unit can be used for the short-term refrigeration of food.
)The unit is in no way suitable for long-term refrigeration of food. Comply
with the respective standards.
Slide the pre-cooled eutectic plates into the dividing wall.
ªSection "Inserting coolant accumulators" on page 10.
Keeping food warm Double-walled, insulated unit model
IIn combination with suitable heat retainers and cloches or upper tray
sections, the unit can be used for short-term temperature maintenance
of food.
)The unit is in no way suitable for long-term temperature maintenance of
food. Comply with the respective standards.
Distributing food
Warning!
Hot dishes!
Dishes can be hot and cause burns.
Protection (e.g. with hotpads or protective gloves) must be used when
handling hot objects.
Warning!
Hot liquid food!
Hot liquid food can splash out from the edge of the plate and cause scalding.
Keep trays in a horizontal position.
Avoid jerky movements with the tray.
Open the unit door completely (270°) and press onto the short side of the
tray transport trolley.
ªChapter "Opening a unit door" on page 9.
Remove trays.
)The unit must be cleaned thoroughly after use.
ªChapter "Cleaning and care" on page 18.
BA 154 315 -en- 3.1-12/11

BLANCO INMOTION Tray Transport Trolley
– 16 –
Shutting down
Shutting unit down
Danger!
Danger of children being locked in!
Children cannot open closed unit doors by themselves and there is a
danger of suffocation.
Always store the empty unit with the doors open.
Store the unit so that it cannot be accessed by children.
BA 154 315 -en- 3.1-12/11
This manual suits for next models
107
Table of contents
Other Blanco Commercial Food Equipment manuals
Blanco
Blanco Cook BC ES 2 User manual

Blanco
Blanco MANHATTAN MWA 3 User manual
Blanco
Blanco BLANCOTHERM 320 KB User manual

Blanco
Blanco INMOTION BW 11 User manual

Blanco
Blanco BW UK 10 User manual

Blanco
Blanco MANHATTAN MNE 3 User manual

Blanco
Blanco INMOTION BW-UK 10 User manual
Blanco
Blanco INMOTION TTW-FPK 16-105 DSZE User manual

Blanco
Blanco INMOTION TTW-F 16-105 DBZE User manual