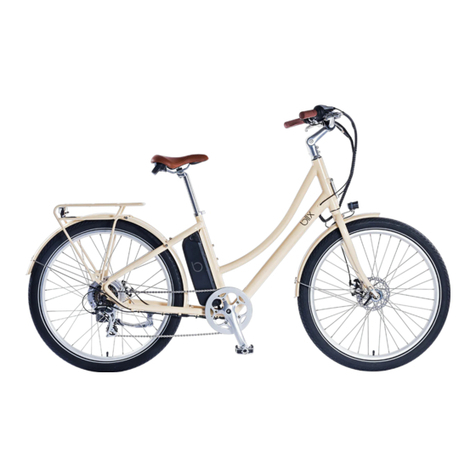
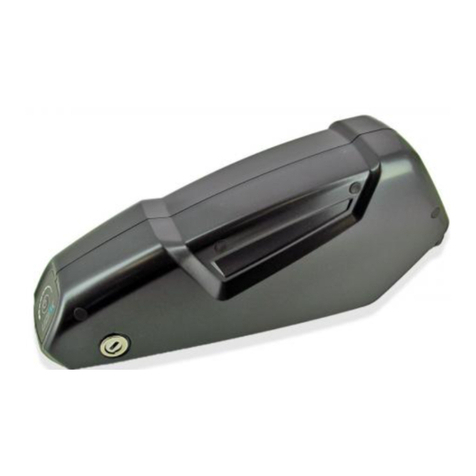
Blix Legacy User manual

Owner’s Manual

Welcome to Blix.
To ensure you get the most out of your new
Blix, familiarize yourself with the operating
guidelines, maintenance tips, and other useful
information.
Blix Owner’s Manual, version 4

Table of Contents
Important Information 4
About this Manual 4
Activate your Warranty 4
Before Riding 6
Safety Regulations 6
Assembly 6
Adjusting Your Fit 6
Getting to Know your Blix 9
The Display 10
Display Symbols 10
Power On the Display 11
Energy Bar 11
Walk Assist Mode 12
LED Lights 12
Trip & Odometer 12
Motor Control 13
The Pedal Assist System 13
Shiing Gears 13
Throttle 13
The Battery 14
Battery Safety 14
Battery Position 15
The Power Button 15
Battery Lock 15
Removing the Battery 16
Fuses 16
Charging 17
Checking the Battery Status 18
Storing the Battery 19
Recycling 19
Battery Range 20
Battery Technical Safety 20
Maintenance 21
Storing your Blix 22
Adjusting the Brakes 22
Adjusting the Gears 22
Troubleshooting 23
Removing the Rear Wheel 23
Error Codes 24
For More Information 25
Warranty 26

4
Important Information
About this Manual
Activate your Warranty
This manual provides tips and instructions for basic
maintenance that will benefit the peormance and
lifespan of your Blix. In addition, we will provide you
with all of the information you will need to operate
your bike before your first ride.
While this manual covers much of the information
you will need to develop a comfortable and
confident relationship with your bike, it is not
intended to guide owners in every possible scenario.
Like any traditional bicycle, Blix bikes will require
some upkeep and maintenance, which can be done
either by yourself or by a certified bike mechanic.
However, Blix bikes utilize specialized hardware
such as batteries and controllers which may require
advanced troubleshooting peormed by a certified
bike mechanic aer consulting with Blix technical
support.
Your warranty activates automatically once you
have received your bike, but you should register your
Blix online by visiting:
www.blixbike.com/pages/bikeregistration
Registering your bike will establish a record of
ownership to ensure that your purchase information
can always be referenced. Registering your bike is
also helpful should your Blix ever be stolen as we
will be able to identify your property if your Blix is
found. You will be asked to record your name, date of

5
Important Information
Questions?
purchase, model, and frame number of your bike.
It is important to keep the frame number for your
records as it is specific only to your bike and may
be referenced in the event of a warranty claim. The
frame number is engraved on the frame near the
pedals on the bottom of the bike.
There are dierent models of Blix bikes and this
manual may contain information and illustrations
that do not apply to yours. If you have any questions
aer reading this manual, we encourage you to
contact our Blix Support:
https://support.blixbike.com/
support@blixbike.com
(855) 655-BLIX [2549]
blixbike.com
Blix Bicycle Inc.
2877 Mission St.
Santa Cruz, CA 95060

6
Before Riding
Safety Regulations
Adjusting Your Fit
ÎCarefully read this manual before your first ride.
ÎBefore each ride, check your bike to ensure there
are no damaged components.
ÎYou should not make any alterations or changes
to your Blix bike which may inhibit its normal
functions. This may aect the safety of the bike.
ÎYour Blix bike is intended both for recreation and
transportation. It is solely designed for cycling on
paved roads and bike paths.
ÎBlix Bikes are considered Class 2 bikes and are
legal on most bike paths and bike lanes. However,
we recommend you check your local laws to
ensure the legality of your eBike in your area.
Aer your Blix is assembled, there are a few easy
steps you can take to adjust the handlebars and
seat to find the peect fit. There are no hard and fast
rules to this; just make sure you feel comfortable and
that you are feeling no strain on your wrists, arms, or
shoulders.
Assembly
Assembly instructions and videos can be found at
support.blixbike.com under the Owners tab.
Blix bikes are designed for easy assembly whether
you are a first time bike owner or a seasoned pro,
but our customer support specialists are a great
resource if you are feeling unsure. Professional
assembly is recommended.

7
Before Riding
Seat Adjustment
Handlebar & Stem Adjustment
To adjust the seat height, open the quick
release seat post clamp. Once you’ve
reached your desired height, simply
clamp the quick release back down so
it squarely closes against the collar. If
the seat height continues to slip when
pressure is applied, you can tighten the
nut on the quick release clamp by hand.
Each Blix model has a dierent handlebar & stem combination.
You can find specific instructions on adjusting the handlebar
& stem of the Aveny/Sol, Packa, and Vika+ on our YouTube
channel, but these are some of basic instructions you can follow
for most models.
To adjust the height of the stem, loosen the stem
bolt. Ensure the stem is fully aligned to the front
wheel before tightening the bolt back down.
To adjust the angle of the stem, loosen the bolt
at the bottom of the stem. Ensure the bolt is tight
once you’ve reached your desired angle.
To adjust the angle of the handlebar, loosen the
handlebar clamp. Ensure both bolts are tight once
you have reached your desired wrist angle.
Aer adjusting your bike to your peect fit, you should be able
to sit up straight comfortably, with no strain to your shoulders,
wrists, or arms.
Tip: You should be able to comfoably touch the ground with
your toes, and should be able to fully extend your legs while
pedaling. This is the optimal height for your seat, but choose the
height that works best for you.

8
Before Riding
Before Each Ride
Safe Riding
Lights & Reflectors
Use your Helmet
ÎEnsure your tires are pumped up to the
recommended PSI. The PSI is written on the side of
the tire for easy reference.
ÎEnsure all bolts and hardware are secured tightly.
ÎCheck that the brakes are adjusted properly. See
the Brake Adjustment Guide for more thorough
information on adjusting your brakes.
ÎCheck that the wheels are securely fastened, and
the front wheel quick release is tight.
ÎEnsure handlebars are tightly mounted in
alignment with your tire, and that the handlebars
are in a comfortable position for your arms and
wrists.
Some Blix models come equipped with LED lights
which are powered by the battery and can be
switched on and o with the display. All Blix Bikes
come with standard reflectors. Remember to
keep the lights and reflectors clean for increased
visibility.
Remember to wear your helmet. Even if you feel
confident on the road and in your own riding ability,
you will share the road with other vehicles and
pedestrians; accidents can happen.

9
Getting to Know your Blix
The Anatomy of an eBike
The Display
The Motor
The Battery
Blix electric bikes include similar components found
on a standard bicycle, with an added electric motor
powered by a rechargeable battery. An LCD display
is also included, allowing you to control the level of
pedal-assist and throttle your Blix will provide during
use.

10
The Display
The LCD display will show your riding information,
including speed, mileage, battery level, and other
details. The display is water resistant, meaning you
can ride your Blix in the rain with the display powered
on.
To minimize the risk of water damage, wipe o the
display aer it has been in contact with rain or
water. If you plan to store your bike for an extended
period of time, store in a dry area.
The Button Pad
Display Symbols
The button pad is mounted on
the le handlebar and is directly
connected to the display. It is
equipped with three buttons:
the Up, Down, and Mode (M)
buttons. These buttons are used
to control all operations of the
display.
These are the functions that you can
access and manage on the display
using the button pad:
ÎEnergy Bar
ÎPedal Assist Level (PAS)
ÎLED lights O/On
ÎSpeed (Current, Average, Max)
ÎTrip Time & Distance
ÎOdometer
ÎError Code Indication
In the next few sections, we will go over
how to access each of these functions
and what they mean.

11
The Display
Power On the Display
Powering O
Energy Bar
1. Power on the batteries. The batteries
must be powered on in order to
control the display on the bike.
a. Press the switch on to the “I” to
power on the rear battery.
b. For the Packa, press and hold the
rubber button on the downtube
battery. Tip: Switch on both
batteries of the dual-battery
Packa for better eiciency.
2. Press and hold the Mode button on
the button pad for 2-3 seconds to turn
the display on. Assist Level 1 (PAS 1) will
automatically be activated when the
display is turned on.
1. The display will power o automatically aer 10 minutes
when not in use.
2. To power o the display, press and hold the Mode button
again for 2-3 seconds.
When the battery is fully charged, all bars will show in the
energy bar. The bars will disappear as the battery loses charge.
You can charge the battery frequently; a fully charged battery
improves peormance.
Turn o the battery to conserve power when the bike
is not in use.
1a. Rear Battery
1b. Downtube Battery
Fully Charged Low Power Depleted

12
The Display
Walk Assist Mode
LED Lights
Trip & Odometer
When walking your bike, you can activate
walk mode. This will engage the motor
at a walking speed of 3-4 mph. With the
display on, press and hold the Down
button to enable walk mode. Walk 1 is
displayed on the screen. Walk mode will
be active as long as you continuously
hold the Down button. Walk mode will
disengage as soon as you let go of the
button.
For Blix models with head and tail lights,
press and hold the Up button for 2-3
seconds to turn the front and rear LED
lights on and o. The rear brake lights will
function even if the head and tail lights
are powered o for your safety. Powering
on the LED head and tail lights will also
illuminate the display for easier viewing at
night or on cloudy days.
Walk assist mode is only for use when pushing the bike; do
not use this function while you are riding your bike.
Press the Mode button to navigate between:
ÎSpeed (mph)
ÎAverage Speed (mph)
ÎMax speed (mph)
ÎPressing the Mode button quickly will also switch between
Trip A, Trip B, and Odometer (ODO). To reset the trip meter,
press and hold the Mode and Down buttons simultaneously.

13
Motor Control
Using the throttle function will cause the battery to run out
faster than when using pedal assist.
The Pedal Assist System (PAS)
Shiing Gears
With the Up and Down buttons, you
can control the level of assistance
you will receive when pedaling.
The higher the PAS level, the more
assistance you will receive and the
faster you can go.
ÎPAS 0 will provide no assistance
ÎPAS 1 will assist up to 10 mph.
ÎPAS 2 will assist up to 13 mph.
ÎPAS 3 will assist up to 15 mph.
ÎPAS 4 will assist up to 18 mph.
ÎPAS 5 will assist up to 20 mph.
You can use the grip shier on the handlebar
to change gears. A lower gear oers less
resistance and a higher pedaling speed, while
a higher gear oers more resistance and
a slower pedaling speed. Changing gears
will have no eect on your pedal assist or
motor control. Experiment to find the peect
combination of gear and PAS for a smoother
ride.
When your pedaling speed overtakes the maximum speed
of the PAS level you are riding in, you will no longer receive
assistance unless you raise the PAS level. For example, if you
are in PAS 1, but you are pedaling at 12 mph, you will not receive
pedal assist unless you turn the PAS level to 2.
If you don’t want to pedal at all, you can use the
throttle lever to receive full electric power while
the display is powered on. The throttle works in
conjunction with the PAS level on the display.
When using the throttle, it is not necessary to
pedal manually.
Throttle

14
The Battery
Battery Safety
ÎKeep the battery out of reach of children.
ÎOnly use the charger provided with your Blix bike.
ÎUse the charger only in a dry, indoor environment
on a flat suace.
ÎDo not use the charger on a carpet. This could
produce static electricity.
ÎDo not connect the charger with wet hands.
ÎDo not charge the battery under direct sunlight.
ÎDo not charge the battery during lightning storms.
ÎCharge the battery where there is plenty of
ventilation.
ÎDo not charge or store the battery in extreme
conditions -hot or cold- as this can cause
permanent damage to the Lithium-Ion cells.
ÎDiscontinue charging if you hear unusually loud
noises or notice leakage from the battery.
ÎDo not disassemble the battery unless specifically
instructed to by Blix support.
ÎDo not heat or hit your battery, this could cause
serious injury.
ÎDo not immerse the battery in water or other
liquid.
ÎDisconnect the charger from the electrical outlet
when not charging.

15
The Battery
Battery Position
The Power Button
Battery Lock
On all Blix models, the battery
is located either under the
saddle of your bike or in the
downtube. This allows for
a low center of gravity and
better stability while riding.
There is a switch located on the
rear battery to turn it on and o.
Press the switch on to the “I” to
power on the rear battery.
Some models, like the Packa, may
have more than one battery. In
this case, both batteries can be
turned on for better eiciency.
To turn on the Packa downtube
battery, press and hold the rubber
button.
Your Blix batteries are equipped
with a set of keys and locks for
securing the batteries to the bike.
The locks will keep the batteries
securely mounted in position
during riding, but can also be used
to remove the battery when not in
use. The keys can be replaced for
a fee by Blix in the event that they
are lost or go missing.

16
The Battery
Removing the Battery
Fuses
Removing the battery can be useful for security,
storage, and easier charging.
To remove the battery:
1. Press the lever under the seat to flip the seat
forward.
2. Unlock the battery and remove the key.
3. Pull the battery upwards.
To reattach the battery:
1. Carefully slide the battery back down the mount
on the frame.
2. Lock the battery to prevent the and to ensure the
battery remains properly mounted.
The battery is equipped with two fuses, one for
charging the battery, and one for discharging the
power from the battery to your bike.
If your battery receives a large current, the fuses
will protect your battery but leave it temporarily
inoperable. This is normal and replacing the fuses
will restore functionality. If your battery indicator
stops working and your display won’t turn on, or your
battery is no longer charging, this may be due to
a blown fuse. See our Fuse Replacement Guide, or
contact Blix Technical Support for assistance.
The Packa seat post does not tilt up; the battery
can be removed from the side of the bike or by
unlocking the quick release at the seat post and
raising the seat.

17
The Battery
Charging
You can charge the battery both when it is mounted
or removed from the bike. You can plug the charger
into any 120v electrical wall outlet.
Complete charging time for a fully empty battery
is about 5 hours. Only charge the battery using the
provided charger. When charging is completed,
disconnect the charger.
Charge the battery regularly between rides. Do not
allow your battery to remain in a uncharged state for
long periods of time, as this may negatively aect
the long term life of the battery.
The charger has two LED
lights: Power and Charge.
The Power light turns
red when the charger is
plugged into an outlet. The
charge light will turn red to
indicate that the charger
is supplying power to
the battery, and will turn
green when the battery is
either full or disconnected.
It is normal for the charger to heat up when
connected to the battery, especially when the
battery has been fully depleted. Some electrical
noise is expected, but please contact support if any
concerns arise.

18
The Battery
Checking the Battery Status
You can check the battery status directly on the
battery when it’s turned on.
On the rear battery, there are 4 LEDs directly on the
battery, 3 green and 1 red. The green LEDs will slowly
deplete until only the red LED remains, indicating
that the battery is empty. The absence of any light
indicates that the battery is completely empty, and
will need to be charged for a while before you are
able to check the levels again. The charge level is
also found on the top of the display.
On the Packa downtube battery, there is a single LED
light which will change color to indicate the battery
charge. The blue light indicates a full charge, a
green light indicates a half charge, and a red light
indicates that the battery is uncharged. The absence
of any light indicates that the battery is completely
empty, and will need to be charged for a while before
you are able to check the levels again.
Fully Charged
Fully Charged
Low Power
Low Power
Depleted
Depleted

19
The Battery
Storing the Battery
Recycling
The battery status and durability can be maintained
with regular use. To ensure a long battery life, be
sure to charge the battery oen, especially between
rides.
ÎDo not leave the battery fully uncharged for long
periods of time. This will aect the overall battery
life. Keep the battery at a charge of between 20-
80% to prolong battery life.
ÎThe battery charger is exclusively designed for
use in a dry, indoor environment with adequate
ventilation.
ÎOnly use the charger provided with your Blix.
ÎDo not store the battery in extreme temperatures
as this will cause irreversible damage to the
Lithium-Ion cells.
ÎDo not allow the battery to fall below a 5% charge.
When storing the battery, it is recommended that you
charge the battery for two hours each month.
The battery’s capacity and peormance will
decrease over time. The life cycle of the battery
depends on many factors including usage, storage,
maintenance, and environment. Lithium-Ion batteries
can be recycled. If you are unsure where to recycle
the battery in your area, contact your local recycling
center.

20
The Battery
Battery Range
Battery Technical Safety
There are many factors that aect the range of the
battery. In the list below, you will find some examples
of factors and conditions that may decrease the
range:
ÎHeadwind
ÎHilly Terrain
ÎSo Ground
ÎLow Tire Pressure
ÎHigh Assistance Level
ÎThrottle Usage
ÎLittle to No
Maintenance
ÎAcceleration
ÎLow Manual Pedaling
Force
ÎHeavy Weight / Over
encumbered
To Maximize Battery Range
ÎAccelerate slowly and avoid over use of the throttle.
ÎPedal more to avoid letting the motor do all the work.
ÎStick to hills with less than a 15% grade.
ÎWhen climbing hills, use PAS 1-2 to prevent overheating.
ÎThe battery consists of a series of interconnected Samsung
Lithium-Ion cells. The battery also contains a control unit
(BMS) that monitors the cells during use and when charging
the battery.
ÎThe control unit (BMS) restricts the use of the battery when
it is at a low voltage level to prevent damage to the battery
cells. This means the battery is empty and needs recharging.
ÎThe control unit also contains a balancing circuit that
controls charging so that the individual cells are charged
evenly. This improves the peormance of the battery.
ÎShould there arise an imbalance between the cells, the
battery range may be aected. In order to improve the
balance between the cells, it is recommended that you fully
charge between uses.
Table of contents
Other Blix Bicycle manuals
