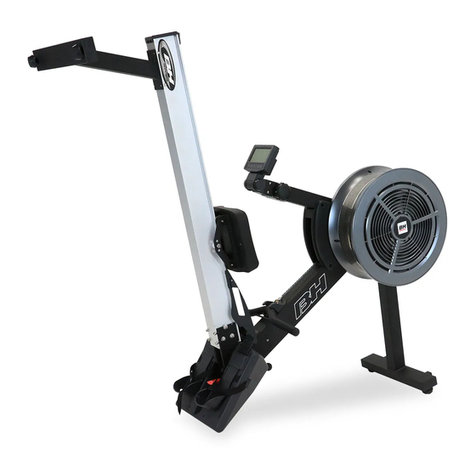
BLUEFIN Fitness BLADE AIR User manual

AIR RESISTANCE R O W E R
INSTRUCTION MANUAL
DE BEDIENUNGSANLEITUNG
ES MANUAL DE INSTRUCCIONES
FR GUIDE D’UTILISATION
IT MANUALEDELLE ISTRUZIONI
NL HANDLEIDING
SE BRUKSANVISNING


004
028
052
076
100
124
148
BLADE AIR // 03
// E N

WEL C O M E T O T H E
B L U EFI N F ITNESS C O MMUNITY
DEAR CUSTOMER
ROWING MACHINE. TO ENSURE YOU GET THE MOST OUT OF YOUR
NEW ROWER, PLEASE ENSURE THAT ALL PERSONS USING THE
EQUIPMENT READ AND UNDERSTAND THE FOLLOWING MANUAL
CAREFULLY BEFORE USE.
BLUEFIN FITNESS ASSUMES NOLIABILITY FOR DAMAGES CAUSED
BY IMPROPER USE OR INCORRECT OPERATION.
MACHINE. SHOULD YOU BE INTERESTED IN KEEPING UP WITH OUR
WEBSITE BLUEFINFITNESS.COM AND FOLLOW US ON OUR SOCIALS:
FACEBOOKFACEBOOK.COM/BLUEFINFITNESS
INSTAGRAM
TWITTER
LINKEDIN
THE BLUEFIN FITNESS TEAM
04 //

WARNING:
This product can expose you to chemical including [lead], which is known to the State of California to cause cancer, and
[Bisphenol A], which is known to the State of California to cause birth defects or other reproductive harm. For more
information go to www.P65Warnings.ca.gov.
PLEASE READ THIS USER GUIDE BEFORE FIRST USING YOUR BLADE AIR.
IT IS IMPORTANT TO KEEP THESE INSTRUCTIONS FOR FUTURE REFERENCE.
- This appliance can be used by children aged from 8 years and above and person with reduced physical or sensory or
mental capabilities or lack of knowledge if they have been given supervision or instruction concerning use of the appliance
in a safe way and understand the hazards involved.
- Children should not play with the appliance.
- Cleaning and user maintenance shall not be made by children without supervision.
- If the supply cord is damaged, it must be replaced by the manufacturer, its service agent or similarly qualified persons in
order to avoid a hazard.
- Only use accessory items recommended by the manufacturer.
- CAUTION the instructions must be followed carefully in the assembly, use and maintenance of the equipment.
- Keep hair, fingers and loose clothing away from moving parts to avoid serious injury.
- This product is intended for home use only.
- Always consult your SP before undertaking any exercise programme.
- This product is not suitable for therapeutic purposes.
- Do not use the product in humid or dusty environments to avoid any risk of electric shock.
- Do not use the product if temperature exceeds 40°C/104°F.
- Ensure the product is on a flat and dry surface before use.
- Only use accessory items recommended by the manufacturer.
SAFETYINFORMATION
BLADE AIR // 05
// E N

06 //
EXPLODED DIAGRAM

No.
1
2
3
4
5
6
7
8
9
10L/R
11
12
13
14
15
16
17
18
19
20
21
22
23
24
25
26
27
28
29
30
31
32
33
34
35
36
37
38
39
40
41
42
43
44
45
46
47
48
49
50
51
52
Description
iPad holder
Computer holder
Bolt M5*18
Bolt M8*35*18*S5
Nylon nut M8*H7.5*S13
Bolt M8*20*S5
Washerd8*φ22*2
Pedal holder
Screw ST4.2*φ19*φ8
Pedal
Strap
Spring washerD8
Washerd8*φ20*2
Pedal tube φ12.5*486
End cap
Bolt M8*42*15*S5
Transportation wheel
Non-slip mat
Screw ST4.2*φ19*φ8
Front stabilizer
Washerd8*φ16*1.5
End cap
Pedal tube 2
Non-slip mat
Fixed U holder
Bolt M8*60*20*S6
Bolt M12*100*17*S19
Nylon nutM12*H11*S19
Spring Φ1.5*Φ15*63*N12
Screw ST4.8*13*φ8
Washerd12*φ24*2
Washerd12*φ30*2
Knob
Bolt M6*20*S5
Rubber pad
Alum plate
Sliding rail
Rail cover
Rear stabilizer
Nut M8*H5.5*S13
Adjustable pad
Roller φ35
Spacer Φ12.5*Φ8.2*4.5
Bolt M8*28*10*S5
Adjustable bolt M6*52*φ10*2.5
Adjustable U seat
Nylon nutM6*H6*S10
Seat plate
Bearing 608ZZ
Roller φ36
Seat shaft Φ10*118
Seat
Qty
1
1
4
1
10
12
2
4
8
1
2
4
4
1
4
2
2
2
4
1
11
2
1
1
1
1
1
1
1
4
1
1
1
4
4
1
1
1
1
2
2
2
6
2
2
4
5
2
4
4
2
1
No.
53
54
55
56
57
58
59
60
61
62
63
64
65
66
67
68
69
70
71
72
73
74
75
76
77
78
79
80
81
82
83
84
85
86
87
88
89
90
91
92
93L/R
94
95
96
97
98
99
100
A
B
C
Description
Round end cap
Handlebar
Foam grip
Nut M10*1*H8*S15
Fixed plate
Nut M10*1*H5*S17
Bearing6000-2RS
Flywheel shaft φ10*135*M10*1.0*20
Screw ST4.2*13*Φ7
Alum plate
Bushing
Fan wheel
Adjustable bolt M6*52
Wave washerd10*φ15*0.3
Mesh belt Wheel
Handlebar holder
Spacer
Bearing6000-ZZ CXSH
Mesh belt Wheel
Bolt M6*55*15*S10
Bolt M6*10*S5
Computer holder
Screw ST4.2*10*φ8
Motor
Screw ST4.2*6*Ф8
Sensor
Sensor holder
Spring Φ1.2*Φ15*48*N9
Screw ST4.2*13*φ8
Wire holder
Magnet plate
Round magnet φ24*6
Bolt M5*10*φ10
Magnet plate
Washer d5*φ13*1
Bolt M4*6*φ7
Computer
Screw ST4.2*8*Φ8
Main frame
Chain cover
Fan wheel cover
Screw ST4.2*16*φ8
Connector
Adapter
Belt
Power trunk wire
Tension wire
Trunk wire
Allen Wrench S5
Spanner S13-S14
Spanner S17-S19
Qty
2
1
2
4
2
4
2
1
8
4
1
1
2
1
1
1
2
2
1
1
4
1
4
1
1
2
1
1
2
1
1
3
4
1
4
2
1
4
1
1
2
13
1
1
1
1
1
1
2
1
2
BLADE AIR // 07
// E N
ASSEMBLY CHECKLIST

08 //
COMPONENT LIST
#6 M8*20*S5 4PCS
#34 M6*20*S5 2PCS
#35 Φ27*Φ23*16*Φ6 2PCS
#27 M12*100*17*S19 1PC
#28 M12*H11*S19 1PC
#33 M12*M10*50 1PC
#21 d8*Φ16*1.5 2PCS
#7 d8*Φ22*2 2PCS
#4 M8*35*18*S5 1PC
#5 M8*H7.5*S13 1PC
#A S5 2PCS
#32 d12*Φ30*2 1PC
#31 d12*Φ24*2 1PC
#C S17-S19 2PCS
#B S13-14-15 1PC
#3 M5*18 4PCS
#38 47*79*53 1PC

BLADE AIR // 09
// E N
ASSEMBLY INSTRUCTIONS
Unlock bolts(6), spring washers(12), and
washers(13) from front stabilizer(20). Then
attach front stabilizer(20) to main
frame(91) using bolts(6), spring
washers(12), and washers(13). Tighten
and secure with allen wrench(A).
1.
6
12
13
91
20
#6 - 2pcs
#12 - 2pcs
#13 - 2pcs
#A - 1pc
6
12
13
37
39
38
#6 - 2pcs
#12 - 2pcs
#13 - 2pcs
#A - 1pc
#38 - 1pc
A.Insert rail cover(38) into sliding rail(37).
B.Unlock bolts(6), spring washers(12), and
washers(13) from sliding rail(37). Then
attach rear stabilizer(39) to sliding rail(37)
using bolts(6), spring washers(12), and
washers(13). Tighten and secure with allen
wrench (A).
2.
A. Attach sliding rail(37) to main frame(91)
using bolt(27), washer(32) and nylon
nut(28). Tighten and secure with
spanner(C).
B. Secure knob(33) in the hole of main
frame(91).
C. Insert seat(52) into sliding rail(37).
D. Secure rubber pad(35) in sliding rail(37)
using bolts(34) with allen wrench (A).
3.
91
27
28
33
37
34 35
35 34
52
37
31
32
#A - 1pc
#34 - 2pcs
#35 - 2pcs
#27 - 1pc
#28 - 1pc
#33 - 1pc
#C - 2pcs
#32 - 1pc
#31 - 1pc

10 //
ASSEMBLY INSTRUCTIONS
A. Attach pedal tube 2(23)
to main frame(91) using
bolts(6) and washers(21).
Tighten and secure with
allen wrench(A).
B. Attach pedal(10L/R) into
main frame(91) using pedal
tube 1(14), bolts(6) and
washers(7). Tighten and
secure with allen
wrench(A).
4.
91
91
23
6
21
67
10L
10R
76
14
#6 - 4pcs
#21 - 2pcs
#7 - 2pcs
#A - 2pcs
91
96
3
5
4
1
#4 - 1pc
#5 - 1pc
#A - 1pc
#B - 1pc
#2 - 4pcs
2
A. Secure iPad holder(1) in the
computer holder(2) with bolts(3) by
spanner(B).
B. Secure computer holder(2) with
main frame(91) with bolt(4) and
nylon nut(5) by allen wrench (A) and
spanner(B).
C. Insert adapter wire(96) to power
hole on the main frame(91), then
plug the adapter into an outlet.
Attention:Cut off the power source
when don't use it long time.
5.

BLADE AIR // 11BLADE AIR //
// E N
MACHINE ADJUSTMENTS
The pedal strap(11) is adjustable and
can be personalized to fit the user’s foot
size.
PEDAL
ADJUSTMENT
Press the hook and rotate it
anticlockwise to take out the plug, then
put another plug into the adapter and
rotate clockwise to fix it.
ADAPTER PLUG
REPLACEMENT
The rotation angle of iPad holder(1) can be adjusted to
obtain the best view of the LCD screen.
CONSOLE ANGLE
ADJUSTMENT

To move the machine, lift up the rear stabilizer(39) until the transportation
wheels(17) touch the ground. With the wheels on the ground, you can transport
the machine to the desired location with ease.
MOVING
BLADE AIR
12 //
MACHINE ADJUSTMENTS
When not in use, you can save space by
folding the sliding rail (37).
1. Lift slightly sliding rail(37) where it
joins the main frame(91). With the other
hand, unlock knob(33).
2. Fold the sliding rail(37) to vertical.
Insert knob(33) into the fixing board and
through sliding rail(37) to secure the
sliding rail (37).
STORING
BLADE AIR

Note:
1. This instrument requires a power adapter. When the instrument displays abnormally, please unplug and then plug in
the power plug again.
2. Without any operation, the product will enter sleep mode after ten minutes.
BLADE AIR // 13
// E N
DESCRIPTION OF INSTRUMENT WINDOW
• Scanning mode: Display in the following order successively for every 1800 seconds.
Time-Distance-Resistance Level-Strokes-Calories-Bluetooth-Pulse
• Press the knob of Display to select and fix a certain function, and then display it on
the main window.
• Display of 32-resistance force adjustment.
DESCRIPTION OF BUTTON FUNCTIONS
• Start or stop the exercise: Press the middle of knob is to start or stop the exercise.
A. Start: Press the middle of knob during non-exercise, it will start to display the exercise data when using.
B. Stop:During display working, press the knob 1 second to switch the display. Then keep pressing the knob 3 seconds to stop
display counting until display “PAU”.
-In the paused state, press 1 second to recovery the display.
-In the paused state, press 3 seconds to recovery the data.
• Function mode of upward selection: Rotate the knob clockwise is upward adjustment when setting, which is used to
increase the value of LEVEL during exercise.
• Function mode of downward selection: Rotate the knob counterclockwise is downward adjustment when setting, which is
used to decrease the value of LEVEL during exercise.
SLEEP AND AUTOMATIC PAUSED MODE
• When in use, there is no speed signal within 4 minutes, the display will be entered paused mode automatically.
• Without any operation, the product will enter sleep mode after 10 minutes.
• Press the knob to stop the paused mode.
• At any time, the system can be shut down by turning off the power plug, the system will not be damaged.
CALORIES CALCULATE METHODS
Calories are calculated at 15 calories per kilometer.
When there is no speed signal, calories and distance will be not counted.
Time
Distance
Resistance level
Strokes
Calorie
Bluetooth & App
Time of exercise
Distance of exercise
Resistance level of exercise
Number of strokes: Statistics of the number of
strokes during exercise
Energy consumed during exercise
Support that APP is controlled via Bluetooth.
When there is Bluetooth equipment connected,
the icon is displayed
0 min: 00 s ~ 99 min: 59 s
0.00 ~ 99.9 km
1 ~ 32
0 ~ 9999
0.0~ 999.9 kcal
CONSOLE FUNCTION

14 //
KINO M A P F ITNESS A P P
ADDING THE APP
• Search for KINOMAP on your smartphone’s appstore and download.
• Aer the download is complete, open the KINOMAP appand register
your personal details.
• Turn Bluetooth onand ensure that the Blade Air console is powered on
and in the wake-up state.
• Sync your Blade Air to the KINOMAP appas follows:

01 02
Press MORE to bring up the
Equipment page, select
Equipment Management.
Press the + icon.
BLADE AIR // 15
// E N

03 04
Select the Rowing icon. Select the Bluefin Fitnessicon.
16 //

05 06
Select Blade Air. Add your Blade Air to complete,
start your exercise.
BLADE AIR // 17
// E N
Blade Aqua M-1Blade Air
Blade Air
Blade Fit

1 8 //
W A R M UP AND COOLD O W N
EACH WORKOUT.
WE RECOMMEND THE FOLLOWING STRETCHES, WHICH WILL REDUCE
NEVER OVERSTRETCH OR PULL YOUR MUSCLES.
SIDE BENDS
Pass one arm up and over your head,bending your upper body in the same
direcon. Hold this posion for 10 to 15 seconds and slowlystraighten
yourself back up. Repeat this 3 mes for eachside.
TOE TOUCH
Slowlybend forward from your waist,leng yourback and shoulders relax
as you stretch towards your toes. Reach down as far as you can go and hold
for 15 seconds. Then relaxand repeat 3 mes.

BLADE AIR // 19
// E N
Lean against a wall with your leleg in front of the right and your arms on
the wall. Keep your right leg straight and yourlefoot on the floor, bend the
leleg and lean forward by moving your hips toward the wall. Hold, then
repeat on the other leg for 15 seconds. Repeat 3 mes for eachleg.
QUADRICEPS STRETCH
With one hand against a wall for balance, reach behind you and pull
your right foot up. Bring your heel as close to yourbuocks. Hold for
10-15 seconds. Repeat three mes for each foot.
INNER THIGH STRETCH
Sit with the soles of your feet together and your knees poinng outwards.
Pull your feet as close to your groin as possible. Gently push your knees
towards the floor. Hold for 15 seconds. Then relaxand repeat 3 mes.
// E N

20 //
R O WING E X E R C ISES
USING YOUR ROWING MACHINE REGULARLY WILL:
shoulders, hips and legs.
THE BASIC ROWINGSTROKE
• Sit on the saddle and fasten your feet to the pedals using the straps.
Then take hold of the rowing bar.
bent as shown in Fig 1.
• Push yourself backwards, straightening your back and legs at the same
Fig 2.
stage you should bring your arms out of the side Fig 3. Then return to stage 2
and repeat.
TRAINING
• Rowing is a strenuous form of exercise,so it’s best to start training with
low resistance and for short periods if you are a beginner. As you progress,
you can increase the resistance and training me to suit your needs and
fitness goals.
We recommend you begin training on alternate days, approx. 3 mes a week
to give yourbody me to recover between workouts.
Table of contents
Other BLUEFIN Fitness Fitness Equipment manuals
BLUEFIN Fitness
BLUEFIN Fitness Weights Bench User manual
BLUEFIN Fitness
BLUEFIN Fitness suuv User manual

BLUEFIN Fitness
BLUEFIN Fitness Lift User manual
BLUEFIN Fitness
BLUEFIN Fitness Blade Aqua W-1 User manual
BLUEFIN Fitness
BLUEFIN Fitness BLADE AQUA M-1 User manual
BLUEFIN Fitness
BLUEFIN Fitness DRUM T-1 User manual

BLUEFIN Fitness
BLUEFIN Fitness TOUR XP User manual

BLUEFIN Fitness
BLUEFIN Fitness 4D Vibration Plate User manual
BLUEFIN Fitness
BLUEFIN Fitness ULTRA SLIM PLUS User manual
BLUEFIN Fitness
BLUEFIN Fitness Ultra Slim User manual
