BONFIGLIOLI BX Series Installation and operating instructions

USER
MANUAL
HEADQUARTERS
Bonfiglioli Riduttori S.p.A.
Via Giovanni XXIII, 7/A
40012 Lippo di Calderara di Reno
Bologna (Italy)
tel: +39 051 647 3111
fax: +39 051 647 3126
bonfiglioli@bonfiglioli.com
www.bonfiglioli.com
BN-BE-BX-M-ME-MX series
Installation, Operation
and Maintenance Manual
We have a relentless commitment to excellence, innovation &
sustainability. Our team creates, distributes and services world-
class power transmission & drive solutions to keep the world in
motion.


1 / 32
IOM BX-BE-BN-MX-ME-M_eng - Translation of original instructions in Italian - Rev 02_0 - 30/09/16
2
2
2
6
10
11
15
16
OWNER’S MANUAL FOR ELECTRIC MOTORS SERIES BX, BE, BN, MX, ME, M
Description
1 Field of application
2 General safety info
3 Installation
4 Wiring
5 Start-up
6 Maintenance
7 Disassembly, recycling or disposal
8 Spare parts
Read carefully
Electrical hazard
Revisions
Refer to page 32 for the catalogue revision index.
Visit www.bonglioli.com to search for catalogues with up-to-date revisions.

2 / 32 IOM BX-BE-BN-MX-ME-M_eng - Translation of original instructions in Italian - Rev 02_0 - 30/09/16
1FIELD OF APPLICATION
The following instructions apply to the three-phase asynchronous electric motors manufactured by
BONFIGLIOLI RIDUTTORI S.p.A., series:
- BX, BE, BN
- MX, ME, M
in their standard version, with or without brake.
Special versions as described in the catalogues and/or in offers, or special applications (for example,
power supply from inverter) will require additional information.
2 GENERAL SAFETY INFORMATION
The electric motors described in the following instructions are designed to be used in industrial instal-
lations and must be operated by qualied personnel only.
During operation, motors have live or moving parts. Therefore, removal of electrical or me-
chanical guards, improper use, or inadequate maintenance may cause serious damage to per-
sons or property.
Installation and maintenance on motors must be performed only by qualied personnel who
have thorough knowledge of the instructions and technical data for the product and who have
been authorised to perform such operations by the safety supervisor.
Since the electric motor does not have a dened function for the nal user and is going to be
physically coupled to another machine, it is the responsibility of the installer to guarantee that
all provisions for its safe operation have been taken.
3 INSTALLATION
3.1 Identication
Gearmotors and motors have a nameplate carrying their identication data.
Table shows the plate used for all motor congurations.
On standard voltage electric motors with an FD brake, the nameplate only gives electrical data
for the frequency identied by the motor designation.
On standard voltage electric motors with an FA brake, the nameplate gives electrical data for
50 Hz and 60 Hz.
On non-standard voltage electric motors with a brake, the nameplate only gives electrical data
for the frequency identied by the motor designation.
On motors with the CUS option, the nameplate only gives electrical data for the frequency
identied by the motor designation.

3 / 32
IOM BX-BE-BN-MX-ME-M_eng - Translation of original instructions in Italian - Rev 02_0 - 30/09/16
3.2 Reception
Upon receipt of the motor, check that it was not damaged during transportation; if damage is noted,
inform the carrier immediately. In addition, check that the characteristics stated on the plate conform
to those ordered and conrmed by BONFIGLIOLI RIDUTTORI S.p.A.
3.3 Transport and handling
Cartons containing more than one motor are usually attached to wooden boards to facilitate handling
by forklifts or transpallets.
FD
IE1
CUS CCC
IE2 - IE3

4 / 32 IOM BX-BE-BN-MX-ME-M_eng - Translation of original instructions in Italian - Rev 02_0 - 30/09/16
3.4 Storage
Observe the following instructions to ensure correct storage of products:
a) Do not store outdoors, in areas exposed to weather or with excessive humidity.
b) Always place boards in wood or other material between oor and products, to avoid direct contact
with the oor.
c) For storage periods exceeding 60 days, all coupling surfaces such as anges and shafts must be
protected with a suitable anti-oxidation product (Mobilarma 248 or equivalent).
d) For storage periods exceeding 6 months, it is a good rule to turn the rotor every 1-2 months and to
take adequate measures against corrosion and humidity.
3.5 Motor installation
Check that mains assembly and service conditions comply with the information on the plate
and described in the technical documentation.
The following instructions must be observed when installing the motor:
Prior to installing the motor remove from the shaft the plastic guards that are supplied for transporta-
tion purposes.
These must be disposed of according to the rules applicable in the Country where the installation
takes place.
If applicable, remove oxidation preventative coating of shaft by means of a suitable solvent, which
afterwards must be disposed of according to the regulations applying locally.
Do not let the solvent be in touch with oilseal lips.
Motors may be handled individually by lifting them with belts or chains (if required due to weight).
Motors of frame sizes BX 100 / MX3, BE 100 / ME3, BN 100 / M3, and larger, are provided with an
eyebolt / lifting point for lifting purposes.
The eyebolts / lifting points are suitable for lifting the motor only.
Make sure that the motor rests in a stable manner and will not roll (in the case of anged motors).

5 / 32
IOM BX-BE-BN-MX-ME-M_eng - Translation of original instructions in Italian - Rev 02_0 - 30/09/16
Make sure that the motor is well-ventilated, that there is nothing to obstruct the free circulation of air,
and that no situation will arise that could block the regular heat dissipation.
The installation must also allow the performance of ordinary maintenance on the motor and, if sup-
plied, of the brake.
Avoid hitting on the motor shaft: bearings may be damaged.
In outdoor installations, protect the motor from direct sun ratiation and, if possible, from inclement weather.
Prior to tting anged motors onto gear units make sure that the key is retained safely into the key
seat. Coat thoroughly motor shaft with a suitable anti-seize product (Loctite 767 or equivalent) to pre-
vent fretting corrosion and facilitate removal of motor at a later time.
Every 6-12 months it may be recommended to remove the motor from the gear head, clean the shaft
area and re-apply the anti-seize product.
In order to avoid vibration once in operation, make sure the motor is secured tightly to mating gear-
box ange. Should the motor need to be painted, screen name plate as well as vented plug (if appli-
cable) and machined parts on beforehand.
After the installation of a brake motor is complete, unscrew and remove the lever that operates the
manual brake release, thus preventing any accidental operation of the same.
3.6 Balancing
The rotor shaft is dynamically balanced with half key tted. Assembly of external transmission unit
must be performed with adeaquate instruments after suitable balancing, avoiding knocks which could
damage the bearings.
Be especially careful not to operate the motor without having properly secured the key not being
used (motors with two shaft ends).
Adopt adequate measures to avoid accidental contact with exposed live or moving parts.
Avoid contact with the motor case, since the temperature under normal operating conditions
may exceed 50 °C.
3.7 Insulation test
Before start-up, or after long storage (or idle) periods, check insulation resistance to mass with
Megger at 500V DC.
The value measured at 25 °C for new windings in good condition should exceed 10 MΩ.
If this value is not reached, oven drying will be required to eliminate excess humidity.

6 / 32 IOM BX-BE-BN-MX-ME-M_eng - Translation of original instructions in Italian - Rev 02_0 - 30/09/16
4 WIRING
4.1 Norms applicable to all motors
Use cables with suitable section for the rated current and for installation conditions, avoiding exces-
sive heating and/or voltage drops. Connection at the terminal board must be performed according to
the diagrams shown in chart below or according to the instructions supplied in the terminal box, using
the appropriate plates, nuts and washers. Earth according to current norms before connecting to the
mains.
In addition to the main terminals, the conduit box may contain thermal protection, anti-condensation
heaters, and brake connections.
Wire any device according to the diagrams contained in the conduit box.
During rest time voltage may still apply to terminals of the heaters and/or the brake.
When installing, repairing or maintaining the motor double check that all connections to the
mains have been cut.
Furthermore, always prevent uncontrolled restarting of the motor as this may be extremely
hazardous for the operator.
At the end of the wiring operations, place the gasket on its site and close the cover. Carefully tighten
the cable gland and close all the openings that are not used.
Single-speed motors Two-speed motors
Delta connection
Single winding (Dahlander)
Low
speed
Low
speed
High
speed
High
speed
Two separate winding
Star connection
4.2 Anti-condensate heaters
Power to the anti-condensate heaters must be supplied separately and it must always be dis-
connected while the motor is operating.
U1
V a.c.±10% Hz P [W] I [A]
BN 71 M1
1~230
50/60
22 0.12
BN 80 M2 22 0.12
BN 90 — 40 0.30
BN 100 M3 50 0.25
BN 112 —
3 ~ 230 / 400Y
50 0.26/0.15
BN 132 ... BN 160MR M4 110 0.38 / 0.22
BN 160M ... BN 180M M5 50 180 1.25 / 0.72
BN 180L ... BN200L — 250 1.51 / 0.87
V a.c. ± 10% Hz P [W] I [A]
BX 80 - BE 80 MX2 - ME2
1 ~ 230
50 / 60
22 0.12
BX 90 - BE 90 — 40 0.30
BX 100 - BE 100 MX3 - ME3 50 0.25
BX 112 - BE 112 —
3 ~ 230 / 400Y
50 0.26 / 0.15
BX 132 - BE 132 MX4 - ME4 110 0.38 / 0.22
BX 160 - BE 160 MX5 - ME5 50 180 1.25/0.72
BX 180 - BE 180 — 250 1.51/0.87
Fan wiring terminals are housed in a separate terminal box

7 / 32
IOM BX-BE-BN-MX-ME-M_eng - Translation of original instructions in Italian - Rev 02_0 - 30/09/16
Single-speed motors Two-speed motors
Delta connection
Single winding (Dahlander)
Low
speed
Low
speed
High
speed
High
speed
Two separate winding
Star connection
4.3 Ventilation
Motors are cooled through outer air blow (IC 411 according to CEI EN 60034-6) and are equipped
with a plastic radial fan, which operates in both directions.
Ensure that fan cover is installed at a suitable distance from the closest wall so to allow air circulation
and servicing of motor and brake, if tted.
On request, all BX/MX, BE/ME motors and BN/M motors, starting from BN 71 or M1 size, can be sup-
plied with independently power-supplied forced ventilation system.
Motor is cooled by an axial fan with independent power supply and tted on the fan cover (IC 416
cooling system).
Brake motors of BN_BA type and all motors with rear shaft projection (PS option) are excluded.
U1
V a.c.±10% Hz P [W] I [A]
BN 71 M1
1~230
50/60
22 0.12
BN 80 M2 22 0.12
BN 90 — 40 0.30
BN 100 M3 50 0.25
BN 112 —
3 ~ 230 / 400Y
50 0.26/0.15
BN 132 ... BN 160MR M4 110 0.38 / 0.22
BN 160M ... BN 180M M5 50 180 1.25 / 0.72
BN 180L ... BN200L — 250 1.51 / 0.87
V a.c. ± 10% Hz P [W] I [A]
BX 80 - BE 80 MX2 - ME2
1 ~ 230
50 / 60
22 0.12
BX 90 - BE 90 — 40 0.30
BX 100 - BE 100 MX3 - ME3 50 0.25
BX 112 - BE 112 —
3 ~ 230 / 400Y
50 0.26 / 0.15
BX 132 - BE 132 MX4 - ME4 110 0.38 / 0.22
BX 160 - BE 160 MX5 - ME5 50 180 1.25/0.72
BX 180 - BE 180 —
250 1.51/0.87
Fan wiring terminals are housed in a separate terminal box
4.4 Ratings of separate supply fan units

8 / 32 IOM BX-BE-BN-MX-ME-M_eng - Translation of original instructions in Italian - Rev 02_0 - 30/09/16
4.5 Direction of rotation
If the mains with phase sequence L1, L2, L3 is connected to terminals U, V, W, the direction of rota-
tion of the motor will be clockwise as seen from the drive end.
If any two terminals are switched, the direction of rotation will be counter-clockwise.
For unidirectional motors, a plate will be provided indicating the direction of rotation and the phase
sequence to be applied (e.g., U, V, W).
This indication is present only when the motor, as a function of project characteristics, requires only
one direction of rotation (for example, anti run-back device installed).
Pay special attention when single direction status is imposed by machine or plant specications.
4.6 FD brake connections
On standard single-pole motors, the rectier is connected to the motor terminal board at the factory.
For switch-pole motors and where a separate brake power supply is required, connection to rectier
must comply with brake voltage VB stated in motor name plate.
Because the load is of the inductive type, brake control and DC line interruption must use
contacts from the usage class AC-3 to IEC 60947-4-1.
(A) (B) (C) (D)
Start
coil coil coil coil
Start Start StartStop Stop Stop Stop
U2
V a.c.±10% Hz P [W] I [A]
BN 71 M1
1~230
50/60
22 0.12
BN 80 M2 22 0.12
BN 90 — 40 0.30
BN 100 M3
3 ~ 230 / 400Y
40 0.12 / 0.09
BN 112 — 50 0.26 / 0.15
BN 132 ... BN 160MR M4 110 0.38 / 0.22
V a.c. ± 10% Hz P [W] I [A]
BE 80 ME2
1 ~ 230
50 / 60
22 0.12
BE 90 — 40 0.30
BE 100 ME3
3 ~ 230 / 400Y
40 0.12 / 0.09
BE 112 — 50 0.26 / 0.15
BE 132 ME4 110 0.38 / 0.22
Fan terminals are wired in the motor terminal box
Delta
connection
Star connection
Motor terminal board Brake

9 / 32
IOM BX-BE-BN-MX-ME-M_eng - Translation of original instructions in Italian - Rev 02_0 - 30/09/16
Scheme (A) - Brake power supply from motor terminals and a.c. line disconnection. Delayed stop
time t2 and function of motor time constants. Mandatory when soft-start/stops are required.
Scheme (B) - Separate supply of brake coil and a.c. line disconnect. Regular stopping time, inde-
pendent on time constants of motor.
Scheme (C) - Brake coil power supply from motor terminals and AC/DC line disconnection.
Scheme (D) - Brake coil with separate power supply and AC/DC line disconnection.
(A) (B) (C) (D)
Start
coil coil coil coil
Start Start StartStop Stop Stop Stop
U2
V a.c.±10% Hz P [W] I [A]
BN 71 M1
1~230
50/60
22 0.12
BN 80 M2 22 0.12
BN 90 — 40 0.30
BN 100 M3
3 ~ 230 / 400Y
40 0.12 / 0.09
BN 112 — 50 0.26 / 0.15
BN 132 ... BN 160MR M4 110 0.38 / 0.22
V a.c. ± 10% Hz P [W] I [A]
BE 80 ME2
1 ~ 230
50 / 60
22 0.12
BE 90 — 40 0.30
BE 100 ME3
3 ~ 230 / 400Y
40 0.12 / 0.09
BE 112 — 50 0.26 / 0.15
BE 132 ME4 110 0.38 / 0.22
Fan terminals are wired in the motor terminal box
4.7 FA and BA brake connections
The diagram below shows the wiring when brake is connected directly to same power supply of the motor:
Delta
connection
Star connection
Motor terminal board Brake

10 / 32 IOM BX-BE-BN-MX-ME-M_eng - Translation of original instructions in Italian - Rev 02_0 - 30/09/16
5 START-UP
Perform the following operations and checks before start-up:
1) check that all safety measures have been applied;
2) power up the motor unloaded at rated voltage;
3) check that the sepate fan cooling (if any) is operating;
4) check that operation is smooth and vibration-free;
5) If the brake is tted, verify that it operates regularly;
6) if operation is satisfactory, apply the load to the motor while checking on values of absorbed cur-
rent, power and voltage.
Abnormal operations such as over current, overheating, noise, or vibrations, may cause seri-
ous damage or hazardous conditions. In these cases, cut power and notify maintenance per-
sonnel immediately.
Switch-pole motors, nine pin motors (motors with voltage in ratio 2) and, at request, single-pole mo-
tors with separate power supply are equipped with an auxiliary terminal board with 6 terminals for
brake connection.
In this version, motors feature a larger terminal box.
See diagram:
Wire the brake according to voltage and type of connection as shown on motor name plate.
Delta
connection
Star
connection
Motor terminal board
Auxiliary terminal board Brake

11 / 32
IOM BX-BE-BN-MX-ME-M_eng - Translation of original instructions in Italian - Rev 02_0 - 30/09/16
Delta
connection
Star
connection
Motor terminal board
Auxiliary terminal board Brake
6 MAINTENANCE
Before any intervention, the motor, auxiliary circuits and/or accessories must be disconnected from
the mains.
In particular:
- check disconnection from the electrical mains,
- provide suitable protections from exposed live parts,
- duble check that accidental restarts are not possible under any circumstances.
It is recommended that periodical checks of motor operating conditions are scheduled as a routine
maintenance practice.
Check particularly on the following:
1) check that operation is smooth and absorbed current within rated value;
2) On brakemotors, check condition of the brake, gauge the air gap “T” and play “X” of the manual
brake release device;when provided
3) keep motor clean and fan cowl unobstructed by accumulation of dust or foreign particles;
4) check that seal rings are in good condition;
5) check that lead-in wires and all wirings are safely and tightly secured;
6) If condensate draining holes are provided, remove periodically the screws that close the holes and
allow the condensate to drain. On installing the motor make sure that the drain hole is located at the
lowest point.
7) standard bearings are grease packed for life and in general no periodical maintenance is re-
quired; it is good practice however to check their condition and eventually replace them after approx.
3 years.
The motor does not have to be removed for normal inspections unless the bearings need to be re-
placed. In this case, the operations should be performed by specialised personnel and with appropri-
ate tools.
6.1 Adjustment of air gap on motors with d.c. brake (FD) or a.c. brake (FA).
Loosen nut ref. 2
Depending on motor frame size adjust the air gap and set dimension T to the min. value indicated in
diagram through either socket head screws ref. (1) or nut ref. (3).
Then after hold rmly screw ref. (1) and lock it by tightening nut ref.(2).

12 / 32 IOM BX-BE-BN-MX-ME-M_eng - Translation of original instructions in Italian - Rev 02_0 - 30/09/16
Check the air gap periodically and re-adjust it if dimension T is found exceeding the min/max values
indicated in diagram.
Particularly, brake may become noisier if gap is wider than the max value. In extreme cases releasing
of the brake might also be affected.
If the brake disengagement device is tted, too wide a gap may lead the braking torque to
drop signicantly as a consequence of the reduced play in the release mechanism.
Distance “X” must mandatorily be equal to or greater than the value listed in the chart.
Thickness of disc lining must always be greater than 1.5 mm.
FD
FD 02 FD 03
FD 53
FD 04
FD 14
FD 05
FD 15
FD 55
FD 06S FD 06
FD 56
FD 07 FD 08
FD 09
FA FA 02 FA 03 FA 04
FA 14
FA 05
FA 15
FA 06S FA 06 FA 07 FA 08
T
X
Min 0.2
0.5
0.8
0.2
0.5
0.8
0.3
0.6
1.0
0.3
0.6
1.0
0.35
0.7
1.1
0.35
0.7
1.1
0.4
0.8
1.2
0.5
1.0
1.5
Max
BN 71 ... BN 100 - BE 80 ... BE 100 - BX 80 ... BX 100
M1 ... M3 - ME2, ME3 - MX2, MX3
BRAKE TYPE
T(mm) = Air gap
FA 02 3.5
FA 03 7.5
FA 04 15
FA 14 15
FA 05 40
FA 15 40
FA 06S 60
FA 06 75
FA 07 150
FA 08 250
BRAKE Max. brake torque

13 / 32
IOM BX-BE-BN-MX-ME-M_eng - Translation of original instructions in Italian - Rev 02_0 - 30/09/16
6.2 Brake torque setting on motors with a.c. brake (FA)
Brake torque can be adjusted steplessly by changing the preload of springs (3).
WARNING: For safety reasons, brake torque will not be set lower than 30% of rated value, even at
springs fully unloaded.
FD
FD 02 FD 03
FD 53
FD 04
FD 14
FD 05
FD 15
FD 55
FD 06S FD 06
FD 56
FD 07 FD 08
FD 09
FA FA 02 FA 03 FA 04
FA 14
FA 05
FA 15
FA 06S FA 06 FA 07 FA 08
T
X
Min 0.2
0.5
0.8
0.2
0.5
0.8
0.3
0.6
1.0
0.3
0.6
1.0
0.35
0.7
1.1
0.35
0.7
1.1
0.4
0.8
1.2
0.5
1.0
1.5
Max
BN 71 ... BN 100 - BE 80 ... BE 100 - BX 80 ... BX 100
M1 ... M3 - ME2, ME3 - MX2, MX3
BRAKE TYPE
T(mm) = Air gap
FA 02 3.5
FA 03 7.5
FA 04 15
FA 14 15
FA 05 40
FA 15 40
FA 06S 60
FA 06 75
FA 07 150
FA 08 250
BRAKE Max. brake torque

14 / 32 IOM BX-BE-BN-MX-ME-M_eng - Translation of original instructions in Italian - Rev 02_0 - 30/09/16
6.3 Brake torque setting on motors with a.c. brake (BA)
Loosen locking nut (2). Through nut (1) adjust the air gap and restore distance “T” to its minimum
value, as listed in the chart Repeat the operation symmetrically on each stud bolt holding the brake.
When setting is complete tighten nuts (1) and (2) on each stud bolt.
Too wide an air gap may result into noise and vibrations in operation and, in extreme cases,
even prevent the motor from braking.
6.4 Brake torque setting on motors with a.c. brake (BA)
Brake torque can be adjusted steplessly by changing the preload of springs (4) acting on nuts (3).
Braking torque will increase proportionally to the compression of springs (4).
Repeat the operation symmetrically on each stud bolt holding the brake.
BA BA 60 BA 70 BA 80 BA 90 BA 100 BA 110 BA 140
TMin 0.3 0.3 0.3 0.3 0.3 0.3 0.4
Max 0.7 0.7 0.7 0.7 0.7 0.7 0.8
BRAKE TYPE
T(mm) = Air gap
BA 60 5
BA 70 8
BA 80 18
BA 90 35
BA 100 50
BA 110 75
BA 140 150
BRAKE Max. brake torque

15 / 32
IOM BX-BE-BN-MX-ME-M_eng - Translation of original instructions in Italian - Rev 02_0 - 30/09/16
BA BA 60 BA 70 BA 80 BA 90 BA 100 BA 110 BA 140
TMin 0.3 0.3 0.3 0.3 0.3 0.3 0.4
Max 0.7 0.7 0.7 0.7 0.7 0.7 0.8
BRAKE TYPE
T(mm) = Air gap
BA 60 5
BA 70 8
BA 80 18
BA 90 35
BA 100 50
BA 110 75
BA 140 150
BRAKE Max. brake torque
7 DISASSEMBLY, RECYCLING OR DISPOSAL
The electrical motors are mainly made by ferrous, non - ferrous, plastic materials and electric / elec-
tronic devices.
Bonglioli recommends and encourages the end of life motor dismantling and the differentiation and
recycling of the components.
The differentiated disposal of the motor components shall be performed with respect to the local reg-
ulations for the environment protection.
For dismantled motors disposal, the European Waste Code (EWC) provides the following classication:
• 16 02 14 discarded equipment other than those mentioned in 16 02 09 to 16 02 13
• 16 02 16 components removed from discarded equipment other than those mentioned in 16 02 15
where:
• 16 02 09* transformers and capacitors containing PCBs
• 16 02 10* discarded equipment containing or contaminated by PCBs other than those mentioned in
16 02 09
• 16 02 11* discarded equipment containing chlorouorocarbons, HCFC, HFC
• 16 02 12* discarded equipment containing free asbestos
• 16 02 13* discarded equipment containing hazardous components other than those mentioned in
16 02 09 to 16 02 12
• 16 02 15* hazardous components removed from discarded equipment
* = concerning hazardous components - hazardous components are not present in Bonglioli electric motors.
NOTE: The above classication is referred to Bonglioli electric motors as per their factory initial con-
ditions. Bonglioli is not responsible for any particular or inappropriate usage or modications applied
to the electric motors, which might require a different EWC classication.

16 / 32 IOM BX-BE-BN-MX-ME-M_eng - Translation of original instructions in Italian - Rev 02_0 - 30/09/16
8 SPARE PARTS
M05
M05
M05 FA
6440 1030 1010 (6030) (6050) 1080 1290
(6320)
(6310)
1030
(6020)
1
(1230)
(1200)
(1240) 6250 (1220) 6234 1390 6444
1328
(1370)
1320 1360
1180
1150
(6290)
6300
(6080)
1310
(1325)
1300
M05 FD
kit ref. Description
M05
M05 FD
M05 FA
1Motor ange
1010 Stator
1030 Rotor
1150 Fan
1180 Fan cowl
KSM (1200) Terminal box
(1230) Terminal box gasket
KSA
(6020) Bearing
(6030) Bearing
(6050) Compensation ring
(6310) Circlip
(6320) Circlip
6234 Blank plug
6250 Terminal board
6440 Flange bolt
6444 NDE shield bolt
M05
1070 Rear shield
KSA (6080) V-ring
kit ref. Description
M05 FD
M05 FA
1080 Shield for brake motor
1290 Spacer ring
1310 Brake disc
1320 Brake springs
KTF
(1325) Brake hub
(6290) Key (brake hub)
(6300) Circlip
1328 Stainless steel disc
KPF (1370) Water/dust guard (IP55)
(6080 Brake seal ring/V-ring (IP55)
M05 FD
KSM (1220) Terminal box lid
(1240) Terminal box lid gasket
1300 d.c. brake type FD
1360 Brake release
1390 ac/dc recti er
M05 FA 1350 a.c. brake type FA
1380 Brake release
(####) Only available as a complete kit

17 / 32
IOM BX-BE-BN-MX-ME-M_eng - Translation of original instructions in Italian - Rev 02_0 - 30/09/16
M05
M05
M05 FA
6440 1030
1010 (6030) (6050) 1080 1290
(6320)
(6310)
1030
(6020)
1
(1230)
(1200)
(1240) 6250
(1220) 6234 1390 6444
1328
(1370)
1320 1360
1180
1150
(6290)
6300
(6080)
1310
(1325)
1300
M05 FD
kit ref. Description
M05
M05 FD
M05 FA
1Motor ange
1010 Stator
1030 Rotor
1150 Fan
1180 Fan cowl
KSM (1200) Terminal box
(1230) Terminal box gasket
KSA
(6020) Bearing
(6030) Bearing
(6050) Compensation ring
(6310) Circlip
(6320) Circlip
6234 Blank plug
6250 Terminal board
6440 Flange bolt
6444 NDE shield bolt
M05
1070 Rear shield
KSA (6080) V-ring
kit ref. Description
M05 FD
M05 FA
1080 Shield for brake motor
1290 Spacer ring
1310 Brake disc
1320 Brake springs
KTF
(1325) Brake hub
(6290) Key (brake hub)
(6300) Circlip
1328 Stainless steel disc
KPF (1370) Water/dust guard (IP55)
(6080 Brake seal ring/V-ring (IP55)
M05 FD
KSM (1220) Terminal box lid
(1240) Terminal box lid gasket
1300 d.c. brake type FD
1360 Brake release
1390 ac/dc recti er
M05 FA 1350 a.c. brake type FA
1380 Brake release
(####) Only available as a complete kit

18 / 32 IOM BX-BE-BN-MX-ME-M_eng - Translation of original instructions in Italian - Rev 02_0 - 30/09/16
ME2 ... ME4 MX2 ... MX4M1 ... M4
M/ME
MX
1010 1100 (6030) (6050) (1370) 1290
1300
(1325)
(6080)
(6300)
(6290)
1150
118013601320
1310
1328
1080(1230)62506234(1220)
(1240)
1390
(1200)
(6020)
1
1030
(6310)
(6320)
1340
6385
1030
M/ME
MX
M_ ME_ MX_
M_ FD ME_ FD MX_ FD
M/ME
MX
M_ FA ME_ FA MX_ FA
kit ref. Description
M_
M_ FD
M_ FA
ME_
ME_ FD
ME_ FA
MX_
MX_ FD
MX_ FA
1Motor ange
1010 Stator
1030 Rotor
1100 Tie-rods
1150 Fan
1180 Fan cowl
KSM (1200) Terminal box
(1230) Terminal box gasket
1340 Motor ange for W gearbox
KSA
(6020) Bearing
(6030) Bearing
(6050) Compensation ring
(6310) Circlip
(6320) Circlip
6234 Blank plug
6250 Terminal board
6385 Kit bushing for W gearbox
M_ / ME_
MX_
1070 Rear shield
KSA (6080) V-ring
kit ref. Description
M_ FD
M_ FA
ME_ FD
ME_ FA
MX_ FD
MX_ FA
1080 Shield for brake motor
1290 Spacer ring
1310 Brake disc
1320 Brake springs
KTF
(1325) Brake hub
(6290) Key (brake hub)
(6300) Circlip
KPF (1370) Water/dust guard (IP55)
(6080) Brake seal ring/V-ring (IP55)
M_ FD
ME_ FD
MX_ FD
KSM (1220) Terminal box lid
(1240) Terminal box lid gasket
1300 d.c. brake type FD
1328 Stainless steel disc
1360 Brake release kit
1390 ac/dc recti er
M_ FA
ME_ FA
MX_ FA
1350 a.c. brake type FA
1380 Brake release kit
(####) Only available as a complete kit
This manual suits for next models
43
Table of contents
Other BONFIGLIOLI Engine manuals
BONFIGLIOLI
BONFIGLIOLI BMS series User manual
BONFIGLIOLI
BONFIGLIOLI BMD 65 User manual
BONFIGLIOLI
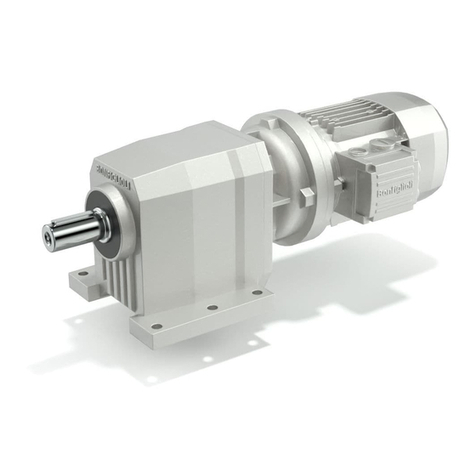
BONFIGLIOLI C Series User manual
BONFIGLIOLI
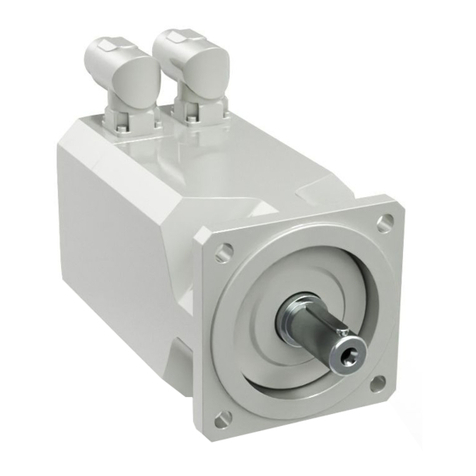
BONFIGLIOLI bmd series User manual
BONFIGLIOLI
BONFIGLIOLI iBMD Series User manual

BONFIGLIOLI
BONFIGLIOLI AS Series User manual
BONFIGLIOLI
BONFIGLIOLI VF Series User manual
BONFIGLIOLI
BONFIGLIOLI C RAP Series User manual
BONFIGLIOLI
BONFIGLIOLI bsr series User manual
