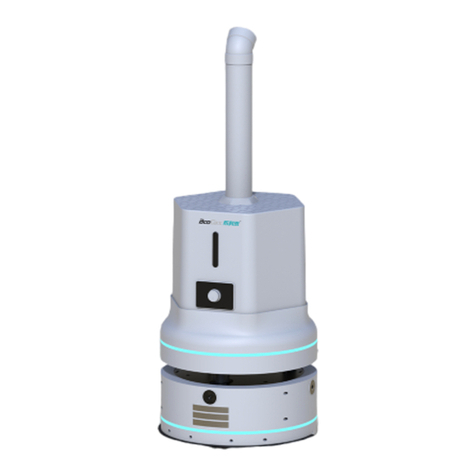
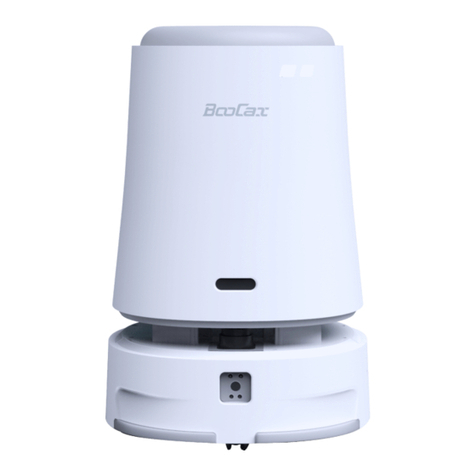
BOOCAX BKS-ST-180C User manual

BKS-ST-180C
Product Manual
V3.1.1
BOOCAX
Better Robot,Better Life

BKS-ST-180C_Product Manual
BooCax 1/ 28 boocax.com
Safety and Precautions
The use of spray robot shall follow the operation instructions. Use beyond the range is prohibited!
BooCax will not assume any responsibilities for the losses caused by improper operation.
Symbols:
indicates prohibited acts.
⚠
indicates danger, warning and attention.
PROHIBITIONS
•Keep out DURING SPRAYING;
•Do not use in flammable gas environment;
•Do not add any additive of unknown source into the water tank;
•Do not clean or add water when the robot is powered on;
•Do not disassemble the robot for repair or debugging;
•Do not touch the terminals when the robot is under charge to avoid short circuit or electric
shock;
•Do not replace any parts. If necessary, please do so under the direction of BooCax.
⚠
PRECAUTIONS
•The spray robot should be parked in a flat and solid place at normal temperature;
•When adding liquid, do not splash liquid into the robot;
•If there is odor or abnormal noise DURING SPRAYING, please immediately turn off the robot
and report to the After Service;
•Before starting the robot, please check whether the safety components (sensor, emergency
stop switch, etc.) are in normal conditions;
•If the floor is waterlogged and greasy, please clean the floor promptly;
•Before removing any parts, please confirm that the power is off;
•The robot body must be maintained by a trained professional.

BKS-ST-180C_Product Manual
BooCax 2/ 28 boocax.com
Contents
1. Introduction to Spray Robot ............................................................................................... 3
2. Product specification.......................................................................................................... 5
3. Appearance size................................................................................................................... 6
4. Function module.................................................................................................................. 7
5. Assembly................................................................................................................................. 9
6. Preparation before use.....................................................................................................12
6.1. Install the charging pile...................................................................................................................... 12
6.2. Clean up barriers.................................................................................................................................. 13
6.3. QR code deployment ......................................................................................................................... 13
6.4. Download mobile App....................................................................................................................... 15
6.5. Turn on, connect the robot .............................................................................................................. 15
6.6. Build the spraying map...................................................................................................................... 17
6.7. Deploy route setting........................................................................................................................... 18
6.8. Area setting............................................................................................................................................ 21
6.9. Scheduled setting................................................................................................................................... 22
6.10. Other settings ..................................................................................................................................... 22
7. Start to work .......................................................................................................................23
7.1. Add liquid............................................................................................................................................... 23
7.2. Start spraying ........................................................................................................................................ 24
Attachment: update instructions..............................................................................................25

BKS-ST-180C_Product Manual
BooCax 3/ 28 boocax.com
1. Introduction to Spray Robot
Product Features
①The spray volume is up to 2600 ml/h, with the atomized particles less than 10 microns;
②The spray diameter is 5~6 m, leaving no dead corners in the spraying area;
③16 L large-capacity tank covers a spraying area up to 20000 ㎡;
④It is simple to use with mobile App control and supports two spraying modes: regular spraying,
immediate spraying;
⑤It can automatically detect the obstacles without manual monitoring, thus reducing the burden
on personnel;
⑥The autonomous navigation function enables a full coverage of the spraying area;
⑦With 4.5 hours of battery life, repeated charging is not needed;
⑧Automatic return for charging spares the trouble of artificial assistance for charging;
⑨When the liquid is lower than the warning level, the robot will automatically close the spray
device and returns to the charging pile.
BooCax BKS-ST-180C atomizing spray robot is
designed to purify the air by rapidly atomizing the liquid
and automatically spraying the area.
This robot can automatically navigate to the area for
full-coverage spraying, and supports mobile App control to
achieve man-machine separation and minimize personnel
exposure, so that the use safety is greatly improved. With
simple structure, it is easy to maintain and manage.
The spray robot is widely applicable to hospitals,
airports, office buildings, shopping malls, schools, factories
and other public places.

BKS-ST-180C_Product Manual
BooCax 4/ 28 boocax.com
Suggestion for use
User type
Spraying scenarios
Suggestion for use
Medical
institution
•Hospital
•Clinic
Registration hall, waiting
hall, internal working area,
canteen, fever clinics,
warehouse, etc.
✓Medical institution level.
Station
•Railway station
•Bus station
•Subway
•Airport
Five accesses and one
platform (station entrance,
ticket gate, elevator
entrance, station exit,
platform), waiting room
(airport lounge)
✓Real-time spraying at
"five accesses and one
platform": medical
institution level;
✓Regular spraying in
waiting room: public
health security level.
School
•Kindergarten
•Primary and
secondary school
•University
Lecture hall, library, indoor
sports hall, classroom,
laboratory, toilet, cafeteria,
office area, etc.
✓Daily scheduled spraying:
public health security
level.
Office
area
•Office building
•Office block
•Administration
service hall
•Bank outlet
Toilets, halls, corridors,
elevator rooms, offices, etc.
✓Real-time spraying at
entrance/exit: medical
institution level;
✓Daily scheduled spraying:
public health security
level.
Shopping
mall
•Shopping mall
•Supermarket
•
Entrance/exit, counter, rest
area, service desk, cashier
desk, elevator, and other
public areas
✓Real-time spraying at
access and in other
crowded areas: medical
institution level;
✓Scheduled spraying in
other areas: public health
security level.
Hotel
•Guesthouse
•Hotel
Hotel lobby, toilet, floor
corridor, guest room,
restaurant, etc.
✓Spraying in guest room
and restaurant: medical
institution level.
✓Spraying in other areas:
public health security
level.

BKS-ST-180C_Product Manual
BooCax 5/ 28 boocax.com
2. Product specification
Name
Spray Robot
Model
BKS-ST-180C
Application
Indoor automatic atomizing spray
Appearance size
Diameter 530 mm* Height 1,340 mm
Body weight
48.4 kg (without liquid)
Spray rate
Maximum 2600 ml/h (adjustable)
Tank volume
16L
Spray diameter
≤6 m
Spray mode
Four-direction nozzle or One-direction nozzle
Movement mode
Autonomous path planning and auto-navigation
Moving speed
0.3 m/s
Obstacle surmounting
ability
≤15 mm
Gradeability
≤8°
Travel lane width
≥750 mm
Noise
≤50dB
Continuous running hours
4.5hours
Charging mode
Auto-charge
Charging time
3hours(0-80%)
Charging pile
INPUT:110V-220V AC
OUTPUT:DC29.4V⎓8.0A
Safety protection
low water alarm

BKS-ST-180C_Product Manual
BooCax 6/ 28 boocax.com
3. Appearance size
Overall size
Front Back

BKS-ST-180C_Product Manual
BooCax 7/ 28 boocax.com
4. Function module
Front
Charging connector
Mist tube
Liquid level observation hole
Chassis
Filling hole
Four-way nozzle
Spray volume knob
Tank
Working status indicator
One-way nozzle

BKS-ST-180C_Product Manual
BooCax 8/ 28 boocax.com
Back
Power switch
Tank
Chassis
Air inlet
Emergency
stop button
Filling hole
Vision sensor

BKS-ST-180C_Product Manual
BooCax 9/ 28 boocax.com
5. Assembly
Step 1: Unpack and check materials
The packaging of this product consists of two boxes, with the larger box for the chassis and
charging pile, and the smaller box for the robot body. After unpacking, check the materials and
accessories against the Nos.1-8 in the figure below for any missing or damage.
Step 2: Install the sprayer
①Take out the chassis and place
it on the floor stably, make sure
that the lower charging mouth
is facing forward, pull out the
two connectors (Terminal 1:
signal wire, Terminal 2: power
wire), and visually find the four
positioning holes on the iron
plate →

BKS-ST-180C_Product Manual
BooCax 10 / 28 boocax.com
②Turn the direction of knob on
the sprayer base forward, and
then pull out the two
connectors (Terminal 1,
Terminal 2 as shown) at the
bottom to match the male and
female connectors on the
chassis. Four dowels are
aligned with the four
positioning holes on the chassis
(note that the lower charging
mouth of the chassis is also
facing forward) so that it falls
smoothly and snaps into place
→
③Remove the protective foam
from the water control valve on
the sprayer base to ensure that
the next stack of water tank is
not hindered →

BKS-ST-180C_Product Manual
BooCax 11 / 28 boocax.com
Step 3: Dock the water tank and robot base cable
Lift the water tank stably, stack it
on top of the sprayer base.
Relying on the positioning steps
that sink around, it can be freely
in place from top to bottom
under the action of gravity →
Step 4: Install mist tube and four-way nozzle
Finally, remove the mist tube,
insert one end into the circular
outlet at the center of the water
tank, and then put the other end
on the top into a four-way nozzle
for connection (for tight
connection, it is recommended
to wrap it with waterproof tape
before putting it in) →

BKS-ST-180C_Product Manual
BooCax 12 / 28 boocax.com
6. Preparation before use
6.1. Install the charging pile
The charging pile of the spray robot should be placed in a safe and tidy place. It should be on
the horizontal ground with its back against the flat wall (it is better to fix the charging pile to the
ground or wall). As shown in the following figure:
Schematic Diagram of Installation and Use of Charging Pile
①Place the back of the charging pile against the wall, and then turn the foot pads at the
bottom to adjust the charging pile.
②Connect the power cord, adapter, and charging pile as shown above, and finally connect the
end of the power cord to the 110V / 220V AC socket to formally complete the boot preparation.

BKS-ST-180C_Product Manual
BooCax 13 / 28 boocax.com
6.2. Clean up barriers
1) Before using the spray robot, remove the barriers in the aisle to avoid affecting the working
and charging of the robot;
The minimum walking width of the robot is 750mm
2) Make sure that there is no vertical step over 15mm in the spraying area, and no objects (books,
boards, stones, etc.) over 15m m in height on the working path;
The surmounting height of the robot is 15mm
3) Make sure that there is no large slope on site:
The maximum gradeability of the robot is 8°.
6.3. QR code deployment
In order to enhance the positioning accuracy of the robot, we designed a QR code scheme to
ensure that the robot's long-term running position is not lost. The QR code is generally used where
the robot positioning is prone to deviation, for example, the two ends of a long corridor, in which
case, a QR code can be pasted at a distance of 10m from the two ends to assist positioning.

BKS-ST-180C_Product Manual
BooCax 14 / 28 boocax.com
1) Precautions for QR code pasting
•Avoid deploying at a place with strong light, so as not to affect the camera to capture the
QR code image;
•The QR code should be pasted at the same level as the camera;
•Paste the QR code in the direction as the arrow;
•If the QR code is damaged, replace it in time.
2) The example is shown below
3) Precautions for saving QR code
•No duplicate QR code boards can appear in the same environment;
•When mapping, the robot stops at the QR code board for 1-2 seconds to ensure that the
QR code is saved(Voice prompt will be given for successful identification);
•The QR code of the charging pile should be identified by the camera in front of the robot,
and the QR code of a corridor can be identified by the cameras on the left and right;
•When incrementally mapping, it is necessary to ensure that the robot's positioning is
accurate before identifying and saving the QR code.

BKS-ST-180C_Product Manual
BooCax 15 / 28 boocax.com
6.4. Download mobile App
Android 8.0 and above mobile phone Scan the QR code below download the corresponding App
and install it
Android mobile browser scan to download the App
6.5. Turn on, connect the robot
1) Turn on the switch to initiate the working mode of the robot
Power switch
2) Turn on the phone wifi, search the wifi network beginning with "BKS-ST-180C", and enter the
assigned password “robot123”to connect the robot

BKS-ST-180C_Product Manual
BooCax 16 / 28 boocax.com
3) Open the App, you will find the robot beginning with "BKS-ST-180C-0025" (as shown in the
following figure), click login
4) Open the App to show the interface shown in the following figure.
Screenshots of App interface and function buttons:
App homepage:
•Robot name and
battery
•Robot status
•Scheduled disinfection
View route
Manual control
App deployment:
•Build map
•Deploy route
•Set disinfection area
•Switch map
App setting:
•Disinfection log
•Switch loop mode
•Volume
•Networking seting
•Firmware update
•Help and feedback
•Run log
•Maintenance
•App version information

BKS-ST-180C_Product Manual
BooCax 17 / 28 boocax.com
6.6. Build the spraying map
1) Preparation before building the map
·Push the robot 0.5-1m in front of the charging pile
·Robot power >50%
2) Start building the map
Click "Deploy" on the homepage of App to show the "Build Map" button. Click the button to build
a two-dimensional spraying map, as shown in the following figure (Push the robot by hand to build
the map):
Legends:
•White radius—the range scanned by the laser;
•Black thick line—the scanned obstacles (special objects such as transparent glass may not be
identified);
•Gray area: Area that has not been scanned.
After the map is built, the robot can locate and navigate on the new map.
⚠Attention:
①When mapping by hand, push the robot forward slowly in the scene from the charging pile
as the starting point, and finally return to the charging pile to form a large circle;
②When mapping, don't be too close to the wall and keep a distance of at least 0.5m;
③The operator must stand behind the robot to avoid leaving noise on the map;
④When turning, walk slowly so that the robot can collect as much characteristic point data as

BKS-ST-180C_Product Manual
BooCax 18 / 28 boocax.com
possible;
⑤As laser radar does not recognize accurately in abnormal environment (glass, mirror, pure
black object, grid, etc.), it is recommended to carry out appropriate treatment, such as pasting
frosted sticker, gray adhesive tape, etc.;
⑥If the working scene is too large/noise, you can use "Incremental composition" to
enlarge/repair the map;
⑦When passing the QR code, stay in front for more than 1 second, and there will be a voice
prompt after the entry is successful.
6.7. Deploy route setting
The working path of robot consists of the starting point, path points and the disinfection points in
series.
Specific setting procedures follow the instructions of App, as shown below:
1) Rapid deployment
➢Charging point: The position of the robot docking the charging pile 。
Click "Deploy route" to enter the route setting mode; push the robot to the charging pile for
docking as guided, and click Next to complete the setting.
➢Path points and disinfection points: deploy the points by pushing robot /dragging map
Mark the required location on the map, and then set the corresponding path
point/disinfection point ( The small blue icon is the corresponding location point)

BKS-ST-180C_Product Manual
BooCax 19 / 28 boocax.com
Path points need to be set for the route that the robot passes through, such as turns and
gates,which must be marked (as shown in Figure 2 below: gray points are path
points).
Disinfection points are set as required for the environmental site (as shown in Figure 3 below:
purple icons are disinfection points).
“Change“、”Connect" function:Mainly used to connect "nearby points" in series.
“Change “is to switch point, that is, changing the current point of the robot to the selected
nearby point. After this operation, you can click "Connect " to connect the robot's previous
path point or disinfection point with the current point.
“Change”and “Connection”, these two functions are mainly designed to facilitate route editing.
2) Free editing-adjust path
➢If the route by rapid deployment is not applicable, click "Free Edit" to adjust the route. The
robot supports adding/deleting/moving points, changing running route, changing disinfection
points, etc.
Table of contents
Other BOOCAX Robotics manuals
Popular Robotics manuals by other brands
OTTO MOTORS
OTTO MOTORS 1500 Fast Charger V1.2 Operation and maintenance manual

MD SPORTS
MD SPORTS 44111 Assembly instructions
DF ROBOT
DF ROBOT MiniQ II manual

Pro's Kit
Pro's Kit GYROSCOPE kit Assembly & instruction manual

Spinmaster
Spinmaster Zoomer Training guide
TURNABOT
TURNABOT SLIPPER Assembly instructions

ZoraBots
ZoraBots Billy-Billy quick guide
Toshiba
Toshiba TH650A-IP instruction manual
Rover Robotics
Rover Robotics Open Rover quick start guide
Kettler
Kettler Riga Assembly instructions
Universal Robots
Universal Robots 3PE Teach Pendant installation guide
TEACH TECH
TEACH TECH TTR-892 Assembly & instruction manual
