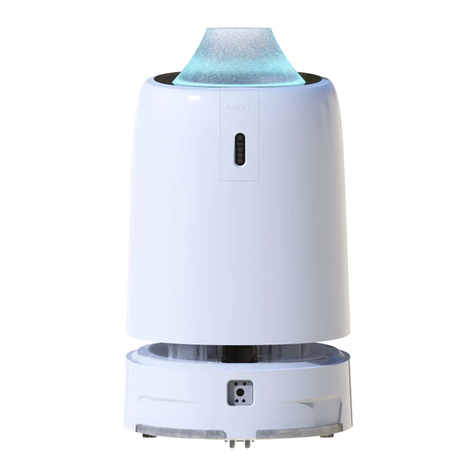
BOOCAX BKS-UVRobot-200 User manual

BKS-UVRobot-200
Product Manual
V 1.2.1
BOOCAX
Better Robot,Better Life

BKS-UVRobot_Product Manual
BooCax 1/ 23 boocax.com
Precautions for Safety and Use
Thank you for purchasing BooCax robot. Please read this manual carefully before using it.
The use of robot shall follow the operation instructions. Use beyond the range is prohibited!
BooCax will not assume any responsibilities for the losses caused by improper operation.
01/ Precautions for Safety
1) Prohibitions
①Person or animal should keep away from the working robot to avoid hurt to eyes or skin;
②Do not touch the UV tube with hands to avoid any damage to the tube;
③Do not use in flammable gas environment or similar flammable and explosive
environment;
④Do not wrap the tube with paper or cloth, to avoid fire due to high temperature;
⑤Do not replace any parts. If necessary, please do so under the direction of BooCax.
2) Precautions
①The robot should be parked or run in a flat and solid place at normal temperature;
②If there is abnormal noise during working, please immediately turn off the robot and
report to the after service;
③Before starting the robot, please check whether the safety components (sensor,
emergency stop switch, etc.) Are in normal conditions;
④If the floor is waterlogged and greasy, please clean the floor promptly;
⑤The robot body must be maintained by a trained professional.
02/Routine maintenance
When performing routine maintenance, please make sure that the robot is turned off, unplugged
or away from the charging pile! Otherwise, electric shock or serious failure may occur.
1) Cleaning
①Wipe clean the body part and UV tube gently with non-dust cloth every week;
②Regularly brush the surface of the driving wheel and universal wheel;
③Regularly contact after-sales for maintenance services such as lubrication, dust-cleaning
at the damping spring and universal wheel bearing;
④Lidar sensor, as the expensive precision component in robot, should be wiped regularly
with a non-dust cloth. Do not wipe with force or other detergent, which may be easy to
cause functional damage.
⑤If the robot will not be used for a long time, store it in a dry and cool place.
2) Check whether the screw is loose
Shake the components gently on a regular basis to observe whether they are loose. If there is
any abnormal sound, please check the screws at the installation position of relevant
components. All the screws of the robot have undergone anti-loosening treatment. However,
for the sake of safety, please contact "BooCax After-sales" if any screw is found loose.
03/Disclaimer

BKS-UVRobot_Product Manual
BooCax 2/ 23 boocax.com
BooCax possesses many patents related to this robot product. No organization or individual may
use these patents without authorization.
The robot has precise internal structure. For the sake of safety, no one is allowed to disassemble
the robot without permission except the authorized personnel of BooCax, otherwise the warranty
will be invalid. BooCax will not assume any responsibility for any damage, breakdown and
property/personal injury caused by unauthorized disassembly. The identification of unauthorized
disassembly will be subject to the anti-disassembly mark on the robot body.
04/ After-sales
If you have any questions about maintenance, safety and other issues during use of BooCax robot,
please contact us by phone or email provided on the back of this manual. We are very willing to
provide you with product-related services.

BKS-UVRobot_Product Manual
BooCax 3/ 23 boocax.com
Contents
1. Product Description.............................................................................................................. 4
2. Product specification.......................................................................................................... 5
3. Appearance size..................................................................................................................... 7
4. Function modules.................................................................................................................. 8
5. Preparation before use .......................................................................................................10
5.1. Install the charging pile........................................................................................................................ 10
5.2. Clean up barriers.................................................................................................................................... 11
5.3. QR code deployment ............................................................................................................................ 11
5.4. Download App ....................................................................................................................................... 13
5.5. Turn on and connect the robot ............................................................................................................ 13
5.6. Build map................................................................................................................................................ 15
5.7. Disinfection route setting..................................................................................................................... 16
5.8. Disinfection area setting ...................................................................................................................... 19
5.9. Scheduled disinfection setting............................................................................................................ 20
5.10. Other settings ..................................................................................................................................... 20
6. Start to work........................................................................................................................21

BKS-UVRobot_Product Manual
BooCax 4/ 23 boocax.com
1. Product Description
Product features
Super sterilization, no residue or pollution
The top-level professional UV disinfection lamp emits light at 254 nm with a total irradiation intensity of
1500 µW/cm², which ensures the disinfection effect by breaking the DNA and RNA chains of viruses, fungi,
bacteria and other microorganisms, so that they are inactivated to reproduce. It can achieve a disinfection
effect of 99.9%, without ozone and secondary pollution.
Ultra-high power to ensure higher efficiency
Total power of 410W, shorter disinfection time and higher disinfection efficiency.
APP control, full-automatic and safe operation
Industrial-grade product, precise positioning, autonomous navigation, intelligent obstacle avoidance,
automatic return for charge, mobile APP control, user-defined disinfection route and time, automatic start
of disinfection at scheduled time, multi-level safety protection, automatically turning lamp off upon infrared
detection of object movement to ensure safe use.
One-button return to autocharge
The robot will return to autocharge after completing the task, so the trouble of line charging is avoided.
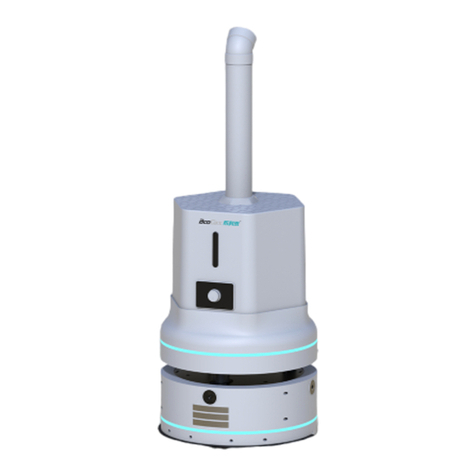
BooCax UVRobot, based on mobile robot platform, is
equipped with professional UV disinfection module, which can
replace operators to enter confined spaces such as dangerous
areas, public areas and inaccessible areas to quickly kill
pathogenic microorganisms such as bacteria, spore fungi, germs,
etc., and thoroughly disinfect indoor air and articles without dead
angle.
UVRobot adopts teaching type automatic mapping,
autonomous navigation, automatic path planning, automatic
charging and automatic return for charge at low battery, thus
realizing one-stop unattended disinfection management.

BKS-UVRobot_Product Manual
BooCax 5/ 23 boocax.com
2. Product specification
Type
Name
UVRobot
Basic
parameters
Model
BKS-UV-200
Intended use
Thoroughly disinfect indoor air and articles without dead
angle
Dimension
Diameter 530mm* height 1375mm (lamp tube 843mm)
Body weight
55.6kg
Total power
475W
Applicable scenes
Hospitals, hotel halls, restaurants, residential corridors and
office buildings
Ultraviolet
sterilization
UV lamp wavelength
254nm
UV lamp material
Quartz
Qty. of UV lamp tubes
10
UV lamp power
41W*10
UVC power
16 W*10
Cumulative light intensity
1500 μw/cm²
Irradiation direction
360°
Sterilization scope
Bacteria, molds, viruses, etc. on the surface of objects
Lamp life
10000 h
Safety
Robot and human shall not stay in the same environment.
Mode of start
By specific order
Movement
Moving speed
0.45 m/s
Driving mode
Differential driving
Over-obstacle capacity
≤10 mm
Gradeability
≤8°
Passage width
≥750 mm
Battery
Battery capacity
25.2V / 38Ah
Service time
1.8h
Mode of charging
Autocharge
Charging time
3.5h
Charging pile
110V~240V wide voltage input

BKS-UVRobot_Product Manual
BooCax 6/ 23 boocax.com
Full-load current
15A
Short-circuit current
250A
Safety design
Emergency Stop Switch
1
Bumper strip
1
Noise
≤60dB
Working temperature
0°~50°

BKS-UVRobot_Product Manual
BooCax 7/ 23 boocax.com
3. Appearance size

BKS-UVRobot_Product Manual
BooCax 8/ 23 boocax.com
4. Function modules
Front
Connector
UV lamp tube
Human body sensor
Working status lamp
UV safety switch
Laser radar
Auxiliary
positioning sensor
Crash sensor
Power wheel

BKS-UVRobot_Product Manual
BooCax 9/ 23 boocax.com
Back
Steering wheel
Emergency
stop switch
Power switch
Nameplate

BKS-UVRobot_Product Manual
BooCax 10 / 23 boocax.com
5. Preparation before use
5.1. Install the charging pile
The charging pile of the spray robot should be placed in a safe and tidy place. It should be on the
horizontal ground with its back against the flat wall, as shown in the following figure:
Schematic Diagram of Installation and Use of Charging Pile
①Place the back of the charging pile against the wall, and then turn the foot pads at the
bottom to adjust the charging pile.
②Connect the power cord, adapter, and charging pile as shown above, and finally connect the
end of the power cord to the 110V / 220V AC socket to formally complete the boot preparation.

BKS-UVRobot_Product Manual
BooCax 11 / 23 boocax.com
5.2. Clean up barriers
1) Before using the robot, remove the barriers (especially flower pot, table and chair, etc.) in
the aisle to avoid affecting the working and charging;
Minimum walking width: 750mm
2) Make sure that there is no vertical step over 10mm, and no objects (books, boards, stones,
etc.) over 10mm in height on the working path;
Surmounting height: 10mm
3) Make sure that there is no steep slope on site:
Maximum gradeability: 8°
5.3. QR code deployment
In order to enhance the positioning accuracy of the robot, QR codes are provided so that the
long-term running is more stable.

BKS-UVRobot_Product Manual
BooCax 12 / 23 boocax.com
The QR codes are generally used where the robot positioning is prone to deviation, for example,
in a corridor longer than 25m, a QR code can be pasted at a distance of 15m to assist positioning.
Or in a spacious place where the environmental characteristics are not obvious, QR codes are also
required to enhance positioning accuracy.
1) QR code pasting:
•Avoid deploying at a place with strong light, so as not to affect the camera to capture the QR
code image;
•The QR code should be pasted at the same level as the camera;
•Paste the QR code as the arrow points;
2) The example is shown below:
3) Precautions
1) No same QR codes can appear in the same environment;
2) When mapping, the robot stops at the QR code board for 1-2 seconds to ensure that the QR
code is saved(Voice prompt will be given for successful identification);
3) The QR code of the charging pile should be identified by the camera in front of the robot, and
the QR code of a corridor is identified by the cameras on two sides;
4) When incrementally mapping, it is necessary to ensure that the robot's positioning is accurate
before identifying and saving the QR code.
The QR code should
be pasted at the same
level as the camera
Keep parallel
to the
ground

BKS-UVRobot_Product Manual
BooCax 13 / 23 boocax.com
5.4. Download App
Android 8.0 and above mobile phone scan the QR code below to download the App and install it:
Scan by Wechat or mobile browser to download App
5.5. Turn on and connect the robot
1) When starting up for the first time, turn the power key switch to "on" position to connect
the power;
Power switch
2) Turn on the phone wifi, search the wifi network beginning with "BKS-UV-200", and enter the
assigned initial password “robot123” to connect the robot;

BKS-UVRobot_Product Manual
BooCax 14 / 23 boocax.com
3) Open the App, you will find the robot beginning with "BKS- UV-200" (as shown in the
following figure), click login;
4) Go to the homepage of App, and the interface shown below indicates that the online
connection is normal, then you can proceed to the next step, i.e., mapping.
Screenshots of App interface and function buttons:
App homepage:
•Robot name and battery
•Robot status
•Scheduled disinfection,
view route, manual
control
App deployment:
•Build map
•Deploy route
•Set disinfection area
•Switch map
App setting:
•Disinfection log
•UV light irradiation time
•Switch line-tracking mode
•Voice setting
•Firmware upgrade
•Help and feedback
•Run log
•Demonstration and testing
•Version 1.1.1_b36

BKS-UVRobot_Product Manual
BooCax 15 / 23 boocax.com
5.6. Build map
1) Preparation
•Push the robot at 0.5-1m away from the charging pile.
•Robot battery>50%
2) Begin to build map
Click Deployment-Build Map on App, and you will see the "Build Map" interface (shown in the
middle figure below). Click "Start to map" to build a 2D map of the working scene (push the robot
by hand to build the map).
Legends:
•White radius—the range scanned by the laser;
•Black thick line—the scanned obstacles (special objects such as transparent glass may not be
identified);
•Gray area: Area that has not been scanned.
⚠ Attention:
①When mapping by hand, push the robot forward slowly in the scene from the charging pile
as the starting point, and finally return to the charging pile to form a large circle;
②When mapping, don't be too close to the wall and keep a distance of at least 0.5m;
③The operator must stand behind the robot to avoid leaving noise on the map;
④When turning, walk slowly so that the robot can collect as much characteristic point data as
possible;
⑤As laser radar does not recognize accurately in abnormal environment (glass, mirror, pure

BKS-UVRobot_Product Manual
BooCax 16 / 23 boocax.com
black object, grid, etc.), it is suggested to carry out appropriate treatment, such as pasting
frosted sticker, gray adhesive tape, reflector, etc.;
⑥If the working scene is too large/noise, you can use "Incremental composition" to
enlarge/repair the map;
⑦When passing the QR code, stay in front for more than 1 second, and there will be a voice
prompt when it is successfully scanned.
5.7. Disinfection route setting
The walking path of robot consists of charging points, path points and disinfection points.
Specific setting procedures follow the instructions of App, as shown below:
1) Rapid deployment
➢Charging point: The position of the robot docking the charging pile.
Click "Deployment routes" to enter the route setting mode; push the robot to the charging
pile for docking as guided, and click Next to complete the setting.
➢Path points and disinfection points: deploy the points by pushing robot /dragging map
In the required position, mark the corresponding point( The small blue icon is the
corresponding location point)
Path points need to be set for the route that the robot passes through, such as turns

BKS-UVRobot_Product Manual
BooCax 17 / 23 boocax.com
and gates, which must be marked (as shown in Figure 2 below: gray points are
path points).
Disinfection points are set as required for the environmental site (as shown in Figure
3 below: purple icons are disinfection points).
“Change“、”Connect"function:Mainly used to connect "nearby points" in series.
“Change“is to switch point, that is, changing the current point of the robot to the selected
nearby point. After this operation, you can click "Connect " to connect the robot's previous
path point or disinfection point with the current point. “Point Change”and “Point Connection”,
these two functions are mainly designed to facilitate route editing.
2) Free editing-adjust path
➢If the route by rapid deployment is not applicable, click "Free Edit" to adjust the route. The
robot supports adding/deleting/moving points, changing running route, changing disinfection
points, etc.

BKS-UVRobot_Product Manual
BooCax 18 / 23 boocax.com
⚠Attention:
When mapping, the turning should be deployed with path points which cannot pass through the
wall, as shown in the figure below:
As shown in the figure above, when the robot has to move from A to C, but is obstructed by a wall
or an unmovable obstacle inbetween, the correct path deployment should be A-B-C. B must be
set as it is the key node of the turning. The figure on the right shows the wrong deployment, in
which the path will go through the wall directly, causing the robot unable to walk.

BKS-UVRobot_Product Manual
BooCax 19 / 23 boocax.com
5.8. Disinfection area setting
•Click "Set disinfection area" menu to "Create New Disinfection Area" and name each
disinfection area separately;
•After creating a new disinfection area, click the purple nodes on the map to select the
disinfection points in the area, as shown in Figure 4 above: 220、221、222 and 224 in the red
box are the disinfection points selected in the disinfection area "1-1".
Table of contents
Other BOOCAX Robotics manuals
Popular Robotics manuals by other brands
Toshiba
Toshiba TH Series instruction manual
Kinderlab robotics
Kinderlab robotics KIBO Getting started with
Tiger Electronics
Tiger Electronics WonderBorg 70709 instruction manual
fischertechnik
fischertechnik COMPUTING ROBO MOBILE SET Assembly instructions
ROBOPEC
ROBOPEC Reeti quick start guide
WowWee
WowWee COJI quick start guide
