Fluke TiR32 User manual

Fluke TiR32 Thermal Imager
Fluke TiR32 Thermal Imager (Work in Progress)
T or infrared cameras are cameras that form anhermographic cameras
image using . IR cameras were originally developed forinfrared radiation
military use and have slowly migrated into other fields as varied as
medicine and archeology. In the building industry it has different usages,
for example we can use thermal cameras to detect leakage or thermal
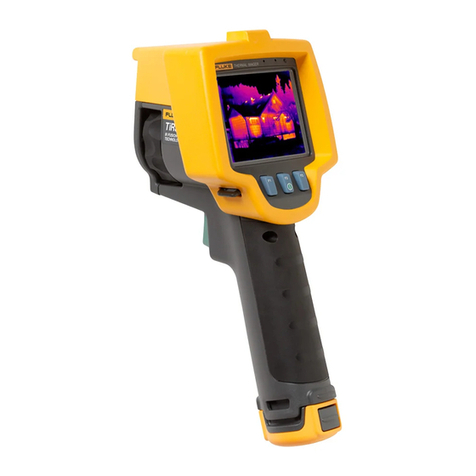
bridges. You can use the the facultys TiR32 Thermal imager to analyze
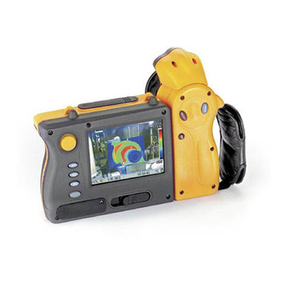
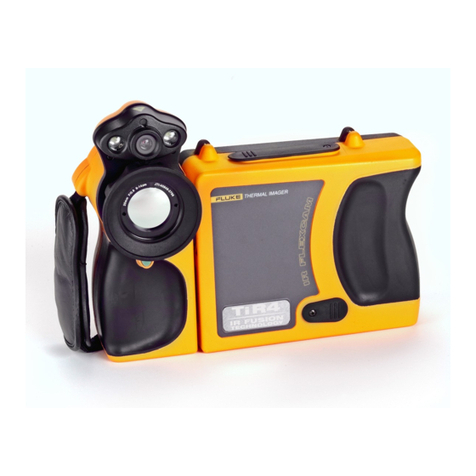
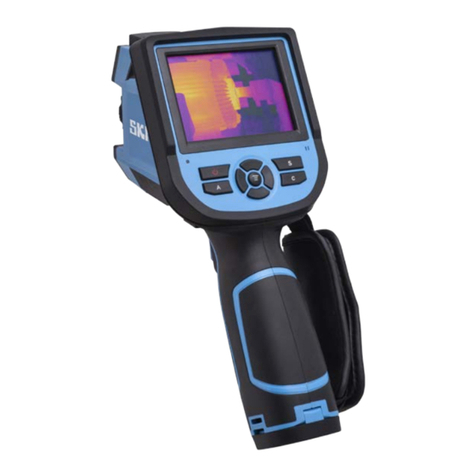
the thermal radiance of any building, object or even people. The picture on
the right shows an interior corner in infrared as well as the device itself.
There is also a general overview here of the things you need to
understand prior to using a thermal imager in order to understand the
results.
The data can be stored either as a JPG file or as an IS2 file, which is the
equivalent of a RAW format on modern dSLR cameras. While the first
enables you to make fast files for presentation purposes, the latter can be
accessed with the free SmartView software and explored, either you goal
is to extract temperatures in exact positions or you need a report from a
set of images.
Contents
Fluke TiR32 Thermal Imager (Work in Progress)
Pre-requisites, access and learning to use the Fluke
TiR32 Thermal Imager
Health and Safety
General Information
Infrared Photography
Emissivity
Thermographic Camera
Application
Uncooled infrared camera
IR-fusion image
Fluke TiR32 and operation
General operation
Using Camera
Setting the Level (Manual)
File Format
Changing the Temperature Units
Setting Emissivity
Making accurate temperature measurements
SmartView Software
Starting SmartView
Image Icon Description
Setting Preferences
Links + further studies
Notes and Appendix
FAQ
References
Appendix
Additional pages
Pre-requisites, access and learning to use the Fluke TiR32
Thermal Imager
The TiR32 is fairly easy to use, but it is not a toy (i.e. it is also not cheap).
You can borrow it as long as you are a responsible person and need the
device for your studies. In this case you should study this page carefully,
going through all the videos and when you come to pick up the device for
the first time, you need to answer some questions to ensure that you are
familiar with the device and also show that you know how to use it. After
you have shown that you can use the device, you will receive booking
access for it in the equipment booking system. If a group wants to borrow
the device, one person still needs to be responsible for the device.
Health and Safety
Batteries contain hazardous chemicals that can cause burns or
explode. If exposure to chemicals occurs, clean with water and
get medical aid.

TiR32 Thermal Imager
IR image of an interior corner and window.
General Information
Infrared Photography
Infrared energy is just one part of the , whichelectromagnetic spectrum
includes radiation from , , , a thin region of gamma rays x-rays ultra violet visi
, , , , and . Theseble light infrared terahertz waves microwaves radio waves
are all related and have different length of wave. (a.k.a. wavelength). All
objects emit a certain amount of black body radiation because of
their temperatures and in accordance with it. Generally speaking, the
temperature has straight effect on its infrared radiation it means that the
infrared radiation increases by rising temperatures.
Emissivity
The of a material (usually written or ) is the relative ability ofemissivity
e
its surface to emit energy by radiation. It is the ratio of energy radiated by
a particular material to energy radiated by a black body at the same
temperature. A true black body would have an = 1 while any real object
would have < 1. Since it is the ratio of tow numbers with similar
dimension, therefore it is a dimensionless quantity.
See emissivity information for actual temperatures. Reflective
objects result in lower than actual temperature measurements.
These objects pose a burn hazard.
Use the product only as specified, or the protection supplied by
the product can be compromised.

In general, black objects have more emissivity factor comparing to other
objects. In other words, the emissivity of duller and blacker materials is
closer to 1 and the more reflective a material is, the lower its emissivity.
Highly polished silver has an emissivity of about 0.02.
Thermographic Camera
A thermographic camera or infrared camera is a device that forms an
image using infrared radiation, similar to a common camera that forms an
image using visible light. Instead of the 450--750 nanometer range of the
visible light camera, infrared cameras operate in wavelengths as long as
14,000 nm (14 µm).
Application
Thermal imageing photography have many different usages. For
example, firefighters use it to see through smoke, find persons, and
localize hotspots of fires. With thermal imaging, power line maintenance
technicians detect overheating joints and parts, a telltale sign of their
failure, to eliminate potential hazards. Where thermal insulation becomes
faulty, building construction technicians can see heat leaks to improve the
efficiencies of cooling or heating air-conditioning. Thermal imaging
cameras are also installed in some luxury cars to aid the driver, the first
being the 2000 Cadillac DeVille. Some physiological activities, particularly
responses, in human beings and other warm-blooded animals can also be
monitored with thermographic imaging. Cooled infrared cameras can also
be found at most major astronomy research telescopes.
Night vision
Firefighting operations
Predictive maintenance (early failure warning) on mechanical &
electrical equipment
Process monitoring
Condition monitoring & surveillance
Automotive applications
Energy auditing of building insulation and detection of refrigerant
leaks
Roof inspection
Auditing of acoustic insulation for sound reduction
Masonry wall structural analysis
Veterinary Thermal Imaging
Moisture detection in walls & roofs (and thus in turn often part
of mold remediation)
Chemical imaging
Research & development of new products
Pollution effluent detection
Aerial archaeology
Paranormal investigation
Search and rescue operations and etc.
Thermal imagers used for preventive and predictive maintenance,
equipment troubleshooting, repair verification, building inspections,
restoration and remediation work, energy audits, and weatherization
purposes. Fluke TiR32, is a thermal camera which is optimized for building
envelope inspections and building diagnostics.

Uncooled infrared camera
There are two types of infrared camera, cooled and uncooled. Fluke TiR32
is the uncooled camera. This kind of camera use a sensor which is
operating at normal temperature, or a sensor stabilized at a temperature
close to ambient using small temperature control elements. All of the
modern un-cooled detectors use sensors that work in according with the
change of , or . In order to reduce image noise,resistance voltage current
un-cooled infrared sensors can be stabilized to an operating temperature,
while they are not cooled down to low temperatures and do not require
bulky, expensive coolers. This provides smaller and less costly infrared
cameras. However, their resolution and image quality might be lower than
cooled detectors. This is due to differences in their fabrication processes,
which limited because of lack of needed technology.
IR-fusion image
IR-Fusion® technology enables the camera to capture both the visible
light image and infrared image at the same time. It is very beneficial in
terms of identifying and reporting suspected components and make the
repair process easier, you can combine both digital and infrared thermal
images for better clarity. This allows you to easily see, document, and
address problems uncovered through your thermal imaging work. Fluke's
unique technology provides pixel-for-pixel alignment of the digital and
infrared thermal images, allowing you unlimited options in optimizing your
on-camera and off-camera analysis. The images to the right show
matched images.

Fluke TiR32 and operation
Infrared energy (temperature) images can be taken with fluke thermal
imager. This device is able to amalgamate observable light with the
energy of infrared images on the same screen. The process of discovering
temperature changes (heat patterns) in articles is called thermography or
thermal imaging. By monitoring temperature changes, the user may
benefit from scheming early maintenance plans in order to avoiding pricey
downtimes or any possible difficulty.
General operation
The menus, coupled with the three softkeys: , , pro
vide access for , thermal image display saving and viewing stored
, and . images setting features
In the menu the following options can be set :
Backlight, Date/Time, Emissivity, File Format, High Temperature Alarm,
Center Point on the image, Hot Spot and Cold Spot on the image, IR-
Fusion Mode, Language, Lens Selection, Level/Span, Palette, Reflected
Background Temperature Compensation, Temperature Scale,
Transmission Correction.

Using Camera
Open the front Lens Cover
Press F2 and hold it for a second to turn it on
Wait up to camera calibrating
By three softkeys F1, F2 and F3 provide access for thermal
image display, saving and viewing stored images, and setting
features
Press Green button (Image Capture Trigger) for taking image
You can change the focus by Focus Control Ring
Before storing photo you can change the setting (also you can
change the settings on the software)
Press F1 to store the image
Press F2 and hold it for a second to turn it off
Setting the Level (Manual)
When in manual ranging, the level setting adjusts the mid-point thermal
span within the total temperature range of the Imager. To set the level:

1. After entering the manual range mode (see “Setting the Range”), press
the softkey labeled . This will place the Imager into the Go to Level Adjusti
mode.ng Level
2. Press the softkey labeled to move the temperature span to higherUp
temperatures or to move the span to lower temperatures.Down
3. To adjust the Span, press the softkey labeled .Go to Span
4. To capture an image, squeeze and release the trigger once.
File Format
Fluke TiR32 can display, blend and store a full visual image (640 X
480) with each IR image. Thermal and visual images can be presented
simultaneously as a full thermal image or as a Picture-In-Picture (PIP)
image in various blend modes which was explained before in IR-fusion
technology.
Data can saved on Imager’s SD memory cards in three different formats:
bmp, jpeg and is2. The bitmap and jpeg formats only save the image
shown on the Imager’s display. The “.is2” format is a file format that saves
all radiometric data, infrared image, IR-Fusion® mode information, palette
information, full visual image, screen settings, and voice recording
annotated to the stored image.
1. In ordet to change the format:
2. Press F2 until the F3 key label reads Setting
3. Press the key labelled Setting
4. Press F2 that labelled until the F1 reads Menu File Format
5. Press key labelled File Format
6. Press F1 for or F3 for to select the file format base on yourUp Down
needs.
Changing the Temperature Units
The Imager will display temperature in Fahrenheit or Celsius. To change
the temperature units:
1. Press F2 until the F3 softkey label reads .Settings
2. Press the softkey labeled .Settings
3. Within the Settings Menu, press F2, labeled , until the F3 softkeyMenu
reads .Units
4. Press F2 until is displayed over F3.Units
5. Press the softkey labeled .Units
6. Press F1 for Celsius or F3 for Fahrenheit.
7. Press the softkey labeled to set the units.Done
8. Continue adjusting other items in the Settings Menu, or quickly squeeze
and release the trigger twice in order to return to live view.
Setting Emissivity
The of a material (usually written or ) is the relative ability ofemissivity
e
its surface to emit energy by radiation. It is the ratio of energy radiated by
a particular material to energy radiated by a black body at the same
temperature. A true black body would have an = 1 while any real object
would have < 1. Emissivity is a dimensionless quantity.
In general, the duller and blacker a material is, the closer its emissivity is
to 1. The more reflective a material is, the lower its emissivity. Highly
polished silver has an emissivity of about 0.02.
Setting your Imager with correct emissivity values is critical to making
accurate temperature measurements. To set the emissivity value:
1. Press F2 until appears over F1.Emissivity
2. Press the softkey labeled .Emissivity
At this point, emissivity can be set directly as a value or selected from a
list of emissivity values for some common materials. To select from a list
of common materials:
1. Press the softkey labeled .Table
2. Press the softkey labeled or to move between the materialsUp Down
in the list. The emissivity value for each material is shown on the screen
as the selection moves between the different materials
3. Press the softkey labeled to select the highlighted material.Done
To set the emissivity value directly:
1. Press the softkey labeled .
2. Press the softkey labeled or to increment or decrement,Up Down
respectively, the emissivity value displayed just above the softkey labels.
3. Press the softkey labeled to select the set value.Done
4. Wait for main menu to disappear or quickly squeeze and release the
trigger twice in order to return to live view.
Making accurate temperature measurements
All the objects radiate infrared energy and this energy is based on two
factors: surface temperature of the object and emissivity of the object’s
surface. Imagers use the information from detecting infrared to estimate
the object temperature.
Objects are in two categories: low emissivity and high emissivity
High emissivity: are efficient at radiating energy and emissivity
factor estimated to be 95% like wood, water, cloth and etc.
Low emissivity: are not efficient at radiating energy. To obtain a
temperature accurately we can do emissivity correction in two
ways: directly entering value and use value of built-in value.
Note: If imagers use fixed value for emissivity, to get the accurate
estimate, the measurements must be multiplied by a value found in a look
up table.
SmartView Software
Combing user friendly interface with excellent analysis, SmartView is
powerful software. Adding permanent comments, structuring and
analyzing in high performance manner are advantages of this option.
SmarView is capable of linking images for further evaluation and
comparison. Utilizing this image editor, the user can effectively observe
important details by adjusting the thermal images. Furthermore, the
software converts IR and visible image to common image file formats such
as JPEG, BMP, GIF, TIFF and PNG files.
SmartView is a free download. For download see
http://download.cnet.com/Sprint-SmartView/3000-2112_4-10909273.html
or

you can go to Fluke website http://www.fluke.com/fluke/usen/Support
and after registration you can download and follow/Software/ti-update.htm
the download instructions.
Specification
Windows ® XP SP2/Vista/7
A web browser for product registration and web updates. Internet
Explorer 8.0 or newer
512 MB of RAM minimum (1 GB for Vista or 7)
250 MB of hard disk space for product installation
16-bit color, 1024 x 768 resolution video or better
Color printer for printing the images
CD-ROM drive (for installing SmartView software)
Windows Media Player and video codec for video playing
(optional)
Features
Image/Video viewing and optimization
Displays an array of open images and videos for convenient
viewing and analysis
Displays the temperature at any given point
Optimize images/video by adjusting level & span, image
parameters, add markers, and more!
Detailed analysis and total image/video control
A complete set of marker tools are provided (Hot and Cold
points, user defined markers, etc.)
Use 3D-IR™ to view images from different perspectives, identify
additional problems, and eliminate false positives…the ultimate
analysis tool for your digital infrared thermal imaging needs
IR-Fusion®: Five viewing modes enable image/video optimization
based on application needs
Navigate, analyze and enhance IR images
Organize data with extensive annotations
Optimize images and quickly reveal issues
View analyze video captured with your thermal imager. Convert
video frames into still images for additional analysis and
communicate results in a report

Rotate images and videos
Extensive annotation possibilities
Add annotations to images in the camera or in the PC software
Review IR PhotoNotes™
Input information such as locations, problem description,
recommended actions, and other notes
Reference images can be linked together for good/bad and before
/after analysis
Annotations can be automatically included in reports
Review voice annotations captured in the field by the imager
Simplified report generation
Generate professional customized reports fast
One-click report generation for a quick result
Choice of features including before/after, IR PhotoNotes,
annotations, supporting data and graphics
Report wizard guides the user through advanced report
generation
Starting SmartView
Title Bar: Located across the top of the SmartView window. Contains
controls to minimize, maximize, and close the SmartView window
Menu Bar: Located under the Title Bar. Contains a number of drop down
menus used to launch various SmartView functions
Tool Bar: Located under the Menu Bar. Contains a number of controls,
from left to right
Open image file button: Click this to open an image
Save active image button: Click this to save an active image
Save all images button: Click this to save all open images
Edit active image button: Click this to open the image editing
window to edit the active image. (Note: You can also double-click the
active image to open the image editing window.)
Quick report on all images button: Click this to open report template
and generate report for the active image
Annotation File Editor button: Click this to open the annotation file
editor to create or modify an annotation file
Image Icon Description

Infrared image
Infrared image with text annotations
IR-Fusion image
IR-Fusion image with text annotations
Setting Preferences
Edit / Preferences / Application Tab
Edit / Preferences / Reports Tab
Edit / Preferences / Files Tab
Edit / Preferences / Insight settings Tab
In order to know how to use it see attached :tutorial
Links + further studies
Fluke Website
Notes and Appendix
FAQ
- How we can solve artifacts?
If any of these artifacts do appear in your properly focused infrared image,
please be assured that it is only because there is not enough of a thermal
differential in the scene to indicate the presence of an anomaly or issue.
Typically, increasing span, changing color palette, or introducing a thermal
differential into the scene will eliminate the appearance of any artifacts.
- How can I set a date/ language?
you can use the F2 key to go to the Menu and use F1 and F3 to find the
setting for time and language.
-Why the image taken by the camera is mostly one color (all in blue
or red)?
This problem hapens when the color range of temperature which is shown
on the right side of the screen is not set properly.
Look the description in
the Setting the level . Also it can be result of a situation which the thermal
camera is not collaborated with the surrounding temperature. you need to
wait for a while or you may need to turn off and then turn it on again.
References
"Fluke IR-Fusion® Technology."
Fluke IR Fusion Infrared
. N.p., n.d. Web.
Thermal Imaging Technology for Image Analysis
08 Oct. 2012. <http://www.fluke.com/fluke/usen/Thermal-Imaging
>./Fluke-IR-Fusion-Technology.htm?PID=56160
"Fluke."
Corporation: Electronics, Biomedical, Calibration and
. N.p., n.d. Web. 08 Oct. 2012. < >
Networks
http://www.fluke.com/
"Thermographic Camera." . Wikimedia Foundation, 16
Wikipedia
Sept. 2012. Web. 08 Oct. 2012. <http://en.wikipedia.org/wiki
>./Thermographic_camera
This page is largely based on the work done by Shabnam Arbab and
Safura Abdiha at the Digital Modeling and Fabrication course.
Appendix
Sample of basic report

Other manuals for TiR32
1
Table of contents
Other Fluke Thermal Camera manuals

Fluke
Fluke Ti105 User manual

Fluke
Fluke tix640 User manual

Fluke
Fluke ThermoView TV43 User manual

Fluke
Fluke Ti27 Instruction manual

Fluke
Fluke Ti32 User manual

Fluke
Fluke Ti90 User manual

Fluke
Fluke TiR1 User manual

Fluke
Fluke Ti40FT-20 User manual

Fluke
Fluke TiS10 Original instructions

Fluke
Fluke tix640 User manual

Fluke
Fluke ThermoView TV40 Series User manual

Fluke
Fluke Ti20 User manual

Fluke
Fluke Ti300 User manual

Fluke
Fluke TiX870 User manual

Fluke
Fluke PTI120-9 User manual

Fluke
Fluke Professional Ti300 PRO User manual

Fluke
Fluke RSE30 User manual

Fluke
Fluke TiX500 User manual

Fluke
Fluke Ti100 User manual

Fluke
Fluke Ti20 User manual