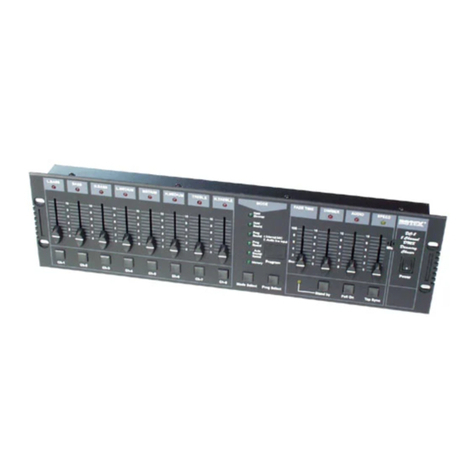
Botex DC-1216 User manual

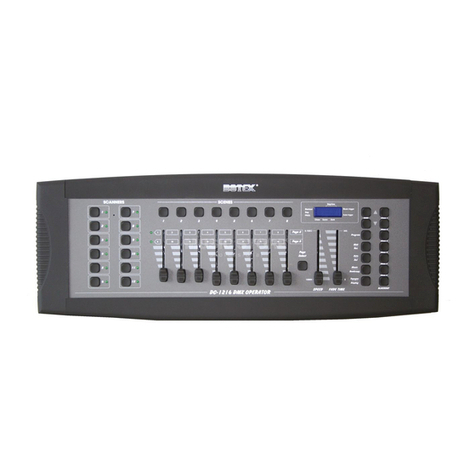
DC-1216
DMX Controller
User Manual

Thomann GmbH
Hans-Thomann-Straße 1
96138 Burgebrach
Germany
Telephone: +49 (0) 9546 9223-0
Internet: www.thomann.de
11.01.2024, ID: 320371 (V3)

Table of contents
1 General information................................................................................................................................. 5
1.1 Symbols and signal words............................................................................................................... 5
2 Safety instructions..................................................................................................................................... 7
3 Features.......................................................................................................................................................... 9
4 Installation and starting up................................................................................................................ 10
5 Connections and controls................................................................................................................... 11
6 Basics............................................................................................................................................................. 15
7 Operating.................................................................................................................................................... 18
7.1 Introduction....................................................................................................................................... 18
7.2 Enabling programming mode..................................................................................................... 18
7.3 Programming scenes...................................................................................................................... 19
7.4 Programming chase........................................................................................................................ 23
7.5 Calling up scenes.............................................................................................................................. 27
7.6 Calling chases.................................................................................................................................... 28
7.7 The MIDI functions........................................................................................................................... 29
8 Technical specications....................................................................................................................... 33
9 Plug and connection assignment.................................................................................................... 35
10 Protecting the environment.............................................................................................................. 36
Table of contents
DC-1216 3
DMX Controller

4DC-1216
DMX Controller

1 General information
This document contains important instructions for the safe operation of the product. Read and
follow the safety instructions and all other instructions. Keep the document for future refer‐
ence. Make sure that it is available to all those using the product. If you sell the product to
another user, be sure that they also receive this document.
Our products and documentation are subject to a process of continuous development. They
are therefore subject to change. Please refer to the latest version of the documentation, which
is ready for download under www.thomann.de.
1.1 Symbols and signal words
In this section you will nd an overview of the meaning of symbols and signal words that are
used in this document.
Signal word Meaning
DANGER! This combination of symbol and signal word indicates an
immediate dangerous situation that will result in death or
serious injury if it is not avoided.
NOTICE! This combination of symbol and signal word indicates a pos‐
sible dangerous situation that can result in material and
environmental damage if it is not avoided.
General information
DC-1216 5
DMX Controller

Warning signs Type of danger
Warning – danger zone.
General information
6DC-1216
DMX Controller

2 Safety instructions
This device is used to control spotlights, dimmers, lighting eects equipment, Moving Heads
or other DMX-controlled devices. The device is designed for professional use and is not suit‐
able for use in households. Use the device only as described in this user manual. Any other use
or use under other operating conditions is considered to be improper and may result in per‐
sonal injury or property damage. No liability will be assumed for damages resulting from
improper use.
This device may be used only by persons with sucient physical, sensorial, and intellectual
abilities and having corresponding knowledge and experience. Other persons may use this
device only if they are supervised or instructed by a person who is responsible for their safety.
Safety
DANGER!
Risk of injury and choking hazard for children!
Children can suocate on packaging material and small parts. Children can injure themselves when handling the device. Never allow
children to play with the packaging material and the device. Always store packaging material out of the reach of babies and small
children. Always dispose of packaging material properly when it is not in use. Never allow children to use the device without supervi‐
sion. Keep small parts away from children and make sure that the device does not shed any small parts (such knobs) that children
could play with.
Intended use
Safety instructions
DC-1216 7
DMX Controller

NOTICE!
Damage to the external power supply due to high voltages!
The device is powered by an external power supply. The external power supply can be damaged if it is operated with the incorrect
voltage or if high voltage peaks occur. In the worst case, excess voltages can also cause a risk of injury and res. Make sure that the
voltage specication on the external power supply matches the local power grid before plugging in the power supply. Only operate
the external power supply from professionally installed mains sockets that are protected by a residual current circuit breaker (FI). As
a precaution, disconnect the power supply from the power grid when storms are approaching or it the device will not be used for a
longer period.
NOTICE!
Risk of re due to covered vents and neighbouring heat sources!
If the vents of the device are covered or the device is operated in the immediate vicinity of other heat sources, the device can over‐
heat and burst into ames. Never cover the device or the vents. Do not install the device in the immediate vicinity of other heat
sources. Never operate the device in the immediate vicinity of naked ames.
NOTICE!
Damage to the device if operated in unsuitable ambient conditions!
The device can be damaged if it is operated in unsuitable ambient conditions. Only operate the device indoors within the ambient
conditions specied in the “Technical specications” chapter of this user manual. Avoid operating it in environments with direct sun‐
light, heavy dirt and strong vibrations. Avoid operating it in environments with strong temperature uctuations. If temperature uc‐
tuations cannot be avoided (for example after transport in low outside temperatures), do not switch on the device immediately.
Never subject the device to liquids or moisture. Never move the device to another location while it is in operation. In environments
with increased dirt levels (for example due to dust, smoke, nicotine or mist): Have the device cleaned by qualied specialists at reg‐
ular intervals to prevent damage due to overheating and other malfunctions.
NOTICE!
Possible staining due to plasticiser in rubber feet!
The plasticiser contained in the rubber feet of this product may react with the coating of the oor and cause permanent dark stains
after some time. If necessary, use a suitable mat or felt slide to prevent direct contact between the device’s rubber feet and the oor.
Safety instructions
8DC-1216
DMX Controller
3 Features
Special features of the device:
n12 units with up to 16 DMX channels operable
n30 banks with each 8 programmable scenes
n6 Chase programmes with Loop function
n8 faders for the DMX output levels
nBuilt-in microphone for sound-control
nAutomatic programme run with tap-sync or speed control
nMIDI control
nBlackout function
nChase programming
nFade time control
Features
DC-1216 9
DMX Controller

4 Installation and starting up
Create all connections while the device is o. Use the shortest possible high-quality cables for
all connections. Take care when running the cables to prevent tripping hazards.
NOTICE!
Data transfer errors due to improper wiring!
If the DMX connections are wired incorrectly, this can cause errors during the data
transfer.
Do not connect the DMX input and output to audio devices, e.g. mixers or ampli‐
ers.
Use special DMX cables for the wiring instead of normal microphone cables.
This device has been designed for mounting in 19-inch racks. The rack ears become accessible
by unscrewing the handles on the side of the device.
Connect the included power adapter to the power supply socket on the device and then put
the power plug into the wall outlet. The device is immediately operational.
Rack mounting
Connecting the power supply
Installation and starting up
10 DC-1216
DMX Controller
5 Connections and controls
ö # $ &% '
0 / . - + *,
(
)
Front
Connections and controls
DC-1216 11
DMX Controller

1[SCANNERS] | 12 scanners with 16 DMX channels and fader control. Press one of the scanner buttons to turn on
manual fader control. Press the scanner button again to turn it o. The LED next to the button lights up or goes out
to indicate your selection. For channel assignment, see table below.
2[SCENES] | Scene buttons. Press one of the scene buttons to load or save scenes. A maximum of 240 scenes can be
saved.
3 Display
4[Program] | Enables programme mode
5[BANK] | Press the Up / Down buttons to choose from 30 banks.
6[Midi/Rec] | For controlling MIDI operations or recording programmes
7[CHASE 1] … [CHASE 6] | For calling up your programmed chases
8[BLACK OUT] | Press this button to temporarily set all DMX values to 0.
9[Auto/Del] | Activates auto mode or deletes scenes or chases
10 [Tapsync/Display] | Press this button to set the beat for the program sequence or to switch the display from % to
numeric (0-255) indication.
11 [Music/Bankcopy] | Used to activate music mode or to copy a bank or chaser with scenes
12 [FADE TIME] | Time control. For setting the fade time. The fade time is the time it takes for a scanner to move from one
position to another, or for a dimmer from fade in to fade out.
13 [SPEED] | Speed control. For setting the chase speed. The chase speed determines how fast or slow the desired scenes
are played.
Connections and controls
12 DC-1216
DMX Controller
14 [Page Select] | Page select button. For selecting the desired page A (1-8) or page B (9-16)
15 Fader. Use these controls to regulate the intensity of channels 1-8 or 9-16, depending on whether Page A or B is
selected.
Device DMX channels
1 1 … 16
2 17 … 32
3 33 … 48
4 49 … 64
5 65 … 80
6 81 … 96
7 97 … 112
8 113 … 128
9 129 … 144
10 145 … 160
11 161 … 176
12 177 … 192
Connections and controls
DC-1216 13
DMX Controller

DMX OUT
MIDI IN USB LIGHT
DC In put:
9-1 2V 500 mA
PUSH
ö # $%
1[MIDI] | MIDI input socket
2[DMX OUT] | DMX output socket for connecting a dimmer or other DMX-controlled devices
3[USB LIGHT] | USB connection for attaching a goose neck lamp, for example
4[DC INPUT] | Connection socket for the 9-V power supply
Back
Connections and controls
14 DC-1216
DMX Controller
6 Basics
This chapter provides basic information about the data transmission using the DMX protocol.
DMX signals are generated by a DMX controller. The signals are transferred over a DMX cable
to the connected devices. Each connection can transmit up to 512 channels. For each channel,
a value between 0 and 255 is being transmitted. The 512 channels form a so-called ‘DMX uni‐
verse’.
DMX devices are connected serially, that means the sending device transmits signals to all con‐
nected receivers (daisy chain). The order of the receivers in the daisy chain does not matter
since all devices lter and process the relevant data independently from each other.
To create the daisy chain, the DMX input of the rst receiver is connected to the DMX output of
the controller or another DMX master. The output of the rst receiver is connected to the input
of the second one, and so on. The output of the last receiver in the DMX chain must be termi‐
nated using a resistor (110 Ω, ¼W).
Signal transmission
Cabling
Basics
DC-1216 15
DMX Controller

If the cable length exceeds 300 m (328 yds.) or the number of devices is greater than
32, the signal must be amplied using a DMX booster.
Each DMX devices operates on a specic number of channels to transfer the incoming control
signals into movements, changing of light intensity or colour, and so on. Since all receivers
that are part of a DMX daisy chain receive all signals, a start address must be assigned to each
DMX device. Starting from this address (a value between 0 and 512) the incoming signals are
being evaluated and transferred into the functions of the receiver (internal channel assign‐
ment).
Signal processing
Basics
16 DC-1216
DMX Controller
It is no problem to use a start address more than once in a DMX chain. In that case, the relevant
receivers operate synchronously (identical movement, light intensity, colour, and so on).
When setting the DMX address, the counting method of the device determines the rst
channel. Depending on the device, the channel numbers may start from 0 or from 1. The
address range may therefore reach from 0 to 511 or from 1 to 512.
Addressing
Basics
DC-1216 17
DMX Controller

7 Operating
7.1 Introduction
With the DC-1216, you can control up to twelve devices with up to 16 DMX channels per
device. 30 banks with each eight programmable scenes are available as program memory. You
can programme six chases, each with up to 240 programmed scenes.
7.2 Enabling programming mode
As soon as you connect the unit to the power supply, the manual mode will be automatically
activated. To switch to the programming mode, press [Program] for three seconds. The LED
[PROG] in the display will start ashing, thus indicating that you are now in programming
mode. In programming mode, you can program scenes and chasers.
Operating
18 DC-1216
DMX Controller
7.3 Programming scenes
1. Enabling programming mode.
2. Press one of the [SCANNERS] buttons to turn on the Fader control for the corresponding
scanner. The LED next to the selected [SCANNERS] button lights up. You can select sev‐
eral scanners at a time.
3. Use the faders to set the desired DMX values.
4. With [Page Select] you can switch from the rst level [PAGE A] to the second level
[PAGE B] to programme channels 9 – 16.
5. Press [Midi/Rec] to save the programmed scene.
6. Use [BANK UP/DOWN] to select the bank in which you want to save the scene. 30 banks
with each eight memory locations are available.
7. To save the scene to the desired location, press the corresponding [SCENES] button (1 –
8). All LEDs and the display will briey ash, indicating that the scene has been saved.
Then the display shows Bank and Scene.
8. Repeat steps 3 – 7 until all desired scenes have been saved. Finally, press the [SCANNERS]
button to turn o fader control.
9. Once the programming is completed, press [Program] for three seconds. The LED [PROG]
goes out in the display and indicates that you have quit the programming mode. After
exiting, the [BLACK OUT] function is automatically activated.
Operating
DC-1216 19
DMX Controller

1. Enabling programming mode.
2. Use [BANK UP/DOWN] to select the bank with the scene you want to alter.
3. Use [SCENES] to select the desired scene.
4. Use the faders to make the desired changes.
5. Press [Midi/Rec] to save the settings.
6. Press the respective [SCENES] button to overwrite the former scene.
Make sure that you select the same scene in steps 3 and 6 to avoid accidentally over‐
writing the wrong scene!
Altering scenes
Operating
20 DC-1216
DMX Controller
Other manuals for DC-1216
2
Table of contents
Other Botex Controllers manuals

Botex
Botex SDC-6 User manual

Botex
Botex DMX Merger DM-2512R User manual

Botex
Botex DMX DC-2448 User manual

Botex
Botex Lemon Series User manual

Botex
Botex MPX-405 User manual

Botex
Botex DMX DC-136 User manual

Botex
Botex SDC-6 User manual

Botex
Botex SC 4 User manual

Botex
Botex SDC-16 User manual

Botex
Botex DC-192 User manual
Popular Controllers manuals by other brands

Apex Digital
Apex Digital Cleco mPro4000GC installation instructions

National Instruments
National Instruments sbRIO-9607 user manual

TECSYSTEM
TECSYSTEM VRT200 instruction manual

GRASS VALLEY
GRASS VALLEY MAESTRO Installation and service manual

Fisher
Fisher EZR instruction manual

Exlar
Exlar EL120 Installation and service manual