Boya BY-WM6S User manual
Buku Panduan
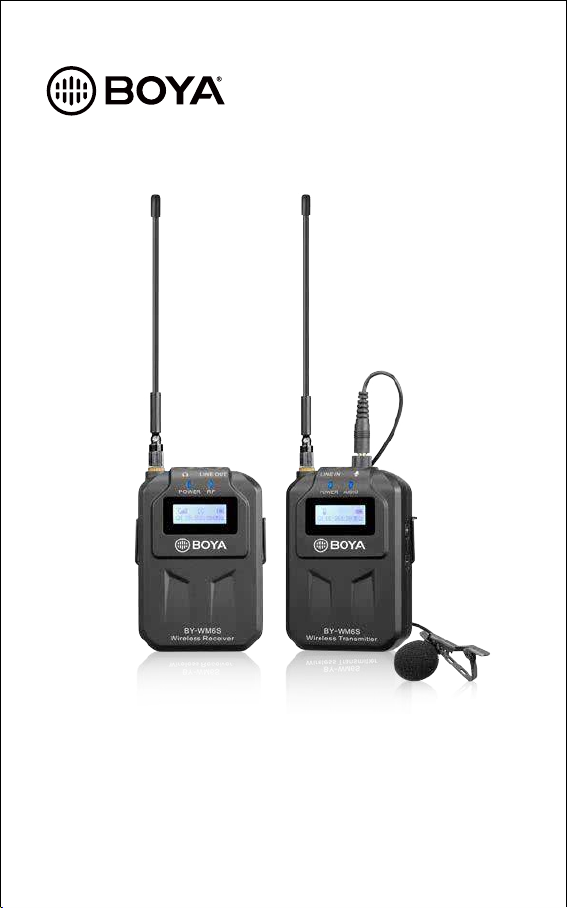
BY-WM6S
Sistem Mikrofon Nirkabel UHF
Panduan
Terima kasih telah memilih BOYA!
BOYA BY-WM6S merupakan sistem mikrofon nirkabel UHF yang cocok
dipakai dengan smartphone, tablet, DSLR, camcorder, perekam suara, dan
lainnya.
BY-WM6S menggunakan baterai yang ada didalam yang dapat diisi ulang
dnegan menggunakan USB Type-C 5V.BY-WM6S berbahan kokoh dengan
antena yang dapat dilepas, sangat mudah digunakan didalam maupun luar
ruangan.
Features
1
• Compatible with smartphone, tablet, DSLR camera, camcorder,
audio recorder
• Deliver clean and broadcast-quality sound for recording
• UHF transmission with 48 channels
• Omnidirectional lavalier microphone included
• Easy-to-read LCD displays
• USB Type-C ports for battery recharging
• Rugged all-metal construction
• Up to 70m (230’)(without obstacle) operation range
• Mute function
• 3.5mm headphone output
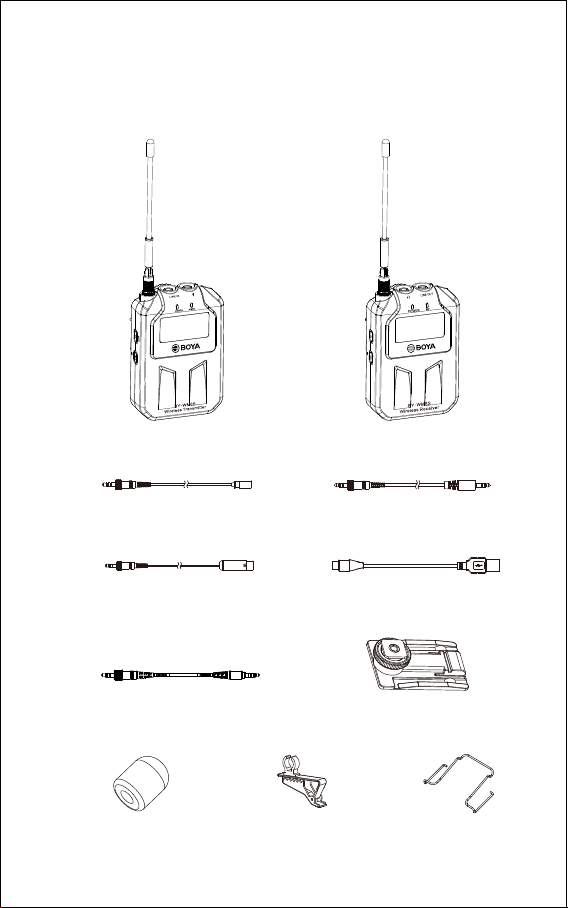
The BY-WM6S consists of one body-pack transmitter (TX6S),
a portable receiver (RX6S), and their accessories as following:
Omni-directional lavalier
microphone
3.5mm TRS to TRS audio output cable
Type-C to USB-A connect cable (x2)
Body-pack transmitters(TX6S) (1) Portable receiver(RX6S) (1)
3.5mm TRS to XLR Male
Output Cable
Microphone clip
Cold-shoe mount adapter3.5mm TRS to TRRS audio output cable
Wind screen Belt clip (x2)
2
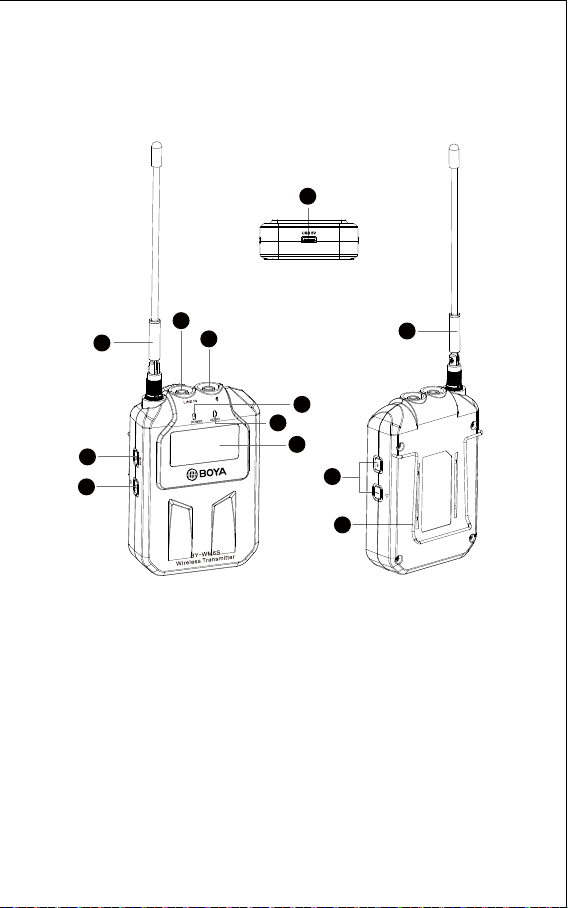
Transmitter
1. Antenna
2. LINE IN
3. Microphone input
4. Power indicator
Connect the supplied lavalier microphone here. Fully insert the
microphone’s 3.5mm TRS plug and make sure it clicks into place,
then lock the plug. To remove, release the locking mechanism,
then pull the plug out.
Back
Bottom
Front
1
1
2
3
4
5
6
9
10
11
7
8
3
5. AUDIO indicator
6. LCD display
7. Power/Mute button
8. SET button
1) Long press the power of the transmitter ON or OFF.
2) Short press to mute
For details, please refer to "LCD display Operation Guide"on page 8
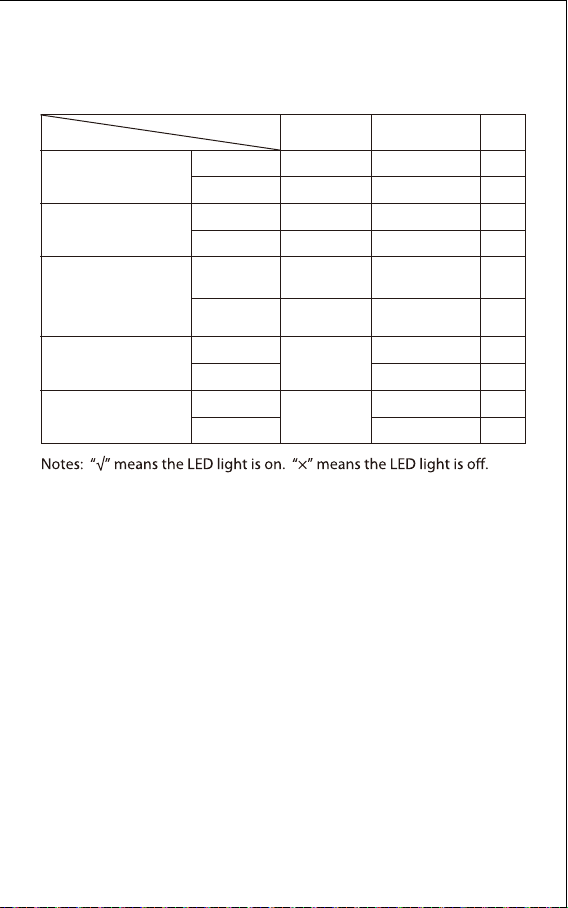
For more details about LED indicator, please refer to as following:
9. + (+ selection)/ – (- selection) buttons
10. Belt clip
11. USB Type-C charging port
Press these buttons to set the transmission channel, light setting.
Channel / Light setting
4
Status LED
The transmitter and the
receiver is connected
The transmitter and the
receiver is disconnected
The transmitter and the
receiver is connected.
And muting function is
on.
The transmitter or the
receiver is in low power
The transmitter or the
receiver is in charging
Transmitter
Receiver
Transmitter
Receiver
Transmitter
Receiver
Transmitter
Receiver
Transmitter
Receiver
√
/
√
/
Flashes blue
/
√
/
√
/
/
√
/
×
/
×
/
√
/
√
√
√
√
√
√
√
Stays red
Flashes red
“POWER” “AUDIO” “RF”
Table of contents
Other Boya Microphone System manuals


