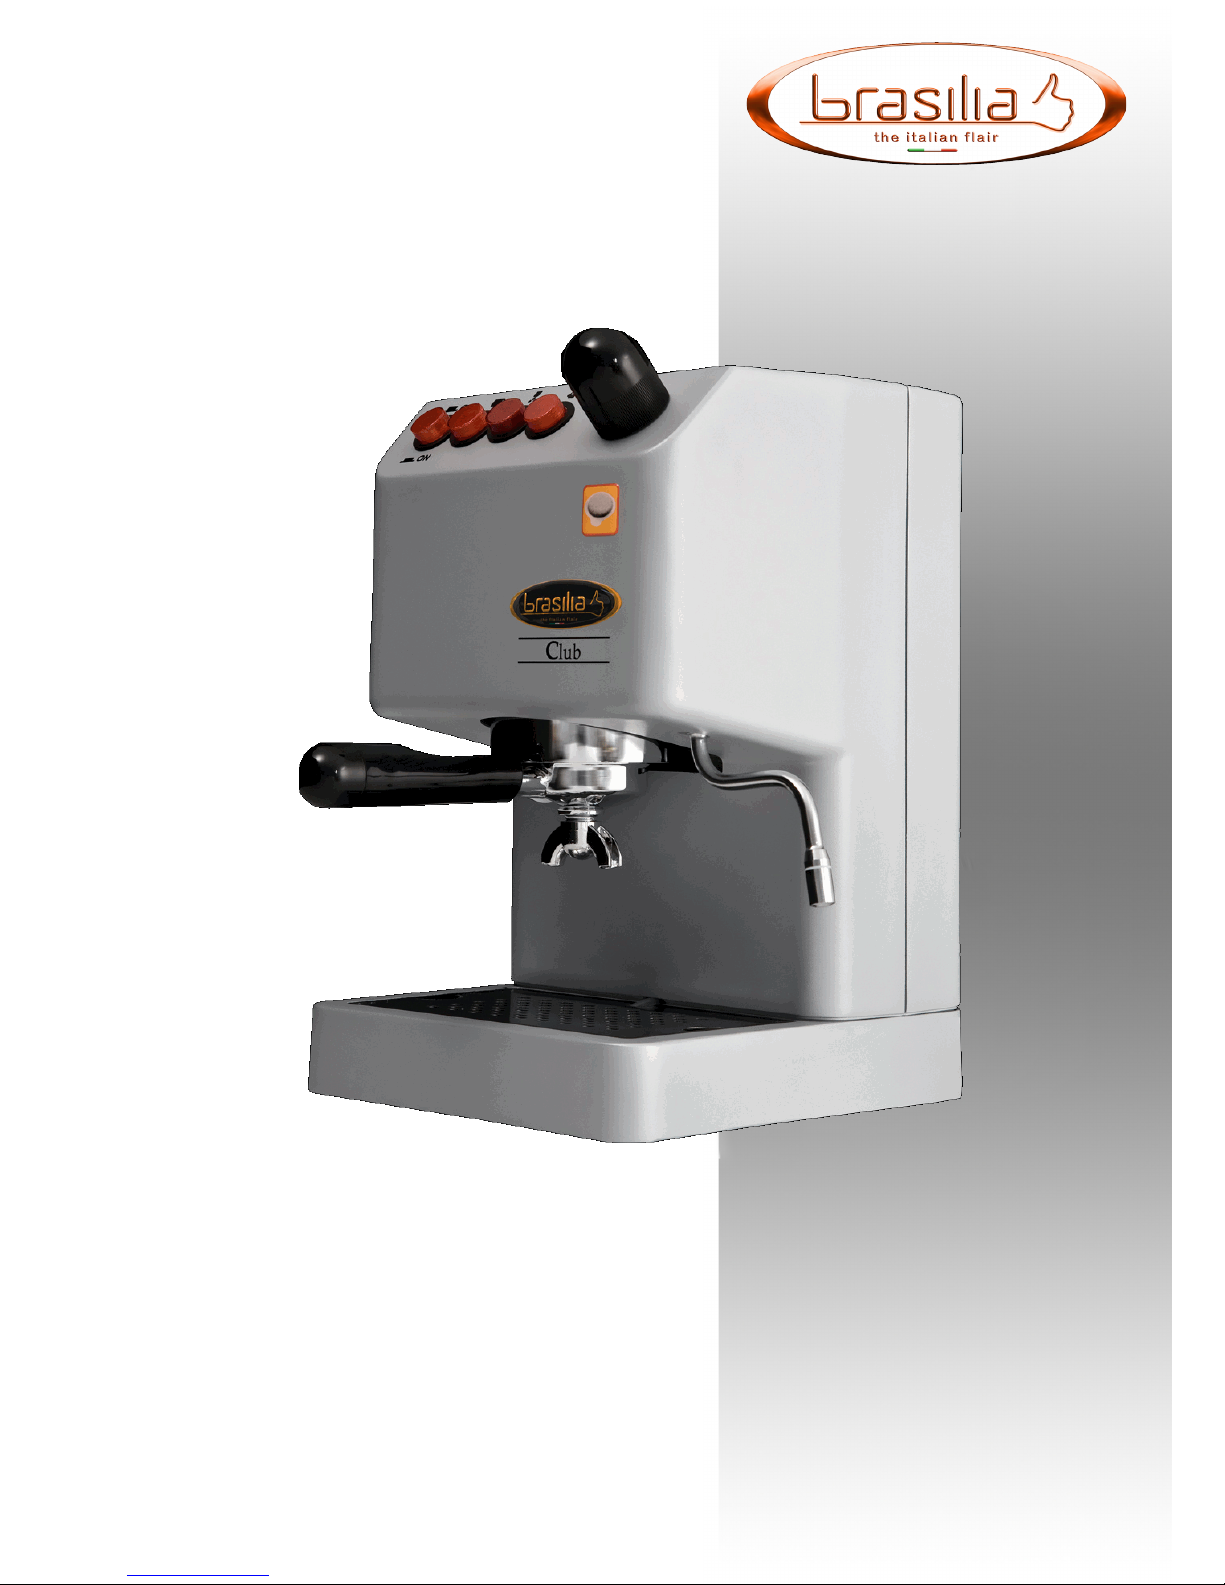
Brasilia CLUB User manual

CLUB
MANUALE DI ISTRUZIONI
INSTRUCTION MANUAL
GEBRAUCHSANLEITUNG
MANUEL D'INSTRUCTIONS
MANUAL DE INSTRUCCIONES
MANUAL DE INSTRUÇOES
GEBRUIKSAANWIJZING
GEBRUIKSAANWIJZING
INSTRUKTIONSHÅNDBOG
ΕΓΧΕΙΡΙΔΙΟ ΟΔΗΓΙΩΝ
BRASILIA S.p.A. STRADA PROVINCIALE BRESSANA-SALICE - 27050 RETORBIDO (PV) ITALY -
TEL. 0383/372011 ric. aut. -FAX SERVER 0383/374450
WWW: www.brasilia.it - E-mail: [email protected]

Club 2
rev.8 - 08/2004
INDICE - INDEX - INHALTSANGABE - INDEX - INDICE -
INHOUD - IINDHOLDSFORTEGNELSE - ΠΕΡΙΕΧΟΜΕΝΑΠΕΡΙΕΧΟΜΕΝΑ
ΠΕΡΙΕΧΟΜΕΝΑΠΕΡΙΕΧΟΜΕΝΑ
ΠΕΡΙΕΧΟΜΕΝΑ
ENGLISH
1. GENERALDATA pag. 3
2. INTRODUCTION: CONSERVATIONOFTHEHANDBOOK pag. 9
3. CONTEMPLATEDUSEANDWARNINGS pag. 9
4. TECHNICALDESCRIPTION pag. 10
5. INSTALLATION-LOCATION -START-UP pag. 10
6. USERINSTRUCTIONS pag. 11
7. MAINTENANCE pag. 12
8. FAULTSANDROUTINEREPAIRS pag. 13
9. SHUT-DOWNAND DISMANTLING pag. 13
10. TECHNICALDATAANDDIAGRAMS pag. 44
ITALIANO
1.DATI GENERALI pag. 3
2.PREMESSA: CONSERVAZIONEDELMANUALE pag. 4
3.USOPREVISTOEAVVERTENZE pag. 4
4.DESCRIZIONETECNICA pag. 5
5.INSTALLAZIONE-POSIZIONAMENTO-MESSAIN FUNZIONE pag. 5
6. ISTRUZIONIPER L'USO pag. 6
7. MANUTENZIONE pag. 7
8. GUASTIE RIPARAZIONIORDINARIE pag. 8
9. MESSAINDISUSOESMANTELLAMENTO pag. 8
10.DATITECNICIESCHEMI pag. 44
DEUTSCH
1.
ALLGEMEINE HINWEISE
S. 3
2.
VORWORT:AUFBEWAHRUNG DER GEBRAUCHSANLEITUNG
S. 14
3.
VERWENDUNG UND WARNUNGEN
S. 14
4.
TECHNISCHE BESCHREIBUNG
S. 15
5.
INSTALLATION -AUFSTELLUNG - INBETRIEBNAHME
S. 15
6.
GEBRAUCHSANWEISUNGEN
S. 16
7.
WARTUNG
S. 17
8.
STÖRUNGEN UND BEHEBUNG DER URSACHEN
S. 18
9.
ENDGÜLTIGEAUSSERBETRIEBSETZUNG
S. 18
10.
TECHNISCHE DATEN UND DIAGRAMME
S. 44
FRANÇAIS
1.DONNEESGENERALES page 3
2.AVANT-PROPOS: CONSERVATION DUMANUEL page 19
3.UTILISATIONPREVUE ETPRECAUTIONS page 19
4.DESCRIPTIONTECHNIQUE page 20
5.INSTALLATION-MISE ENPLACE-MISE ENSERVICE page 20
6.MODED'EMPLOI page 21
7.ENTRETIEN page 22
8. PANNES ET REPARATIONS ORDINAIRES page 23
9. MISE HORS D'USAGE ET DESTRUCTION page 23
10.CARACTERISTIQUESTECHNIQUES ETSCHEMAS page 44
NEDERLANDS
1. ALGEMENEGEGEVENS pag. 3
2. INLEIDING: BEWARINGVANDE GEBRUIKSAANWIJZING pag. 34
3. VOORZIEN GEBRUIKENWAARSCHUWINGEN pag. 34
4. TECHNISCHEBESCHRIJVING pag. 35
5. INSTALLATIE- PLAATSING -IN WERKINGSTELLEN pag. 35
6. GEBRUIKSAANWIJZING pag. 36
7. ONDERHOUD pag. 37
8. DEFECTENENEENVOUDIGEREPARATIES pag. 38
9. HETAPPARAATDEMONTEREN pag. 38
10. TECHNISCHEGEGEVENSENSCHEMA'S pag. 44
ESPAÑOL
1. DATOSGENERALES pag. 3
2.PREMISA:CONSERVACION DELMANUAL pag. 24
3. USOPREVISTOYADVERTENCIAS pag. 24
4.DESCRIPCIONTECNICA pag. 25
5.INSTALACION-COLOCACION-PUESTAENSERVICIO pag. 25
6.INSTRUCCIONESDEEMPLEO pag. 26
7.MANUTENCION pag. 27
8.AVERIASYREPARACIONES pag. 28
9.PUESTAENDESUSOYDESTRUCCION pag. 28
10.CARACTERISTICASTECNICAS YDIAGRAMAS pag. 44
PORTUGUÊS
1. CARACTERISTICAS GERAIS pag. 3
2. PREÂMBULO: USOECONSERVAÇÃO DO MANUAL pag. 29
3. USOPREVISTOE CAUTELAS pag. 29
4.DESCRIÇÃO TECNICA pag. 30
5.
INSTALAÇÃO - POSICIONAMENTO - COLOCAÇAO EM
FUNCIONAMENTO
pag. 30
6.INSTRUÇÕESPARAOUSO pag. 31
7. MANUTENÇÃO pag. 32
8. DESARRANJOSEREPARAÇÕESORDINARIAS pag. 33
9. COLOCAÇÃOFORA DE USOEDEMOLIÇÃO pag. 33
10.CARACTERISTICAS TECNICASE ESQUEMAS pag. 44
DANSK
1. GENERALE DATA side 3
2. PRÆMISSEROMOPBEVARINGAF HÅNDBOGEN side 39
3. FORVENTETBRUGOGADVARSLER side 39
4. TEKNISKBESKRIVELSE side 40
5. INSTALLATION-PLACERING-STARTAF MASKINEN side 40
6. BRUGSANVISNING side 41
7. VEDLIGEHOLDELSE side 42
8. BESKADIGELSEROGNORMALEREPARATIONER side 43
9. SLUKNINGOG DEMONTERING side 43
10. TEKNISKEDATAOGDIAGRAMMER side 44

Club 3
rev.8 - 08/2004
DATI GENERALI-GENERAL DATA- ALLGEMEINE DATEN-DONNEES GENERALES- DATOS
GENERALES-CARACTERISTICAS GERAIS-ALGEMENE GEGEVENS-GENERALE DATA-
ΓΕΝΙΚΑ ΣΤΟΙΧΕΙΑΓΕΝΙΚΑ ΣΤΟΙΧΕΙΑ
ΓΕΝΙΚΑ ΣΤΟΙΧΕΙΑ
COSTRUTTORE
BRASILIA S.p.A.
MANUFACTURER
StradaProvinciale
HERSTELLER
Bressana - Salice
CONSTRUCTEUR
27050 Retorbido (PV) Italia
FABRICANTE
FABRIKANT
Tel.: + 39.383.372011
ΚΑΤΑΣΚΕΥΑΣΤΗΣ
Fax: + 39.383.374450
WWW: www.brasilia.it
E-mail: [email protected]
MODELLO/MODEL/MODELL/MODELE/MODELO
:
CLUB
ANNODI FABBRICAZIONE/YEAROFMANUFACTURE/BAUJAHR
ANNEEDE FABRICATION/AÑO DEFABRICACION/ANO DEFABRICAÇAÕ
2004
BOUWJAHR/
BYGNINGSÅR/ΕΤΟΣ ΚΑΤΑΣΚΕΥΗΣ
RAPPRESENTANTE LOCALE (Apporretimbro)
LOCAL AGENT (Stamp below):
LOKALERVERTRETER (Stempel):
REPRESENTANTLOCAL(Cachet):
REPRESENTANTE LOCAL(Ponerel timbre):
REPRESENTANTE LOCAL(Pôrocarimbo):
LOKALEVERTEGENWOORDIGER (stempel):
LOKALREPRESENTANT(skal stemples):
ΑΝΤΙΠΡΟΣΩΠΟΣ (Θεσατε σϕραγιδα
):
Rev. N°
6
7
8
Data
n.d.
06/2004
08/2004
Pag.
/
Note
n.r.
startup
prosp.rev.

Club 4
rev.8 - 08/2004
PREMESSA: CONSERVAZIONE DEL MANUALE
Il manuale è destinato all’utilizzatore e/o manutentore della macchina.
Questo manuale ha la funzione di fornire informazioni per un uso corretto della macchina ed un’appropriata manutenzione, nonchè di tutelare la
sicurezza dell’operatore.
E’ necessario conservare con cura il presente manuale, poichè il costruttore non risponde di danni arrecati a persone o cose, o subiti
dalla macchina se utilizzata in modo difforme da quanto in esso descritto o nel caso non vengano rispettate le prescrizioni di manu-
tenzione e sicurezza.
Il presente manuale deve essere sempre a disposizione dell’utilizzatore e/o manutentore, il quale deve essere informato sull’uso
corretto della macchina e su eventuali rischi residui. Deve essere conservato in un luogo asciutto e pulito.
Le indicazioni riportate nel presente manuale non sostituiscono le disposizioni di sicurezza ed i dati tecnici per l’istallatione ed il funzio-
namento, applicate direttamente sulla macchina e sugli imballi.
Il presente manuale è da considerarsi parte della macchina e deve essere conservato per futuri riferimenti fino allo smantellamento della stessa.
In caso di smarrimento del manuale o di richiesta di ulteriori informazioni, contattare il rivenditore di zona oppure il costruttore.
Il presente manuale rispecchia lo stato della tecnica al momento attuale e non potrà essere considerato inadeguato solo perchè successivamente
aggiornato in base a nuove esperienze.
Il costruttore si riserva altresì il diritto di modificare il manuale senza l’obbligo di aggiornare le edizioni precedenti, salvo casi eccezionali.
Un uso improprio della macchina o difforme da quanto descritto nel presente manuale preclude ogni condizione di garanzia o
responsabilità del costruttore; l’utilizzo deve essere effettuato da parte di una persona adulta e responsabile.
USO PREVISTO E AVVERTENZE
La macchina per caffè espresso è un apparecchio adatto all’erogazione di vapore/acqua calda per la preparazione professionale di una miscela
di caffè o il prelievo di acqua e/o vapore.
I suoi componenti, in materiali atossici e duraturi, sono facilmente accessibili per un’idonea pulizia e manutenzione.
L’utilizzatore deve essere una persona adulta e non consentire l’uso della macchina a bambini o persone non responsabili.
L’utilizzatore deve attenersi alle norme di sicurezza vigenti nel paese d’installazione, oltre alle regole dettate dal comune buonsenso
e assicurarsi che vengano effettuate correttamente le periodiche operazioni di manutenzione.
L’installatore, l’utilizzatore o il manutentore hanno l’obbligo di segnalare al costruttore eventuali difetti o deterioramenti che possano compromet-
tere l’originale sicurezza dell’impianto.
L’istallatore ha l’obbligo di verificare le corrette condizioni ambientali, in modo che garantiscano la sicurezza e l’igiene degli operatori e degli utenti.
Le responsabilità derivanti dai componenti commerciali montati a bordo della macchina sono delegate ai rispettivi costruttori; le responsabilità del
personale autorizzato all’uso della macchina sono delegate al cliente.
Non esporre la macchina agli agenti atmosferici (sole, pioggia, ecc...)
La sosta prolungata (fermo macchina) a temperatura inferiore a 0° C(zero gradi centigradi) può provocare danneggiamenti o rotture alle tubazioni
o alla caldaia; è consigliabile pertanto il completo svuotamento.
Raccomandazioni per l’uso
Non manomettere i componenti della macchina o tirare il cavo di alimentazione elettrica per scollegare la spina. Nonostante
l’impiego di un pressocavo, tiri anomali sul cavo potrebbero spezzarlo.
Non effettuare la pulizia interna della macchina con la tensione o la spina inserita e comunque non utilizzare getti d’acqua o detergenti.
L’operatore non deve toccare la macchina con mani o piedi umidi o bagnati, nonchè utilizzarla a piedi nudi. Nonostante l’utilizzo di
una messa a terra della macchina, si consiglia l’uso diun impianto salvavita centralizzato per evitare al massimo il rischio di shocks elettrici.
Non toccare con le mani o altre parti del corpo i beccucci del caffè e le lance di acqua calda e vapore, poichè i liquidi o il vapore
erogati sono surriscaldati e possono provocare ustioni. La macchina, in condizioni normali di funzionamento, ha diverse parti surriscal-
date che vanno quindi maneggiate impugnandole solo nei punti previsti.
Evitare di fare funzionare la macchina senz’acqua.
Eventuali occlusioni od otturazioni possono provocare getti imprevisti di liquido o vapore con gravi conseguenze. Mantenere il più possibile
l’acqua pulita usando filtri ed addolcitori. Per macchine non collegate alla rete, in caso di acqua di durezza elevata, utilizzare acqua naturale per
uso alimentare.

Club 5
rev.8 - 08/2004
DESCRIZIONE TECNICA
Caratteristiche
- Caldaia in ottone
- Gruppo erogatore per caffè macinato o per cialda di caffè
- Macchina con serbatoio acqua incorporato
oppure predisposta per l’allacciamento alla rete idrica
- Filtro per uso misto con caffè macinato o cialda di caffè su richiesta
- Erogazione vapore
- Erogazione acqua calda
Principi di funzionamento
La macchina per caffè espresso si compone essenzialmente dei seguenti elementi:
Caldaia
Serve a contenere l’acqua calda e il vapore ed è realizzata in ottone per mantenere inalterate nel tempo le proprie caratteristiche.
Gruppo erogatore
Il gruppo di erogazione è quel componente dove, agganciando il portafiltro (contenente il filtro ed il caffè macinato oppure la cialda di caffè),
all’arrivo dell’acqua calda si realizzano le fasi di infusione ed erogazione delle bevande.
Fonte di calore
Viene fornita normalmente da una resistenza elettrica immersa nell’acqua della caldaia che permette il riscaldamento dell’acqua e la produzione
di vapore.
Elettropompa
Il dispositivo serve a prelevare l’acqua dal serbatoio ed immetterla nella caldaia.
Rubinetto acqua calda - vapore
Permette il prelievo dell’acqua per la preparazione di bevande calde, tè, camomilla e del vapore per montare il latte indispensabile per preparare
cappuccini o per riscaldare acqua, punch e preparare cioccolate.
INSTALLAZIONE - POSIZIONAMENTO - MESSA IN FUNZIONE
Avvertenze per l’installazione
Il costruttore ha ragionevolmente previsto ogni sicurezza possibile onde garantire l’incolumità degli utilizzatori, ma le svariate condizioni di instal-
lazione e/o movimentazione possono creare situazioni incontrollabili o non prevedibili; per cui è necessario valutare sempre eventuali
rischi residui e tenere in considerazione i seguenti suggerimenti:
- Gli elementi di imballo (cartone, cellophane, punti metallici, ecc...) possono tagliare, ferire o divenire pericolosi se non maneggiati con cura
o usati impropriamente; non lasciare alla portata di bambini o persone non responsabili.
- Qualunque anomalia o difetto va tempestivamente segnalato al personale autorizzato e qualificato per effettuare l’installazione/ manuten-
zione.
- E’ obbligatorio il collegamento di messa a terra, nonchè la rispondenza dell’impianto con le normative vigenti nel paese di installazione.
Il costruttore declina ogni responsabilità per incidenti dovuti all’inosservanza della normativa.
- E’ vietato l’uso di prolunghe o collegamenti volanti. L’ambiente di lavoro è forzatamente esposto all’acqua e all’umidità che precludono le
naturali condizioni di isolamento dell’impianto.
- L’installazione della macchina va effettuata esclusivamente da personale autorizzato e qualificato.
- Verificare l’integrità dei componenti e, qualora si verifichino difetti o anomalie, sospendere l’installazione e chiederne la sostituzione.
- Verificare che la tensione di alimentazione (vedi targhetta caratteristiche) coincida con quella della rete di distribuzione prevista nel luogo
di installazione.
- Il cliente deve provvedere ad alimentare la macchina proteggendo la linea con un interruttore di sicurezza (salvavita) adeguato.

Club 6
rev.8 - 08/2004
Fig. 1 Installazione
1- Interruttore generale
2- Interruttore erogazione caffè
3- Pulsante erogazione acqua
4- Pulsante vapore spia resistenza
5- Gruppo erogazione caffè
6- Portafiltro
7- Scarico
8- Griglia
9- Coperchio serbatoio acqua
10- Serbatoio acqua
11- Rubinetto vapore-acqua calda
12- Beccuccio vapore-acqua calda
13- Cavo di alimentazione
Posizionamento e collegamenti
Prima di installare la macchina si consiglia di controllare l’efficenza della rete idrica di alimentazione
(per macchine allacciate a rete) e dei collegamenti elettrici.
Per il corretto allacciamento della macchina è necessario disporre di un interruttore elettrico con fusibili adeguati all’assorbimento della macchina.
Attenzione: il collegamento alla terra (filo giallo/verde) è obbligatorio. Effettuare i collegamenti elettrici, collegando il cavo di alimentazione
(part.13 fig.1) ad una presa di corrente idonea (corrispondente ai dati indicati sulla targa: 220 V o 110 V) dotata di interruttore di sicurezza.
Riempire il serbatoio (part.10 fig.1) d’acqua (si consiglia l’uso di acqua addolcita o naturale per uso alimentare) oppure effettuare l’allacciamento
a rete. Controllare l’efficenza del tubo di scarico generale ed effettuare quindi l’allacciamento con il tubo di scarico della macchina.
Per macchine allacciate a rete, trovare una opportuna collocazione per il depuratore. Collegarlo alla rete ed al raccordo di entrata acqua della
macchina. Collocare un recipiente sotto il tubetto di scarico ed aprire il rubinetto della rete idrica (vedi istruzioni per rigenerazione depuratore). Far
defluire l’acqua per qualche minuto per pulire le resine.
Messa in funzione
Prima di dare tensione alla macchina effettuare il carico della caldaia: aprire il rubinetto (part.11 fig.1), premere il pulsante acqua (part.3) ed
attendere che esca acqua dal beccuccio (part.12). A questo punto la caldaia sarà stata riempita d’acqua.
Chiudere ora il rubinetto (part.11) e premere l’interruttore generale (part.1) per accendere la macchina. Attendere che la spia della resistenza
(part.4) si accenda e si spenga un paio di volte. La macchina ora ha raggiunto la temperatura ottimale ed è pronta per l’uso.
Si consiglia di mantenere la macchina sempre accesa nel caso in cui se ne faccia uso quotidianamente.
Importante: per macchine non allacciate alla rete idrica, controllare che il serbatoio (part.10) sia sempre pieno d’acqua.
Dopo la messa in funzione, inserire nel portafiltro (part.6 fig.1) uno dei filtri (per 1 o 2 tazze).
ISTRUZIONI PER L’USO
Queste che seguono sono da considerarsi linee generali di comportamento. E’ quindi indispensabile seguire le istruzioni e le normative del
costruttore per quanto concerne la sicurezza.
La gestione della macchina è molto semplice e le verifiche che l’operatore deve attuare per ottenere un buon caffè sono:
- utilizzare acqua fresca di rete opportunamente depurata oppure acqua naturale per uso alimentare
- temperatura dell’acqua in caldaia compresa tra i 100°C e i 130°C
- durata dell’erogazione 20-30 secondi
- dose di caffè macinato compresa tra i 6 e i 7 gr.
- pulizia costante del macinadosatore
- controllo dell’usura della macine del macinadosatore
- Temperatura erogazione caffè: 85/92°C
La temperatura è condizionata dal tipo di miscela utilizzato. Può essere rilevata con un termometro di precisione durante l’erogazione.
Comefarel’espresso
Togliete il portafiltro dal gruppo e gettate il fondo battendo il bordo del portafiltro sulla barra dell’apposito cassetto.
Non battete il portafiltro contro una superficie non protetta; la tenuta del portafiltro potrebbe danneggiarsi. Un colpo deciso dovrebbe essere
sufficiente. La piccola quantità di polvere che resta non influenzerà negativamente il gusto del caffè.
Riempite il portafiltro con caffè macinato finemente, posizionando il portafiltro nell’apposita sede alla base del macinadosatore e tirando la levetta
una volta per un solo caffè e due volte per la doppia dose. Attenzione: ricordatevi sempre di tirare la leva del macinadosatore fino in fondo; poi
lasciatela tornare da sè in posizione di riposo.
1
2
3
4
5
6
7
8
9
1
0
1
1
1
2
1
3

Club 7
rev.8 - 08/2004
Una volta riempito il portafiltro, pressate il caffè macinato con l’apposito pressino, spingendo all’insù il portafiltro. Pulite con il palmo della mano il
bordo del portafiltro per eliminare l’eccesso di polvere di caffè. In questo modo sarete certi che la tenuta fra il portafiltro e la macchina sarà
perfetta.
Nel caso in cui si dispone di un filtro ad uso misto, è possibile inserirVi una cialda di caffè anzichè il caffè macinato. Nel caso invece in cui si
dispone di un modello a cialda, inserire una cialda di caffè nel filtro.
Agganciate il portafiltro nel gruppo della macchina, ruotando fino a che sia fissato. Non stringete troppo, altrimenti sarà difficile da togliere dopo
l’erogazione.Dopo aver agganciato correttamente il portafiltro, ponete una tazza, precedentemente scaldata, sotto il beccuccio. Nel caso di
portafiltro doppio, usate due tazze.
Azionate il gruppo premendo il pulsante erogazione caffé (part.2 fig.1).
Non appena raggiunta la quantità di caffè desiderata, ripremere l’interruttore. L’erogazione è terminata, togliete la tazza e servite.
Erogazione acqua calda e vapore
Per erogare acqua calda dal relativo beccuccio (part.12 fig.1), aprire il rubinetto (part.11). Lasciare aperto il rubinetto (part.11) e premere il
pulsante erogazione acqua calda (part.3). Dopo aver ottenuto la quantità d’acqua desiderata, rilasciare il pulsante e chiudere il rubinetto.
Per erogare vapore, aprire il rubinetto (part. 11 ) e lasciarlo aperto fino all’inizio dell’erogazione di vapore (inizialmente uscirà acqua calda ).
Chiudere il rubinetto, premere il pulsante vapore (part. 4) per 15 secondi in modo da aumentare la temperatura in caldaia. Immergere il beccuccio
nel liquido da scaldare o da emulsionare. Aprire il rubinetto di nuovo e, mantenendo premuto il pulsante (part. 4) prelevare la quantità di vapore
desiderata.(La disponibilità di vapore è sufficiente per la preparazione di 2 cappuccini).
Se la macchina è dotata di dispositivo “Turbosteam”, la quantità di vapore disponibile è superiore.
Terminata la richiesta di vapore, chiudete il rubinetto (part.11) e premete il pulsante (part.3). In tal modo viene ricaricata la caldaia, sino all’arresto
del funzionamento della pompa.
Come fare il cappuccino
Per fare un cappuccino occorre montare del latte fresco fino ad ottenere una schiuma che verrà
versata sopra l’espresso.
Per emulsionare il latte occorre aprire il rubinetto (part. 11) e lasciarlo aperto fino a quando inizia ad
erogare vapore ( inizialmente uscirà acqua calda). Chiudere il rubinetto e premere il pulsante vapore
(part. 4) per 15 secondi in modo da aumentare la temperatura in caldaia.
Usate un bricco per scaldare, contenente almeno tre pollici di latte. Immergere la lancia del vapore nel
bricco contenente il latte da emulsionare. Aprire nuovamente il rubinetto e tenere il bricco inclinato
con la lancia posizionata come nella figura (non al centro e non a contatto con le pareti del bricco).
Durante il riscaldamento del latte controllare che il beccuccio diffusore di vapore sia sempre immerso
nel latte fino al raggiungimento della giusta temperatura e del grado di emulsione desiderata. Quindi
richiudere il rubinetto , togliere il bricco dalla lancia e versare il latte emulsionato sul caffè .( La dispo-
nibilità di vapore è sufficiente per la preparazione di due cappuccini). Detergere infine la lancia con
un panno umido in modo da rrimuovere tutti i residui di latte per evitare che questo, seccando, diventi
difficile da rimuovere.
Attenzione: la lancia vapore è molto calda e non bisogna toccarla fin quando non si sarà
raffreddata.
Informate il cliente appena possibile del fatto che la bevanda è molto calda. Tenete da parte il latte
montato per il prossimo cappuccino.
MANUTENZIONE
Operazioni di pulizia giornaliera
Da effettuare preferibilmente la sera:
- Pulire doccetta, guarnizione sottocoppa e guide portafiltro dei gruppi erogatori con un pannospugna.
- Sciacquare filtri e portafiltri in acqua calda con l’aggiunta di detergente specifico, per sciogliere i depositi grassi del caffè.
- Lavare la vaschetta di scarico e la griglia poggiatazze (part.8 fig.1) con dell’acqua.
- Pulire accuratamente la lancia del vapore usata per riscaldare bevande subito dopo l’uso, onde evitare il formarsi di incrostazioni che possono
otturare i fori del diffusore ed evitare inoltre che bevande di diversa natura riscaldate in precedenza possano alterare il sapore delle bevande in
riscaldamento.
Operazioni di pulizia settimanali
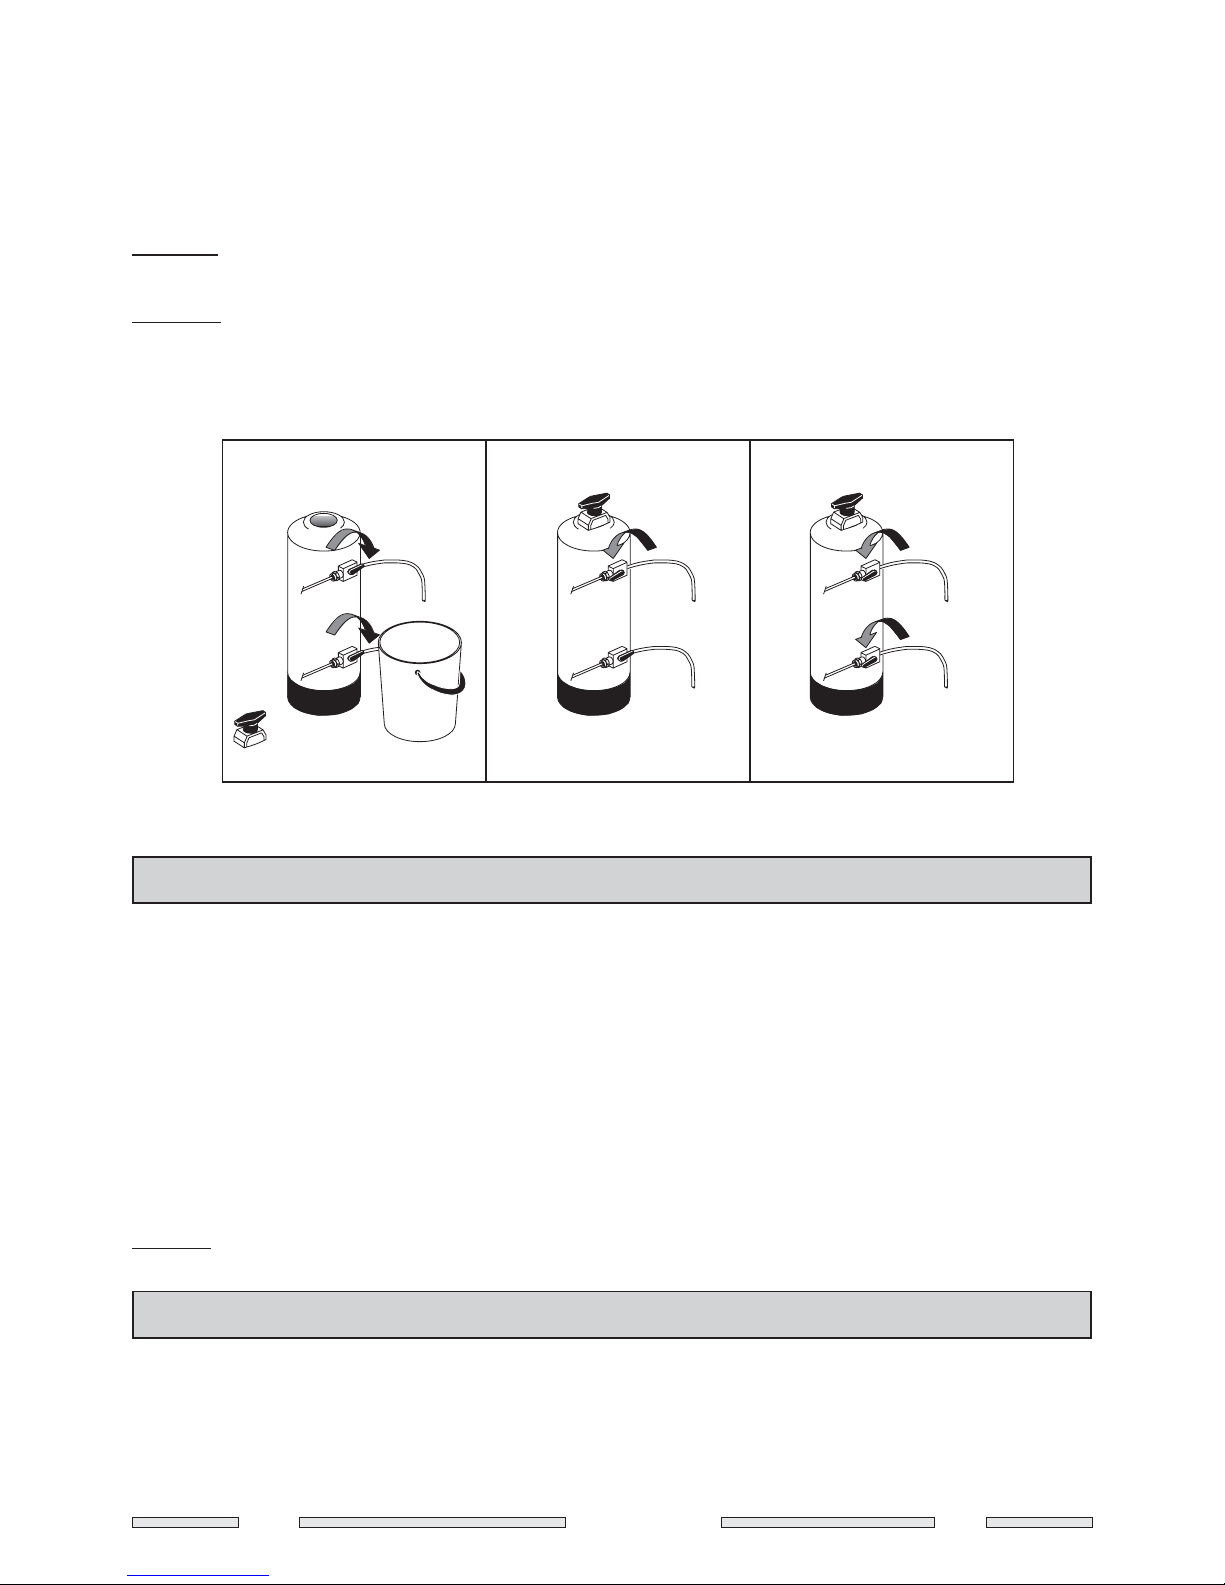
- Pulizia serbatoio: riempire il serbatoio (part.10 fig.1) con dell’acqua e versarvi 3 o 4 cucchiaini di acido citrico o di aceto; lasciare questa miscela
nel serbatoio finchè esso sarà ben pulito. Svuotare poi il serbatoio facendo uscire parte dell’acqua dalla coppa porta-filtro (part.6) e parte dal
beccuccio acqua calda-vapore (part.12). Ripetere l’operazione di lavaggio, rimpendo il serbatoio di sola acqua.
Attenzione: è opportuno cambiare spesso l’acqua della caldaia nelle macchine con caldaia di piccola capacità.
- Pulizia carrozzeria: usare un panno umido (non abrasivo). Non usare assolutamente alcool o solventi sulle parti scritte o verniciate.

Club 8
rev.8 - 08/2004
Istruzioni per la rigenerazione del depuratore di tipo manuale
Per effettuare la rigenerazione dell’addolcitore è necessario attenersi alle seguenti istruzioni:
1) Collocare un recipiente avente capacità di almeno 2 litri sotto al tubetto E. Spostare le levette C e D da sinistra verso destra (fig.2).
2) Togliere il coperchio svitando il pomolo G e mettere il sale (normale sale da cucina) nel depuratore (fig. 2) nella quantità di 1 kg. per l’addolcitore
da 8 litri e 2 kg. per l’addolcitore da 12 litri. Rimettere quindi il coperchio e spostare la levetta C del rubinetto da destra verso sinistra (fig.3) per
far defluire l’acqua salata attraverso il tubetto F. Quando l’acqua sarà dolce, riportare la levetta D da destra verso sinistra. (fig.4).
Importante:
La rigenerazione deve essere effettuata ogni 15 giorni nel caso di un consumo giornaliero di caffè che oscilli fra 1 e 2 kg. Se il consumo supera
tale quantità, la rigenerazione dovrà essere effettuata ogni 7 giorni.
Attenzione:
L’operazione di rigenerazione dell’addolcitore è importantissima. La mancata rigenerazione delle resine dell’addolcitore provoca come conse-
guenza la formazione di depositi calcarei nella caldaia, nelle elettrovalvole e nel circuito idraulico. Questi depositi incidono negativamente sul
rendimento e l’affidabilità della macchina fino a provocare danni anche gravi. Di conseguenza, si rende necessario l’intervento del servizio
assistenza per le operazioni di pulizia della caldaia. Questo tipo di intervento non è coperto da garanzia e quindi i relativi costi sono a carico del
possessore della macchina.
GUASTI E RIPARAZIONI ORDINARIE
Riconoscere i problemi:
- Accertatevi sempre che il macinadosatore abbia nel suo contenitore del caffè macinato sufficiente per almeno una dose.
- Se il caffè scende troppo lentamente, la macinatura è probabilmente troppo fine. Viceversa, se il caffè scende troppo velocemente, la macinatura
è troppo grossa.
- Tenete a mente che il processo di funzionamento della macchina forza l’acqua a grande pressione sul caffè. Se il contatto fra l’acqua e la
polvere di caffè dura più di 20/30 secondi, il gusto del caffè sarà sgradevole ed amaro. Questo effetto si chiama sovra-estrazione.
- Riscaldate sempre la tazza risciacquandola con acqua calda. Se la tazza è fredda, il brusco cambiamento di temperatura dell’espresso ne
modificherà il gusto.
- Non caricate mai il portafiltro senza effettuare subito l’erogazione; la polvere di caffè “brucerebbe” nel gruppo e l’espresso ottenuto risulterebbe
molto amaro.
Le operazioni di manutenzione devono essere effettuate da personale specializzato e autorizzato dal costruttore.
Non effettuare riparazioni di fortuna o precarie, nè tantomeno utilizzare ricambi non originali.
Attenzione: TOGLIERE SEMPRE LA CORRENTE per effettuare controlli o operazioni di manutenzione.
MESSA IN DISUSO E SMANTELLAMENTO
La messa in disuso della macchina va effettuata da personale autorizzato. A questo scopo, è necessario eliminare la pressione dal circuito
idraulico, scollegare il cavo elettrico dalla rete di alimentazione e smaltire le sostanze potenzialmente nocive all’ambiente. Riporre la macchina in
luogo adeguato, fuori dalla portata di bambini o persone non responsabili.
Per lo smantellamento come rifiuto, ritornare la macchina al fornitore oppure consegnarla ad un centro autorizzato di raccolta rifiuti.
Non disperdere nell’ambiente.
Fig. 2 Fig. 4
Fig. 3
C
D
E
G
C
D
E
F
C
D
E
F

Club 9
rev.8 - 08/2004
INTRODUCTION: CONSERVATION OF THE HANDBOOK
The manual is intended for the machine’s user and/or maintenance technician.
The object of this manual is to provide information for the correct use of the machine and proper maintenance, as well as to safeguard the safety
of the operator.
This manual must be carefully retained, since the manufacturer accepts no responsibility for damage to people or things, or suffered
by the machine if it is used in other ways than that described therein or if the maintenance and safety prescriptions are not complied
with.
This manual must always be available to the user and/or maintenance technician, who must be informed of the correct use of the
machine and of possible hidden risks. It must be kept in a dry, clean place.
The information given in this manual does not replace the safety instructions and technical data for installation and operating directly
affixed to the machine and packaging.
This manual is to be considered as part of the machine and must be kept for future reference until same is dismantled.
Should you lose it or require further information, contact your area agent or the manufacturer.
This manual reflects the state of the art at the current time and cannot be considered inadequate merely because it is updated later on the basis
of new developments.
The manufacturer also reserves the right to modify the manual without the duty of updating earlier issues, except in exceptional cases.
If the machine is used incorrectly or in ways other than described in this manual it will render any guarantee or manufacturer’s
responsibility condition null and void; it should only be used by a responsible adult.
CONTEMPLATED USE AND WARNINGS
The espresso coffee machine is an appliance for delivering steam/hot water for the professional preparation of coffee or for obtaining water
and/or steam.
Its long-lasting, non-toxic components are easily accessible for proper cleaning and maintenance.
The user must be an adult. The machine must not be used by children or unsuitable people.
The user must comply with the safety regulations in force in the country of installation, as well as with the rules dictated by common
sense, and ensure that routine maintenance is carried out regularly and correctly.
The installer, the user and the maintenance technician must inform the manufacturer of possible faults or wear which could affect the system’s
original safety.
The installer must check that the environmental conditions are suitable, so as to guarantee safety and hygiene for the operators and users.
The various manufacturers are responsible for the commercial components fitted to the machine; the customer is responsible for the people
authorized to use the machine.
Do not expose the machine to the weather (sun, rain, etc.).
Long machine stoppages at temperatures below 0 °C (zero degrees celsius) can cause damage or breakage to the piping or boiler; thus total
emptying is recommended.
Safetyprecautions
Do not tamper with the machine’s components or pull on the electric power cord to unplug it. Although a cable stay is used,
unexpected tugs on the cord could break it.
Never clean the inside of the machine with the power on or with the plug connected and do not use detergents or jets of water in any
case.
The operator must not touch the machine with damp or wet hands or feet, or use it with bare feet. Although the machine is earthed,
we recommend the use of a centralized life-saving system to prevent the risk of electric shocks as much as possible.
Do not touch the coffee spouts nor the water and steam taps with the hands or other parts of the body since the liquids or steam delivered
are very hot and could cause burns. Under normal operating conditions the machine has several very hot parts which should therefore only
be handled where indicated.
Do not operate the machine without water. If the machine is not fitted with an automatic filling device, check using the level gauge and refill
the boiler.
Possible obstructions or blocks could cause unexpected jets of liquid or steam, with serious consequences. Keep the water as clean
as possible using filters and softeners. For machines not connected to the mains, in the case of hard water, pure drinking water should be used.

Club 10
rev.8 - 08/2004
TECHNICAL DESCRIPTION
Characteristics
- Brass boiler
- Delivery group for ground coffee or for coffee pods
- Filter for mixed use, with ground coffee or coffee pods
- Machine with incorporated water reservoir
or fitted for connection to the water mains
- Steam delivery
- Hot water delivery
OperatingPrinciples
An espresso coffee machine is basically made up of the following elements:
Boiler
Is used to contain the hot water and steam and is made of brass so that its properties do not deteriorate over the years.
Brewing group
The brewing group is the component which, when attached to the filter holder (containing the filter and the ground coffee or the coffee pod),
brews and delivers the beverages when supplied with hot water.
Heat source
This is normally provided by an electric heating element immersed in the boiler which heats the water and provide the steam.
Electric pump
This device is used for transferring water from the reservoir to the boiler.
Steam and water tap
It allows steam to be delivered to give the indispensable “froth” to the milk used for preparing cappuccino, for heating water and punches and
for preparing chocolate drinks, and water to be delivered for preparing hot drinks, tea and tisanes.
INSTALLATION - LOCATION - START-UP
Precautionsfor installation
The manufacturer has obviously taken every possible precaution to guarantee user safety, but the different installation and/or transport conditions
could give rise to uncontrollable or unpredictable conditions; so it is always necessary to assess possible hidden hazards and to consider
the following suggestions:
- The packing elements (cardboard, cellophane, metal staples, etc.) can cut, wound or cause accidents if not handled carefully or if used
incorrectly; do not leave them accessible to children or unsuitable people.
- Any fault or defect should be promptly notified to the personnel who are qualified and authorized to carry out installation and maintenance.
- An earthing connection is mandatory, as is the system’s conformity with the regulations in force in the country of installation. The manufacturer
accepts no responsibility for accidents due to non-compliance with the regulations.
- The use of extensions or flying connections is prohibited. The working environment is heavily exposed to water and damp which
prevent the natural conditions for insulating the system.
- The machine must only be installed by authorized, qualified personnel.
- Check the condition of the components and, should defects or faults arise, stop the installation and ask for their replacement.
- Ensure that the power supply voltage (see rating plate) is the same as that of the mains supply network to be used in the place of
installation.
- The customer must provide for the machine’s power supply, protecting the line with a suitable safety cut-out (life-saver).

Club 11
rev.8 - 08/2004
Fig. 1 Installation
1 - Main switch
2 - Coffee delivery switch
3 - Water delivery push-button
4 - Steam push-button/heating element indicator light
5. Coffee delivery group
6 - Filter holder
7 - Drain
8 - Grid
9 - Water tank cover
10 - Water tank
11 - Steam-hot water tap
12 - Steam hot water spout
13 - Electric power supply cord
Locationand connections
Before installing the machine it is advisable to check the efficiency of the water mains (for machines connected to thewater mains) and of the
electrical connections (n° 1 fig. 1).
An electric cut-out with fuses rated for the machine’s electrical input is needed for the machine to be properly connected. Attention: the earth
connection (yellow/green wire) is mandatory. Make the electrical connections, connecting the power supply cord (n°13 fig.1) to a suitable power
socket (220 V or 110 V) fitted with a safety switch.
Fill the tank (n°10 fig.1) with water, prefereably softened (the use of pure drinking water is recommended for machines not connected to the
mains) or perform the connection to the water mains. Finally, the efficiency of the main drain pipe must be checked before it is connected to the
machine’s drain pipe.
For machines connected to the mains, find a suitable position for the water softener. Connect the softener to the water mains tapand to the
machine’s water inlet. Place a recipient under the water softener’s discharging pipe (see regeneration instructions). Open tap and run the water
through for a few minutes to clean the softener.
Start-up
Before starting the machine, perform the boiler filling: open the tap (n°11 fig.1), press the water push-button (n°3) and wait for water to
emerge from the spout (n°12). At this point the boiler will have been filled with water. Now close the tap and press the main switch (n°1 fig.1).
Wait for the heating element indicator light (n°4) to switch on and off again a couple of times. The machine has now reached the optimal tempe-
rature and is ready for use. It is recommended to keep the machine always switched on in cases where it is in daily use.
Attention: for machines not connected to the mains, check that the tank (n° 10) is always full of water.
After start up put one of the filters (for 1 or 2 cups) into the filter-holder (n°6).
USER INSTRUCTIONS
The following should be considered general lines of operating. It is thus essential to follow the manufacturer’s instructions and regulations
as regards safety.
Operating the machine is very simple and the checks that the operator must make to obtain good coffee are:
- use suitably softened fresh mains water or pure drinking water
- boiler water temperature between 100°C and 130°C inclusive
- delivery time 20-30 seconds
- ground coffee dose between 6 and 7 g. inclusive
- constant cleaning of the coffee dosing grinder
- checking the wear of the dosing grinder’s grindstones
- Coffee delivery temperature: 85/92°C
The temperature depends on the type of blend used; it can be checked with a precision thermometer during delivery.
Howto makeespresso coffee
Remove the filter holder from the group and dispose of the grounds by hitting the edge of the filter holder against the bar in the apposite drawer.
Do not hit the filter holder against an unprotected surface; the filter holder’s seal could be damaged. A smart blow should be enough. The small
quantity of powder remaining will not have a negative effect on the taste of the coffee.
1
2
3
4
5
6
7
8
9
1
0
1
1
1
2
1
3

Club 12
rev.8 - 08/2004
Fill the filter holder with finely ground coffee, placing the filter holder in the housing provided at the bottom of the grinder-doser and pulling the
lever once for a single coffee and twice for a double dose.
Attention: always remember to pull the lever to its full extent; then let it return to its rest position on its own.
When the filter holder is filled, press down the ground coffee with the special tamp, pushing the filter holder upwards. Clean the edge of the filter
holder with the palm of the hand to get rid of excess coffee powder. This will ensure that the seal between the filter holder and the machine will
be perfect.
If a filter for mixed use is being utilized, you can put a coffee pod instead of ground coffee in it.
If a model for coffee pods is being used, place a coffee pod in the filter.
Fit filter holder to the machine group, fixing it and turning it until it is fully in. Do not tighten too much, otherwise it will be difficult to remove after
delivery.
After having fitted the filter holder properly put a previously heated cup under the spout. Two cups are required if a double filter holder is used.
Operate the group by pressing the coffee delivery switch (n°2). As soon as the required amount of coffee is being obtained, press the same
switch again to stop delivery. Remove the cup and serve it.
Delivery of hot water and steam
To deliver hot water from the spout (n°12 fig.1), open the tap (n° 11) and press the hot water delivery push-button (n°3). When the required
amount of hot water has been obtained, release the push-button and shut the tap.
To deliver steam from the relative spout (n° 12), open the tap (n°11). Leave the tap open until steam starts to emerge (hot water will come out
at first). Shut the tap and press the steam delivery push-button (n°4) for 15 seconds to increase the temperature in the boiler. Immerse the spout
in the liquid to be heated or emulsified. Open the tap and, keeping the push-button (n°4) pressed, run off the required amount of steam. There is
enough steam available for preparing 2 cappuccinos.
If the machine is fitted with the “Turbo-steam” device, there is more steam available.
When the steam is no longer required, shut the tap (n°11) and press the push-button (n° 3). This will start loading the boiler until the pump cuts
out.
MAINTENANCE
Daily cleaning operations
Preferably done in the evening:
- Clean the delivery groups’ sprays, underpan seals and filter holder guides with a sponge cloth.
- Rinse the filters and filter holders in hot water with the addition of a specific detergent, to dissolve the fatty coffee deposits.
- Rinse the tray and the cup support grid (n°8 fig.1) in hot water
- Carefully clean the steam pipes used for heating beverages immediately after use, so as to avoid the formation of deposits which could block
the delivery nozzles and also to prevent different types of beverages heated previously from contaminating the taste of the beverage being
heated.
Weekly cleaning operations
- Cleaning the tank: fill the tank(n°10 fig.1) with water and pour 3 or 4 teaspoons of citric acid or vinegar; leave this mixture in the tank until it is
thoroughly clean. Then empty the tank by draining some of the water from the filterholder pan (n°6) and some through the hot water spout (n°
2). Repeat this operation filling the tank only with water.
Attention: For machines with a small capacity boiler it is recommended to change the water frequently.
- Outer case cleaning: use a damp cloth (not abrasive). Never under any circumstances use alcohol or solvents on the written or painted parts.
How to make cappuccino
For making cappuccino, fresh milk must be “frothed” to give a foam which will be poured over the
espresso coffee.
To frothen the milk, first open the steam tap (n. 11) and let it switched on until steam comes out (hot
water will come out at first). Close the tap and keep steam button (n.4) for 15 seconds pressed, so
to increase the boiler temperature.
Use a jug containing at least three inches of milk. Approach the jug to the steam pipe and immerse
the pipe in the milk, as shown in the picture: pay attention to keep the jug inclined (the pipe should not
be in the centre or touch the jug). Open steam tap again and move the jug in a circular fashion until
the milk starts to froth: control that the steam pipe is always immersed. When the milk has been
frothed, quickly close the steam tap. Remove the jug from the pipe and pour the frothed milk over the
espresso coffee.( There is enough steam available for preparing 2 cappuccinos).
Clean the milk from the pipe as soon as possible to prevent it from drying and becoming difficult to
remove.
N.B.: the steam pipe is very hot and should not be touched until it has cooled.
Inform the customer as soon as possible that the drink is very hot. Keep extra frothed milk for the
next cappuccino.

Club 13
rev.8 - 08/2004
Instructionsfor regeneratingthe manual softener
The instructions given below should be followed to regenerate the softener:
1) Put a container with a capacity of at least 2 litres under pipe E. Move levers C and D from left to right (fig.2)
2) Remove the lid by unscrewing knob G and put salt (normal kitchen salt) into the softener (fig. 2): 1 kg. for the 8-litre softener and 2 kg. for the
12-litre softener. Then refit lid and move tap lever C from right to left (fig. 3) so that the salty water can flow through pipe F. When the water
is pure, reset lever D from right to left (fig. 4).
Important:
Regeneration must be done every 15 days for a daily coffee consumption of betwee 1 and 2 kg. If consumption is greater than this, regeneration
should be done every 7 days.
Attention:
It is very important to regenerate the softener. Failure to regenerate the resins in the softener causes calcification in the boiler, the solenoid
valves and the hydraulic circuit. These deposits have a negative influence on the machine’s performance and reliability and can even cause
serious damage, which will lead to the intervention of the assistance service for cleaning the boiler. This type of intervention is not covered by
guarantee and therefore the relative costs are the responsibility of the owner of the machine.
FAULTS AND ROUTINE REPAIRS
Identifying problems:
- Always ensure that there is enough ground coffee for at least one dose in the grinder-doser’s reservoir.
- In the coffee drops too slowly then grinding is probably too fine. Vice-versa, if it drops too fast, the grinding is too coarse.
- Remember that the machine’s operating process forces the water over the coffee at high pressure. If contact between the water and the
ground coffee lasts more than 20/30 seconds, the coffee will taste unpleasant and bitter. This effect is called over-extraction.
- Always heat the cup by rinsing it in hot water. If the cup is cold, the abrupt temperature change of the espresso coffee will change its taste.
- Never load the filter holder without making an immediate delivery; the ground coffee would “burn” in the group and the espresso obtained would
be very bitter.
The maintenance operations must be carried out by specialized personnel authorized by the manufacturer.
Do not perform makeshift or ad-hoc repairs, and never use non-original spare parts.
Attention: ALWAYS UNPLUG THE ELECTRICITY when carrying out maintenance checks or operations.
SHUT-DOWN AND DISMANTLING
Shutting the machine down should be done by authorized personnel. For this purpose one must eliminate the pressure from the hydraulic
circuit, disconnect the electric flex from the mains power supply network and dispose of substances which are potentially
harmful to the environment. Place the machine in a suitable place, out of the reach of children or unsuitable people.
For dismantling the machine as refuse, return it to the supplier or take it to an authorized refuse collection centre.
Do not dispose of it in the environment.
Fig. 2 Fig. 4
Fig. 3
C
D
E
G
C
D
E
F
C
D
E
F

Club 14
rev.8 - 08/2004
VORWORT: AUFBEWAHRUNG DER GEBRAUCHSANLEITUNG
Die Gebrauchsanleitung ist für den Benutzer und/oder das Wartungspersonal der Maschine bestimmt.
Sie enthält Informationen für die korrekte Verwendung der Maschine , für ihre fachgerechte Wartung und den Schutz der Sicherheit der
Bedienungsperson.
Die Gebrauchsanleitung sorgfältig aufbewahren,da der Hersteller nicht für Schäden an Personen oder Dingen haftet, oder für Schäden
an der Maschine durch unsachgemäßen Gebrauch oder falls die Wartungs-und Sicherheitsvorschriften nicht beachtet werden.
Die Gebrauchsanleitung muß dem Benutzer und/oder dem Wartungspersonal immer zur Verfügung stehen. Das Wartungspersonal
muß über die korrekte Verwendung der Maschine und über eventuell bestehende Risiken infomiert werden. Die Gebrauchsanleitung an einem
trockenen und sauberen Ort aufbewahren.
Die in der Gebrauchsanleitung enthaltenen Angaben sind kein Ersatz der Sicherheitsvorschriften und der direkt an der Maschine und
an der Verpackung angebrachten technischen Daten für die Installation und den Betrieb.
Die Gebrauchsanleitung ist als Teil der Maschine zu betrachten und muß ,solange die Maschine verwendet wird, aufbewahrt werden, um spätere
Konsultationen zu ermöglichen.
Falls die Gebrauchsanleitung verloren geht oder zusätzliche Informationen benötigt werden, wenden Sie sich bitte an Ihren Händler
oder direkt an den Hersteller.
Die vorliegende Gebrauchsanleitung entspricht dem gegenwärtigen Stand der Technik und verliert ihre Gültigkeit nicht, falls neue Erkenntnisse
Änderungen des Inhalts erforderlich machen.
Der Hersteller behält sich überdies das Rechtvor, die Gebrauchsanleitung zu ändern, ohne, von besonderen Fällenabgesehen, die vorhergehenden
Auflagen auf den neuesten Stand zu bringen.
Die unsachgemäße oder nicht den Angaben der Gebrauchsanleitung entsprechende Verwendung bewirkt den Verlust der Garantie
und schließt jede Haftung des Herstellers aus. Die Maschine darf nur von Erwachsenen und verantwortungsbewußten Personen bedient werden.
VERWENDUNG UND WARNUNGEN
Die Espressokaffeemaschine ist ein Gerät, das für die Abgabe von Dampf/heißem Wasser für die professionelle Zubereitung von Kaffee oder
für die Entnahme von Wasser und/oder Dampf eingerichtet ist.
Ihre Bestandteile aus ungiftigen und haltbaren Materialien sind leicht zugänglich und können daher problemlos vorschriftsmäßig gereinigt und
gewartet werden.
Die Maschine darf nur von erwachsenen Personen bedient werden, die Kindern oder nicht verantwortungsbewußten Personen
die Verwendung der Maschine nicht erlauben dürfen.
Abgesehen von den selbstverständlichen Regeln,muß der Benutzer die im jeweiligen Land gültigen Sicherheitsvorrschriften einhalten
und sich vergewissern, daß die regelmäßigen Wartungsmaßnahmen ordnungsgemäß durchgeführt werden.
Der Installateur, der Benutzer bzw. das Wartungspersonal sind dazu verpflichtet, dem Hersteller eventuelle Schäden oder
Abnutzungserscheinungen, die die ursprüngliche Sicherheit der Anlage beeinträchtigen könnten, umgehend zu melden.
Der Installateur ist dazu verpflichtet, sich zu vergewissern, daß die Bedingungen am Ort der Aufstellung der Maschine den Sicherheits-und
Hygienevorschriften entsprechen.
Für die in die Maschine eingebauten handelsüblichen Bestandteile sind jeweiligen Hersteller verantwortlich; für das mit der Bedienung der Maschine
beauftragte Personal ist der Kunde verantwortlich.
Die Maschine keinen Witterungseinflüssen (Sonne, Regen, usw.) aussetzen.
Der längere Stillstand der Maschine bei Temperaturen unter 0°C (Null Grad Celsius) kann zu Beschädigungen oder Brüchen der Rohre oder des
Kessels führen. Es wird daher empfohlen,die Maschine vollkommen zu entleeren.
Warnhinweise
An den Bestandteilen der Maschine keinerlei Eingriffe vornehmen und nicht am elektrischen Speisekabel ziehen, um den
Stecker aus der Dose zu ziehen. Trotz der Verwendung eines Kabelschutzes, könnte das Kabel brechen, wenn daran gezogen wird.
Vor der Reinigung des Maschineninnenteils Strom unterbrechen und Stecker herausziehen. Nie Wasserstrahle und Reinigungsmittel
verwenden.
Die Maschine darf nicht mit feuchten oder nassen Händen bedient werden. Der Benutzer sollte auch keine nassen Füße haben
oder bloßfüßig sein, wenn er an dem Gerät arbeitet. Obwohl die Maschine vorschriftsmäßig geerdet ist, wird empfohlen, eine zentrale
elektrische Sicherheitsanlage zu verwenden, um das Risiko elektrischer Schläge auf ein Minimum zu reduzieren.
Jede Berührung der Kaffeehähne oder der Wasser- und Dampfhähne mit den Händen oder mit anderen Körperteilen vermeiden, da die
austretenden Flüssigkeiten oder der Dampf kochend heiß sind und Verbrennungen verursachen können. Unter normalen
Betriebsbedingungen erhitzen verschiedene Teile der Maschine sich stark und dürfen daher nur an den dazu vorgesehenen Stellen angegriffen
werden.
Die Maschine nicht ohne Wasser benützen. Falls die Maschine nicht mit einer automatischen Füllvorrichtung ausgerüstet ist, den Wasserstand
auf dem Standanzeiger kontrollieren und den Kessel, falls erforderlich, auffüllen.
Verengungen oder Verstopfungen können die unvorhergesehene Abgabe von Flüssigkeits-oder Dampfstrahlen mit
schwerwiegenden Folgen bewirken.
Filter und Wasserenthärter verwenden, um das Wasser möglichst rein zu halten. Für Maschinen die nicht an die Wasserleitung angeschlossen
sind, Tafelwasser verwenden, falls das Leitungswasser hart ist.

Club 15
rev.8 - 08/2004
TECHNISCHE BESCHREIBUNG
Eigenschaften
-Kessel aus Messing
- Brühgruppe für gemahlenen Kaffee oder für Kaffeepods
-Auf Anfrage, Mehrzweckfilter für Kaffeepod oder gemahlenen Kaffee
- Maschine mit eingebautem Wasserbehälter
oder mit Vorrichtung für Anschluß an die Wasserleitung
- Dampfabgabe
- Heißwasserabgabe
Funktionsprinzip
Die Espressokaffeemaschine besteht im wesentlichen aus folgenden Elementen:
Kessel
Der Kessel enthält das heiße Wasser und den Dampf. Er wird aus Messing hergestellt, um seine lange Haltbarkeit zu gewährleisten.
Brühgruppe
Die Brühgruppe ist jener Teil der Maschine, in den der Filterhalter (mit dem Filter und dem gemahlenen Kaffee oder dem Kaffee pod) eingehängt
wird und in dem durch den Zustrom von heißem Wasser die Brühphase und schließlich die Abgabe des Getränks erfolgt.
Wärmequelle
Die Wärme wird normalerweise von einem Widerstand im Wasser des Kessels erzeugt, und ermöglicht die Erwärmung des Wassers und die
Erzeugung von Dampf.
Elektropumpe
Pumpt das Wasser aus dem Behälter in den Kessel..
Dampf-und Wasserhahn
Für die Entnahme von Dampf, um die für die Zubereitung eines Cappuccino unerläßliche Milch “aufzuschäumen” oder um Wasser und verschiedene
Getränke wie Punch aufzuwärmen und um heiße Schokolade zuzubereiten. Für die Entnahme von Wasser für die Zubereitung heißer Getränke,
Tee, Kamillentee usw.
INSTALLATION - AUFSTELLUNG - INBETRIEBNAHME
Sicherheitsmaßnahmenzur Installation
Der Hersteller hat alle nur möglichen Sicherheitsvorkehrungen getroffen, um die Unversehrtheit der Benutzer zu gewährleisten. Die verschiedenen
Bedingungen bei der Installation und/oder beim Transport können jedoch zu unkontrollierbaren oder unvorhergesehenen Situationen führen. Es
ist daher erforderlich, immer eventuell verbliebene Risiken zu bewerten, und die folgenden Empfehlungen zu berücksichtigen:
Die Teile der Verpackung (Karton, Zellophan, Metallklammern, usw.) können schneiden, verletzen oder gefährlich werden, wenn sie nicht mit
Sorgfalt gehandhabt und unzweckmäßig verwendet werden; nicht in der Reichweite von Kindern oder nicht verantwortungsbewußten Personen
lassen.
Jede Anomalie oder Schaden muß rechtzeitg dem mit der Durchführung der Installation und Wartung beauftragten und dazu autorisierten
Personal gemeldet werden.
Die Erdung der Maschine ist gesetzlich vorgeschrieben. Die Anlage muß den Vorschriften entsprechen, die in dem Land, in dem die
Maschine aufgestellt wird, gültig sind. Der Hersteller übernimmt keine Haftung für Unfälle die auf die Nichtbeachtung dieser Vorschriften
zurückzuführen sind.
Die Verwendung von Verlängerungskabeln oder fliegenden Verbindungen ist verboten. Die Arbeitsumgebung ist zwangsläufig
Wasser und Feuchtigkeit ausgesetzt, wodurch die natürliche Isolation der Maschine stark beeinträchtigt wird.
Die Installation der Maschine darf ausschließlich von autorisiertem Fachkräften durchgeführt werden.
Den einwandfreien Zustand aller Bestandteile überprüfen. Falls Anamolien oder Schäden festgestellt werden, die Installation unterbrechen, und
den Ersatz der schadhaften Teile anfordern.
Überprüfen, ob die Versorgungsspannung (siehe Angabe auf dem Maschinenschild) mit der am Aufstellungsort vorhandenen Netzspannung
übereinstimmt.
Der Kunde muß die Speiseleitung der Maschine mit einem geeigneten Sicherheitsschalter schützen.

Club 16
rev.8 - 08/2004
Abb.1 Installation
1- Hauptschalter
2- Kaffeeabgabeschalter
3 - Wasserabgabetaste
4 - Dampfabgabetaste/Kontrollampe Widerstand
5 - Brühgruppe
6- Filterhalter
7- Abfluß
8- Gitter
9- Deckel des Wasserbehälters
10- Wasserbehälter
11- Dampf-Heißwasserhahn
12- Dampf-Heißwasserauslauf
13- Speisekabel
Aufstellungund Anschlüsse
Es wird empfohlen, vor der Aufstellung der Maschine, die Leistungsfähigkeit des Wassernetzes (für Maschinen die an die Wasserleitung
angeschlossen sind) und der elektrischen Anschlüsse.
Für den korrekten Anschluß der Maschine ist ein elektrischer Schalter erforderlich, dessen Schmelzeinsätze für die Stromaufnahme der Maschine
geeignet sind. Achtung: Die Erdung (gelb-grüner Draht) ist vorgeschrieben. Den elektrischen Anschluß vornehmen. Dazu das Speisekabel
(Teil 13 Abb.1) mit einem Stecker an die geeignete, mit Sicherheitsschalter versehene, Steckdose (220 oder 110 V) anschließen.
Den Wasserbehälter (Teil 10) mit Wasser füllen(wenn möglich enthärtetem Wasser oder Tafelwasser) oder die Maschine and die Wasserleitung
anschließen. Vor dem Anschluß des Abflußrohrs der Maschine, Zustand und Eignung des Hauptabflußrohrs überprüfen.
Bei and die Wasserleitung angeschlossenen Maschinen, den Wasserenthärter an einer geeigneten Stelle unterbringen und danach ihn an den
Leitungshahn einerseits und an den Fitting des Wassereinlaufs der Maschine andererseits anschließen. Einen Behälter unter das Abflußrohr des
Enthärters stellen (siehe Regenerierung des Enhärters). Den Hahn öffnen und das Wasser einige Minuten lang fließen lassen, um die imEnthärter
enthaltenen Harze zu reinigen.
Inbetriebnahme
Vor de Betriebsetzung der Maschine, die Kesselfüllung durchführen: den Hahn (Teil 11 Abb. 1) öffnen, die Wassertaste (Teil 3) drücken und
warten, bis Wasser aus dem Auslauf (Teil 12) fließt. Der Kessel ist nun mit Wasser gefüllt.
Den Hahn schließen und den Hauptschalter drücken (Teil 1 Abb.1). Warten bis die Kontrollampe des Widerstands (Teil 4) sich einige Male ein- und
ausschaltet. Die Maschine hat nun die ideale Temperatur erreicht und ist betriebsbereit.
Es wird empfohlen, die Maschine nicht auszuschalten, falls sie täglich verwendet wird.
Wichtig: Bei Maschinen die nicht an die Wasserleitung angeschlossen sind, regelmäßig den Wasserstand im Behälter (Teil 10) kontrollieren.
Nach der Inbetriebnahme, einen der beiden Filter (für 1 oder 2 Tassen) in den Filterhalter (Teil 6) einsetzen.
GEBRAUCHSANWEISUNGEN
Die folgenden Anweisungen sind allgemeine Verhaltensrichtlinien. Die Befolgung der spezifischen Hinweise und Sicherheitsvorschriften
des Herstellers ist daher unerläßlich.
Die Bedienung der Maschine ist sehr einfach und es genügt die unten angeführten Anweisunge einzuhalten, um schmackhaften Kaffee zu
erhalten:
- Zweckmäßig enthärtetes, kaltes Leitungswasser oder Tafelwassel verwenden
- Temperatur des Wassers im Kessel: zwischen 100°C und 130°.
- Dauer der Abgabe: 20-30 Sekunden.
- Menge des gemahlenen Kaffees: zwischen 6 und 7 Gr.
- Ständige Reinigung der Kaffee-Dosiermühle
- Kontrolle der Abnutzung der Mahlsteine der Kaffee-Dosiermühle
- Temperatur Kaffeeabgabe: 85/92°C
DieTemperatur hängt vonderArt der verwendetenMischung ab. DieTemperatur kann währendderAbgabe mit einemPräzisionsthermometer
gemessen werden.
Zubereitung eines Espresso:
Den Filterhalter von der Gruppe abnehmen und in die dazu vorgesehene Lade entleeren. Dabei mit dem Rand des Filterhalters auf die Stange in
der Lade klopfen. Den Filterhalter nicht gegen eine ungeschützte Fläche schlagen, da dadurch seine Dichtheit beeinträchtigt werden könnte. Ein
kurzer, entschiedener Schlag müßte ausreichen, umden Kaffeesatz herausfallen zu lassen. Diekleine Menge Kaffeepulver, die im Filter zurückbleibt,
hat keine negative Auswirkung auf den Geschmack des Kaffees.
1
2
3
4
5
6
7
8
9
1
0
1
1
1
2
1
3

Club 17
rev.8 - 08/2004
Den Filterhalter mit fein gemahlenem Kaffee füllen. Dazu den Filterhalter in den zu diesem Zweck am Boden der Mahl-/Dosiervorrichtung
vorgesehenen Sitz einsetzen und den Hebel nach unten ziehen: Einmal für einen Kaffee, zweimal für die doppelte Dosis. Achtung: Den Hebel
immer bis zum Anschlag nach unten ziehen und dann von selbst in Ruhestellung zurückkehren lassen.
Nach der Füllung des Filterhalters, den gemahlenen Kaffee niederpressen. Dazu den Filterhalter an den Presser halten und nach oben drücken.
Mit der Handfläche das überschüssige Kaffeepulver vom Rand des Filterhalters entfernen, um die perfekte Dichtheit zwischen Filterhalter und
Maschine zu gewährleisten.
Wird der Mehrzweckfilter benützt, kann man anstatt dem gemahlenen Kaffee ein Kaffeepod in den Filter geben. Falls es sich um eine Kaffepods-
Ausführung handelt, muß man ein Kaffeepod in den Filter geben.
Den Filterhalter in die Gruppe einsetzen und drehen, bis er fest sitzt. Nicht zu fest zuziehen, da er, wenn er zu fest sitzt, nach der Abgabe des
Kaffees nur mit Mühe abgenommen werden kann.
Nach dem korrekten Einsatz des Filterhalters, eine vorgewärmte Tasse unter den Kaffeeabgabehahn stellen, bzw. zwei Tassen, falls ein doppelter
Filterhalter verwendet wird. Die Brühgruppe mit dem Kaffeeschalter (Teil 2 Abb.1) einschalten. Sobald die gewünschte Kaffeemenge erreicht
ist, den Schalter noch drücken, die Tasse wegziehen und den Kaffee servieren.
Heißwasser-Dampfabgabe
Für die Abgabe von heißem Wasser aus dem entsprechenden Auslauf (Teil 12 Abb.1), den Hahn (Teil 11) öffnen und die Taste für die
Heißwasserabgabe (Teil 3) drücken. Sobald die gewünschte Wassermenge abgegeben wurde, die Taste auslassen und den Hahn schließen.
Für die Abgabe von Dampf aus dem entsprechenden Auslauf (Teil 12), den Hahn (Teil 11) öffnen und solange offen lassen, bis Dampf abgegeben
wird (am Anfang läuft Wasser aus). Den Hahn schließen, die Taste für Dampfabgabe (Teil 4) 15 Sekunden lang drücken, um die Temperatur im
Kessel zu steigern. Die Dampflanze in die zu erwärmende Flüssigkeit tauchen. Den Hahn (Teil 11) öffnen, die Taste (Teil 4) drücken und die
gewünschte Dampfmenge ablassen. Die zur Verfügung stehende Dampfmenge reicht für die Zubereitung von 2 Cappuccino. Bei Maschinen, die
mit der “Turbo-steam”-Vorrichtung versehen sind, ist die zur Verfügung stehende Dampfmenge größer.
Wenn kein Dampf mehr benötigt wird, den Hahn (Teil 11) schließen und die Taste (Teil 3) drücken: der Kessel füllt sich mit Wasser, bis der
vorgesehene Stand erreicht ist und die Pumpe stehen bleibt.
WARTUNG
Tägliche Reinigung
Vorzugsweise am Abend durchführen:
- Mit einem Schwammtuch die Ausläufe, Filterdichtungen und Führungen des Filterhalters der Brühgruppen reinigen.
- Filter und Filterhalter mit heißem Wasser und spezifischem Spülmittel reinigen, um die fettigen Kaffeerückstände zu lösen.
- Ablaufwanne und Abstellgitter reinigen.
- Sofort nach Gebrauch sorgfältig die für die Erwärmung von Getränken verwendeten Dampflanzen reinigen, um die Bildung von Verkrustungen
zu verhindern, die die Löcher der Düse verstopfen und den Geschmack der frischen Getränke beeinträchtigen könnten.
Wöchentliche Reinigung
- Reinigung des Wasserbehälters: Den Behälter (Teil10) mit Wasser füllen und 3 od. 4 Teelöffel Zitronensäure od. Essig hinzufügen. Diese
Mischung wirken lassen bis der Behälter sauber ist. Anschließend den Behälter entleeren; dabei das Wasser teilweise aus dem Filterhalter (Teil
6) und teilweise aus dem Heißwasserauslauf (Teil 12) abfließen lassen. Den Vorgang mit reinem Wasser widerholen.
Achtung: Bei Maschinen mit kleinem Wasserkessel, wird empfohlen, das Wasser im Kessel häufig zu wechseln.
- Reinigung des Gehäuses: ein feuchtes weiches Tuch verwenden. Die beschrifteten od. lackierten Teile nicht mit Alkohol od. Lösungsmitteln
behandeln.
Zubereitung eines Cappuccino
Für die Zubereitung eines Cappuccino muß frische Milch schaumig “geschlagen” werden und der Schaum
anschließend auf den Espresso gegossen werden.
Um die Milch aufzuschäumen, den Dampfhahn öffnen (Nr.11) und hin geöffnet lassen, bis Dampf abgegeben
wird (am Anfang läuft Wasser aus). Den Dampfhahn schließen und die Dampftaste (Nr.4) 15 Sekunden lang
drücken, um die Temperatur im Kessel zu steigern.
Ein Kännchen mindestens dreidaumenhoch mit Milch füllen. Das Kännchen unter die Dampflanze halten, so
daß das Ende der Lanze in die Milch taucht: kippen Sie das Kännchen nach vorne, so wie in Abbildung (die
Dampflanze soll das Kännchen nicht berühren). Langsam den Dampfhahn öffnen und das Kännchen leicht im
Kreis hin-und her bewegen, bis die Milch zu schäumen beginnt. Kontrollieren, daß das Ende der Dampflanze
immer in der Milch getaucht bleibt. Nun den Dampfhahn rasch schließen, das Kännchen unter der Dampflanze
wegziehen und den Schaum auf den Espresso gießen.( Die zur Verfügung stehende Dampfmenge reicht für
die Zubereitung von 2 Cappuccino). Die Lanze so bald wie möglich von der Milchresten säubern, um zu
verhindern, daß die Milchreste trocknen und dann schwer zu entfernen sind.
Achtung: Die Dampflanze wird sehr heiß und darf daher nicht berührt werden, bevor sie abgekühlt
ist.
Sobald wie möglich, den Gast darauf aufmerksam machen, daß das Getränk sehr heiß ist. Die aufgeschäumte
Milch für den nächsten Cappuccino zur Seite stellen.

Club 18
rev.8 - 08/2004
Anleitungen für die Regenerierung des manuellen Enthärters
Für die Regenerierung des Enthärters wie folgt vorgehen:
1) Einen Behälter mit einem Fassungsvermögen von mindestens 2 Liter unter das kleine Rohr E stellen. Die Hebel C und D von links nach rechts
verschieben (Abb.2).
2) Den Griff G abschrauben, den Deckel entfernen und Salz (normales Kochsalz) in das Gerät (Abb. 2) füllen: 1 Kg. für 8 Liter-Enthärter bzw.
2 Kg. für 12 Liter-Enhärter. Anschließend den Deckel wieder aufsetzen, den Hebel C von rechts nach links schieben (Abb. 3), um durch den
Schlauch F Salzwasser abfließen zu lassen. Sobald das abfließende Wasser nicht mehr salzig ist, den Hebel D von rechts nach links schieben
(Abb.4)
Wichtig
Bei einem täglichen Kaffeeverbrauch zwischen 1 und 2 Kg. muß die Regenerierung alle 15 Tage durchgeführt werden. Bei höherem
Kaffeeverbrauch, die Regenerierung einmal pro Woche durchführen.
Achtung
Die Regenerierung des Enthärters ist äußerst wichtig. Falls sie unterlassen wird, bilden sich Kalkablagerungen im Wasserkessel, in den
Elektroventilen und im Hydraulikkreislauf. DieseAblagerungen beeinträchtigen die Leistung und Zuverlässigkeit der Maschineund können schließlich
zu schweren Schäden führen, die nur von Technikern des Kundendienstes behoben werden können. Die Reinigung des Wasserkessels ist nicht
in der Garantie inbegriffen und die entstehenden Kosten gehen daher zu Lasten des Kunden.
STÖRUNGEN UND BEHEBUNG DER URSACHEN
Probleme erkennen:
- Die im Behälter der Mahl-Dosiervorrichtung enthaltene Menge gemahlenen Kaffees muß immer mindestens für einen Kaffee ausreichen.
- Wenn der Kaffee zu langsam austritt, ist er wahrscheinlich zu fein gemahlen. Er ist hingegen zu grob gemahlen, wenn er zu schnell austritt.
- Während des Brühvorgangs trifft das Wasser mit hohem Druck auf den Kaffee. Falls die Berührung zwischen Wasser und Kaffeepulver 20
bis 30 Sekunden überschreitet,hat der Kaffee einen unangenehmen,bitteren Geschmack. Es handelt sichdabei um den sogenannten “exzessiven
Auszug des Kaffeearomas”.
- Die Kaffeetassen vor Gebrauch immer mit heißem Wasser vorwärmen. Fließt der Kaffee in eine kalte Tasse bewirkt der plötzliche
Temperaturwechsel eine Veränderung des Geschmacks.
- Den gefüllten Kaffeefilter nicht in die Maschine einsetzen, ohne sofort einen Kaffee zuzubereiten. Anderenfalls “verbrennt” das Kaffeepulver
in der Gruppe und der Kaffee wird bitter.
Wartungsmaßnahmen dürfen nur von Fachpersonal durchgeführt werden, das vom Hersteller dazu autorisiert wurde.
Keine provisorischen Reparaturen vornehmen oder nicht Original-Ersatzteile verwenden.
Achtung: Vor der Durchführung von Kontrollen oder Wartungsmaßnahmen, IMMER DIE STROMVERSORGUNG DER MASCHINE
UNTERBRECHEN.
ENDGÜLTIGE AUSSERBETRIEBSETZUNG UND VERSCHROTTUNG
Die Außerbetriebsetzung der Maschine muß von autorisiertem Personal durchgeführt werden. Dabei wie folgt vorgehen: den Druck aus dem
Hydraulikkreis ablassen, das Speisekabel aus der Steckdose ziehen und die potentiell umweltschädlichen Substanzen eliminieren.Die Maschine
an einem geeigneten Ort, außerhalb der Reichweite von Kindern und nicht verantwortungsbewußten Personen, abstellen.
Die Maschine dem Lieferanten zurückgeben oder zu einer öffentlichen Abfallsammelstelle bringen, falls sie verschrottet werden soll.
Die Maschine in keinem Fall an nicht dafür vorgesehenen Plätzen abstellen.
Abb. 2 Abb. 4
Abb. 3
C
D
E
G
C
D
E
F
C
D
E
F

Club 19
rev.8 - 08/2004
AVANT-PROPOS: CONSERVATION DU MANUEL
Ce manuel a été préparé à l’intention de l’utilisateur et/ou de la personne chargée d’assurer l’entretien de la machine.
Ce manuel a pour objet de fournir des informations inhérentes à l’utilisation de la machine et à son entretien et d’assurer la sécurité de l’utilisateur.
Ce manuel doit être conservé avec soin, le constructeur déclinant toute responsabilité pour tout dommage infligé aux personnes,
aux choses ou à la machine suite au manque de respect des instructions contenues dans ce manuel ou en cas de manque de
respect des instructions liées à l’entretien et à la sécurité.
Ce manuel doit toujours être à la disposition de l’utilisateur et/ou de la personne chargée de l’entretien, qui doit être informé de
l’usage correct de la machine et des risques éventuels. Il doit être rangé dans un lieu sec et propre.
Les instructions fournies dans ce manuel ne remplacent pas les mesures de sécurité et les informations techniques relatives à l’installation
et au fonctionnement de la machine, qui figurent directement sur cette dernière et sur l’emballage.
Ce manuel fait partie intégrante de la machine et doit être conservé afin de pouvoir s’y reporter jusqu’à la destruction de cette dernière.
En cas de perte de ce manuel, ou de nécessité d’obtenir de plus amples informations, veuillez contacter le revendeur le plus proche
ou bien le fabricant.
Ce manuel reflète les connaissances techniques actuelles: toute modification successive en fonction de nouvelles expériences, ne pourra en
aucun cas permettre de considérer qu’il n’est pas approprié.
Leconstructeurse réserve également ledroitde modifier ce manuelsansêtre tenu de mettreàjour les éditions précédentes,saufcas exceptionnels.
Toute utilisation impropre de la machine ou non conforme aux instructions fournies dans ce manuel exclut toute possibilité de
bénéficier de la garantie et dégage le constructeur de toute responsabilité; la machine doit être utilisée par une personne adulte et responsable.
UTILISATION PREVUE ET PRECAUTIONS
La machine à café express est un appareil destiné au débit de vapeur/eau chaude pour la préparation professionnelle d’un mélange de café,
ou au prélèvement d’eau chaude et/ou de vapeur.
Ses éléments, réalisés à partir de matériaux non toxiques et résistants, sont faciles à nettoyer et à entretenir.
Cet appareil doit être utilisé par une personne adulte; son usage est interdit aux enfants et aux personnes irresponsables.
L’utilisateur doit respecter les mesures de sécurité en vigueur dans son pays, ainsi que les règles dictées par le bon sens et s’assurer
que l’entretien de la machine est effectué correctement et périodiquement.
L’installateur, l’utilisateur ou la personne chargée de l’entretien de la machine sont tenus de signaler au constructeur toute détérioration ou défaut
éventuel susceptible de compromettre la sécurité de l’installation.
L’installateur est tenu de vérifier si les conditions ambiantes garantissent la sécurité et l’hygiène des opérateurs et des utilisateurs.
Les composants montés dans la machine sont placés sous la responsabilité de leurs fabricants respectifs; le personnel autorisé à utiliser la
machine est placé sous la responsabilité du client.
Ne jamais exposer la machine aux agents atmosphériques (soleil, pluie, etc.)
L’arrêt prolongé de la machine à une température inférieure à 0°C (zéro degré centigrade) peut endommager ou provoquer la rupture des tuyaux
ou de la chaudière; il est donc préférable, dans de telles circonstances, de vidanger complètement la machine.
Recommandations pour l’utilisation
N’essayer jamais de démonter les composants de la machine et ne pas tirer sur le câble d’alimentation électrique pour la
débrancher. De fait, en dépit de l’utilisation d’un serre-câble, le câble risque de se rompre si vous tirez trop violemment.
Eteindre et débrancher la machine avant de la nettoyer à l’intérieur et éviter d’utiliser des jets d’eau ou des détergents.
L’opérateur ne doit jamais toucher la machine avec les mains ou les pieds humides ou mouillés, ou encore à pieds nus. Même
si la machine est mise à la terre, nous conseillons de faire appel à un disjoncteur centralisé afin d’éviter tout risque d’électrocution.
Ne pas toucher les becs du café et les lances de vapeur et eau chaude avec les mains ou autres parties du corps, car les liquides ou la
vapeur qui en émanent sont très chauds et peuvent provoquer des brûlures.
En des conditions normales d’utilisation, de nombreuses parties de la machine deviennent brûlantes; il ne faut donc les empoigner qu’aux endroits
prévus à cet effet.
Eviter de faire fonctionner la machine sans eau. Si la machine n’est pas équipée d’un dispositif de remplissage automatique, vérifier le
niveau d’eau et rajouter la quantité nécessaire dans la chaudière.
D’éventuelles obturations peuvent provoquer des jets imprévisibles de liquide ou de vapeur aux conséquences graves. Veiller à ce que
l’eau reste le plus propre possible en utilisant des filtres et des adoucisseurs.
Si la machine n’est pas raccordée au réseau et l’eau du robinet est dure, utiliser de l’eau minérale sans gaz.

Club 20
rev.8 - 08/2004
DESCRIPTION TECHNIQUE
Caractéristiques
- Chaudière en laiton
- Groupe de débit pour café moulu ou pour pastille de café
- Filtre pour utilisation soit avec café moulu, soit avec pastille de café sur demande
- Machine avec réservoir d’eau incorporé
oubien prévue pour le raccordement au réseau hydraulique
- Débit vapeur
- Débit eau chaude
Principesde fonctionnement
La machine à café express se compose principalement des éléments suivants:
Chaudière
Elle contient l’eau chaude et la vapeur; sa construction en laiton lui permet de conserver dans le temps ses propres caractéristiques.
Groupe de débit
Le groupe de débit est la pièce dans laquelle, en accrochant le porte-filtre contenant le filtre et le café moulu (oubien la pastille de café) et au
passage de l’eau chaude, se réalisent les phases d’infusion et de débit des boissons.
Source de chaleur
Généralement, elle provient d’une résistance électrique plongée dans l’eau de la chaudière permettant de chauffer l’eau et de produire de la
vapeur.
Groupe moto-pompe
Ce dispositif sert à prélever l’eau dans le réservoir et à l’iintroduire dans la chaudière.
Robinet de vapeur et eau chaude
Il permet de prélever la vapeur pour “monter” le lait indispensable à la préparation du cappuccino, ou pour chauffer l’eau, le punch et préparer le
chocolat chaud et de prélever de l’eau pour la préparation de boissons chaudes, du thé et des tisanes (camomille, etc.)
INSTALLATION - MISE EN PLACE - MISE EN SERVICE
Précautionspour l’installation
Dans la mesure du possible, le constructeur a prévu tous les systèmes de sûreté pour garantir la sécurité des utilisateurs; toutefois les conditions
d’installation et/ou d’entretien peuvent provoquer des situations incontrôlables ou impossibles à prévoir: il faut donc évaluer constamment
les risques résiduels et tenir compte des conseils suivants:
-Les éléments d’emballage (carton, cellophane, agrafes métalliques, etc.) peuvent couper, blesser ou devenir dangereux s’ils ne sont pas
maniés avec précaution ou s’ils sont mal utilisés; ne jamais les laisser à la portée des enfants ou des personnes non responsables.
-Les anomalies ou les défauts doivent être rapidement signalés au personnel autorisé préposé à l’installation et à l’entretien.
-Le raccordement de mise à la terre est obligatoire; de même, l’équipement doit être conforme aux normes en vigueur dans le pays
d’installation. Le constructeur décline toute responsabilité en cas d’accidents.
-Il est interdit d’utiliser des rallonges et des connexions volantes; le site de travail est forcément exposé à l’eau et à l’humidité qui
compromettent les conditions d’isolement de l’installation.
-La machine doit être installée par le personnel préposé et qualifié.
- Vérifier l’intégrité des éléments et, en cas de défauts ou d’anomalies, interrompre l’installation et demander le remplacement de ces derniers.
-Contrôler la tension d’alimentation (voir la plaquette des caractéristiques); elle doit coïncider avec celle du réseau de distribution local.
-Le client doit pourvoir à l’alimentation de la machine en protégeant la ligne par un disjoncteur (différenciel) adéquat.
Table of contents
Other Brasilia Coffee Maker manuals

Brasilia
Brasilia OPUS SUBLIMA User manual

Brasilia
Brasilia OPUS User manual

Brasilia
Brasilia ROMA User manual

Brasilia
Brasilia Excelsior User manual

Brasilia
Brasilia Gradisca User manual

Brasilia
Brasilia Agile User manual

Brasilia
Brasilia OPUS User manual

Brasilia
Brasilia EXECUTIVE User manual

Brasilia
Brasilia maki User manual

Brasilia
Brasilia PORTOFINO RESTYLING User manual