manuals.online logo
Brands
  1. Home
  2. •
  3. Brands
  4. •
  5. PASCO
  6. •
  7. Accessories
  8. •
  9. PASCO PASPort PS-2120 User manual

PASCO PASPort PS-2120 User manual

Other PASCO Accessories manuals

PASCO PS-3212 User manual

PASCO

PASCO PS-3212 User manual

PASCO Pasport PS-2110 User manual

PASCO

PASCO Pasport PS-2110 User manual

PASCO PS-3209 User manual

PASCO

PASCO PS-3209 User manual

PASCO PASPort PS-2133 User manual

PASCO

PASCO PASPort PS-2133 User manual

PASCO PS-3236 Guide

PASCO

PASCO PS-3236 Guide

PASCO PASPort PS-2170 User manual

PASCO

PASCO PASPort PS-2170 User manual

PASCO PASPort PS-2168 User manual

PASCO

PASCO PASPort PS-2168 User manual

PASCO CI-6537 User manual

PASCO

PASCO CI-6537 User manual

PASCO Pasport AirLink2 User manual

PASCO

PASCO Pasport AirLink2 User manual

PASCO PS-3201 User manual

PASCO

PASCO PS-3201 User manual

PASCO PS-3212 User manual

PASCO

PASCO PS-3212 User manual

PASCO PasPort PS-2195 User manual

PASCO

PASCO PasPort PS-2195 User manual

PASCO PS-3210A User manual

PASCO

PASCO PS-3210A User manual

PASCO CI-6460 User manual

PASCO

PASCO CI-6460 User manual

PASCO PS-3218 User manual

PASCO

PASCO PS-3218 User manual

PASCO PS-3224 User manual

PASCO

PASCO PS-3224 User manual

PASCO PS-2102 User manual

PASCO

PASCO PS-2102 User manual

PASCO AirLink PS-3200 User manual

PASCO

PASCO AirLink PS-3200 User manual

PASCO PS-3215 User manual

PASCO

PASCO PS-3215 User manual

PASCO PS-3221 User manual

PASCO

PASCO PS-3221 User manual

PASCO PS-3322 User manual

PASCO

PASCO PS-3322 User manual

PASCO PS-3227 Guide

PASCO

PASCO PS-3227 Guide

PASCO PasPort PS-2102 User manual

PASCO

PASCO PasPort PS-2102 User manual

PASCO PS-3213 User manual

PASCO

PASCO PS-3213 User manual

Popular Accessories manuals by other brands

Quincy lab 140AE-1 operating manual

Quincy lab

Quincy lab 140AE-1 operating manual

HomePro ZIR000 user manual

HomePro

HomePro ZIR000 user manual

DOL 20SCR Technical user guide

DOL

DOL 20SCR Technical user guide

RAB Smart Task installation manual

RAB

RAB Smart Task installation manual

Kemppi KMS 300 quick guide

Kemppi

Kemppi KMS 300 quick guide

Stearns 57,500 Series Installation and service instructions

Stearns

Stearns 57,500 Series Installation and service instructions

iGuzzini TWILIGHT COPENAGHEN manual

iGuzzini

iGuzzini TWILIGHT COPENAGHEN manual

Adelaide Annexe & Canvas Avan Deluxe installation guide

Adelaide Annexe & Canvas

Adelaide Annexe & Canvas Avan Deluxe installation guide

OHAUS 5000 instruction manual

OHAUS

OHAUS 5000 instruction manual

HOME8 WLS1300 quick start guide

HOME8

HOME8 WLS1300 quick start guide

MAXBOTIX MaxSonar quick start guide

MAXBOTIX

MAXBOTIX MaxSonar quick start guide

ioSmart iSmart56 Installation and user guide

ioSmart

ioSmart iSmart56 Installation and user guide

Focusrite Scarlett 18i8 user guide

Focusrite

Focusrite Scarlett 18i8 user guide

Velleman ED38105 user manual

Velleman

Velleman ED38105 user manual

JumpSport SkyBounce user manual

JumpSport

JumpSport SkyBounce user manual

Prima-Temp PRIYA Instructions for use

Prima-Temp

Prima-Temp PRIYA Instructions for use

Tefcold BC85I-BC85I W user manual

Tefcold

Tefcold BC85I-BC85I W user manual

Vaisala WMS302 user guide

Vaisala

Vaisala WMS302 user guide

manuals.online logo
manuals.online logoBrands
  • About & Mission
  • Contact us
  • Privacy Policy
  • Terms and Conditions

Copyright 2025 Manuals.Online. All Rights Reserved.

!
PS-2120
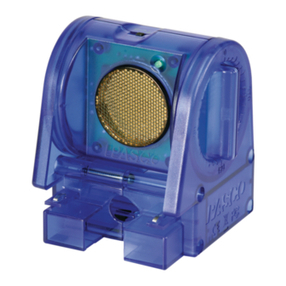
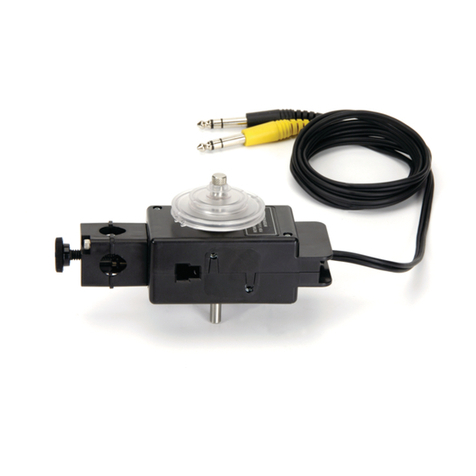
The PS-2120 Rotary Motion Sensor measures both linear and angular position,
velocity, and acceleration.
Rotary Motion Quick Start
Additional Equipment Needed
• USB Link (PS-2100) with USB-compatible computer or PS-2000 Xplorer
• EZscreen or DataStudioTM software (version 1.6.1 or later)
Equipment Setup
1. Connect the sensor to a USB Link or to an Xplorer.
2. Connect the USB Link or Xplorer cable to a USB port on your computer
or a USB hub.
3. The software launches when it detects a PASPORT sensor. Select
EZscreen or DataStudio.
Sensor Specifications
Resolution: 0.02 mm (linear) and 0.09 degrees
(angular)
Accuracy +/- 0.09 degrees
Maximum speed 30 revolutions/sec
Default sample rate: 10 samples/sec
Maximum sample rate: 1000 samples/sec
800-772-8700 • 916-786-3800 • techsupp@pasco.com • www.pasco.com 012-07857A
12
3
Rotary Motion Sensor
Using the Rotary Motion Sensor
1. Plug the PS-2120 Rotary Motion Sensor into a USB link or Xplorer.
2. Use the included clamp to attach the sensor horizontally to a ring stand.
3. Place a 30 cm section of string over the large pulley.
4. Choose two masses with a difference of 2 grams. Tie one mass on
each end of the string.
5. Hold the masses (the lesser mass as low as possible) and click the
Start button.
6. Release the masses, but catch them before hitting the pulley. Click the
Stop button.
7. What does the angular position vs. time graph suggest about the motion
of the masses after they were released?
8. Repeat the experiment for masses with a difference of 4 grams.
9. How does the angular position vs. time graph change? Explain.
EZScreen Activity
012-07857A
DataStudio Activity - Angular Acceleration
1. To take rotational measurements in your classroom, click
EZscreen in the PASPORTAL window.
2. In the lower right corner of the EZscreen, click the Rotary
Motion Sensor icon to cycle through measurement types.
(Linear measurements are based on the large pulley groove.)
3. Click the Start button once to collect data and again to stop.
Rotary Motion Activities
The PASPORT™Rotary Motion Sensor will zero automatically when you
click the Start button in DataStudio. This will reset all measurements of the
Rotary Motion Sensor to zero upon beginning data collection. If you would like
the sensor to “remember” its position between data runs, deselect the “Zero
Automatically on Start” box, which is located in the Setup window (only
available in DataStudio 1.6.2 or later). This “position memory” will be lost
when you disconnect the sensor, or you reopen or quit DataStudio.
Figure 1: PASPORT setup window
In addition, the Zero button in the Setup window can be used to
manually
zero
the sensor. Deselect the “Zero Automatically on Start” box, place the
sensor in the desired orientation, and click the Zero button.
When measuring either linear or rotational motion quantities, you must select
the appropriate accessory from the pull-down menu in the setup window.
The large pulley groove is the default, but you can select other configurations
from the menu in the setup window (see Figure 1).
Click the arrow to
select from available
rotational or linear
accessories.