3. Saque la caja de conexiones del ventilador
4. Determine la dirección deseada del aire (FIG.2).
ADVERTENCIA: DESCONECTE LA CORRIENTE QUE VA AL ENCHUFE ANTES DE
HACER CONEXIONES ELECTRICAS EN ESTE.
5. Pase el cable eléctrico al interruptor y al ventilador. Pase el cable a través de la
abertura de la pared en el lado de la “entrada” del ventilador y hacia dentro de la
carcasa del ventilador (FIG.3).
6. Quite el disco removible en la caja de conexiones. Sujete el cable eléctrico a la caja
de conexiones con el conector que corresponde para el tipo de cable que se use.
Deje conductores de 15,24 cm (6 plg.) hacia el interior de la caja para hacer las
conexiones eléctricas.
7. Haga las conexiones eléctricas. Conecte el cable negro con el negro, el blanco con
el blanco, y el verde o descubierto a la caja usando el tornillo de tierra (FIG.3).
8. Coloque la carcasa del ventilador en la pared. Instale la caja de conexiones y la
tapa. Conecte el motor del ventilador en el enchufe en la tapa de la caja de
conexiones.
9. Sujete la carcasa del ventilador en la pared, y taladre dos agujeros pilotos de 4,8
mm a través del centro de las dos ranuras en el borde de montaje (FIG.4). Use las
ranuras en el borde que se alinean con las aberturas de los soportes de montaje en
la carcasa del ventilador.
10. Instale los soportes de montaje desde el interior de la carcasa del ventilador y tire de
ellas fuertemente hacia el fondo de la pared. Conpruebe de que la pestaña en el
soporte está enganchado en la carcasa del ventilador.
11. Inserte los tornillos a través del borde de montaje y apriete los soportes firmemente
contra la pared.
12. Para paredes de menos de 11,43 cm (4–1/2 plg.) de grosor, coloque un marco
alrededor de la carcasa de manera que quede empotrado de 3,2 a 6,3 mm (de
1/8 a 1/4 plg.) (FIG.5).
Si la carcasa del ventilador no está a nivel del borde del material de la pared,
coloque una fina capa de masilla o yeso a lo largo del borde de la carcasa para
llenar el hueco entre la carcasa y la pared (FIG.6).
13. Gire las rejillas en los pasadores de montaje. Conecte la corriente y compruebe el
funcionamiento del ventilador. Apriete la rejilla contra la pared, sin deformarla.Si es
necesario, doble el soporte de la rejilla hasta que ésta quede al nivel con la pared.
(FIG.6).
USO Y CUIDADO
DESCONECTE LA CORRIENTE ELECTRICA ANTES DE REPARAR EL
VENTILADOR
No encienda el vetilador mientras esté usando una chimenea o una estufa de madera
hasta que el humidificador esté totalmente caliente y completamente abierto. La
acción de conectar el ventilador demasiado pronto puede dirigir el humo o gases
dentro de la habitación. Espere hasta que el fuego esté bien dispuesto.
Desconecte siempre el motor del ventilador antes de reparar el ventilador. Los
cojinetes del motor en este ventilador están lubricados de por vida y nunca
necesitarán lubricación.
Limpie la la paleta del ventilador y el motor cada seis meses retirando la rejilla,
desenchufando el motor, y pasando un aspirador suavamente por la paleta y motor
del ventilador. el motor y la carcasa. Limpie las rejillas en agua caliente enjabonada.
NO USE TELAS ABRASIVAS, ESPONJILLAS DE LANA DE ACERO NI POLVOS
ABRASIVOS.
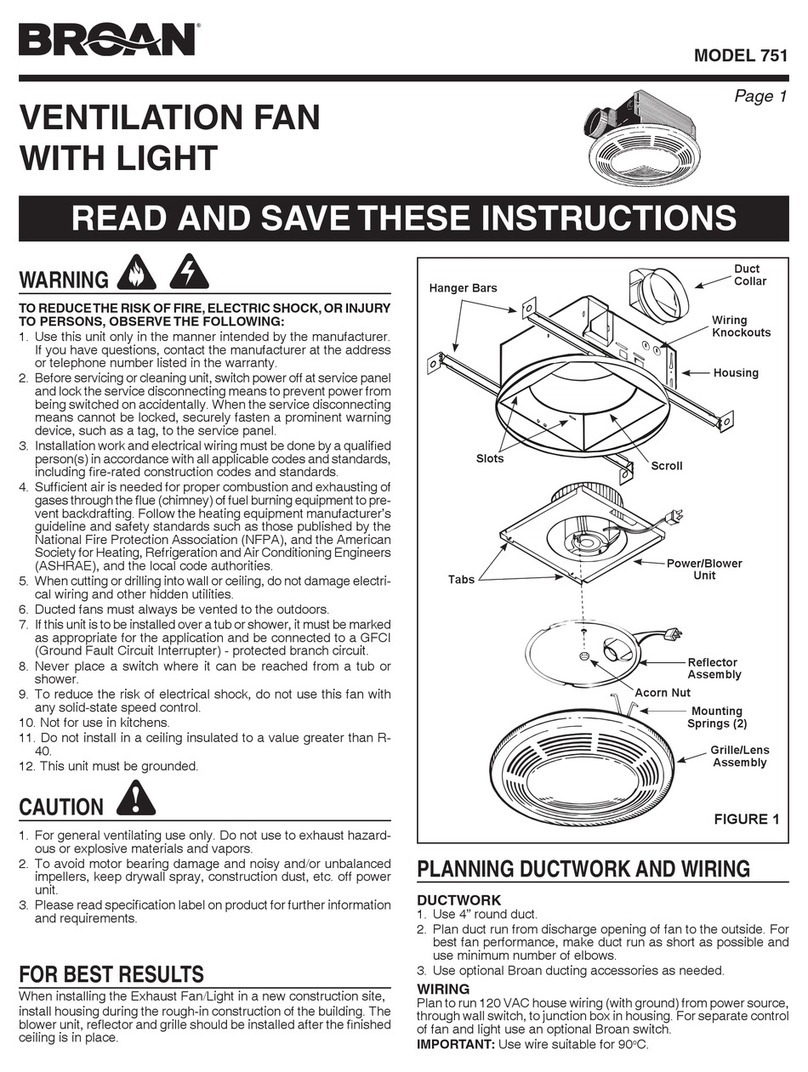
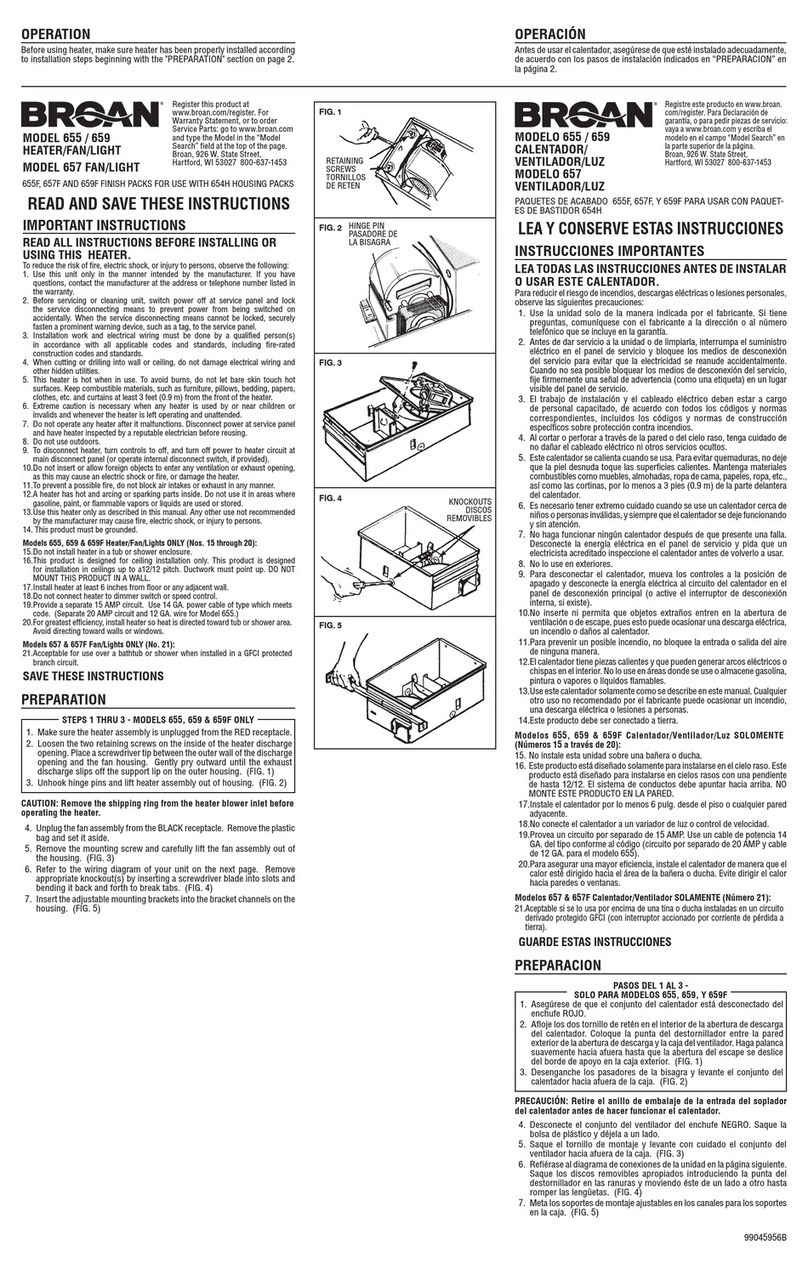
3. Remove wiring box from fan.
4. Determine desired air flow direction (FIG. 2)
WARNING: DISCONNECT ELECTRICAL POWER TO OUTLET YOU ARE TAP-
PING INTO BEFORE MAKING ELECTRICAL CONNECTIONS.
5. Feed electrical cable to switch and fan. Feed cable through wall opening on
“inlet” side of fan and into fan housing. (FIG. 3)
6. Remove knockout on wiring box. Fasten electrical cable to wiring box with proper
connector for type of wire used. Provide 6” leads inside box for electrical con-
nections.
7. Make electrical connections. Connect black to black, white to white, and bare or
green wire to box using green ground screw. (FIG. 3)
8. Position fan housing in wall. Install wiring box and cover. Plug the fan motor into
receptacle on wiring box cover.
9. Hold fan housing in wall, and drill two 3/16” pilot holes through center of two
slots in mounting flange. (FIG. 4) Use slots in flange which line up with mounting
bracket openings in fan housing.
10. Install mounting brackets from inside of fan housing and pull them tightly against
back of wall. Make sure tab on bracket is engaged in fan housing. (FIG. 2)
11. Insert screws through mounting flange and tighten mounting brackets firmly
against wall.
12. For walls less than 4–1/2” thick, frame out fan housing so that housing is re-
cessed 1/8” - 1/4”. (FIG. 5)
If fan housing is not flush with edge of wall material, lay a thin bead of plaster or
patching compound along edge of housing to fill gap between housing and wall.
(FIG. 6)
13. Spin grilles onto mounting studs. Turn on power and check operation of fan.
Tighten grille flush against wall, but do not distort grilles. Bend grille bracket if
necessary to make grille flush with wall. (FIG. 6)
USE AND CARE
DISCONNECT ELECTRICAL POWER SUPPLY BEFORE SERVICING FAN.
Do not turn on the fan when starting a fire in a fireplace or wood stove until the
damper is thoroughly warm and fully open. Turning the fan on too soon may draw
smoke and flue gases into the room. Wait until the fire is well established.
Always unplug the fan motor before servicing the fan. The motor bearings on this
fan are lifetime lubricated and will never need oiling.
Clean the fan blade and motor every six months by removing the grille, unplugging
the motor, and gently vacuuming the fan blade and motor.
Clean the grille in warm, soapy water. Use a mild detergent, such as a dishwashing
liquid. DO NOT USE ABRASIVE CLOTHS, STEEL WOOL OR SCOURING POW-
DERS.
Broan-NuTone LLC, 926 West State Street, Hartford, WI 53027 (1-800-637-1453)
KEY NO. PART NO.
NO. NO. PIEZ DESCRIPTION DESCRIPCION
CODIGO
1 99110454 Grille (2 Req.) Rejilla
2 99260428 #6-32 Sheet Metal Nut Tuercas de lámina metálica
(2 Req.) * No. 6-32 (se necesitan 2)
3 99170245 #8B x 3/8 Sheet Metal
Tornillos de lámina metálica
Screws (3 Req.) *
No. 8B x 3/8 (se necesitan 3)*
4 97005322 Motor Mounting Bracket Soporte de montaje del motor
5 99080199 Motor Motor
6 99020125 Blade Paleta
7 98004932 Wiring Box Cover Cubierta de la caja de conexiones
8 99150471 #10-32 x 1/2 Green Ground Tornillo verde de tierra
Screw * No.10-32 x 1/2*
9 98005329 Wiring Box Caja de conexiones
10 97007603 Housing Carcasa
11 99260485 #8B Sheet Metal Nut
Tuerca tipo U de lámina metálica
U-Type (2 Req.) *
No. 8B (se necesitan 2)*
12 99420497 Mounting Bracket (2 Req.) Soporte de montaje
(se necesitan 2)*
13 99170262 #8B x 1-1/4 Pan Head Screw
Tornillos de cabeza plana
(2 Req.) *
No. 8B x 1-1/4 (se necesitan 2)*
14 99270982 Receptacle Enchufe
* Standard Hardware. May be purchased locally. *Material estándar. Puede ser adquirido
localmente
Order service parts by Part No. - NOT by Key No.
Encargue piezas de servicio por No. Piez - NO por No. Codigo.
SERVICE PARTS
Model 512
PIEZAS DE SERVICIO
Modelo 512
99040925G
BROAN-NUTONEONEYEARLIMITEDWARRANTY
Broan-NuTonewarrantstotheoriginalconsumerpurchaserofitsproductsthatsuchproductswillbefreefromdefectsinmaterialsor
workmanshipforaperiodofoneyearfromthedateoforiginalpurchase.THEREARENOOTHERWARRANTIES,EXPRESSOR
IMPLIED, INCLUDING, BUT NOT LIMITED TO, IMPLIED WARRANTIES OF MERCHANTABILITY OR FITNESS FOR A
PARTICULARPURPOSE.
Duringthisone-yearperiod,Broan-NuTonewill,atitsoption,repairorreplace,withoutcharge,anyproductorpartwhichisfoundtobe
defectiveundernormaluseandservice.
THISWARRANTYDOESNOTEXTENDTOFLUORESCENTLAMPSTARTERSANDTUBES.Thiswarrantydoesnotcover(a)normal
maintenanceandserviceor(b)anyproductsorpartswhichhavebeensubjecttomisuse,negligence,accident,impropermaintenance
orrepair(otherthanbyBroan-NuTone),faultyinstallationorinstallationcontrarytorecommendedinstallationinstructions.
Thedurationofanyimpliedwarrantyislimitedtotheone-yearperiodasspecifiedfortheexpresswarranty.Somestatesdonotallow
limitationonhowlonganimpliedwarrantylasts,sotheabovelimitationmaynotapplytoyou.
BROAN-NUTONE’SOBLIGATIONTOREPAIRORREPLACE,ATBROAN-NUTONE’SOPTION,SHALLBETHEPURCHASER’S
SOLEANDEXCLUSIVEREMEDYUNDERTHISWARRANTY.BROAN-NUTONESHALLNOTBELIABLEFORINCIDENTAL,
CONSEQUENTIALORSPECIALDAMAGESARISINGOUTOFORINCONNECTIONWITHPRODUCTUSEORPERFORMANCE.
Somestatesdonotallowtheexclusionorlimitationofincidentalorconsequentialdamages,sotheabovelimitationorexclusionmaynot
applytoyou.
Thiswarrantygivesyouspecificlegalrights,andyoumayalsohaveotherrights,whichvaryfromstatetostate.Thiswarrantysupersedes
allpriorwarranties.
Toqualifyforwarrantyservice,youmust(a)notifyBroan-NuToneattheaddressstatedbelowortelephone:1-800-637-1453,(b)give
themodelnumberandpartidentificationand(c)describethenatureofanydefectintheproductorpart.Atthetimeofrequestingwarranty
service,youmustpresentevidenceoftheoriginalpurchasedate.
Broan-NuToneLLC,926WestStateStreet,Hartford,WI53027(1-800-637-1453)
GARANTIABROAN-NUTONELIMITADA PORUNAÑO
Broan-NuTonegarantizaal consumidorcompradororiginal desus productosquedichos productoscareceránde defectosen
materialesoenmanodeobraporunperíododeunañoapartirdelafechaoriginaldecompra.NOEXISTENOTRASGARANTIAS,
EXPLICITASO IMPLICITAS,INCLUYENDO, PERONO LIMITADASA,GARANTIASIMPLICITASDE COMERCIALIZACION
OAPTITUD PARAUN PROPOSITOPARTICULAR.
Duranteelperíodo deunaño,yasupropiocriterio,Broan-NuTonerepararáoreemplazará,sin costoalgunocualquierproductoo
piezaqueseencuentredefectuosa bajocondicionesnormalesdeservicioyuso.
ESTAGARANTIANOSEAPLICAATUBOSY ARRANCADORES DE LAMPARAS
FLUORESCENTES.Estagarantíanocubre(a)mantenimiento yservicio normaleso (b)cualquier productoopiezasquehayan
sidoutilizadasdeformaerrónea,negligente,quehayancausadounaccidente,oquehayansidoreparadasomantenidasinapropiadamente
(porotrascompañíasque noseanBroan-NuTone),instalacióndefectuosa,oinstalacióncontrariaalasinstruccionesdeinstalación
recomendadas.
Laduracióndecualquiergarantíaimplícitaselimitaa unperíodo deun añocomo seespecificaenlagarantíaexpresa.Algunos
estadosnopermitenlimitacionesencuantoaltiempodeexpiracióndeunagarantíaimplícita,porloquelalimitaciónantesmencionada
puedenoaplicarse austed.
LAOBLIGACION DEBROAN-NUTONE DEREPARAR OREEMPLAZAR,SIGUIENDOELCRITERIO DEBROAN-NUTONE,
DEBERASERELUNICOYEXCLUSIVORECURSOLEGALDEL COMPRADOR BAJOESTA GARANTIA.BROAN-NUTONE
NOSERARESPONSABLE PORDAÑOSINCIDENTALES,CONSIGUIENTES,OPORDAÑOS ESPECIALESQUESURJANA
RAIZDELUSOODESEMPEÑODEL PRODUCTO. Algunosestadosno permitenlaexclusiónolimitacióndedañosincidentales
oconsiguientes,porloque lalimitaciónantesmencionadapuedenoaplicarse austed.
Estagarantíaleproporcionaderechoslegalesespecíficos,yustedpuedetambiéntenerotrosderechos,loscualesvaríandeestado
aestado.Estagarantía reemplazatodas lasgarantías anteriores.
Paracalificarenlagarantíadeservicio,usteddebe(a)notificaraBroan-NuTone aldomicilioquesemencionaabajooalteléfono:1-
800-637-1453,(b)darelnúmero delmodeloylaidentificacióndelapieza,y (c)describirlanaturalezadecualquierdefecto enel
productoopieza.Enelmomentodesolicitarserviciocubiertoporlagarantía,usteddebedepresentarevidenciadelafechaoriginal
decompra.
Broan-NuTone LLC, 926 West State Street Hartford, WI 53027U.S.A.(1-800-637-1453)
