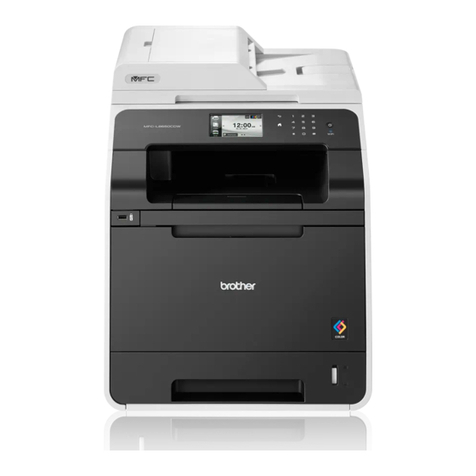
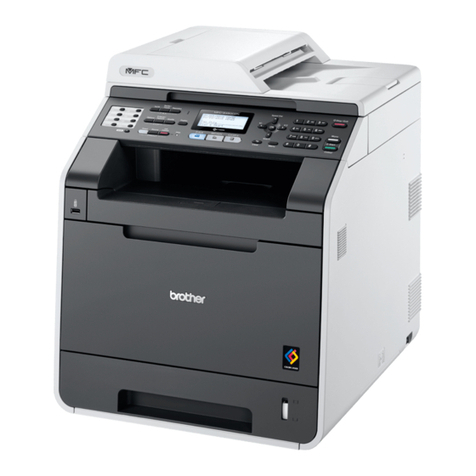
Brother MFC-8510DN Assembly instructions

Advanced User’s Guide
MFC-8510DN
MFC-8910DW
Not all models are available in all countries.
Version 0
ARL/ASA/NZ

i
User's Guides and where do I find them?
1PDF printing is not supported on Windows®Phone.
2Visit us at http://solutions.brother.com/.
Which Guide? What's in it? Where is it?
Product Safety
Guide
Read this Guide first. Please read the Safety
Instructions before you set up your machine.
See this Guide for trademarks and legal
limitations.
Printed / In the box
Quick Setup Guide Follow the instructions for setting up your
machine and installing the drivers and
software for the operating system and
connection type you are using.
Printed / In the box
Basic User's Guide Learn the basic Fax, Copy, Scan and Direct
Print operations and how to replace
consumables. See troubleshooting tips.
Printed / In the box
Advanced User's
Guide
Learn more advanced operations: Fax,
Copy, security features, printing reports and
performing routine maintenance.
PDF file / Installer CD-ROM /
In the box
Software User's
Guide
Follow these instructions for Printing,
Scanning, Network Scanning, Remote
Setup, PC-Fax, and using the Brother
ControlCenter utility.
PDF file / Installer CD-ROM /
In the box
Network User's
Guide
This Guide provides useful information
about wired and wireless network settings
and security settings using the Brother
machine. You can also find supported
protocol information for your machine and
detailed troubleshooting tips.
PDF file / Installer CD-ROM /
In the box
Wi-Fi Direct™ Guide
(MFC-8910DW)
This Guide provides details on how to
configure and use your Brother machine for
wireless printing directly from a mobile
device supporting the Wi-Fi Direct™
standard.
PDF file / Brother Solutions
Center 2
Google Cloud Print
Guide
This Guide provides details on how to
configure your Brother machine to a Google
account and use Google Cloud Print
services for printing over the Internet from
devices using Gmail™ for mobile, GOOGLE
DOCS™ for mobile and applications for the
Chrome OS.
PDF file / Brother Solutions
Center 2
Mobile Print/Scan
Guide for Brother
iPrint&Scan
This Guide provides useful information
about printing JPEG and PDF 1files from
your mobile device and scanning from your
Brother machine to your mobile device when
connected on a Wi-Fi network.
PDF file / Brother Solutions
Center 2

ii
Table of Contents
1 General Setup 1
IMPORTANT NOTE............................................................................................... 1
Memory storage.....................................................................................................1
Set Daylight Saving Time ......................................................................................1
Ecology features.................................................................................................... 2
Toner Save ...................................................................................................... 2
Sleep Time ...................................................................................................... 2
Deep Sleep mode............................................................................................ 2
Quiet mode feature................................................................................................3
Quiet mode ...................................................................................................... 3
LCD Contrast.........................................................................................................3
Dial Prefix ..............................................................................................................4
Setting up the prefix number ...........................................................................4
Changing the prefix number ............................................................................ 4
Mode Timer............................................................................................................5
2 Security features 6
Secure Function Lock 2.0......................................................................................6
Setting the password for the administrator .....................................................7
Changing the password for the administrator.................................................. 7
Setting up the Public user mode......................................................................8
Setting up restricted users...............................................................................8
Turning Secure Function Lock on/off...............................................................9
Switching Users............................................................................................... 9
Setting Lock.........................................................................................................10
Setting up the password ................................................................................11
Changing your Setting Lock password ..........................................................11
Turning Setting Lock on/off............................................................................12
Restricting dialling................................................................................................12
Dial pad restriction.........................................................................................12
One Touch restriction ....................................................................................13
Speed Dial restriction ....................................................................................13
LDAP server restriction (MFC-8910DW) .......................................................13

iii
3 Sending a fax 14
Additional sending options...................................................................................14
Changing a 2-sided fax layout (MFC-8910DW).............................................14
Sending faxes using multiple settings ...........................................................14
Contrast .........................................................................................................15
Changing Fax Resolution ..............................................................................15
Additional sending operations..............................................................................16
Sending a fax manually .................................................................................16
Dual access ...................................................................................................16
Broadcasting..................................................................................................17
Real Time Transmission ................................................................................18
Overseas Mode .............................................................................................19
Delayed Fax ..................................................................................................20
Delayed batch transmission ..........................................................................20
Checking and cancelling waiting jobs............................................................21
Electronic cover page ....................................................................................21
Destination Display ........................................................................................23
Polling overview...................................................................................................24
Polled transmit...............................................................................................24
4 Receiving a fax 26
Remote Fax Options............................................................................................26
Fax Forwarding..............................................................................................26
Fax Storage ...................................................................................................26
Changing Remote Fax Options .....................................................................27
Remote retrieval ............................................................................................28
Remote fax commands..................................................................................30
Additional receiving operations............................................................................31
Printing a reduced incoming fax ....................................................................31
Duplex (2-sided) printing for FAX mode ........................................................31
Setting the Fax Receive Stamp .....................................................................32
Setting the Print Density ................................................................................32
Printing a fax from the memory .....................................................................33
Out of Paper Reception .................................................................................33
Polling overview...................................................................................................34
Polling receive ...............................................................................................34
Stop polling....................................................................................................35
5 Dialling and storing numbers 36
Additional dialling operations ...............................................................................36
Combining quick dial numbers ......................................................................36
Additional ways to store numbers........................................................................36
Setting up Groups for Broadcasting ..............................................................36
Changing Group numbers .............................................................................41
Deleting Group numbers ...............................................................................43

iv
6 Printing reports 44
Fax reports...........................................................................................................44
Transmission Verification Report...................................................................44
Fax Journal (Activity Report) .........................................................................44
Reports ................................................................................................................45
How to print a report ......................................................................................45
7 Making copies 46
Copy settings.......................................................................................................46
Stop copying..................................................................................................46
Enlarging or reducing the image copied ........................................................46
Using the Options key ...................................................................................48
Sorting copies................................................................................................49
Improving copy quality...................................................................................49
Adjusting Brightness and Contrast ................................................................50
Making N in 1 copies (page layout) ...............................................................51
2 in 1 ID Copy................................................................................................52
Tray selection ................................................................................................53
Duplex (2-sided) copying.....................................................................................54
Duplex Copy (long edge flip) .........................................................................54
Advanced Duplex Copy (short edge flip) .......................................................55
A Routine maintenance 57
Cleaning and checking the machine....................................................................57
Checking the Page Counters.........................................................................58
Checking the remaining life of parts ..............................................................58
Replacing periodic maintenance parts.................................................................58
Packing and shipping the machine ......................................................................59
BOptions 62
Optional paper tray (LT-5400) .............................................................................62
Memory board......................................................................................................62
SO-DIMM Types............................................................................................62
Installing extra memory .................................................................................63
C Glossary 65
DIndex 69

v

1
1
1
IMPORTANT NOTE 1
Most of the illustrations in this User’s
Guide show the MFC-8910DW.
Memory storage 1
Your menu settings are stored permanently,
and in the event of a power failure will not be
lost. Temporary settings (for example,
Contrast, Overseas Mode) will be lost. Also,
during a power failure the machine will retain
the date and time and programmed fax timer
jobs (e.g. Delayed Fax) for up to 60 hours.
Other fax jobs in the machine's memory will
not be lost.
Set Daylight Saving
Time 1
You can set the machine to change for
Daylight Saving Time. If you choose On, it will
reset the time forward one hour and if you
choose Off, it will reset the time backward one
hour.
aPress Menu, 0, 2, 2.
bPress aor bto choose On or Off.
Press OK.
cPress Stop/Exit.
General Setup 1

Chapter 1
2
Ecology features 1
Toner Save 1
You can save toner using this feature. When
you set Toner Save to On, prints appear
lighter. The default setting is Off.
aPress Menu, 1, 4, 1.
bPress aor bto choose On or Off.
Press OK.
cPress Stop/Exit.
Note
We do not recommend Toner Save for
printing Photo or Greyscale images.
Sleep Time 1
The Sleep mode setting can reduce power
consumption. When the machine is in Sleep
mode (Power Save mode) it acts as though it
is turned off. The machine will wake up and
start printing when it receives a print job.
You can choose how long the machine must
be idle before it goes into Sleep mode. When
the machine receives a fax or a print job, the
timer will be reset. The default setting is 3
minutes.
While the machine is in Sleep mode the LCD
will show Sleep.
aPress Menu, 1, 4, 2.
bEnter the length of time (0-90 minutes)
the machine is idle before entering
Sleep mode.
Press OK.
cPress Stop/Exit.
Deep Sleep mode 1
If the machine is in Sleep mode and does not
receive any jobs for a certain length of time,
the machine will go into Deep Sleep mode
automatically and the LCD will show
Deep Sleep. Deep Sleep mode uses less
power than Sleep mode. The machine will
wake up when it receives a fax or a print job.

General Setup
3
1
Quiet mode feature 1
Quiet mode 1
The Quiet mode setting can reduce noise
while printing. When Quiet Mode is turned On,
the print speed becomes slower. The default
setting is Off.
aPress Menu, 1, 5.
bPress aor bto choose On or Off.
Press OK.
cPress Stop/Exit.
LCD Contrast 1
You can change the contrast to make the
LCD look lighter or darker.
aPress Menu, 1, 7.
bPress cto make the LCD darker. Or,
press dto make the LCD lighter.
Press OK.
cPress Stop/Exit.

Chapter 1
4
Dial Prefix 1
The Dial Prefix setting will automatically dial a
predefined number before every fax number
you dial. For example: If your telephone
system requires a 9 to dial an outside number
use this setting to automatically dial 9 for
every fax you send.
Setting up the prefix number 1
aPress Menu, 0, 6.
(for New Zealand) Press Menu, 0, 5.
bEnter the prefix number (up to 5 digits)
on the dial pad.
Press OK.
Note
• You can use the numbers 0 to 9, #, l
and !. (Press Hook to display “!”.)
• You cannot use ! with any other numbers
or characters.
• If your telephone system requires a timed
break recall (hookflash), press Hook to
enter the break.
• If the pulse dialing mode is on, # and lare
not available to use.
cPress Stop/Exit.
Changing the prefix number 1
aPress Menu, 0, 6.
(for New Zealand) Press Menu, 0, 5.
bDo one of the following:
To change the prefix number,
press 1.
To delete the prefix number, press 1,
and then press Clear to delete the
digits. Press OK. Go to step d.
To exit without making a change,
press 2. Go to step d.
Note
• You can use the numbers 0 to 9, #, l
and !. (Press Hook to display “!”.)
• You cannot use ! with any other numbers
or characters.
• If your telephone system requires a timed
break recall (hookflash), press Hook to
enter the break.
• If the pulse dialing mode is on, # and lare
not available to use.
cEnter a new prefix number using the dial
pad (up to 5 digits). Press OK.
dPress Stop/Exit.

General Setup
5
1
Mode Timer 1
The machine has three mode keys on the
control panel: FAX, SCAN, and COPY.
You can set how much time the machine
takes after the last Copy or Scan operation to
return to FAX mode. If you choose Off, the
machine will stay in the mode you used last.
This setting also sets the time the machine
will change from registered user to the Public
mode when using Secure Function Lock.
(See Switching Users uu page 9.)
aPress Menu, 1, 1.
bPress aor bto choose 0 Sec,
30 Secs, 1 Min, 2 Mins, 5 Mins or
Off.
Press OK.
cPress Stop/Exit.

6
2
Secure Function Lock 2.0
2
Secure Function Lock lets you restrict Public
access to the following machine functions:
Fax Tx
Fax Rx
Copy
Scan 1
USB Direct
Print 2
Page Limit 3
1Scan includes scan jobs sent via Brother
iPrint&Scan.
2Print includes print jobs via Google Cloud Print and
Brother iPrint&Scan.
3Page Limit is configured using Web Based
Management.
This feature also prevents users from
changing the default settings of the machine
by limiting access to the user-defined Menu
settings.
Before using the security features you must
first enter an administrator password.
Access to restricted operations can be
enabled by creating a restricted user.
Restricted users must enter a password to
use the machine.
Make a careful note of your password. If you
forget it, you will have to reset the password
stored in the machine. For information about
how to reset the password call Brother
Customer Service.
Note
• Secure Function Lock can be set manually
at the control panel, or by using Web
Based Management or BRAdmin
Professional 3 (Windows®only). We
recommend using Web Based
Management or BRAdmin Professional 3
(Windows®only) to configure this feature.
(uu Network User's Guide)
• Only administrators can set limitations
and make changes for each user.
• When Secure Function Lock is on, you
can only use 1.Contrast,
6.Polled TX and 7.Coverpage under
2.Setup Send in the Fax menu.
If Fax Tx is disabled, you cannot use any
of the function in the Fax menu.
• Polling Receive is enabled only when both
Fax Tx and Fax Rx are enabled.
Security features 2

Security features
7
2
Setting the password for the
administrator 2
The password you set in these steps is for the
administrator. This password is used to set
up users and to turn the Secure Function
Lock on or off. (See Setting up restricted
users uu page 8 and Turning Secure
Function Lock on/off uu page 9.)
aPress Menu, 1, 8, 1.
bEnter a four-digit number for the
password using numbers 0-9.
Press OK.
cRe-enter the password when the LCD
shows Verify:.
Press OK.
dPress Stop/Exit.
Changing the password for
the administrator 2
aPress Menu, 1, 8, 1.
bPress aor bto choose Set Password.
Press OK.
cEnter the registered four-digit password.
Press OK.
dEnter a four-digit number for the new
password.
Press OK.
eIf the LCD shows Verify: re-enter the
new password.
Press OK.
fPress Stop/Exit.

Chapter 2
8
Setting up the Public user
mode 2
Public user mode restricts the functions that
are available for Public users. Public users do
not need to enter a password to access the
features made available through this setting.
You can set up one Public user.
aPress Menu, 1, 8, 1.
bPress aor bto choose Setup ID.
Press OK.
cEnter the administrator password.
Press OK.
dPress aor bto choose Public.
Press OK.
ePress aor bto choose Enable or
Disable for Fax Tx.
Press OK.
After you have set Fax Tx, repeat this
step for Fax Rx, Copy, Scan,
USB Direct and Print. When the
LCD shows Exit, press OK.
fPress Stop/Exit.
Setting up restricted users 2
You can set up users with a password and
restrict the functions that are available to
them. You can set up more advanced
restrictions, such as by page count or PC
user login name, through Web Based
Management. (uu Network User's Guide)
You can set up to 25 restricted users.
aPress Menu, 1, 8, 1.
bPress aor bto choose Setup ID.
Press OK.
cEnter the administrator password.
Press OK.
dPress aor bto choose UserXX.
Press OK.
eUse the numeric keys to enter the user
name. (uu Basic User's Guide:
Entering text)
Press OK.
fEnter a four-digit password for the user.
Press OK.
gPress aor bto choose Enable or
Disable for Fax Tx.
Press OK.
After you have set Fax Tx, repeat this
step for Fax Rx, Copy, Scan,
USB Direct and Print. When the
LCD shows Exit, press OK.
hRepeat steps dto gfor entering each
additional user and password.
iPress Stop/Exit.
Note
You cannot input the same name for
different users.

Security features
9
2
Turning Secure Function
Lock on/off 2
If you enter the wrong password, the LCD will
show Wrong Password. Re-enter the
correct password.
Turning Secure Function Lock on
aPress Menu, 1, 8, 1.
bPress aor bto choose Lock OffiOn.
Press OK.
cEnter your four-digit administrator
password.
Press OK.
Turning Secure Function Lock off
aPress Menu, 1, 8, 1.
bPress aor bto choose Lock OniOff.
Press OK.
cEnter your four-digit administrator
password.
Press OK.
Switching Users 2
This setting allows you to switch between
registered restricted users or Public mode
when Secure Function Lock is turned on.
Changing to the restricted user mode
aHold down Shift and press
Secure Print.
bPress aor bto choose ID.
Press OK.
cEnter your four-digit password.
Press OK.
Note
• If the current ID is restricted for the
function you want to use,
Access Denied will appear on the LCD
and then the machine will ask you to
confirm your name. If you are allowed to
access the function you want to use, press
aor bto choose your name and enter your
four-digit password.
• If your User ID has a page limit restriction
and you have already reached the
maximum number of pages, the LCD will
show Limit Exceeded when you print
data. Contact your administrator to check
your Secure Function Lock Settings.

Chapter 2
10
Changing to the Public mode
After a restricted user has finished using the
machine, it will return to the Public setting
within the same time as the Mode Timer
setting (Menu, 1, 1). (See Mode Timer
uu page 5.) You can also exit from the
restricted user mode by pressing the current
Mode key you are in. Then LCD will ask you
Go to Public?.
Press 1to choose 1.Yes.
Note
If the function you want to use is restricted
for all users, Not Available will appear
on the LCD and the machine will go back
to the Ready mode, and you cannot
access the function you want to use.
Contact your administrator to check your
Secure Function Lock Settings.
Setting Lock 2
Setting Lock lets you set a password to stop
other people from accidentally changing your
machine settings.
Make a careful note of your password. If you
forget it, you will have to reset the passwords
stored in the machine. Please call your
administrator or Brother Customer Service.
While the Setting Lock is On, you cannot
change the settings without a password. You
can only change the following Fax
transmission settings that are in the FAX
menu (Menu, 2, 2).
Contrast
Fax Resolution
Delayed Fax
Real Time TX
Polled TX
Overseas Mode
Machine settings cannot be changed using
the Remote Setup while Setting Lock is On.

Security features
11
2
Setting up the password 2
aPress Menu, 1, 8, 2.
bEnter a four-digit number for the
password using numbers 0-9.
Press OK.
cRe-enter your password when the LCD
shows Verify:.
Press OK.
dPress Stop/Exit.
Changing your Setting Lock
password 2
aPress Menu, 1, 8, 2.
bPress aor bto choose Set Password.
Press OK.
cEnter your current four-digit password.
Press OK.
dEnter a four-digit number for the new
password.
Press OK.
eRe-enter your new password when the
LCD shows Verify:.
Press OK.
fPress Stop/Exit.

Chapter 2
12
Turning Setting Lock on/off 2
If you enter the wrong password when
following the instructions below, the LCD will
show Wrong Password. Re-enter the
correct password.
Turning Setting Lock on
aPress Menu, 1, 8, 2.
bPress aor bto choose On.
Press OK.
cEnter your four-digit password.
Press OK.
dPress Stop/Exit.
Turning Setting Lock off
aPress Menu, 1, 8, 2.
bEnter your four-digit password.
Press OK twice.
cPress Stop/Exit.
Restricting dialling 2
This feature is to prevent users from sending
a fax or calling a wrong number by mistake.
You can set the machine to restrict dialling
when you use the dial pad, One Touch,
Speed Dial or LDAP search 1.
If you choose Off, the machine does not
restrict the dialling method.
If you choose Enter # twice, the machine
will prompt you to re-enter the number, and
then if you re-enter the same number
correctly, the machine will start dialling. If you
re-enter the wrong number, the LCD will
show an error message.
If you choose On, the machine will restrict all
fax sending and outbound calls for that
dialling method.
1LDAP is available as a download from the Brother
Solutions Center at: http://solutions.brother.com/.
Dial pad restriction 2
aPress Menu, 2, 6, 1.
bPress aor bto choose On, Off or
Enter # twice.
Press OK.
cPress Stop/Exit.

Security features
13
2
One Touch restriction 2
aPress Menu, 2, 6, 2.
bPress aor bto choose On, Off or
Enter # twice.
Press OK.
cPress Stop/Exit.
Speed Dial restriction 2
aPress Menu, 2, 6, 3.
bPress aor bto choose On, Off or
Enter # twice.
Press OK.
cPress Stop/Exit.
LDAP server restriction
(MFC-8910DW) 2
(The LDAP function is available as a
download.)
aPress Menu, 2, 6, 4.
bPress aor bto choose On, Off or
Enter # twice.
Press OK.
cPress Stop/Exit.
Note
• The Enter # twice setting will not work
if you press Hook before entering the
number. You will not be asked to re-enter
the number.
• Restricted dialing will not work when you
use an external phone.
• The machine cannot restrict dialling when
you use the Redial/Pause button.
• If you chose On or Enter # twice, you
cannot use the Broadcasting feature and
cannot combine quick dial numbers when
dialling.

14
3
Additional sending
options 3
Changing a 2-sided fax layout
(MFC-8910DW) 3
You need to choose the duplex scanning
format before you send a 2-sided fax. The
format you choose will depend on the layout
of your 2-sided document.
aPress Menu, 1, 9, 3.
bDo one of the following:
If your document is flipped on the
Long edge, press aor bto choose
Long edge.
Press OK.
If your document is flipped on the
Short edge, press aor bto choose
Short edge.
Press OK.
cPress Stop/Exit.
Sending faxes using multiple
settings 3
Before you send a fax, you can change any
combination of these settings: contrast,
resolution, Overseas mode, delayed fax
timer, polling transmission, real time
transmission or cover page settings.
aMake sure you are in FAX mode .
After each setting is accepted, the LCD
asks if you want to enter more settings.
22.Setup Send
Next?
a1.Yes
b2.No
Select ab or OK
bDo one of the following:
To change more settings, press 1.
The LCD returns to the Setup Send
menu so you can change another
setting.
If you have finished changing
settings, press 2and go to the next
step for sending your fax.
Sending a fax 3
Long edge
Portrait Landscape
Short edge
Portrait Landscape
Other manuals for MFC-8510DN
8
This manual suits for next models
1
Table of contents
Other Brother MFP manuals

Brother
Brother DCP-395CN User manual

Brother
Brother dcp-9015cdw User manual

Brother
Brother MFC-J245 User manual

Brother
Brother DCP-L2520DW User manual

Brother
Brother DCP-9055CDN User manual

Brother
Brother DCP-7030 User manual

Brother
Brother DCP-L2500D Operating and maintenance manual

Brother
Brother DCP-L2520DW User manual

Brother
Brother FAX-2950 User manual

Brother
Brother DCP-L8400CDN User manual