Brother FAX-2950 User manual

1
Start Here FAX-2950 / MFC-7240
MFC-7290
Quick Setup Guide
ARL/ASA/NZ/GLF Version 0
Please read the Product Safety Guide first, then read this Quick Setup Guide for the correct setup and installation
procedure.
To view the Quick Setup Guide in other languages, please visit http://solutions.brother.com/.
1
Unpack the machine and check the components
This machine must be grounded, If in doubt, call a qualified electrician.
To ensure safe operation the supplied plug must be inserted only into a standard electrical socket that is
properly grounded through the standard electrical wiring. Non grounded equipment may cause an
electrical shock hazard, and may cause excessive electrical noise radiation.
Note
Not all models are available in all countries.
Installer CD-ROM
Telephone Line Cord Adapter
(Australia only)
AC Power Cord
Basic User’s Guide Quick Setup Guide Telephone Line Cord
Drum Unit and Toner Cartridge Assembly
(pre-installed)
Product Safety Guide
ADF Document Output Support Telephone Handset Curled Handset Cord
For Australia and
New Zealand:
For Hong Kong, Malaysia
and Singapore:
For India:
The mains plug supplied with this machine is
a grounded three pin plug. Make sure that
the AC socket will accept the supplied
grounded pin plug.
For Philippines
and Thailand:
The mains plug supplied with this machine is a side grounded two pin plug. Make sure that
the AC socket will accept the supplied grounded pin plug.

2
WARNING
Plastic bags are used in the packing of your machine. To avoid danger of suffocation, keep these
plastic bags away from babies and children. Plastic bags are not toys.
CAUTION
CAUTION
When moving the machine, grasp the side handholds firmly from the front of the machine.
WARNING indicates a potentially hazardous situation which, if not avoided,
could result in death or serious injuries.
CAUTION indicates a potentially hazardous situation which, if not avoided, may
result in minor or moderate injuries.
WARNING
CAUTION
Note
• Keep a minimum gap around the machine as shown in the illustration.
• The components included in the box may differ depending on your country.
• We recommend that you save the original packaging.
• If for any reason you must ship your machine, carefully repack the machine in the original packaging to avoid
any damage during transit. The machine should be adequately insured with the carrier. For how to repack
the machine, see Packing and shipping the machine in the Advanced User’s Guide.
• The interface cable is not a standard accessory. Buy the appropriate interface cable.
USB cable
• It is recommended to use a USB 2.0 cable (Type A/B) that is no longer than 2 metres.
• DO NOT connect the interface cable at this time. Connecting the interface cable is done during the MFL-Pro
installation process.
100 mm 100 mm 210 mm
250 mm

3
2
Remove the packing
material from the
machine
aRemove the packing tape from the outside of
the machine.
bOpen the front cover.
cRemove the Silica Pack from the inside of the
machine.
CAUTION
CAUTION
DO NOT eat the silica gel pack. Please throw
away. If ingested, seek medical attention
immediately.
dLift the elastic band off the drum.
ePull the paper strip to remove the protective
material as shown in the illustration.
fTake out the drum unit and toner cartridge
assembly.
IMPORTANT
DO NOT connect the AC power cord yet.

4
gGently shake it from side to side several times
to distribute the toner evenly inside the
assembly.
hPut the drum unit and toner cartridge assembly
back in the machine.
iClose the front cover of the machine.
3
Attach the ADF
Document Output
Support
aUnfold the ADF Document Support.
bOpen the control panel cover by lifting it toward
the back.
Control Panel Cover

5
cAttach the ADF Document Output Support.
dClose the control panel cover.
4
Install the Handset
aConnect the curled handset cord to the
machine and the other end to the handset.
5
Load paper in the paper
tray
aPull the paper tray completely out of the
machine.
bWhile pressing the green paper-guide release
lever a, slide the paper guides to fit the paper
size you are loading in the tray. Make sure that
the guides are firmly in the slots.
1

6
cFan the stack of paper well to avoid paper jams
and misfeeds.
dPut paper in the tray and make sure:
The paper is below the maximum paper
mark (bbb)a.
Over filling the paper tray will cause paper
jams.
The side to be printed on must be face down.
The paper guides gently touch the sides of
the paper so it will feed correctly.
ePut the paper tray firmly back in the machine.
Make sure that it is completely inserted into the
machine.
fUnfold the support flap ato prevent paper
from sliding off the face-down output tray.
Note
For Legal or Folio size paper, press the release
button a in the bottom of the paper tray and then
pull out the back of the paper tray.
(Legal or Folio size paper are not available in
some regions.)
11
1
(Middle East and Africa only) For more
information about recommended paper, see
Recommended paper and print media in the
Basic User’s Guide.
1
1

7
6
Connect the power cord
and telephone line
aConnect the AC power cord to the machine,
and then plug it into an electrical socket.
bTurn the machine’s power switch on.
cConnect the telephone line cord. Connect one
end of the telephone line cord to the socket on
the machine marked LINE and the other end to
a telephone wall socket.
WARNING
The machine must be grounded using an
earthed plug.
Since the machine is grounded through the
electrical socket, you can protect yourself
from potentially hazardous electrical
conditions on the telephone network by
keeping the power cord connected to your
machine when you connect it to a telephone
line. Similarly, you can protect yourself when
you want to move your machine by
disconnecting the telephone line first and then
the power cord.
IMPORTANT
DO NOT connect the interface cable
yet.
IMPORTANT
The telephone line cord MUST be connected to
the socket on the machine marked LINE.
(Example
for Australia)
Note
If you are sharing one telephone line with an
external telephone, connect it as shown below.
Before you connect the external telephone,
remove the protective cap cfrom the EXT.
socket on the machine.
aExtension telephone
bExternal telephone
cProtective cap
(Example
for Australia)
3
1
2

8
7
Set your country
This procedure may not be available, depending on
the model of your machine.
In this case, proceed to the next step.
You must set your country so that the machine works
correctly on local telecommunication lines in each
country.
aCheck that the power is turned on by plugging
in the power cord and turn the power switch on.
Press OK.
Set Country
Press OK Key
bPress aor bto select your country (Australia,
New Zealand, South Africa, Turkey or others).
Australia
Select ab or OK
cPress OK when the LCD shows your country.
dThe LCD prompts you to make sure of the
country again.
Australia?
1.Yes 2.No
eDo one of the following:
If the LCD shows the correct country, press
1to go to Step f.
Press 2to go back to Step bto select the
country again.
fAfter the LCD shows Accepted, the machine
will restart automatically. After the restart, the
LCD shows Please Wait.
Note
If you are sharing one telephone line with an
external telephone answering machine, connect it
as shown below.
Before you connect the external telephone
answering machine, remove the protective cap c
from the EXT. socket on the machine.
aExtension telephone answering machine (not
allowed)
bExternal telephone answering machine
cProtective cap
Set the receive mode to External TAD if
you have an external answering machine.
See Choose a Receive Mode on page 9. For
additional details, see Connecting an
external TAD in the Basic User’s Guide.
(Example
for Australia)
3
1
2

9
8
Choose a Receive Mode
There are four possible receive modes: Fax Only,
Fax/Tel, Manual and External TAD.
aPress Menu, 0, 1.
bPress aor bto choose the receive mode.
Press OK.
cPress Stop/Exit.
9
Set the LCD contrast
(if needed)
If you are having difficulty reading the LCD, try
changing the contrast setting.
aPress Menu, 1, 5.
bPress cto increase the contrast.
—OR—
Press dto decrease the contrast.
Press OK.
cPress Stop/Exit.
10
Set the date and time
The machine displays the time, and if you set up the
station ID the date and time will be added to each fax
you send.
aPress Menu, 0, 2, 1.
bEnter the last two digits of the year on the dial
pad, and then press OK.
Date&Time
Year:2013
(e.g. Enter 1, 3for 2013.)
cEnter the two digits for the month on the dial
pad, and then press OK.
Date&Time
Month:03
(e.g. Enter 0, 3for March.)
dEnter the two digits for the day on the dial pad,
and then press OK.
Date&Time
Day:25
(e.g. Enter 2, 5for 25th.)
eEnter the time in 24-hour format on the dial
pad, and then press OK.
Date&Time
Time:15:25
(e.g. Enter 1, 5, 2, 5for 15:25.)
fPress Stop/Exit.
For more details, see Using receive modes in
the Basic User's Guide.
Do you want to use the telephone features of your
machine (if available) or an external telephone or
external telephone answering device connected on the
same line as the machine?
Your machine
automatically answers
every call as a fax.
Your machine controls
the line and
automatically answers
every call. If the call is
not a fax, the phone will
ring for you to pick up
the call.
Your external telephone
answering device (TAD)
automatically answers
every call. Voice
messages are stored
on the external TAD.
Fax messages are
automatically printed.
You control the phone
line and must answer
every call yourself.
Do you want the machine to
answer fax and telephone calls
automatically?
Manual
Fax Only
Fax/Tel
External TAD
No
Yes
Yes
No
No
Yes
Are you using the voice message
function of an external telephone
answering device?

10
11
Enter personal
information (Station ID)
The machine displays the date and time, and if you
set up the Station ID, it will add it to each fax you send.
aPress Menu, 0, 3.
bEnter your fax number (up to 20 digits) on the
dial pad, and then press OK.
Station ID
Fax:
cEnter your telephone number (up to 20 digits)
on the dial pad, and then press OK. If your
telephone number and fax number are the
same, enter the same number again.
Station ID
Tel:
dUse the dial pad to enter your name (up to
20 characters), and then press OK.
Station ID
Name:
ePress Stop/Exit.
12
Fax Transmission Report
Your Brother machine is equipped with a
Transmission Verification Report that can be used as
confirmation that you sent a fax. This report lists the
name or fax number of the receiving party, the date,
time, and duration of the transmission, the number of
pages transmitted, and whether or not the
transmission was successful. If you want to use the
Fax Transmission Report feature see Printing reports
in the Advanced User’s Guide.
13
Set tone or pulse dialling
mode (not available in
New Zealand)
Your machine comes set for a Tone dialling service. If
you have a Pulse dialling service (rotary), you need to
change the dialling mode.
aPress Menu, 0, 4.
bPress aor bto choose Pulse (or Tone).
Press OK.
cPress Stop/Exit.
14
Set the telephone line
compatibility
If you are connecting the machine to a VoIP service
(over the Internet) you need to change the
compatibility setting.
aPress Menu, 2, 0, 1.
bPress aor bto choose Basic(for VoIP).
Press OK.
cPress Stop/Exit.
Note
• See the following chart for entering your name.
• If you need to enter a character that is on the
same key as the last character, press cto move
the cursor to the right.
• If you entered a character incorrectly and want
to change it, press dor cto move the cursor to
the incorrect character, press Clear.
Press
key
One
time
Two
times
Three
times
Four
times
Five
times
2ABC2A
3DEF 3D
4GH I 4G
5JKL5J
6MNO 6M
7PQRS 7
8TUV8T
9WX Y Z 9
For more details, see Entering text in the
Basic User’s Guide.
Note
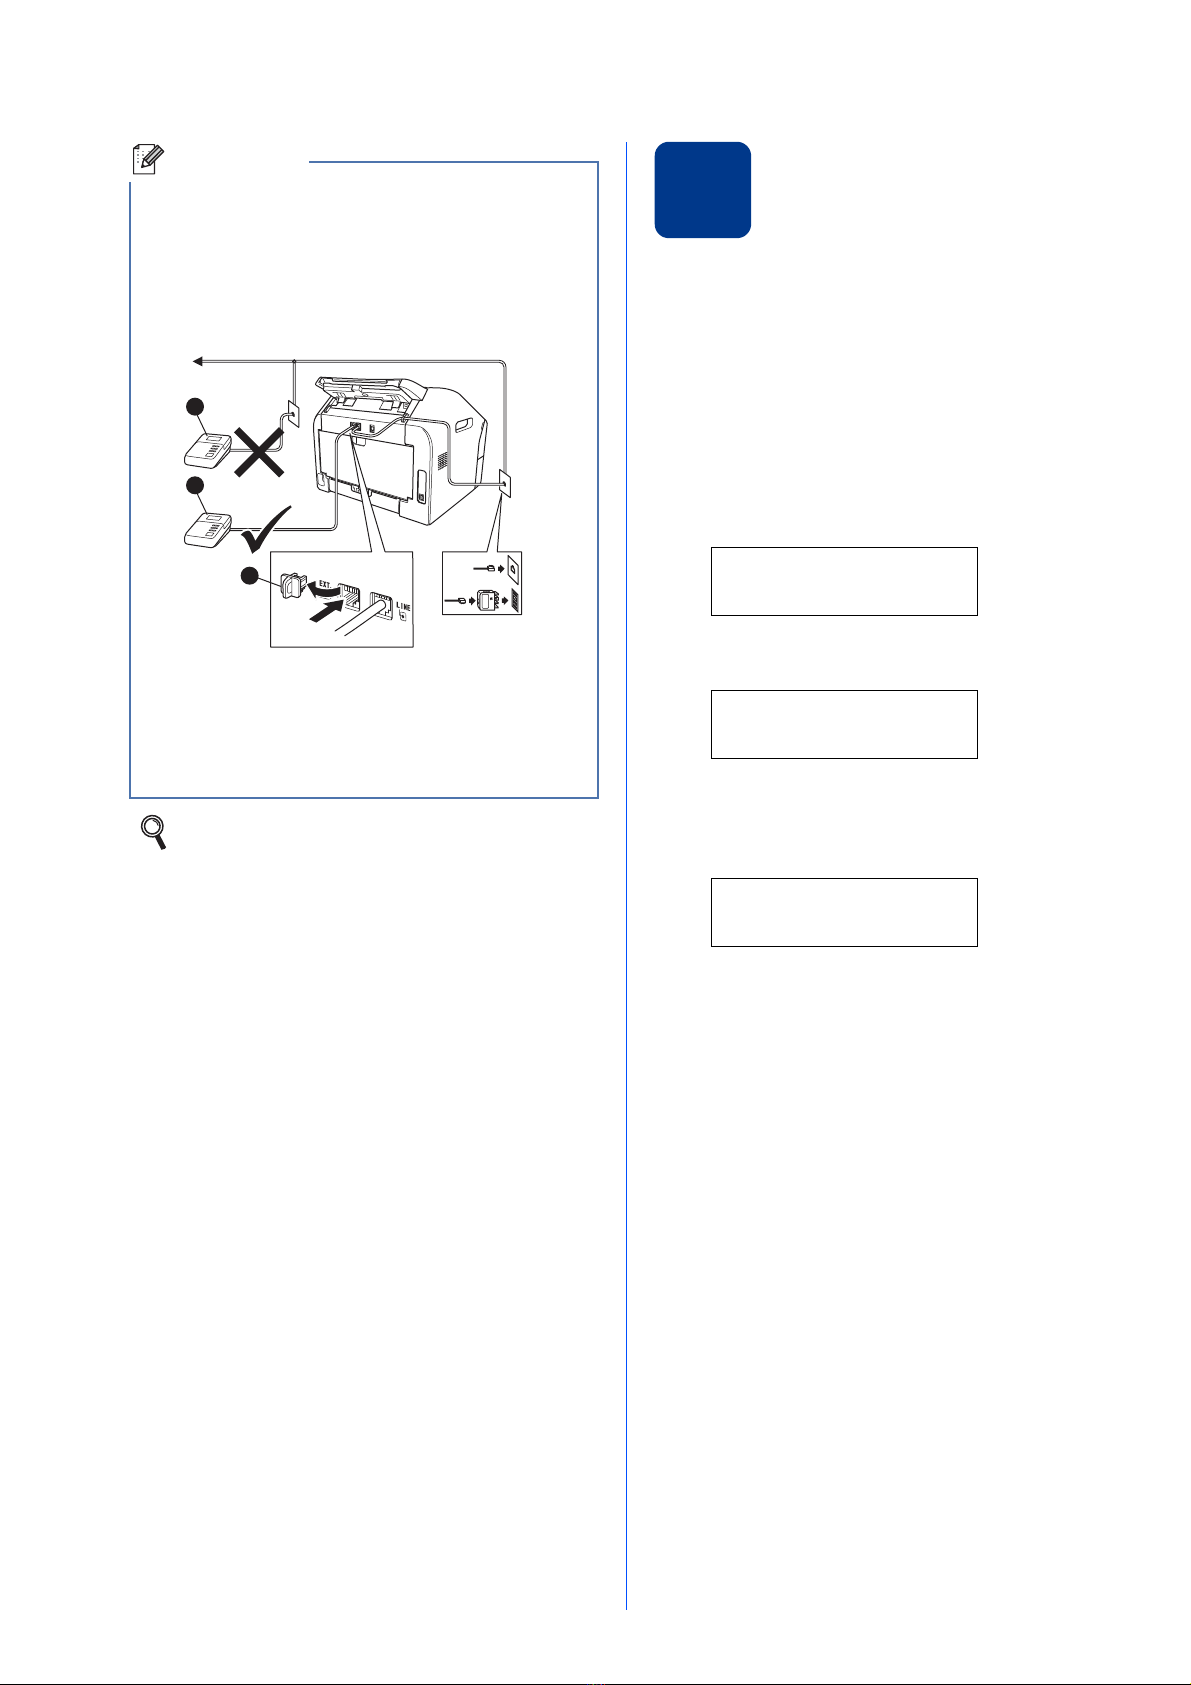
If you make a mistake and want to start again,
press Stop/Exit and go back to step a.
Note
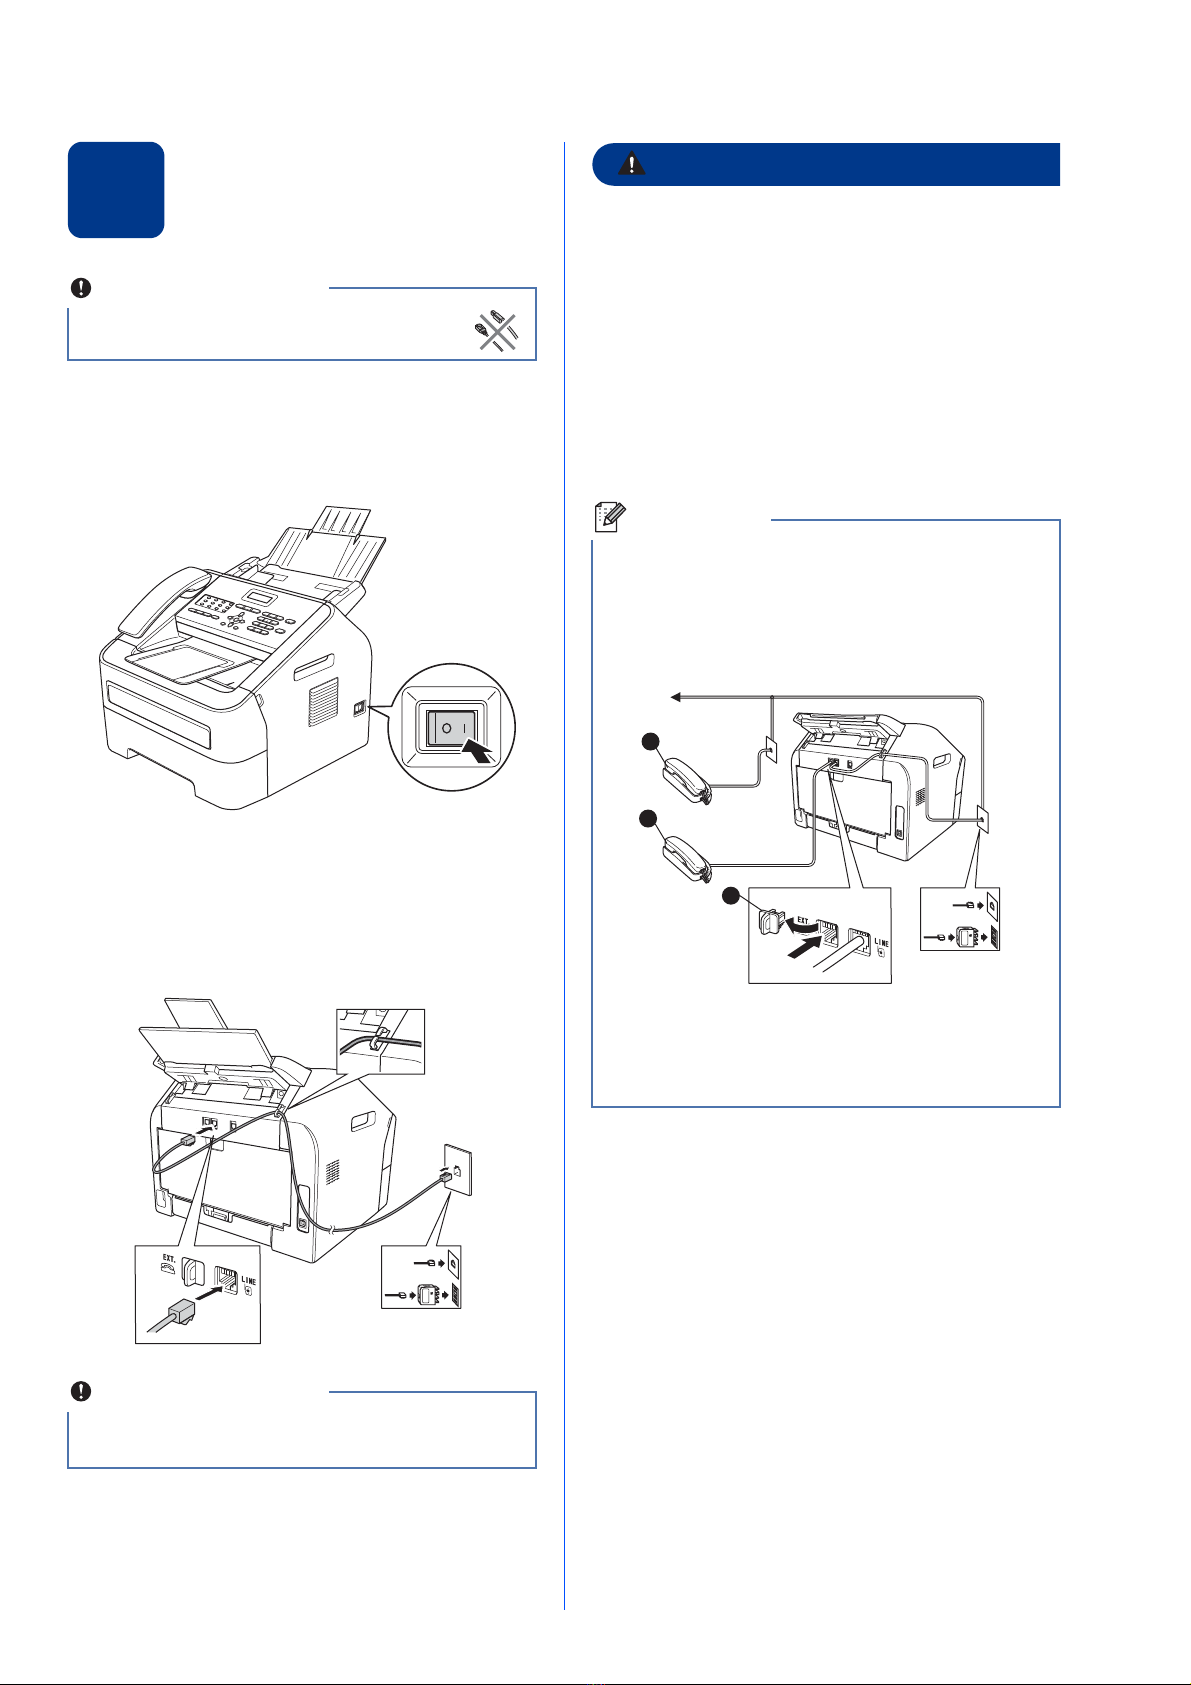
If you are using an analogue telephone line you
can skip this step.

11
15
Set the telephone line
type (Middle East and
Africa only)
If you are connecting the machine to a line that
features a PABX (PBX) or ISDN to send and receive
faxes, it is also necessary to change the phone line
type accordingly by completing the following steps.
aPress Menu, 0, 6.
bPress aor bto choose PBX, ISDN or Normal.
Press OK.
Do one of the following:
If you choose ISDN or Normal, go to step f.
If you choose PBX, go to step c.
cDo one of the following:
If you want to change the current prefix
number, press 1and go to step d.
If you do not want to change the current
prefix number, press 2and go to step f.
dPress Clear to delete the default setting, then
enter the prefix number (up to 5 digits) on the
dial pad, and then press OK.
ePress aor bto choose On or Always and press
OK.
fPress Stop/Exit.
16
Dial Prefix (not available
in Middle East and Africa)
The dial prefix setting will automatically dial a
predefined number before every fax number you dial.
For example: If your phone system requires a 9 to dial
an outside number this setting will automatically dial 9
for every fax you send.
aPress Menu, 0, 6.
(For New Zealand, press Menu, 0, 5.)
bEnter the prefix number (up to 5 digits) on the
dial pad, and then press OK.
cPress Stop/Exit.
Note
The default setting is “!”. When you press
Tel/Mute/R and Shift at the same time, “!” will be
displayed on the LCD.
Note
• You can use the numbers 0 to 9, #, land !.
(Press Tel/Mute/R and Shift at the same time
to display “!”.)
• You cannot use ! with any other numbers or
characters.
• If your telephone system requires a timed break
recall, press Tel/Mute/R and Shift at the same
time to enter the break.
Note
• If you choose On, pressing Tel/Mute/R and
Shift at the same time (the screen displays “!”)
will let you access an outside line.
• If you choose Always, you can access an
outside line without pressing Tel/Mute/R and
Shift at the same time.
Note
PBX and TRANSFER
The machine is initially set to Normal, which lets
the machine connect to a standard PSTN (Public
Switched Telephone Network) line. However,
many offices use a central telephone system or
Private Automatic Branch Exchange (PABX).
Your machine can be connected to most types of
PABX (PBX). The machine’s recall feature
supports timed break recall only (TBR). TBR will
work with most PABX (PBX) systems allowing
you to gain access to an outside line, or transfer
calls to another extension. The feature works
when Tel/Mute/R and Shift are pressed at the
same time.
Note
• You can use the numbers 0 to 9, #, land !.
(Press Hook/Hold to display “!”.)
• You cannot use ! with any other numbers or
characters.
• If your telephone system requires a timed break
recall (hookflash), press Hook/Hold to enter the
break.
• (Not available in New Zealand) If the pulse
dialling mode is on, # and lare not available to
use.

12
17
Set Daylight Saving Time
(Oceania and Asia only)
You can set the machine to change for Daylight
Saving Time. If you choose On, it will reset the time
forward one hour and if you choose Off, it will reset
the time backward one hour.
aPress Menu, 0, 2, 2.
bPress aor bto choose On or Off.
Press OK.
cPress 1or 2to choose 1.Change or 2.Exit.
dPress Stop/Exit.
18
Automatic Daylight
Savings Time (Middle
East and Africa only)
You can set the machine to change automatically for
Daylight Saving Time. It will reset itself forward one
hour in the Spring and backward one hour in the
Autumn.
aPress Menu, 0, 2, 2.
bPress aor bto choose On (or Off).
Press OK.
cPress Stop/Exit.

13
Windows®
USB
Macintosh
19
Choose your Operating System
These installation instructions are for Windows®XP Home/Windows®XP Professional, Windows®XP
Professional x64 Edition, Windows Vista®, Windows®7, and Mac OS X (versions 10.5.8, 10.6.x, 10.7.x).
Note
• You can visit us at http://solutions.brother.com/ where you can get product support, the latest driver updates
and utilities, and answers to frequently asked questions (FAQs) and technical questions.
• For Linux®, visit your model page at http://solutions.brother.com/.
Windows
®
, go to page 14
Macintosh, go to page 16

14
Windows®
USB
For Windows
®
Users
(Windows®XP/XP Professional x64 Edition/Windows Vista®/Windows®7)
20
Before you install
aMake sure that your computer is ON and you
are logged on with Administrator rights.
bTurn off the machine and make sure the USB
interface cable is NOT connected to the
machine. If you have already connected the
cable, disconnect it.
21
Install MFL-Pro Suite
aPut the installer CD-ROM into your CD-ROM
drive. If the model name screen appears,
choose your machine. If the language screen
appears, choose your language.
bClick Install MFL-Pro Suite, and click Yes if
you accept the license agreements.
cChoose Standard and then click Next.
dFollow the on-screen instructions until this
screen appears.
IMPORTANT
• If there are any programs running, close them.
• The screens may differ depending on your
operating system.
Note
The installer CD-ROM includes Nuance™
PaperPort™ 12SE. This software supports
Windows®XP (SP3 or greater), XP Professional
x64 Edition (SP2 or greater), Windows Vista®
(SP2 or greater) and Windows®7. Update to the
latest Windows®Service Pack before installing
MFL-Pro Suite.
Note
If the Brother screen does not appear
automatically, go to My Computer (Computer),
double-click the CD-ROM icon, and then
double-click start.exe.
Note
• If the installation does not continue
automatically, open the top menu again by
ejecting and then reinserting the CD-ROM or
double-click the start.exe program from the
root folder, and continue from step bto install
MFL-Pro Suite.
• For Windows Vista®and Windows®7 users,
when the User Account Control screen
appears, click Allow or Yes.

15
Windows®
USB
Windows®
USB
Macintosh
eConnect the USB cable to the USB port
marked with the symbol on your machine
and then connect the cable to your computer.
fTurn the machine on.
The installation will automatically start. Follow
the on-screen instructions.
gWhen the On-Line Registration screen
appears, make your selection and follow the
on-screen instructions. Once you have
completed the registration process, click Next.
hWhen the Setup Complete screen appears,
check the box of the action you want to
perform, and then click Next.
22
Finish and restart
aClick Finish to restart your computer. After
restarting the computer, you must be logged on
with Administrator rights.
IMPORTANT
DO NOT cancel any of the screens during the
installation. It may take a few seconds for all
screens to appear.
Note
For Windows Vista®and Windows®7 users,
when the Windows Security screen appears,
select the check box and click Install to complete
the installation correctly.
Note
• If an error message appears during the
software installation, run the Installation
Diagnostics located in Start/All
Programs/Brother/MFC-XXXX (where MFC-
XXXX is your model name).
• Depending on your security settings, a
Windows®Security or antivirus software
window may appear when using the machine or
its software. Please allow or permit the window
to continue.
Finish
The installation is now
complete.
Note
XML Paper Specification Printer Driver
The XML Paper Specification Printer Driver is the
most suitable driver for Windows Vista®and
Windows®7 when printing from applications that
use the XML Paper Specification documents.
Please download the latest driver by accessing
the Brother Solutions Center at
http://solutions.brother.com/.

16
Macintosh
USB
For Macintosh Users
(Mac OS X 10.5.8 - 10.7.x)
20
Before you install
aMake sure your machine is connected to the
power and your Macintosh is ON. You must be
logged on with Administrator rights.
bConnect the USB cable to the USB port
marked with the symbol on your machine
and then connect the cable to your Macintosh.
cMake sure your machine’s power switch is on.
21
Install MFL-Pro Suite
aPut the installer CD-ROM into your CD-ROM
drive.
bDouble-click the Start Here OSX icon. If
prompted, select your model and then follow
the on-screen instructions.
cChoose your machine from the list, and then
click OK.
dWhen this screen appears, click Next.
IMPORTANT
For users of Mac OS X 10.5.7 or lower, upgrade
to Mac OS X 10.5.8 - 10.7.x. (For the latest drivers
and information for the Mac OS X you are using,
visit http://solutions.brother.com/.)
IMPORTANT
DO NOT cancel any of the screens during the
installation. It may take a few minutes for the
installation to complete.
The installation of MFL-Pro Suite is now
complete.
Go to step 22 on page 17.

17
Macintosh
USB
Windows®
USB
Macintosh
22
Download and install
Presto! PageManager
When Presto! PageManager is installed OCR
capability is added to Brother ControlCenter2. You
can easily scan, share and organize photos and
documents using Presto! PageManager.
aOn the Brother Support screen, click
Presto! PageManager and follow the
on-screen instructions.
Finish
The installation is now
complete.

Other Information
18
Brother CreativeCentre
Get inspired. If you’re using Windows®, double-click
the Brother CreativeCentre icon on your desktop to
access our FREE web site with many ideas and
resources for personal and professional use. This
icon appears after installing MFL-Pro Suite or the
optional software available from the Brother Solutions
Center.
Mac users can access Brother CreativeCentre at this
web address:
http://www.brother.com/creativecenter/

19
Consumables
Consumables
When the time comes to replace consumable items, an error will be indicated by the LCD on the control panel. For
more information about the consumables for your machine, visit us at http://www.brother.com/original/ or contact
your local Brother reseller.
Toner cartridges Drum unit
Standard Toner: TN-2230 (For Oceania),
TN-2260 (For Asia, Middle East and Africa)
High Yield Toner: TN-2250 (For Oceania),
TN-2280 (For Asia, Middle East and Africa)
DR-2225 (For Oceania)
DR-2255 (For Asia, Middle East and Africa)

Trademarks
The Brother logo is a registered trademark of Brother Industries, Ltd.
Brother is a registered trademark of Brother Industries, Ltd.
Microsoft and Windows are registered trademarks of Microsoft Corporation in the United States and/or other countries.
Windows Vista is either a registered trademark or trademark of Microsoft Corporation in the United States and/or other countries.
Apple, Macintosh, and Mac OS are trademarks of Apple Inc., registered in the U.S. and other countries.
Mac and the Mac logo are trademarks of Apple Inc., registered in the U.S. and other countries.
Linux is the registered trademark of Linus Torvalds in the U.S. and other countries.
Nuance, the Nuance logo and PaperPort are trademarks or registered trademarks of Nuance Communications, Inc. or its affiliates in the United
States and/or other countries.
Each company whose software title is mentioned in this manual has a Software License Agreement specific to its proprietary programs.
Any trade names and product names of companies appearing on Brother products, related documents and any other
materials are all trademarks or registered trademarks of those respective companies.
Compilation and Publication
Under the supervision of Brother Industries, Ltd., this manual has been compiled and published, covering the latest product descriptions and
specifications.
The contents of this manual and the specifications of this product are subject to change without notice.
Brother reserves the right to make changes without notice in the specifications and materials contained herein and shall not be responsible for
any damages (including consequential) caused by reliance on the materials presented, including but not limited to typographical and other
errors relating to the publication.
Copyright and License
©2012 Brother Industries, Ltd. All rights reserved.
This manual suits for next models
2
Table of contents
Other Brother MFP manuals

Brother
Brother DCP-395CN User manual

Brother
Brother DCP-L2520DW User manual

Brother
Brother DCP-L2500D Operating and maintenance manual

Brother
Brother DCP-L8400CDN User manual

Brother
Brother MFC-8510DN Assembly instructions

Brother
Brother DCP-9055CDN User manual

Brother
Brother MFC-J430w User manual

Brother
Brother dcp-9015cdw User manual

Brother
Brother MFC-J245 User manual

Brother
Brother DCP-L2520DW User manual