Konica Minolta bizhub 250 User manual

Shortcut Manual
Bizhub 250/350
C203/253/353


1. Touch Panel
2. Main Power
3. Power
4. Mode Memory
5. Utility/Counter
6. Reset
7. Interrupt
8. Stop
9. Proof Copy
10. Start
11. Panel
12. “C” Clear
13. Keypad
14. Help
15. Enlarge Display
16. Accessibility
17. Power Save
18. Access
19. Brightness
20. User Box
21. Fax / Scan
22. Copy

Basic (I)
-- Color Mode
1. Auto Color – This setting to automatically detect the documents are in color or black and white
2. Full Color – The copy in full color
3. Black – The copy in black and white
4. 2 Color – Print all areas of the document determined to be in color with the specified color, and
print all areas determined to be black in black
5. Single Color – Print copies in the
specified color, regardless of whether the
document is in color or in black and white
Basic (II)
-- Paper
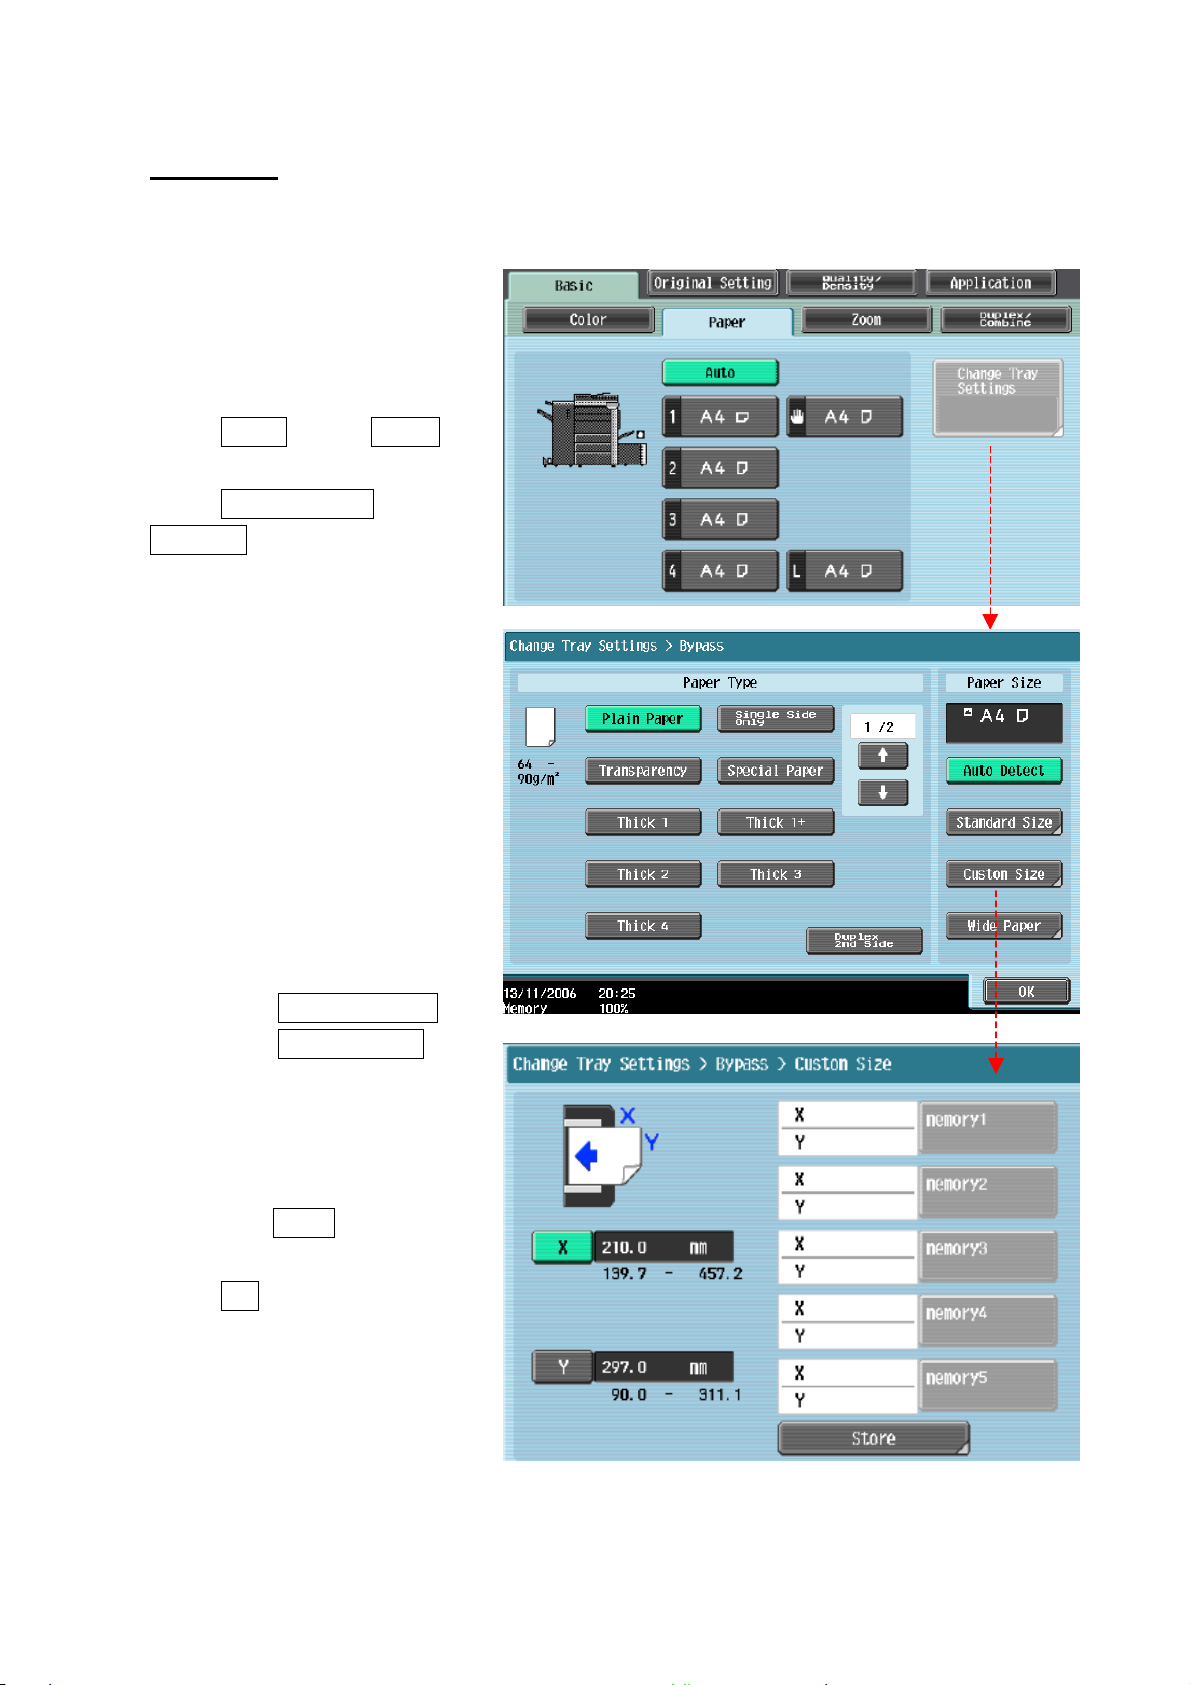
Change Bypass Tray Setting
1 Touch Basic, Touch Paper
2 Select Bypass Tray
3 Touch Change Tray
Settings
4 Select Paper Type
5 Input paper size
a Touch Standard Size
b Touch Custom Size
input (Length) X and
(width) Y,e.g. 90mm
please input 0900
(If stored paper size,
touch Store,then
choose Memory1 -5 )
6 Touch OK

Basic (III)
-- Zoom
Touch ZOOM
1 Select fixed zoom size
a Touch default zoom ratios
e.g.︰A3 A4 default zoom ratio is
0.707
b Touch
-
+
to change zoom ratio
2 Touch XY Zoom
Using the keypad,type in the desired zoom ratio then touch OK
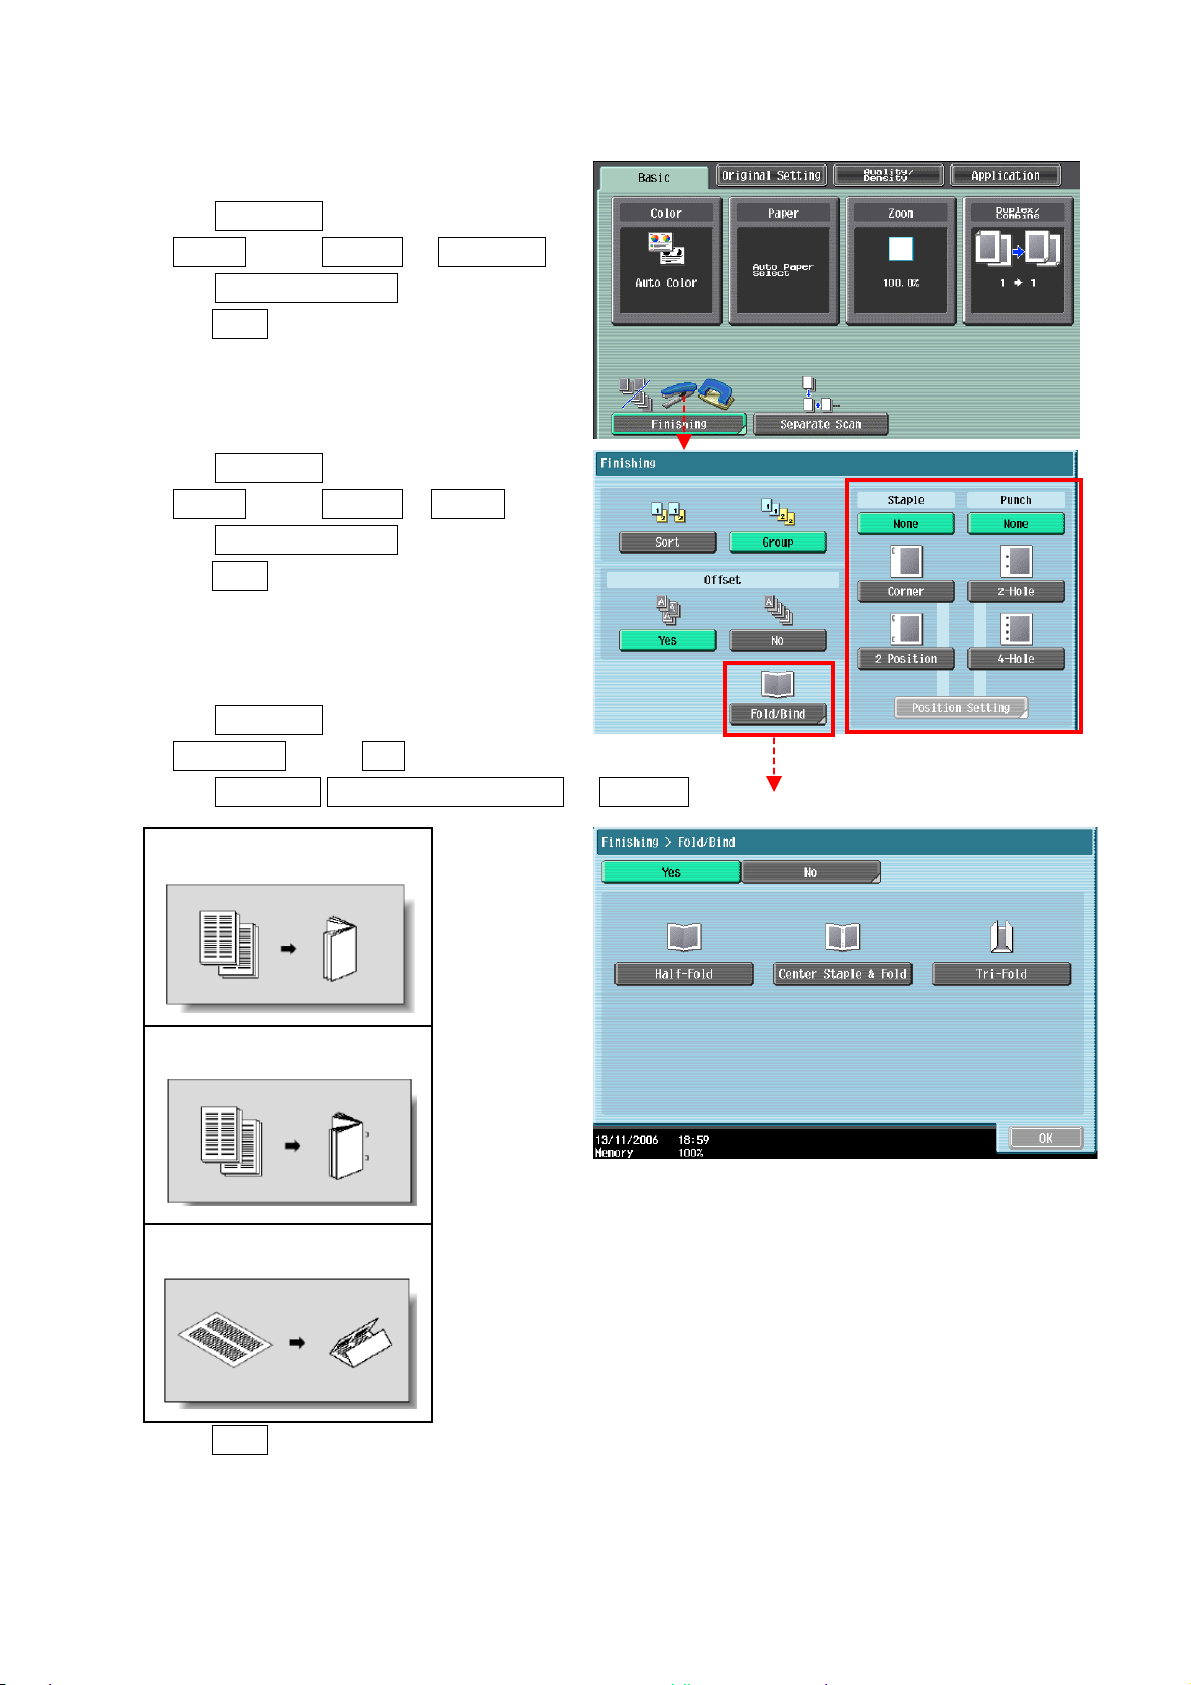
Sort / Group
1. Touch Finishing
2. Touch Sort or Group
3. Touch Start
Offset
1. Touch Finishing
2. Offset touch Yes
3. Press Start
Sort Group
(Optional Function)
Staple
1. Touch Finishing
2. At Staple select Corner or 2position
3. Touch position Setting
4. Press Start
Punch
1. Touch Finishing
2. At Staple select 2 Hole or 4 Hole
3. Touch position Setting
4. Press Start
Fold/Bind
1. Touch Finishing
2. At Fold/Bind select Yes
3. Touch Half-Fold Center Staple & Fold or Tri-Fold
4. Press Start
Half-Fold
Center Staple & Fold
Tri-Fold

Basic (IV)
--Duplex/Combine
Select Combine
1. Touch 2 in 1 or
2. Touch 4 in 1/ 8 in 1
To reduce the size from 2 / 4 / 8
sheets originals into 1 sheet of copy
Original >Copy
a. 1-sided > 2-sided Single-sided Original to Double-sided Copy
b. 2-sided >1-sided Double-sided Original to Single-sided Copy
c. 2-sided >2-sided Double-sided Original to Double-sided Copy
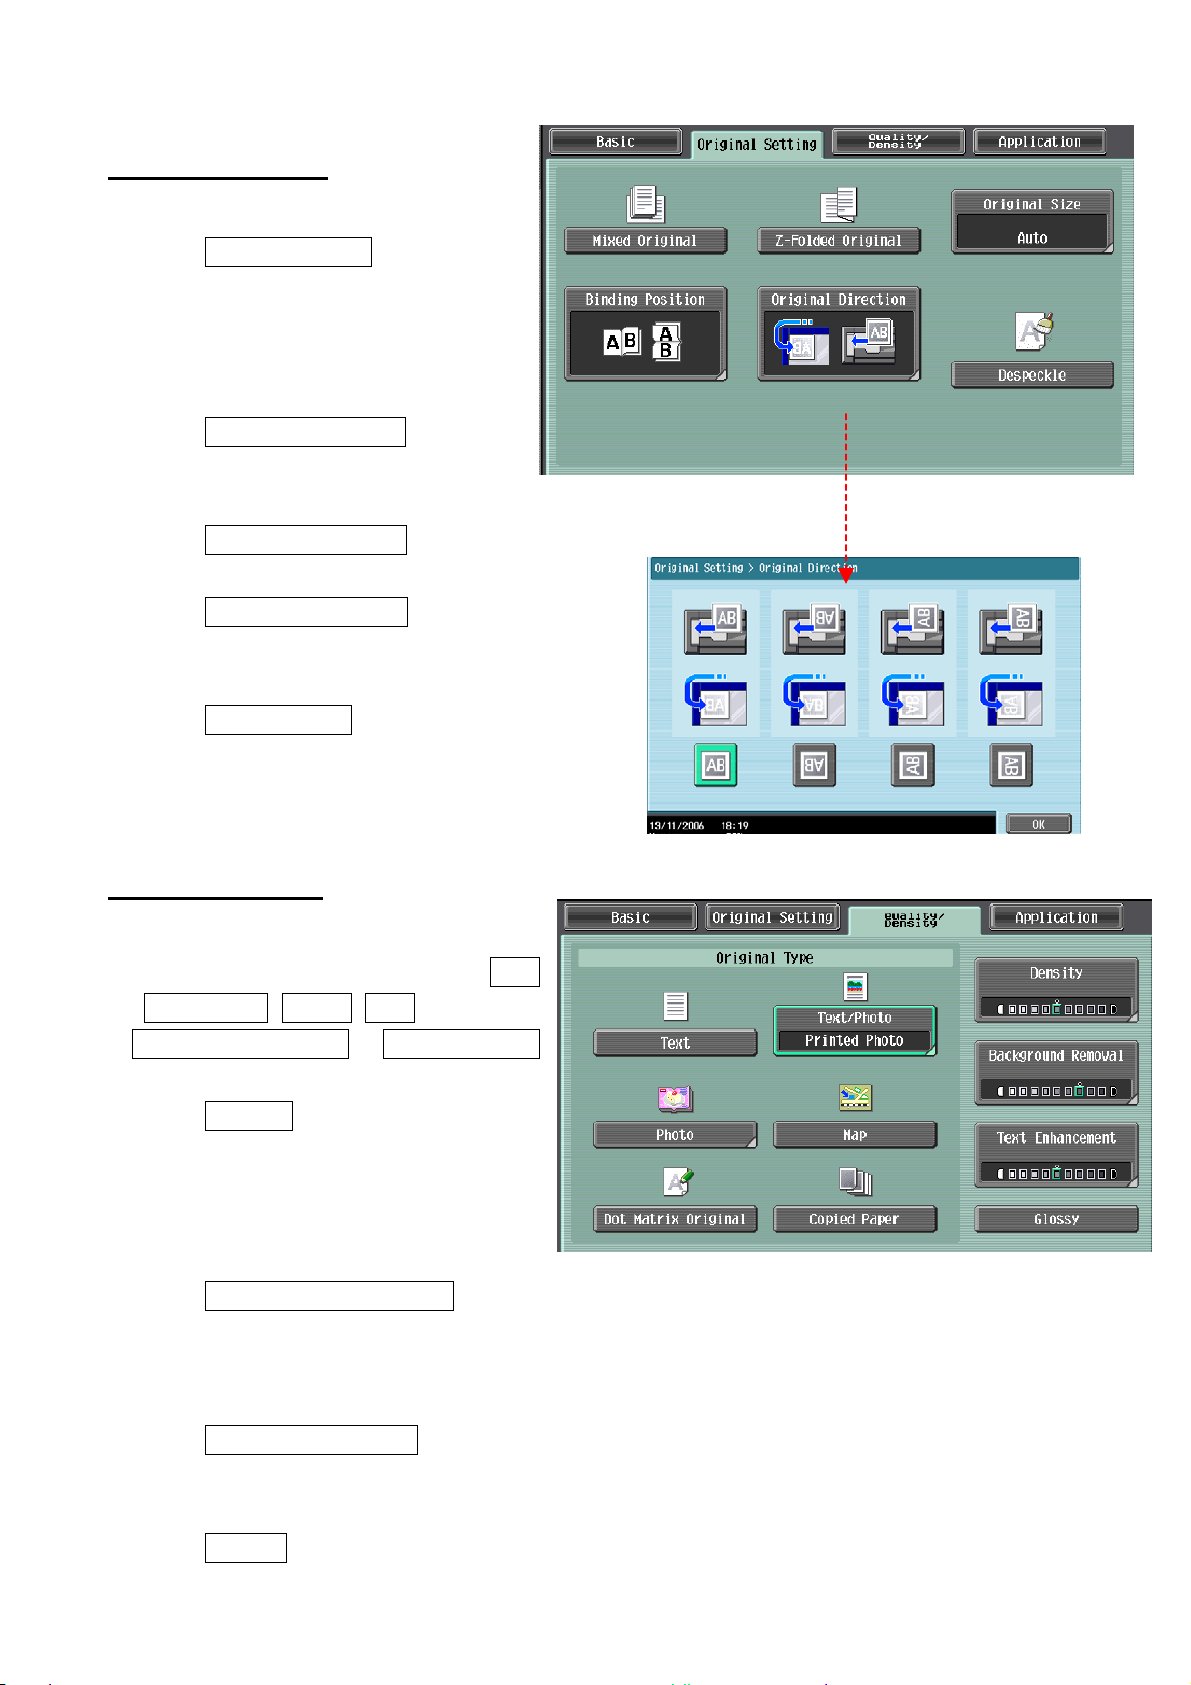
Original Setting
1. Touch Mixed Original
automatically detect the documents
size and automatically choose paper
tray
2. Touch Z-Folded Original (Optional
Function)
3. Touch Binding Direction -- copy-binding direction
4. Touch Original Direction – select original
direction
5. Touch Original Size -- select original size
Quality/Density
1. Select Original Type to choose Text,
Text/Photo, Photo, Map,
Dot Matrix Original or Copied Paper
2. Touch Density – the print image can
be adjusted, each time [Lighter] or
[Darker] is touched, the density is
lightened or darkened by one level.
3. Touch Background Removal – the density of the background color of the document
can be adjusted, each time [Light] or [Dark] is touched, the background density is
lightened or darkened by one level.
4. Touch Text Enhancement – select the reproduction quality of text when copying
documents consisting of text that overlaps images such as illustrations or graphs
5. Touch Glossy – select this setting when copying images with a glossy finish

Application
- OHP Interleave
1. Touch Application
2. Touch Sheet /Cover /Chapter Insert
3. Touch OHP Interleave
4. Select inserting paper tray
5. Load OHP transparencies into the bypass
tray
6. Touch OK
7. Press Start
Other manuals for bizhub 250
7
This manual suits for next models
4
Table of contents
Other Konica Minolta MFP manuals

Konica Minolta
Konica Minolta bizhub C654e User manual

Konica Minolta
Konica Minolta bizhub 306 User manual

Konica Minolta
Konica Minolta Bizhub 165 User manual

Konica Minolta
Konica Minolta bizhub 360 User manual

Konica Minolta
Konica Minolta bizhub C3850FS User manual

Konica Minolta
Konica Minolta BIZHUB 226 User manual


