manuals.online logo
Brands
  1. Home
  2. •
  3. Brands
  4. •
  5. Brother
  6. •
  7. Sewing Machine Accessories
  8. •
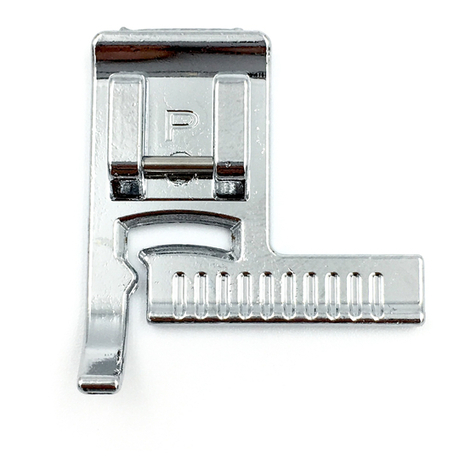
  9. Brother SA208 User manual

Brother SA208 User manual

1XG8920-001
VORSICHT
Drehen Sie das Handrad in Ihre Richtung (gegen den Uhrzeigersinn),•
um sicherzustellen, dass die Nadel nicht auf den Nähfuß trifft. Die Nadel
könnte sonst abbrechen und Sie könnten sich dadurch verletzen.
Achten Sie darauf, dass Geradstich eingestellt ist (linke Nadelposition).•
Stellen Sie die Stichbreite zusätzlich auf 0,0 mm.
DEEN
CAUTION
Rotate the handwheel toward you (counterclockwise) to make sure the•
needle does not strike the presser foot. Otherwise the needle may break
and cause injuries.
Be sure to select the straight stitch (left needle position). In addition, set•
the stitch width to 0.0 mm.
FR
ATTENTION
Tournez le volant vers vous (sens inverse des aiguilles d’une montre)•
pour vous assurer que l’aiguille ne heurte pas le pied-de-biche. Sinon,
l’aiguille risque de se casser et de vous blesser.
Veillez à sélectionner le point droit (aiguille à gauche). Veillez également à•
régler la largeur de point sur 0,0 mm.
VOORZICHTIG
Draai het handwiel naar u toe (tegen de klok in) om ervoor te zorgen dat•
de naald de persvoet niet raakt. Anders kan de naald breken en hierdoor
kunt u letsel oplopen.
Zorg ervoor dat u de rechte steek (linkernaaldstand) selecteert. Stel•
bovendien de steekbreedte in op 0,0 mm.
NL
Attaching the presser foot■
Sewing■
Sew with the folded hem aligned on the edge of
the presser foot.
Folded hem1
If the stitch width is set to 7.0 mm, the needle
will drop into the notch on the right side.
Note
Be sure to select the straight stitch (left needle
position).
Ifthefabricdoesnoteasilytunderthe•
presser foot, raise the presser foot lever to its
highest position to raise the presser foot even
higher.
If the fabric does not feed at the beginning•
of stitching, place fabric (with the same
thickness as the fabric being sewn) under the
heel of the presser foot.
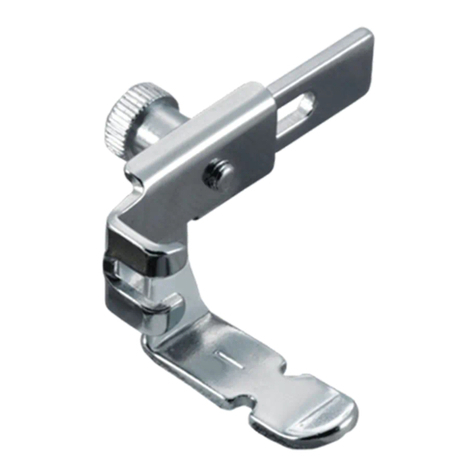
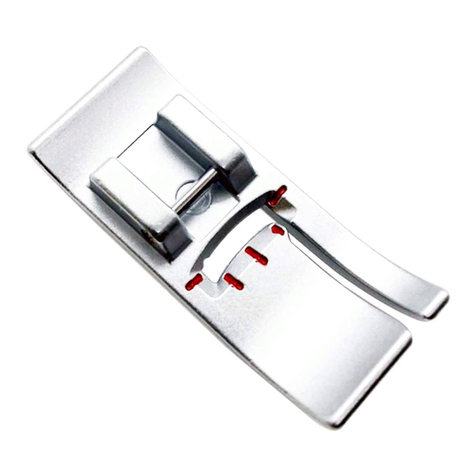
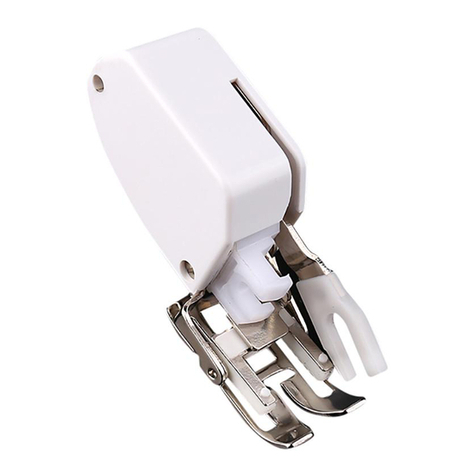
EN Use: This presser foot is useful for attaching various kinds of zippers.
Anbringen des Nähfußes■
Nähen■
Nähen Sie mit dem gefalteten Saum an der
Kante des Nähfußes.
Gefalteter Saum1
Wenn die Stichbreite auf 7,0 mm eingestellt ist,
geht die Nadel durch die Aussparung auf der
rechten Seite.
Hinweis
Achten Sie darauf, dass Geradstich eingestellt
ist (linke Nadelposition).
Wenn der Stoff nicht problemlos unter den•
Nähfuß passt, stellen Sie den Nähfußhebel
auf die höchste Position, um den Nähfuß
anzuheben.
Wenn der Stoff zu Beginn des Nähens nicht•
transportiert wird, legen Sie etwas Stoff (mit
gleicher Stärke wie der zu nähende Stoff)
unter die Hinterseite des Nähfußes.
DE Verwendung: Dieser Nähfuß ist beim Einnähen verschiedener
Reißverschlussarten hilfreich.
Fixez le pied-de-biche■
Couture■
Cousez en prenant soin d’aligner l’ourlet plié au
bord du pied-de-biche.
Ourlet plié1
Si la largeur de point est réglée sur 7,0 mm,
l’aiguille s’insérera dans l’encoche située sur le
côté droit.
Remarque
Veillez à sélectionner le point droit (aiguille à
gauche).
Siletissupassedifcilementsouslepied-de-•
biche, relevez au maximum le levier pour que
le pied-de-biche se trouve dans sa position la
plus haute.
Si le tissu n’avance pas lorsque vous•
commencez à coudre, placez un tissu (de
la même épaisseur que celui que vous
souhaitez coudre) sous le talon du pied-de-
biche.
FR Utilisation : Ce pied-de-biche vous permettra de coudre facilement
différentes sortes de fermetures à glissière.
Persvoet bevestigen■
Naaien■
Naaien met de gevouwen zoom op één lijn met
de rand van persvoet.
Gevouwen zoom1
Als de steekbreedte op 7,0 mm is ingesteld,
valt de naald in de inkeping aan de rechterkant.
Opmerking
Zorg ervoor dat u de rechte steek
(linkernaaldstand) selecteert.
Als de stof niet gemakkelijk onder de persvoet
past, zet u de persvoethendel omhoog tot de
hoogste stand, zodat de persvoet nog hoger
wordt.
Als de stof niet wordt doorgevoerd aan het•
begin van de steken, plaatst u een stuk stof
(ongeveer zo dik als de stof die u naait) onder
de hiel van de persvoet.
NL Gebruik: Deze persvoet is handig voor het inzetten van diverse soorten
ritsen.
EN Narrow Zipper Foot
DE Schmaler
Reißverschlussfuß
FR Pied étroit pour
fermeture à glissière
NL Smalle ritsvoet
IT
Piedino per cerniere strette
ES Pie para cremalleras
estrecho
PT Calcador estreito para
zíper
RU Узкаялапкадля
вшиваниямолнии
7mm
XG8920-001.indd 1 2017/04/18 19:16:43
2
EN Narrow Zipper Foot
DE Schmaler
Reißverschlussfuß
FR Pied étroit pour
fermeture à glissière
NL Smalle ritsvoet
IT
Piedino per cerniere strette
ES Pie para cremalleras
estrecho
PT Calcador estreito para
zíper
RU Узкаялапкадля
вшиваниямолнии
7mm
PRECAUCIÓN
Gire la polea hacia usted (hacia la izquierda) para asegurarse de que la•
aguja no choca contra el pie prensatela. De otra manera, la aguja podría
romperse y causar lesiones.
Seleccione siempre una puntada recta (posición de la aguja a la•
izquierda). Además, seleccione una anchura de puntada de 0,0 mm.
ESIT
ATTENZIONE
Ruotareilvolantinoversodisé(insensoantiorario)pervericareche•
l’ago non colpisca il piedino premistoffa. In caso contrario, l’ago potrebbe
rompersi e provocare lesioni personali.
Selezionare il punto diritto (posizione sinistra dell’ago). Inoltre, impostare•
la larghezza del punto su 0,0 mm.
PT
CUIDADO
Gire o volante em sua direção (sentido anti-horário) para garantir que•
a agulha não possa atingir o calcador. Caso contrário, a agulha poderá
quebrar e causar ferimentos.
Selecione o ponto reto (posição esquerda da agulha). Além disso, ajuste•
a largura do ponto para 0,0 mm.
ОСТОРОЖНО!
Повернитемаховикнасебя(противчасовойстрелки),чтобы•
проверить,чтоигланеударяетпоприжимнойлапке.Впротивном
случаеигламожетсломаться,чтоможетпривестиктравме.
Убедитесь,чтовыбранапрямаястрочка(слевымположениемиглы).•
Установитедляпараметрашириныстрочкизначение“0,0мм”.
RU
Montaggio del piedino premistoffa■
Cucitura■
Cucire con l’orlo piegato allineato al bordo del
piedino premistoffa.
Orlo piegato1
Se la larghezza del punto è impostata su 7,0
mm, l’ago scenderà nella fessura sul lato
destro.
Nota
Selezionare il punto diritto (posizione sinistra
dell’ago).
Se il tessuto non si inserisce agevolmente•
sotto il piedino premistoffa, sollevare al
massimo la leva del piedino premistoffa per
alzare di più anche il piedino.
Se il tessuto non avanza all’inizio della•
cucitura, collocare del tessuto (dello stesso
spessore del tessuto da cucire) sotto
l’estremità esterna del piedino premistoffa.
IT Uso: Questo piedino premistoffa è utile per applicare vari tipi di cerniere.
Colocar el pie prensatela■
Coser■
Cosa con el dobladillo plegado alineado con el
borde del pie prensatela.
Dobladillo plegado1
Si se selecciona una anchura de puntada de
7,0 mm, la aguja bajará en la muesca del lado
derecho.
Nota
Seleccione siempre una puntada recta
(posición de la aguja a la izquierda).
Si la tela no cabe fácilmente debajo del•
pie prensatela, levante la palanca del pie
prensatela hasta su posición más elevada
para levantar aún más el pie prensatela.
Si la tela no avanza al principio de la costura,•
coloque una tela (del mismo grosor que la
que vaya a coser) debajo del talón del pie
prensatela.
ES Uso: Este pie prensatela resulta útil para colocar varios tipos de
cremalleras.
Colocar o calcador■
Costura■
Costure com a bainha dobrada alinhada com a
borda do calcador.
Bainha dobrada1
Se a largura do ponto for ajustada para 7,0 mm,
a agulha cairá na ranhura do lado direito.
Nota
Selecione o ponto reto (posição da agulha à
esquerda).
Se o tecido não couber facilmente sob o•
calcador, levante a alavanca do calcador para
sua posição mais alta para elevar o calcador
ainda mais.
Se o tecido não avançar no início da costura,•
coloque um tecido (com a mesma espessura
do tecido que está sendo costurado) sob a
parte posterior do calcador.
PT Uso: Este calcador é útil para a colocação de diversos tipos de zíper.
Установка прижимной лапки ■
Шитье■
Шейтетак,чтобыподогнутыйкрай
материаласовпадалскраемприжимной
лапки.
Подогнутыйкрай1
Еслизадатьширинустрочки7,0мм,игла
провалитсяввырезсправойстороны.
Примечание
Убедитесь,чтовыбранапрямаястрочка(с
левымположениемиглы).
Еслиматериалнепроходитподприжимной•
лапкой,поднимитерычагприжимной
лапкивсамоеверхнееположение,чтобы
увеличитьвысотуподъемаприжимной
лапки.
Еслиматериалнеподаетсявначале•
шитья,подложитеподпластинуприжимной
лапкиотрезокматериалатакойже
толщины,чтоирабочийматериал.
RU Использование:Даннаяприжимнаялапкаиспользуетсядля
вшиваниямолнииразличныхтипов.
XG8920-001.indd 2 2017/04/18 19:16:44
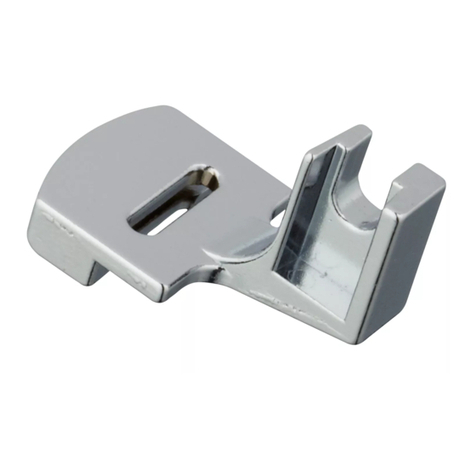
1XG8921-001
EN Narrow Zipper Foot
SC 拉链窄压脚
JA ファスナー 押え
7mm
EN
CAUTION
Rotate the handwheel toward you (counterclockwise) to make•
sure the needle does not strike the presser foot. Otherwise the
needle may break and cause injuries.
Be sure to select the straight stitch (left needle position). In•
addition, set the stitch width to 0.0 mm.
SC
注意
朝自身方向旋转手轮(逆时针),确保机针不会碰到压脚。否则针••
可能会断裂,导致受伤。
请务必选择直线针迹(左针位置)。此外,将针迹宽度设置为0.0•••
mm。
JA
注意
必ずプーリーを回して押えに針があたらないことを確認してくださ•
い。針折れやけがの原因になります。
必ず直線ぬい(左)の模様を選択してください。また、ふり幅は•
0.0mmに設定してください。
Attaching the presser foot■
Sewing■
Sew with the folded hem aligned on the
edge of the presser foot.
Folded hem1
If the stitch width is set to 7.0 mm, the
needle will drop into the notch on the right
side.
Note
Be sure to select the straight stitch (left
needle position).
Ifthefabricdoesnoteasilytunderthe•
presser foot, raise the presser foot lever
to its highest position to raise the presser
foot even higher.
If the fabric does not feed at the•
beginning of stitching, place fabric (with
the same thickness as the fabric being
sewn) under the heel of the presser foot.
EN Use: This presser foot is useful for attaching various kinds of zippers.
安装压脚 ■
缝制 ■
将折缝与压脚边缘对齐,然后进行缝制。
折缝1
如果针迹宽度设置为7.0•mm,机针将落到
右侧的切槽中。
注释
请务必选择直线针迹(左针位置)。
如果布料很难放到压脚下方,请将压脚拨••
杆抬到最高位置,以抬高压脚。
如果无法在针迹开头处送入布料,请将一••
块(厚度与所要缝制布料相同的)布料放
在压脚后部下方。
SC 用法:此压脚用于缝制各种拉链。
押えの取り付け方 ■
ぬい方 ■
折り山に押えの端を合わせてぬいます。
折り山1
振り幅を7.0mmに設定すると、右側のくぼ
みに針を落としてぬうことができます。
お願い
必ず直線ぬい(左)の模様を選択してくだ
さい。
布地を押えの下に入れにくいときは、押え•
レバーを持ち上げてもう一段上げると入
れやすくなります。
ぬい始めに布地が送らないときは、押えの•
後ろに同じ厚さの布地を置いてぬいます。
JA 用途:色々なタイプのファスナー付けに使用できます。
XG8921-001.indd 1 2017/04/18 19:24:22

Other Brother Sewing Machine Accessories manuals

Brother KIT I User manual

Brother

Brother KIT I User manual

Brother F036N User manual

Brother

Brother F036N User manual

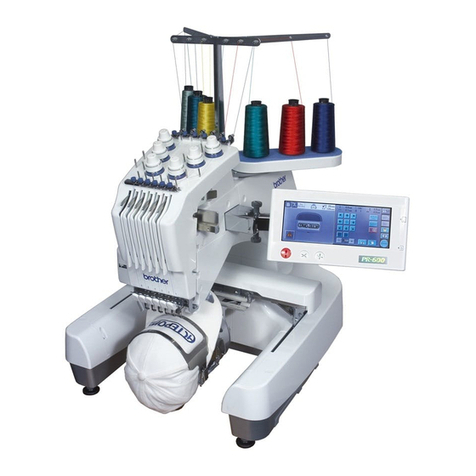
Brother PR-600/600C User manual

Brother

Brother PR-600/600C User manual

Brother Innov-is V7 User manual

Brother

Brother Innov-is V7 User manual

Brother ScanNCut DX Stamp Starter Kit User manual

Brother

Brother ScanNCut DX Stamp Starter Kit User manual

Brother WT10 User manual

Brother

Brother WT10 User manual

Brother ScanNCut DX Embossing Starter Kit User manual

Brother

Brother ScanNCut DX Embossing Starter Kit User manual

Brother SA179 User manual

Brother

Brother SA179 User manual

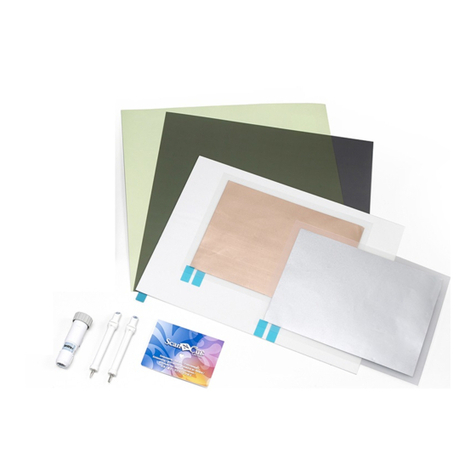
Brother ScanNCut DX Foil Transfer Starter Kit User manual

Brother

Brother ScanNCut DX Foil Transfer Starter Kit User manual

Brother 4234DT User manual

Brother

Brother 4234DT User manual

Brother 888-M50 User manual

Brother

Brother 888-M50 User manual

Brother sa160 User manual

Brother

Brother sa160 User manual

Brother SA104/F082 User manual

Brother

Brother SA104/F082 User manual

Brother SA204 User manual
Brother

Brother SA204 User manual

Brother PR-620 User manual

Brother

Brother PR-620 User manual

Brother ScanNCut DX Printable Sticker Starter Kit User manual

Brother

Brother ScanNCut DX Printable Sticker Starter Kit User manual

Brother SA179 User manual

Brother

Brother SA179 User manual

Brother ScanNCut DX Embossing Tool Set User manual

Brother

Brother ScanNCut DX Embossing Tool Set User manual

Brother KIT CW User manual

Brother

Brother KIT CW User manual

Brother PRSCLPM1 User manual

Brother

Brother PRSCLPM1 User manual

Brother MD-600 Series User manual

Brother

Brother MD-600 Series User manual

Brother F012N User manual

Brother

Brother F012N User manual

Brother S-6200A User manual

Brother

Brother S-6200A User manual

Brother PRCL1 User manual

Brother

Brother PRCL1 User manual

Popular Sewing Machine Accessories manuals by other brands

handi quilter HQ Amara installation instructions

handi quilter

handi quilter HQ Amara installation instructions

handi quilter QT09726 installation instructions

handi quilter

handi quilter QT09726 installation instructions

Racing MCA 18K-38/TR Installation Guide book

Racing

Racing MCA 18K-38/TR Installation Guide book

Singer DF250 instruction manual

Singer

Singer DF250 instruction manual

Pfaff Creative fabric mover Set up and go

Pfaff

Pfaff Creative fabric mover Set up and go

Sullivans Sew & Go instructions

Sullivans

Sullivans Sew & Go instructions

Alpenglow Yarn Skeinminder quick start guide

Alpenglow Yarn

Alpenglow Yarn Skeinminder quick start guide

Sewing Sarah 32 PIECE PRESSER SET user guide

Sewing Sarah

Sewing Sarah 32 PIECE PRESSER SET user guide

manuals.online logo
manuals.online logoBrands
  • About & Mission
  • Contact us
  • Privacy Policy
  • Terms and Conditions

Copyright 2025 Manuals.Online. All Rights Reserved.