Freelance 101 Isssue 3 Edition 1 12.10.06 7851
9
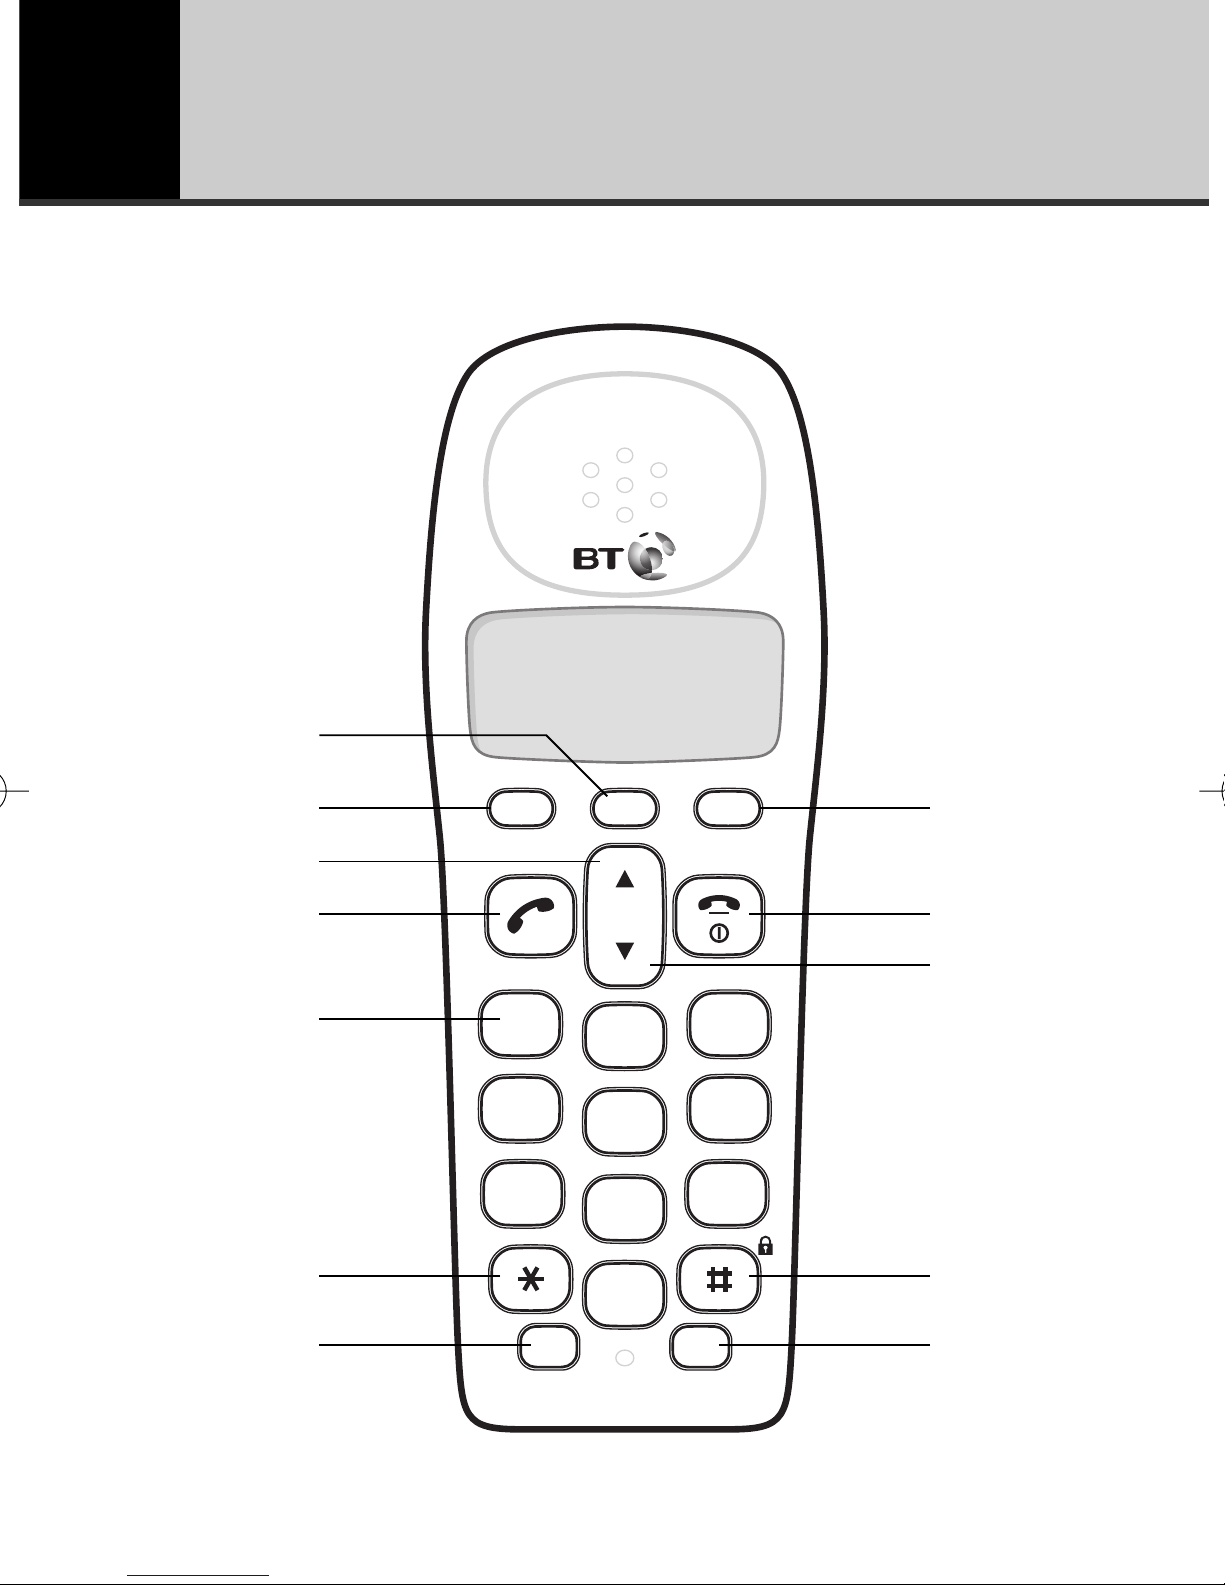
1Clear/Secrecy
During a call, press to stop your caller
hearing you, page 14.
Use to delete characters.
Use to delete Calls list and Redial list
entries, page 16.
2Store
In standby mode, press and hold to
enter programming mode.
In programming mode, press to
confirm a setting.
3Scroll Up
During a call, press to raise the
earpiece volume, page 13.
While the phone is ringing, press to
raise the ringer volume, page 14.
In programming mode, press to scroll
up through display options.
4Talk
Press to make or receive a call,
page 12.
51, 2 and 3
In standby mode, press and hold to dial
the direct access numbers, page 18.
6✱/Dial mode
In talk mode, press to temporarily
switch from pulse to tone dialling,
page 39.
7R (Recall)/Int
In talk mode, use for Recall.
Used when connected to a
switchboard/PBX (page 39) and for
Call Waiting, page 24.
In standby mode, press and hold to
make an internal call, page 30.
Or to transfer a call to an additional
BT Freelance 101 handset, page 31.
8Pause/Redial
In standby mode, press to enter the
redial list, page 15.
In talk or programming mode, press
to enter a pause in a number.
9End Call/Power On/Off/ Cancel
Press to end a call, page 12.
In standby mode, press and hold to
switch the handset power on/off,
page 12.
In programming mode, press to exit
and return to standby.
0Calls list / Scroll Down
In standby mode, press to access
the Calls list, page 21.
During a call, press to lower the
earpiece volume, page 13.
While the phone is ringing, press to
lower the ringer volume, page 14.
In programming mode, press to scroll
down through display options.
!#/Keypad lock
In standby mode, press and hold to
switch key lock on, page 14.
Press any button then # within
3 seconds to switch key lock off,
page 15.
@M – Direct access key
In standby mode, press and hold to
dial the stored direct access number
under the 1 button, page 18.