4
Introduction
Please read the instructions carefully
before use and retain this user
guide for future reference. This guide
covers the basic features of the
Diverse 2020 Pocket.
Building up a phone system.
You can add further handsets to build
up a comprehensive and easy-to-use
cordless telephone system. Up to 6
separate handsets (8 with Diverse
2-line and Diverse ISDN) can be
used with each Diverse base station;
and each handset can itself work
from six base stations.
As this product is rechargeable, it is
normal that a certain amount of heat
will be produced in its day to day
operation. Whilst this is entirely safe,
we would advise against placing the
phone on antique, veneered or wooden
surfaces as damage may occur.
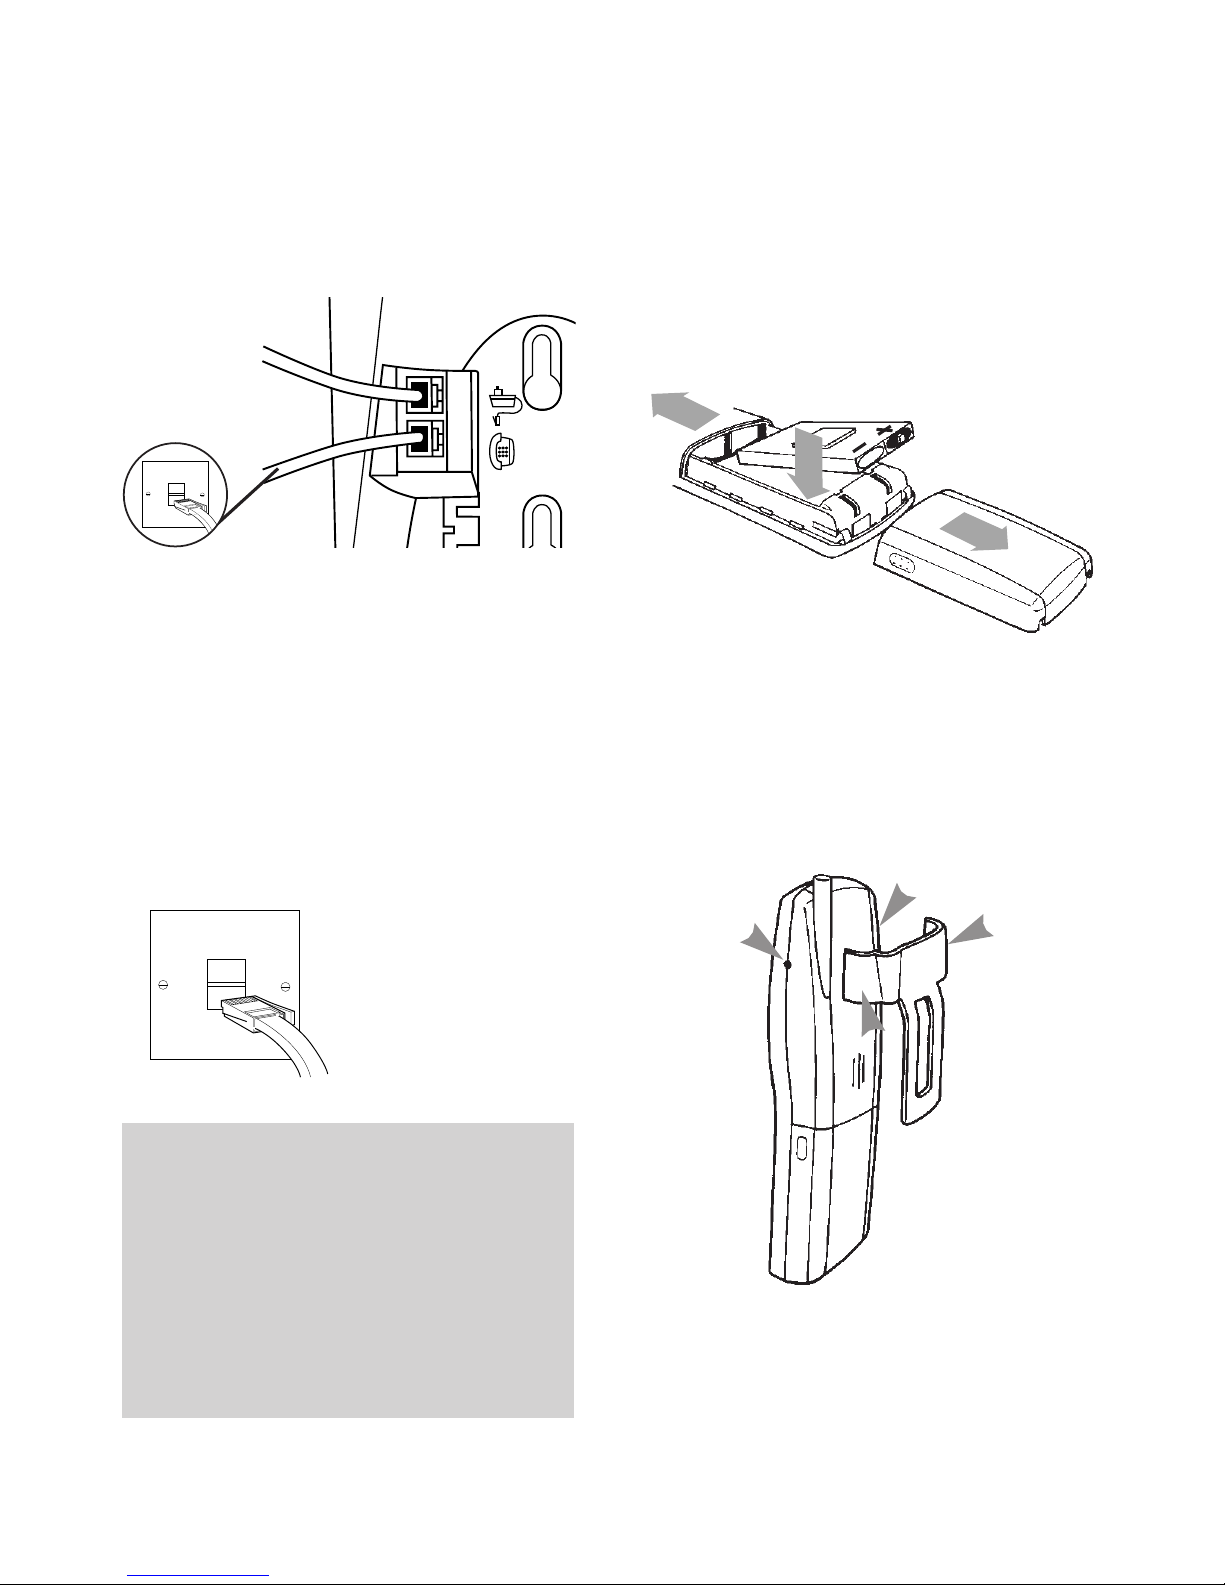
Setting Up
Follow these steps to get your
Diverse 2020 Pocket ready for use.
WARNING
1 Use only approved rechargeable
battery packs. Never attempt
to use other batteries or
conventional batteries. Using
such batteries could lead to a
short circuit or destroy the
battery casing.
Replacement battery packs are
available from the Diverse Helpline
on 0845 790 8070.
2Do not try to use any power supply
except the one provided, otherwise
you may permanently damage your
Diverse. It will also result in
non-compliance with EN41003: 1993,
and will invalidate the approval given
to this apparatus.
3Do not use non-BT charging stations;
this could damage the batteries.
4Research has shown that in certain
cases, medical equipment can be
affected by cordless telephones.
A distance of at least one metre should
therefore be observed between the
telephone and medical equipment.
5The Diverse 2020 Pocket can also
interfere with other electrical
equipment e.g. answering machines,
TV and radio sets, clock radio/
alarms and computers if placed too
close. It is recommended to place
your Diverse 2020 Pocket at least
one metre away from such
appliances to avoid any risk of
interference.
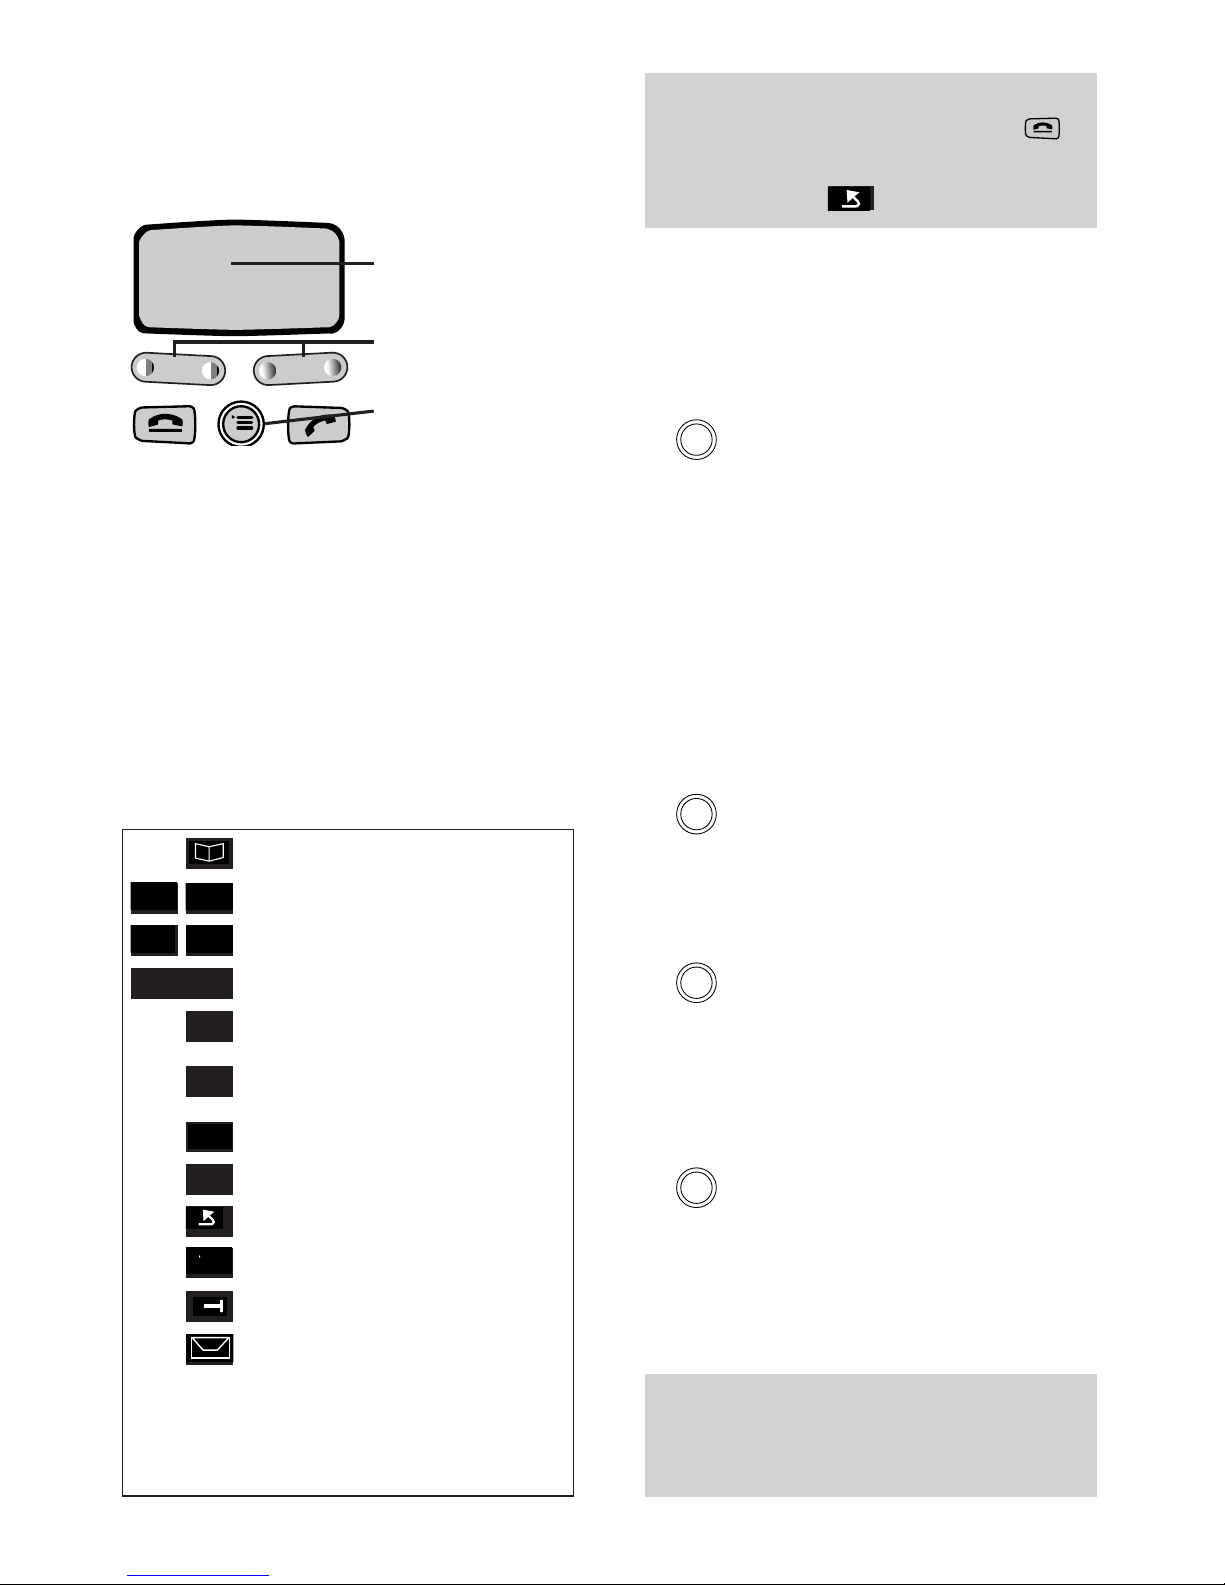
12
ABC 3
DEF
4
GHI
5
JKL 6
MNO
7
PQRS
8
TUV 9
WXYZ
#
✱0
Rcl
.
a A
Pwr
12
ABC 3
DEF
4
GHI
5
JKL 6
MNO
7
PQRS
8
TUV 9
WXYZ
#
✱0
Rcl
.
a A
Pwr
12
ABC 3
DEF
4
GHI
5
JKL 6
MNO
7
PQRS
8
TUV 9
WXYZ
#
✱0
Rcl
.
a A
Pwr
12
ABC 3
DEF
4
GHI
5
JKL 6
MNO
7
PQRS
8
TUV 9
WXYZ
#
✱0
Rcl
.
a A
Pwr
12
ABC 3
DEF
4
GHI
5
JKL 6
MNO
7
PQRS
8
TUV 9
WXYZ
#
✱0
Rcl
.
a A
Pwr
12
ABC 3
DEF
4
GHI
5
JKL 6
MNO
7
PQRS
8
TUV 9
WXYZ
#
✱0
Rcl
.
a A
Pwr
Diverse 2020 Pocket