BTL 2000 Series User manual

v501z6BJ24/03/2004EN
BTL-2000
Series
USER’S MANUAL
&
USERS’S GUIDE

BTL-2000 USER'S MANUAL & USER’S GUIDE
Page 2 of 45
Index
1GENERAL CHARACTERISTICS ...........................................................................................................................4
2USER MANUAL .....................................................................................................................................................5
2.1.1 Outward Appearance .................................................................................................................................6
2.1.2 Functions of Push buttons, Connectors, and Display. ...............................................................................6
2.1.3 Basic Operation Procedures ...................................................................................................................... 6
2.2 Instrument Assembly and Initiation ............................................................................................................7
2.3 Starting Operation......................................................................................................................................7
2.4 Medical Field Selection (push button [DIAG]) ............................................................................................ 8
2.4.1 User diagnoses ..........................................................................................................................................8
2.5 Adjusting therapy parameters ....................................................................................................................9
2.5.1 Density .......................................................................................................................................................9
2.5.2 Irradiated Area ........................................................................................................................................... 9
2.5.3 Power.........................................................................................................................................................9
2.5.4 Frequency ................................................................................................................................................10
2.5.5 Nogier (Frequencies according to Dr. Nogier) .........................................................................................10
2.5.6 EAV (Frequencies according to Dr. Voll) .................................................................................................10
2.5.7 Medical Fields ..........................................................................................................................................11
2.6 Programme selection (push button [PROG]) ...........................................................................................12
2.7 Manual setting (push button [MAN]).........................................................................................................12
2.8 User menu (push button [MENU])............................................................................................................13
2.8.1 Patient search ..........................................................................................................................................13
2.8.2 Patient List ...............................................................................................................................................14
2.8.3 User diagnoses ........................................................................................................................................15
2.8.4 System Setup........................................................................................................................................... 17
2.8.5 Acupuncture.............................................................................................................................................21
2.8.6 PROBE TEST: Optical Power of Probe....................................................................................................22
2.9 Therapy....................................................................................................................................................23
2.9.1 Display during therapy .............................................................................................................................23
2.9.2 To start therapy........................................................................................................................................23
2.9.3 To interrupt therapy..................................................................................................................................23
2.9.4 To Continue Therapy ...............................................................................................................................23
2.9.5 To terminate therapy................................................................................................................................ 23
2.10 Power Supply: Mains and Battery ...........................................................................................................23
2.10.1 Sparing Batterires ....................................................................................................................................24
2.11 Optical Attachments.................................................................................................................................24
2.11.1 Dentistry Attachment................................................................................................................................24
2.11.2 Gynaecological Attachment .....................................................................................................................24
2.11.3 ENT Attachment.......................................................................................................................................24
2.11.4 Positioning an Attachment .......................................................................................................................25
2.12 Maintenance.............................................................................................................................................25
2.13 Safety of Instrument.................................................................................................................................25
2.13.1 Remote control ( DOOR ).........................................................................................................................25
2.13.2 Use of Safety Accessories .......................................................................................................................25
2.13.3 Safety Warnings.......................................................................................................................................26
2.14 Useful addresses .....................................................................................................................................27
2.15 Warranty ..................................................................................................................................................27
2.16 Accessories..............................................................................................................................................27
2.16.1 Standard Accessories ..............................................................................................................................27
2.16.2 Additional Accessories.............................................................................................................................27
3TECHNICAL PARAMETERS ...............................................................................................................................28
3.1 Technical parameters BTL-2000..............................................................................................................28
3.2 Technical parameters ADAPTER BTL-282 ..............................................................................................30
4USER’S GUIDE .................................................................................................................................................... 31
4.1 Introduction ..............................................................................................................................................31
4.2 Light; the principle of laser light and its specifics.....................................................................................31
4.3 Types of lasers......................................................................................................................................... 32
4.3.1 Source......................................................................................................................................................32
4.3.2 Wavelength (primarily semi-conductor lasers).........................................................................................32
4.3.3 Operation mode .......................................................................................................................................33
4.3.4 Type of beam ...........................................................................................................................................34
4.3.5 Laser class (defined by the output)..........................................................................................................34
4.3.6 Use........................................................................................................................................................... 34
4.4 Basic physical quantities..........................................................................................................................34
4.5 Biologic effects of a low-output laser (non-invasive laser) .......................................................................34


BTL-2000 USER'S MANUAL & USER’S GUIDE
Page 3 z 45
4.6 Contradictions of non-invasive laser therapy ...........................................................................................35
5LIST OF THERAPIES...........................................................................................................................................36
5.1 Dentistry (Medical Field 03) ..................................................................................................................... 36
5.2 Dermatology (Medical Field 04) ...............................................................................................................36
5.3 Gynaecology (Medical Field 05)...............................................................................................................37
5.4 E.N.T. (Medical Field 06) .........................................................................................................................37
5.5 Rehabilitation (Medical Field 07).............................................................................................................. 38
5.6 Neurology (Medical Field 08) ...................................................................................................................39
5.7 Orthopaedics (Medical Field 09) ..............................................................................................................39
5.8 Sports Medicine (Medical Field 10)..........................................................................................................40
5.9 Pediatrics (Medical Field 11)....................................................................................................................40
5.10 General Practitioner (Medical Field 12)....................................................................................................40
5.11 Acupuncture.............................................................................................................................................41
6APPENDIX A........................................................................................................................................................42
7APPENDIX B........................................................................................................................................................43

BTL-2000 USER'S MANUAL & USER’S GUIDE
Page 4 z 45
1 GENERAL CHARACTERISTICS
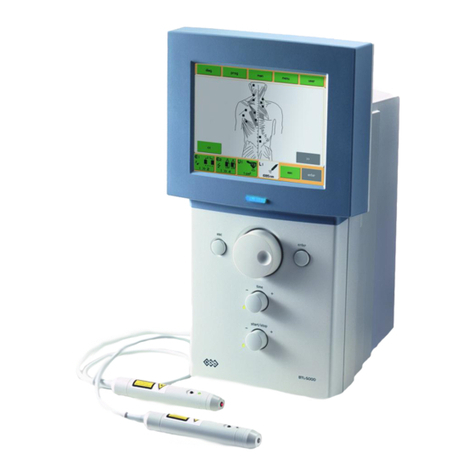
BTL-2000 is a portable therapeutic laser that employs red and infrared BTL laser probes of various
powers.
BTL-2000 is designed for easy use and is understandable even for those who are new to laser
technology. The laser beam irradiation strength is easy to regulate. Parameters can easily be
changed as desired and your own programmes can be created and saved. BTL-2000 software
allows continuous change of frequency, density, power, area and time. Considering all parameters
are correlated, when a parameter is changed the instrument automatically recalculates the
remaining parameters.
BTL-2000 provides preset programmes for the following medical fields: rehabilitation, orthopaedics
dentistry, gynaecology, neurology, dermatology, ENT, sports medicine, paediatrics, and general
practice. The use of the preset programmes can significantly speed up therapy. When a field and
diagnosis is chosen, the instrument will automatically set up the therapy parameters.
BTL-2000 excels with its high power and operates in both Continuous and Pulse modes. In the
pulse mode it is possible to modify the DUTY FACTOR of output frequency in the range of
10–90 %. BTL-2000 enables the user to precisely determine the necessary probe distance from
skin by setting the desired therapy surface area. BTL-2000 automatically tests laser probe
performance and corrects the power for optimal laser output. BTL-2000 is compatible with both
digital and analog probes.
BTL-2000 is especially suitable for acupuncture treatment. BTL-2000 has two modes for easy and
percise location of acupuncture points. While the instrument measures the changes in skin
resisitivity, visual and accoustic signals indicate acupuncture point locations. The instrument is also
pre-programmed with Nogier and EAV frequencies.
For dentistry, gynaecology and ENT special optical attachments enable the laser to treat difficult to
reach places. The optical attachments are easily attatched to the probe and ready for use.
BTL-2000 complies with all internationally recognised laser instrument specifications.

BTL-2000 USER'S MANUAL & USER’S GUIDE
Page 5 z 45
2 USER MANUAL
Upper Panel, Front Panel, Lower Panel
1 2
14
15
4
5
6
7
8
9
10
16
13
11
12
3

BTL-2000 USER'S MANUAL & USER’S GUIDE
Page 6 z 45
2.1.1 Outward Appearance
BTL-2000 is housed in a metal varnished box. Weight and measurements are described in Technical Parameters 3.
The lighted LCD display and push buttons are located on the front panel. Laser probe connector and mains power
switch are located on the upper panel. Connector for mains power/recharge adapter (CHARGE) cable, acupuncture
probe connector (ACUPUNCTURE), connector for remote blocking (REMOTE CONTROL) and input for measuring
laser power (PROBE TEST) are located on the lower panel.
Voltage converter switch (115/230) and mains power plug are located on the mains power adapter (BTL-282).
Manufacturer label and product label are located on the rear panel of the instrument case and mains power adapter.
Warning labels are located on the rear and upper panels of the instrument case and on the laser probe.
2.1.2 Functions of Push buttons, Connectors, and Display.
1. Mains Power Switch
2. Laser Probe Output
3. LCD display
4. [DIAG] push button enters Medical Field Menu.
5. [PROG] push button enters Preset Programme Menu.
6. [MAN] push button sets therapy parameters for manual programming.
7. [MENU] push button returns instrument to System Menu.
8. [TAB] push button moves cursor to right when entering Safety Code, selects parameter settings [MAN], and
moves cursor between medical field number and diagnosis number [PROG].
9. [ENTER] push button confirms selection, setting changes and safety code.
10. [ESC/STOP] push button terminates therapy, starts/stops timer, and returns display to previous setting.
11. [ + ] push button increases parameter values, selects settings, and moves cursor to the right.
12. [ - ] push button decreases parameter values, selects settings and moves cursor to the left deleting previous
character.
13. Connector for mains power/ recharge adapter cable (CHARGE).
14. Probe Test: Laser Optical Power Meter (TEST).
15. Acupuncture Probe Input (ACUPUNCTURE).
16. Remote Control Connector (DOOR).
2.1.3 Basic Operation Procedures
BTL 2000 is controlled by means of an interactive menu. Press the [ + ] or [ - ] push buttons to move between menu
settings. The selected setting is indicated by an arrow in the display’s left margin. The presence of an additional
arrow indicates that the menu exceeds four lines when selecting the last setting on the display. Press [ENTER] to
confirm selected setting. Press [ESC/STOP] to return to previous menu.
The lower margin of the push buttons contains a set of letters. For entering letters, choose the desired letter by the
number of push button presses relative to the placement of that character on the push button. For example in the
figure above, U is entered by pressing the [Tab] push button once, V is entered by pressing the [Tab] push button
twice, etc..
11 characters can be entered using each lettered push button. For entering non letter characters, choose the desired
character by the number of push button presses relative to the placement of that character in the table below. For
example in the figure below, “ ! “ is entered by pressing the [Tab] push button nine times, “ ? “ is entered by pressing
the [Tab] push button ten times, etc..
TAB
UVWXYZ
TAB
UVWXYZ

BTL-2000 USER'S MANUAL & USER’S GUIDE
Page 7 z 45
DIAG A B C D E 1 2 . , : ;
PROG F G H I J 3 4 + - * /
MAN K L M N O 5 6 ( ) < >
MENU P Q R S T 7 8 @ # $ &
TAB U V W X Y Z 9 0 ! ? ´
For entering sentences (name, diagnosis, etc.) the [ + ] push button moves cursor to the right, acting as a spacebar,
and the [ - ] push button moves the cursor to the left deleting previous characters.
2.2 Instrument Assembly and Initiation
Carefully unpack instrument and place on a sturdy and level surface (max. 15°angle). Place in cool, dry environment
out of reach from direct sunlight. Instrument generates heat when in use therefore it should not be placed in the
vicinity of other heat generating devices. This may cause overheating of instrument. The instrument is cooled by
natural air convection. Do not cover instrument with flammable materials. Do not place instrument in proximity of
devices that emit strong eletric, magnetic, or electro-magnetic fields (motors, transformers, X-rays, etc.). This can
cause electromagnetic interference. In case of any misunderstanding, please contact your BTL service
representative.
Before the INITIAL turning on of instrument, check the Voltage Converter located on the adapter to insure it
is in the correct position and in accordance with the mains voltage parameters. Voltage coversion is further
described in the chapter Maintenance 2.12. In case of any misunderstanding, please contact your BTL service
representative.
We recommend proper storage of the instrument box in case additional transport of instrument is necessary.
The instrument applies irradiation only, it does not apply any pharmaceuticals or substances.
Connecting instrument (DOOR connector on the lower panel) with the door contact is recommended. For further
information see Safety 2.13.
The power will be ON following the pressing of the mains power switch on the upper panel. When the battary is low, a
“Low battery“ warning will be signalled on the display. It is then necessary to connect the mains power adapter to
recharge the battery.
When turning the instrument on you MUST NOT press any buttons on the front panel. This will generate the
error sign “Error 100 – Keyboard button jammed”. It is then necessary to turn off the instrument for minimum
of three seconds to allow it to reset. (See NOTE).
It is now necessary to enter a code to unlock the instrument. The manufacture code is preset as 0000. If it is not
modified you can continue by pressing the [ENTER] push button. It is possible to change the code using the
instructions in the chapter User diagnoses 2.4.1. Once the accurate code has been entered, the display shows th
main menu. If there are any other reactions after the turning on of the instrument do not attach laser probe and
contact BTL service technician before further use.
NOTE: After turning the instrument on and before the entering of the code, the instrument is testing its internal
functions (∼0.5 sec.). If the instrument finds an internal problem, you will see the error notice “Error“ and the
instrument will then be locked in Safe Mode. In this case, it is necessary to contact your BTL service representative. If
the error notification “Error 100 – Keyboard button jammed“ is displayed, it is either an operating error or it is
possible a button is jammed. In the second case, try to release the affected button or contact your BTL service
representative.
2.3 Starting Operation
Switch the instrument on by pressing the power switch on the upper panel. Enter the safety code on initial screen.
BTL-2000
T HERAPEUTIC LASER
E N T E R CODE: 0000

BTL-2000 USER'S MANUAL & USER’S GUIDE
Page 8 z 45
Using the [ + ] and [ - ] arrows, insert the safety code. Use the [TAB] push button to move cursor to the next position.
Once the code has been entered, press the [ENTER] push button. The manufacture code is preset as 0000. Press
the [ESC/STOP] push button to delete inserted values and to return to the first position.
If the code is entered correctly, the display will show menu which can be preset using the [Sart with] function. If the
code is not correct, the cursor will move to the first position of the code.
BTL-2000
UNIVERSAL
D I A G PROG
M A N MENU
Use the relative push buttons on the instrument front panel to select from the four programmes on the Main Menu.
2.4 Medical Field Selection (push button [DIAG])
When pressing the [DIAG] push button the instrument will enter the Medical Field Menu and it is then possible to
select a preset medical field, Acupuncture frequency (Nogier or EAV), or user created programmes.
According to user specialization, there is only one medical field pre-programmed in the instrument. Additional medical
fields are available but not included.
User diagnoses
Nogier
EAV
Dentistry
Dermatology
Gynaecology
ENT
Rehabilitation
Neurology
Orthopaedics
Sports medicine
Paediatrics
General Practitioner
Example of medical field menu:
> U ser diagnoses
N o g i er
E A V
D e n t istry
Use the [ + ] or [ - ] arrows to move between medical fields and press the [ENTER] push button to select desired
medical field. Press the [ESC/STOP] push button to return to the previous menu.
2.4.1 User diagnoses
This setting allows searching for and selecting a user diagnoses with preset therapeutic parameters.
If there are no user diagnoses in the memory, “Memory free” will appear on the display.
If there are less than 6 user-created diagnoses in memory, a list of these diagnoses in alphabetical order will appear
on the display. If there are 6 or more user-created diagnoses in memory, the following diplay will appear:
U S E R DIAGNOSES
F i r s t char: _

BTL-2000 USER'S MANUAL & USER’S GUIDE
Page 9 z 45
Enter the first letter of desired diagnosis name and press the [ENTER] push button to enter the list of diagnoses. Use
the [ + ] and [ - ] arrows to move between diagnoses names and press the [ENTER] push button to select desired
diagnosis. After selecting desired diagnosis, preset therapy parameters will be displayed. Press the [ESC/STOP]
push button to return to previous menu.
D e n s . _0.9J/cm2
F r e quency 6.36Hz
A r e a 1.0cm2Pwr 30mW
T i m e 1:39 Ready
Density shows set irradiation density value (J/cm2)
Frequency shows set frequency (Hz)
Area shows set area of irradiated area (cm2)
Power shows set laser beam output (mW)
Time shows set therapy duration (min/sec)
Use the [ + ] or [ - ] arrows to adjust therapy parameters. Use the [TAB] push button to move between parameters.
Start therapy by pressing the probe push button.
For saving the adjusted parameters use the [MENU] push button to enter patient file or user diagnoses file.
Use the [ESC/STOP] push button to return to previous menu.
2.5 Adjusting therapy parameters
When adjusting preset therapy parameters, use the [MENU] push button to enter patient files, diagnoses, or user
settings.
2.5.1 Density
When the density is adjusted, the instrument automatically recalculates therapy time and power parameters.
2.5.2 Irradiated Area
When using a divergent probe, use the following table for the probe distances from skin:
Irradiated area
[cm2]
Distance of probe from skin
[cm]
0.5 1.5
1 2
1.5 2.5
2 3
2.5 3.5
3 4
When using a divergent probe, depth of penetration changes according to the distance of the probe from skin and it
is necessary to deduct the desired depth of penetration from the displayed distance of probe.
When using a convergent probe, distance of the probe from the skin is not a crucial factor. The distance is not
measured because the beams are parallel.
2.5.3 Power
When the power is adjusted, the instrument automatically recalculates the duration of exposure. Power value could
be adjusted within range 20% to 100% of maximal probe output. Output power and the duration of therapy has an
inverse relationship. An increase in power output will result in a decrease in therapy duration. Density will remain the
same. The instrument calculates output power in tenths of mW, but the display only shows whole numbers. Maximum
and minimum power depends on the type of probe used, preset density and area.

BTL-2000 USER'S MANUAL & USER’S GUIDE
Page 10 z 45
2.5.4 Frequency
When the frequency is adjusted, the instrument automatically recalculates therapy time and power parameters.
BTL-2000 offers pre-programmed EAV and Nogier frequencies.
2.5.5 Nogier (Frequencies according to Dr. Nogier)
After entering Nogier freqencies, the list of frequencies will be displayed. Use [ + ] and [ - ] arrows to move between
the frequencies. Press the [ENTER] push button to select required frequency. Press the [ESC/STOP] to return to
previous menu.
> U 1 .14Hz
A 2 .28Hz
B 4 .56Hz
C 9 .12Hz
When required frequency is selected, therapy parameters will be displayed:
D e n s . _2.0J/cm2
F r e q u ency 1.14Hz
A r e a 1.0cm2Pwr 30mW
Tim e 1:23 Ready
Use the [ + ] and [ - ] arrows to adjust therapy parameters. Use the [TAB] push button to move between therapy
parameters. Density and area values are preset. Frequencies can be modified only in the range of Nogier’s
frequencies. Power and time are automatically recalculated. Start therapy by pressing probe push button.
2.5.5.1 Table of frequencies for laser acupuncture according to Dr. Nogier
Frequency [Hz] Use and Application Area
U 1.14 Universal – whole body
A 2.28 Chaotic changes – tissues and transitional epithelium, body openings (mouth, nose,
eyes, …)
B 4.56 Nutritive effect – chest and abdominal cavity
C 9.12 Mesenchyma – limbs, gluteal area, muscles and ligaments, kidneys, genitals
D 18.3 Metabolism – joints of cerebral symmetric organs
E 36.5 Nerve tissue –peripheral parts of spine, back and top parts of head and neck
F 73.0 Psychosomatic disorders – subcortical areas, lower parts of the face
G 146.0 Emotional diseases – brain cortex, nervous system, frontal and temporal parts of head,
lateral parts of nose
2.5.6 EAV (Frequencies according to Dr. Voll)
After entering EAV, a list of frequencies will be displayed. Use the [ + ] and [ - ] arrows to move between the
frequencies. Press the [ENTER] push button to select required frequency. Press the [ESC/STOP] push button to
return to previous menu. When required frequency is selected, therapy parameters will be displayed:
D e n s . _2.0J/cm2
F r e q u Ency 1.70Hz
A r e a 1.0cm2Pwr 30mW
T i m e 1:23 Ready
Use the [ + ] and [ - ] arrows to adjust therapy parameters. Use the [TAB] push button to move between therapy
parameters. Density and area values are preset. Frequencies can be modified only in the range of EAV frequencies.
Power and time are automatically recalculated. Start therapy by pressing probe push button.
Press the [ESC/STOP] push button to return to previous menu.

BTL-2000 USER'S MANUAL & USER’S GUIDE
Page 11 z 45
2.5.6.1 Table of EAV frequencies EAV (according to Dr.Voll)
Frequency [Hz] Use and Application Area
1.20 Tachycardia
1.70 Abscess, furunculosis
1.75 Psychostimulative and sympaticostimulative effect
2.20 Fatigue, lipothymia, exhausting, restlessness, melalgia
2.45 Haematoma, oedema, excessive menstrual bleeding due to myoma, haemorrhage of
varices, sleeplessness, autonomic disorders, sinusitis
2.50 Distorsion, vegetative dystrophia
2.65 Gallbladder dystonia, periostitis
2.90 Rhinitis
3.30 Arteriosclerosis, arteriosclerotic hypertension
3.50 Lithiasis, renal colic, tremor, melancholia
3.60 Sleeplessness, excitability
3.80 Spasms, glossodynia
3.90 Neuralgia, depression, insomnia
4.00 Disorders of pancreas, endocrine disorders, menorrhagia, headaches,dizzeness
4.90 Dysmenorhea, stiff neck
5.55 Angiospasm with paresaesthesia
5.80 Fear, dizzeness, headaches
5.90 Spastic paralysis
6.00 Parasympatikotoic effect, hypertension, spastic stiff neck
6.30 Excitability, headaches
6.80 Myotonia
7.50 Neuralgia n. trigemini
7.70 Spastic paralysis
8.25 Paralysis
9.20 Eczema due to renal insufficiency, diastolic hypertension, renal insufficiency
9.35 Paralysis
9.40 Cystitis, disorders of prostate, disordes of colon, bronchitis, eczema due to disorders of
lungs or vessles, gout, joint ache, gastric disorders (including ulcer), parsis, varices,
haemorrhoids
9.45 Tonsillitis, angina pectoris, disorders of hypophysis and gonads
9.50 Spastic hypertension, climacteric hypertension, laryngitis, migraine
9.60 Arthritis, rheumatism, rachiopathies
9.70 Ischialgia, rheumatism
10.00 Flebitis, ulcus cruris
2.5.7 Medical Fields
After entering the required medical field, the following menu will be displayed:
DENTISTRY
F i r s t char: _
Enter the first letter of desired diagnosis name and press the [ENTER] push button to enter the list of diagnoses. Use
the [ + ] and [ - ] arrows to move between diagnoses names and press the [ENTER] push button to select desired
diagnosis. After selecting desired diagnosis, preset therapy parameters will be displayed. Press the [ESC/STOP]
push button to return to previous menu.

BTL-2000 USER'S MANUAL & USER’S GUIDE
Page 12 z 45
D e n s . _2.0J/cm2
F r e q u ency 5.00Hz
Are a 1.0cm2Pwr 30mW
T i m e 1:23 Ready
Use the [ + ] and [ - ] arrows to adjust therapy parameters. Use the [TAB] push button to move between therapy
parameters. Start therapy by pressing probe push button.
Press the [ESC/STOP] push button to return to previous menu.
2.6 Programme selection (push button [PROG])
When pressing the [PROG] push button the instrument will enter the Preset Programme Menu. It is then possible to
select a preset therapy programme. A progamme number consists of a medical field number (first two numbers) and
a diagnosis number (second two numbers).
P r o g 0400
A c n e
D ens . 0.4J/cm2
F r e quency 5.50Hz
Use the [ + ] and [ - ] arrows to set desired programme number. Use the [TAB] push button to move between the
medical field number and diagnosis number. Press the [ENTER] push button to enter therapy parameters of desired
programme. Press the [ESC/STOP] push button to return to previous menu. When the desired programme has been
entered, therapy parameters will be displayed.
D ens . _0.4J/cM2
F r e quency 5.00Hz
A r e a 1.0cm2PwR 16mW
Tim e 0:30 Ready
Use the [ + ] and [ - ] arrows to adjust therapy parameters. Use the [TAB] push button to move between therapy
parameters. Start therapy by pressing the probe push button. Press the [ESC/STOP] push button to return to
previous menu.
2.7 Manual setting (push button [MAN])
When pressing the [MAN] push button, the instrument will enter the Therapy Prameters Menu and it is then possible
to set therapy parameters manually.
D ens . _1.0J/cm2
F r e quency Continual
Are a 1.0cm2Pwr 30mW
Tim e 0:33 Ready
Use the [ + ] and [ - ] arrows to adjust therapy parameters. Use the [TAB] push button to move between therapy
parameters. Start therapy by pressing the probe push button. Press the [ESC/STOP] push button to return to
previous menu.

BTL-2000 USER'S MANUAL & USER’S GUIDE
Page 13 z 45
2.8 User menu (push button [MENU])
When pressing the [MENU] push button, the instrument will enter the System Menu and it is then possible to select
from the following list.
Patient search
Patient list
User diagnoses
System setup
Acupuncture
Probe test
> Pat i ent search
Pat i ent list
U ser diagnases
Sys t em setup
Press the [ + ] or [ - ] arrows to move between displayed settings. Press the [ENTER] push button to select desired
setting. Press the [ESC/STOP] push button to return to previous menu.
2.8.1 Patient search
Enter Patient Search when searching for patient file with saved therapy parameters. If there is no patient file in
memory, “Memory free” will be shown on display. If there are less than 6 patient files in memory, a list of these
patient files in alphabetical order will appear on the display. If there are 6 or more patient files in memory, the
following menu will be displayed:
PAT IENT LIST
F i r s t char: _
Type the first letter of desired patient name and press the [ENTER] push button to enter the list of patients. Use the
[ + ] and [ - ] arrows to move between patient names and use the [ENTER] push button to select desired patient.
After selecting desired patient, patient therapy parameters will be displayed.
D e n s . _0.9J/cm2
F r e quencY Continual
A r e a 1.0Cm2Pwr 30mW
T i m e 1:39 Ready
Use the [ + ] and [ - ] arrows to adjust therapy parameters. Use the [TAB] push button to move between therapy
parameters. Start therapy by pressing the probe push button. Press the [ESC/STOP] push button to return to
previous menu.

BTL-2000 USER'S MANUAL & USER’S GUIDE
Page 14 z 45
2.8.2 Patient List
When entering Patient List, the following list will be displayed:
> N ew patient
E d i t patient
Del e te patient
Use the [ + ] and [ - ] arrows to move between displayed settings. Press the [ENTER] push button to select desired
file. Press the [ESC/STOP] push button to return to previous menu.
2.8.2.1 New Patient
When creating a new patient, enter New Patient by using the [ENTER] push button. After entering New Patient, the
following menu will be displayed:
Pat i e nt name:
_
Enter the patient name and press the [ENTER] push button to save it in memory.
After pressing the [ENTER] push button, the therapy parameters will be displayed.
D e n s . _0.9J/cm2
F r e quency Continual
A r e a 1.0cm2Pwr 30mW
T i m e 1:39 Edit
Use the [ + ] and [ - ] arrows to adjust therapy parameters. Use the [TAB] push button to move between therapy
parameters. Press the [ENTER] push button to save adjusted data. After pressing the [ENTER] push button, “Data
saved“ will be shown on the display. Press the [ESC/STOP] push button to return to previous menu.
2.8.2.2 Edit Patient
Enter Patient Search when searching for patient file with saved therapy parameters. If there is no patient file in
memory, “Memory free” will be shown on display. If there are less than 6 patient files in memory, a list of these
patient files in alphabetical order will appear on the display. If there are 6 or more patient files in memory, the
following menu will be displayed:
PAT IENT LIST
F i r s t char: _
Type the first letter of desired patient name. Use the [ENTER] push button to enter the list of patients in alphabetical
order. Use the [ + ] and [ - ] arrows to move between patient names. Use the [ENTER] push button to select desired
patient. After selecting desired patient, patient therapy parameters will be displayed.

BTL-2000 USER'S MANUAL & USER’S GUIDE
Page 15 z 45
D e n s . _0.9J/cm2
F r e quency Continual
A r e a 1.0cm2Pwr 30mW
T i m e 1:39 Edit
Use the [ + ] and [ - ] arrows to adjust therapy parameter. Use the [TAB] push button to move between therapy
parameters. Press the [ENTER] push button to save adjusted data. After pressing the [ENTER] push button, “Data
saved“ will be shown on the display. Press the [ESC/STOP] push button to return to previous menu.
2.8.2.3 Delete Patient
Enter Patient Search when searching for patient file with saved therapy parameters. If there is no patient file in
memory, “Memory free” will be shown on display. If there are less than 6 patient files in memory, a list of these
patient files in alphabetical order will appear on the display. If there are 6 or more patient files in memory, the
following menu will be displayed:
PAT IENT LIST
F i r s t char: _
Type the first letter of desired patient name and press the [ENTER] push button to enter the list of patients in
alphabetical order. Use the [ + ] and [ - ] arrows to move between patient names and the [ENTER] push button to
select desired patient. After selecting desired patient, following setting menu will be displayed:
D A T A WILL BE DELETED
Con t inue? Yes
Press the [ENTER] push button to delete data. After pressing the [ENTER] push button “Data deleted“ will be shown
on the display. Use the [ + ] and [ - ] arrows to move between the Yes or No settings. Press the [ESC/STOP] push
button to return to previous menu.
2.8.3 User diagnoses
When entering User diagnoses, the following list will be displayed:
> N ew D Ignosis
E d i t Diagnosis
Del e TE diagnosis
Use the [ + ] and [ - ] arrows to move between settings. Press the [ENTER] push button to select desired setting.
Press the [ESC/STOP] push button to return to previous menu.

BTL-2000 USER'S MANUAL & USER’S GUIDE
Page 16 z 45
2.8.3.1 New Diagnosis
When creating a new diagnosis, enter New Diagnosis by using the [ENTER] push button. After entering New
Diagnosis the following menu will be displayed:
The r a py name:
_
Enter the diagnosis name and press the [ENTER] push button to save it in memory.
After pressing the [ENTER] push button, therapy parameters will be dispayed.
D e n s . _0.9J/cm2
F r e quency Continual
A r e a 1.0cm2Pwr 30mW
T i m e 1:39 Edit
Use the [ + ] and [ - ] arrows to adjust therapy parameters. Use the [TAB] push button to move between therapy
parameters. Press the [ENTER] push button to save adjusted data. After pressing the [ENTER] push button, “Data
saved“ will be shown on the display. Press the [ESC/STOP] push button to return to previous menu.
2.8.3.2 Edit diagnosis
If there are no diagnoses in memory, “Memory free” will be shown on display. If there are less than 6 diagnoses in
memory, a list of these patient files in alphabetical order will appear on the display. If there are 6 or more patient files
in memory, the following menu will be displayed:
U SER DIAGNOSES
Fir s t char: _
Type the first letter of desired diagnosis name and press the [ENTER] push button to enter the list of diagnoses. Use
the [ + ] and [ - ] arrows to move between diagnoses and the [ENTER] push button to select desired diagnosis. After
selecting diagnosis, diagnosis parameters will be displayed.
D e n s . _0.9J/cm2
F r e quency Continual
A r e a 1.0cm2Pwr 30mW
T i m e 1:39 Edit
Use the [ + ] and [ - ] arrows to adjust therapy parameters. Use the [TAB] push button to move between therapy
parameters. Press the [ENTER] push button to save adjusted data. After pressing the [ENTER] push button, “Data
saved“ will be shown on the display. Press the [ESC/STOP] push button to return to previous menu.

BTL-2000 USER'S MANUAL & USER’S GUIDE
Page 17 z 45
2.8.3.3 Delete Diagnosis
If there are no diagnoses in memory, “Memory free” will be shown on display. If there are less than 6 diagnoses in
memory, a list of these patient files in alphabetical order will appear on the display. If there are 6 or more patient files
in memory, the following menu will be displayed:
U SER DIAGNOSES
Fir s t char: _
Type the first letter of desired diagnosis name and press the [ENTER] push button to enter the list of diagnoses. Use
the [ + ] and [ - ] arrows to move between diagnoses and the [ENTER] push button to select desired diagnosis. After
selecting diagnosis, following menu will be displayed:
D A T A WILL BE DELETED
Con t inue? Yes
Press the [ENTER] push button to delete data. After pressing the [ENTER] push button “Data deleted“ will be shown
on display. Use the [ + ] and [ - ] arrows to move between the Yes or No settings. Press the [ESC/STOP] push button
to return to previous menu.
2.8.4 System Setup
When entering System Setup, the following list will be displayed:
Entry Code Changes
Backlight
DF (duty factor) Change
Acupuncture Programme
Keyboard Beep
Start with
Language
Door Activity
Battery Formatting
Default Settings
> Ent r y code change
Bac k light
DF change
A cup . progRamme
Press the [ + ] or [ - ] arrows to move between displayed settings. Press the [ENTER] push button to select desired
setting. Press the [ESC/STOP] push button to return to previous menu.

BTL-2000 USER'S MANUAL & USER’S GUIDE
Page 18 z 45
2.8.4.1 Entry Code Change
The manufacture code is preset as 0000. It is possible to change the code by entering Entry Code Change.
After entering Entry Code Change, the following menu will be displayed:
BTL-2000
T E R A PEUTIC LASER
ENT E R CODE: 0000
Enter the preset safety code and press the [ENTER] push button. After entering the preset safety code, the following
setting menu will be displayed:
BTL-2000
T E R A PEUTIC LASER
N EW CODE: 0000
Use the [ + ] and [ - ] arrows to enter the new code. Use the [TAB] push button to move cursor to next position. Once
the code has been entered, press the [ENTER] push button. After pressing the [ENTER] push button “Data saved“
will be shown on display. Press the [ESC/STOP] push button to return to previous menu.
2.8.4.2 Backlight
When entering Backlight, the following setting menu will be displayed:
Bac k l ight sEtting
0 % 50% 100%
M M M M M MMMMMMMMMMM
Use the [ + ] and [ - ] arrows to adjust backlight intensity. Use the [ENTER] push button to store new data. After
pressing the [ENTER] push button “Data saved“ will be shown on display. Press the [ESC/STOP] push button to
return to previous menu.
Backlight intensity is relative to the energy consumed; the operation time of the battaries is influenced by the
backlight intensity. We recommend not setting this intensity too high.
2.8.4.3 DF change
If the instrument is operating in pulse mode (it means the frequency is not set to 0) it is possible to adjust the Duty
Factor of the output signal. Duty factor (%) defines the ratio of impulse length to period length. The preset value is
80%, and can vary from 10% to 90%. The instrument recalculates the correlating time and power in response to the
changing of the mean value of the laser beam. DF value in frequency mode has significant influence on the
calculated time. If the time is too long, increase the DF and the time length will automatically decrease. The following
figure compares two different duty factors with other conditions being constant. If DF is higher, the laser irradiates a
higher mode (average) and the time length shortens.

BTL-2000 USER'S MANUAL & USER’S GUIDE
Page 19 z 45
2.8.4.3.1 Comparison of Two Different Duty Factors
After entering the DF change setting, the following menu will be displayed:
D u t y factor
8 0 %
Use the [ + ] and [ - ] arrows to adjust Duty Factor. Use the [ENTER] push button to store new data. Press the
[ESC/STOP] push button to return to previous menu.
2.8.4.4 Acupuncture Programme
After entering the Acupuncture Programme setting, the therapy paramters will be displayed:
D e n s . _0.9J/cm2
F r e quency Continual
A r e a 1.0cm2Pwr 30mW
T i m e 1:39 Edit
Use the [ + ] and [ - ] arrows to adjust therapy parameters. Use the [ENTER] push button to store new data. After
pressing the [ENTER] push button “Data saved“ will be shown on display. Press the [ESC/STOP] push button to
return to previous menu.
2.8.4.5 Keyboard Beep
After entering the Keyboard Beep setting, the following menu will be displayed:
Key b o ard
Swi tched on
Use the [ + ] and [ - ] arrows to move between the ON and OFF settings. Use the [ENTER] push button to store new
data. Press the [ESC/STOP] push button to return to previous menu.
2.8.4.6 Start With
After entering the Start With setting, the following list will be displayed. From this list it is possible to preset the
instruments introductory menu. This menu appears after the entering of the safety code.

BTL-2000 USER'S MANUAL & USER’S GUIDE
Page 20 z 45
Main menu
Diagnoses – Selection according to branches and diagnoses
Program – Selection from the programs menu
Manual – Manual setting
Menu – Selection from menu
Pacient searching
> Mai n
D i a g
P r o g
M a n
Use the [ + ] and [ - ] arrows to move between Start With settings. Use the [ENTER] push button to store new data.
After pressing the [ENTER] push button “Data saved“ will be shown on display. Press the [ESC/STOP] push button
to return to previous menu.
2.8.4.7 Language
After entering the Language setting, the following list will be displayed. From this list it is possible to preset the user
language.
English
Czech
… (according to default set)
> C e s k Y
E n g l Ish
Use the [ + ] and [ - ] arrows to move between Cesky / English settings. Use the [ENTER] push button to store new
data. Press the [ESC/STOP] push button to return to previous menu.
2.8.4.8 Door Activity
After entering the Door Activity setting, the following menu will be displayed. This programme allows the blocking of
the instrument while the door is open.
D o o r Activity
Clo Sed
Use the [ + ] and [ - ] arrows to move between the Closed and Open settings. Use the [ENTER] push button to store
new data. Press the [ESC/STOP] push button to return to previous menu.
Table of contents
Other BTL Medical Equipment manuals

BTL
BTL 1500 User manual

BTL
BTL BTL-4000 Topline Series User manual

BTL
BTL 5000 Shockwave Series User manual

BTL
BTL BTL-09 Guide

BTL
BTL BTL-6000 SWT EASY User manual

BTL
BTL BTL-07p User manual

BTL
BTL BTL-1300 User manual

BTL
BTL VANQUISH ME User manual

BTL
BTL BTL-5000 Series User manual

BTL
BTL 6000 SWT TOPLINE User manual
Popular Medical Equipment manuals by other brands

Enraf Nonius
Enraf Nonius Curapuls 670 Service manual

Stryker
Stryker The Go BED FL17E Maintenance manual

Scheppach
Scheppach DC500 Translation of original instruction manual

BONVISI
BONVISI ENDO P SYSTEM Quick manual

Stryker
Stryker 4126-000-000 Instructions for use

Albrecht
Albrecht CDS ELBOW BRACE FLEXION User instructions