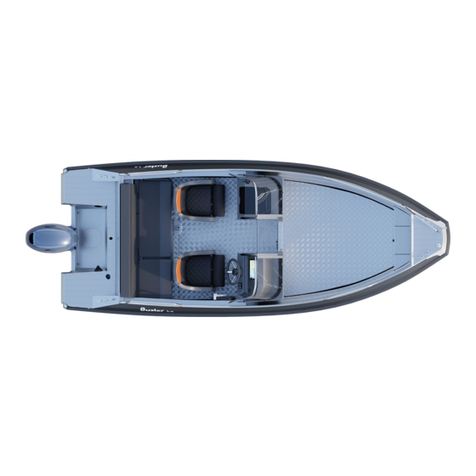
buster L User guide

Inha Works Ltd. 2009 1 (31)
OWNER'S HANDBOOK
BUSTER L
2010
Inha Works Ltd.
Saarikyläntie 21, FI-63700 Ähtäri
tel. +358 6 5355 111
Your authorised Buster dealer:

Inha Works Ltd. 2009 2 (31)
PREFACE
Dear Buster owner! Thank you for choosing a Finnish Buster boat and we hope you
will have many enjoyable experiences on board.
This handbook aims to help you use your boat safely and with peace of mind. It
includes details of the boat itself, the equipment and systems installed in it, and
information about how to operate and maintain it. Before you start using your boat,
we urge you to first familiarise yourself with it by reading this handbook thoroughly.
Naturally, the Owner's Handbook cannot provide you with seamanship skills or
information on boating safely. If the Buster is your first boat, or you have changed to
a type of boat with which you are unfamiliar, for the sake of your comfort and safety,
please acquire sufficient handling and operating experience before you take on the
responsibility of command. The seller of the boat, a boat club, or national motorboat
and yachting associations will gladly tell you about local boating schools or
recommend competent teachers.
Before taking out your boat, ensure that its design category is appropriate for the pre-
vailing wind and sea conditions and that you and your crew are capable of handling it
in the existing conditions. The wind conditions and swells in which design category C
can be used include gales and heavy winds, which come with an exceptional risk of
high waves and gusts. Only a competent and fit crew can satisfactorily handle such
dangerous conditions, and can do so only in a well-maintained boat.
This Owner's Handbook is not a detailed guide to maintenance or fault diagnosis. If a
problem occurs, please contact your nearest Buster dealer. If repairs are needed,
use only those businesses recommended by a Buster dealership. Alterations that
affect the safety characteristics of a Buster boat can be carried out only with the
written approval of the manufacturer, who cannot be held responsible for changes to
the boat that it has not approved.
In some countries driving a boat requires a licence or some other similar
authorisation.
Always maintain your boat in good condition and bear in mind the consequences of
wear resulting from ageing, rough treatment and improper use. Any boat, no matter
how strong, can be significantly damaged by improper use. Always adapt the speed
and course of your boat in relation to the conditions at sea.
If your boat is equipped with a life-raft, read its operating instructions thoroughly. The
boat should have on-board safety equipment (life-jackets, safety harnesses, etc.)
appropriate to the boat type, weather conditions, etc. In some countries such
equipment is mandatory. The crew must be familiar with the operations of all safety
equipment and emergency manoeuvres (rescuing a man overboard, towing, etc.).
Rescue exercises are regularly organised by boating schools and clubs.
Every person on board should use an appropriate flotation aid (such as a life-jacket
or vest). Note that in some countries the law requires flotation aids to be used at all
times while on board.
Inha Works Ltd. 2009 3 (31)
STORE THIS HANDBOOK IN A SAFE PLACE AND HAND IT OVER TO THE NEXT
OWNER WHEN YOU RELINQUISH THE BOAT.
I Owner
First name: _____________________________ Surname:__________________________
Residence: _____________________________
Year of purchase:____________________________
II Owner
First name: _____________________________ Surname:__________________________
Residence: _____________________________
Year of purchase:____________________________
III Owner
First name: _____________________________ Surname:__________________________
Residence: _____________________________
Year of purchase:____________________________
IV Owner
First name: _____________________________ Surname:__________________________
Residence: _____________________________
Year of purchase:____________________________
V Owner
First name: _____________________________ Surname:__________________________
Residence: _____________________________
Year of purchase:____________________________

Inha Works Ltd. 2009 4 (31)
Contents
1General 6
2Definitions 6
3Warranty 6
4Before launching 7
4.1 Registration 7
4.2 Insurance 7
4.3 Training 7
5Boat characteristics and operation 7
5.1 General 7
5.2 Basic information about the boat 7
5.3 Recommended maximum number of people on board 8
5.4 Loading 9
5.5 Engine and propeller 9
5.6 Preventing water getting on board and stability 10
5.6.1 Hull and deck openings 10
5.6.2 Bilge pumps and drainage 10
5.6.3 Stability and buoyancy 11
5.7 Prevention of fire and explosions 11
5.7.1 Engines and fuel systems 11
5.7.2 Fire extinguishing and fire prevention 12
5.8 Electrical system 13
5.9 Control characteristics 17
5.9.1 Driving at high speeds 17
5.9.2 Dead-man's grip 18
5.9.3 Visibility from the steering position 18
5.10Good seamanship – other recommendations and instructions 18
5.10.1How to avoid falling overboard and procedures for getting back on
board 18
5.10.2Securing loose equipment 19
5.10.3Respect for the environment 19
5.10.4Anchoring, mooring and towing 20
5.10.5Trailer towing 21
6Service, repairs and winter storage 22

Inha Works Ltd. 2009 5 (31)
BEFORE DEPARTURE...
Read this Owner's Handbook thoroughly, and before departure always check:
* Prevailing weather conditions and the weather forecast
Assess the wind conditions, the state of the sea, and visibility. Is your boat's
design class, size, and on-board equipment, together with the skills of the
helmsman and crew sufficient for the waterways which you intend to use?
* Load capacity
Do not overload the boat. Distribute the load evenly, and place heavy objects as
low as possible because placing them too high will reduce the boat's stability.
* Passengers
Ensure that life-jackets or vests are available for everyone on board. Before
departure, agree what duties each person will be responsible for during the trip.
* Fuel
Check that there is enough fuel on board, including sufficient reserve to cope with
bad weather and any unforeseen circumstances.
* Engine and equipment
Check that the steering, electrical devices and battery all function properly and
are in good condition. In addition, check the seaworthiness of the boat: ensure
that there are no fuel or water leaks, and that there is adequate safety equipment
on board, etc. Check that the level of bilge water is minimal.
* Ventilation
Ensure that the fuel space is ventilated to minimise the risk of fire.
* On-board equipment is well secured
Make sure all articles are properly stowed to remain in place in the event of heavy
seas and high winds.
* Sea charts
Unless you are fully acquainted with the route, that you have charts for the
waterway which you intend to use.
* Manoeuvring during departure and arrival
The crew should agree on who is to be responsible for casting off each rope, etc.
During departure and arrival ensure that mooring or other lines do not get
entangled in the propeller.
For further instructions concerning the engine, see the manufacturer's instruction
manual.

Inha Works Ltd. 2009 6 (31)
1 General
This Owner's Handbook will help to familiarise you with the characteristics of your
new boat. Instruction manuals for equipment fitted to the boat are also included and
are frequently referred to. You can, of course, add to this handbook by obtaining the
instruction books for all other equipment. Space for your own notes has been
provided at the back of this handbook.
2 Definitions
Warnings and specific remarks in this handbook are defined as follows:
DANGER!: Indicates grave danger highly likely to lead to death or
permanent injury if appropriate precautionary measures are not
taken.
WARNING!: Indicates danger which may lead to injury or death if
appropriate precautionary measures are not taken.
ATTENTION!: Is a reminder to operate the boat in a safe manner or to bear in
mind dangerous methods of operation that may lead to injury or
damage to the boat or some part of it.
This handbook adopts units of measurement in accordance with the SI system. In
some cases other units have been included in parentheses. An exception to this is
wind speed, which is designated on the Beaufort scale as in the EU Directive on
recreational craft.
3 Warranty
In accordance with the enclosed warranty conditions, a guarantee is provided for the
boat and any equipment that has been installed in the boatyard. For post-production
installations to the engine, trim tabs, compass, any navigation equipment and other
devices, the manufacturer of the equipment in question is directly responsible for any
issues relating to the warranty. , Separate warranty cards, together with contact
information for their suppliers, are enclosed for all equipment/devices. For other
issues relating to the warranty we request that you contact the Buster dealer
indicated on the cover of this handbook.

Inha Works Ltd. 2009 7 (31)
4 Before launching
4.1 Registration
In some countries, it is mandatory for even small boats to be registered. Check with
the local authorities in your country of residence for the statutory regulations
concerning boat registration.
4.2 Insurance
Boat insurance may compensate for damage which has occurred on the water,
during transportation or dry docking. Check separately the insurer's liability regarding
hoisting the boat. Insurance can also indirectly affect safety on the water, because in
the event of serious injuries it allows the essential focus to be on saving lives.
Insurance companies will provide more detailed information on various insurance
alternatives.
4.3 Training
Ample literature is available about boating. A great deal of beneficial practical
information can also be had from boating clubs and from attending navigation
courses. These provide a sound basis for your boating skills, though sureness in
handling, navigating, mooring and anchoring a boat are best acquired by means of
long practice.
5 Boat characteristics and operation
5.1 General
This Owner's Handbook is not a complete maintenance guide or repair manual. The
aim of the handbook is to help owners familiarise themselves with the characteristics
of their new boat as well as showing them how to use it properly.
5.2 Basic information about the boat
The basic information of the Buster L is as follows:
Boat model: Buster L
Design category: C (coastal waters)
See also paragraph 5.4 Loading.
Design category C is defined as follows:
Category C: The boat is designed to operate in conditions of up to a
maximum wind velocity of 6 on the Beaufort scale (approx. 14 m/sec)

Inha Works Ltd. 2009 8 (31)
and a corresponding swell (a significant wave height of up to 2 m with
occasional waves of 4 m maximum). Such conditions can occur in open
water on lakes, estuaries, and in coastal waters in moderate weather.
ATTENTION! the significant wave height is the average height value of the
upper third of the swell which roughly corresponds to an
experienced observer’s estimate of the wave height. Some
individual waves could be twice this height.
Main dimensions and capacities:
The length, beam, draught, total weight, etc., and fuel tank
volume of the boat are listed in Appendix 1: technical
specifications.
Manufacturer's plate: Part of the above information is recorded on the
manufacturer’s plate attached to the boat near the steering
console. More comprehensive information is given in
appropriate sections of this handbook.
5.3 Recommended maximum number of people on
board
The recommended maximum number of people to have on board the boat is six.
Designated seating arrangements are shown in Diagram 1.
WARNING! Never exceed the maximum recommended number of
people on board. Irrespective of the number of people on
board, the total weight of people and equipment must never
exceed the recommended maximum load (see paragraph
5.4 Loading). Always use the seats in the boat. If your boat
is not equipped with seats for six people, everyone on board
must sit in the designated seating places as shown in the
diagram.

Inha Works Ltd. 2009 9 (31)
Diagram 1. Seating for the maximum number of people on board
5.4 Loading
The recommended maximum load capacity for the Buster L is 450 kg.
An adult’s weight is taken to be 75 kg and a child’s 37.5 kg. In addition to the above-
mentioned recommended maximum load, the boat can be loaded with the following
weights: 10 kg of basic equipment and a total weight of 40 kg of fuel in the boat’s
fixed tank.
WARNING: When loading your boat never exceed the recommended
maximum load. Pack the boat carefully and distribute the
load evenly in order to maintain the design trim (approx.
even keel). Avoid storing heavy weights at too high an
elevation.
5.5 Engine and propeller
The largest recommended engine capacity for the Buster L is 37 kW (50 hp)
When fitting the engine and choosing a propeller, comply with the engine
manufacturer’s instructions.

Inha Works Ltd. 2009 10 (31)
5.6 Preventing water getting on board and stability
5.6.1 Hull and deck openings
The location of deck openings and their respective plugs are shown in Diagram 2.
The Buster L has an outlet for draining rain water from the cockpit. This outlet is
meant to be plugged if you observe water flowing back into the cockpit through the
drain outlets when the boat is loaded. In other situations, the drain outlets should be
kept open and regularly cleared to prevent them from getting blocked with debris.
The boat has a drain plug in the aft section screwed to the lower corner of the
transom, through which the boat can be drained when docked or loaded on a trailer.
Diagram 2. Location of outlets, cut-off valves and bilge pump: 1) Automatic bilge
pump; 2) Cockpit drain plug for draining rainwater.
5.6.2 Bilge pumps and drainage
The Buster L is equipped with an electrically-operated, automatic bilge pump, the
location of which is shown in Diagram 2. It discharges water that has collected in the
bilge whenever the surface sensor detects its presence. The draining capacity of the
electrical bilge pump is approx. 38 l/min. The automatic pump is in a constant state of
readiness independent of the position of the main power switch, provided that the
accumulator is connected. The bilge pump is activated when the sensor is fully
submerged for five seconds and is deactivated when the sensor is dry. The pump
can also be force-fed by activating the springloaded switch on the switch panel.

Inha Works Ltd. 2009 11 (31)
The bilge pump has been positioned as close to the bottom plate as is practicable.
Even so, a small amount of water inevitably remains in the bilge where it cannot be
discharged by the pump. However, this water can be drained off through the drain
outlet on the right-hand side of the boat’s transom.
The suction head of the electrically-operated bilge pump should regularly be checked
and cleared of debris that may have accumulated there. Access to the pump is
through the service hatch in the engine well.
WARNING! The bilge pump system is not designed to deal with leaks
resulting from running aground or leaks that occur as a result
of other damage.
ATTENTION! Check the operation of the bilge pump at regular intervals.
Clear any debris from the end of the pump’s suction hose.
5.6.3 Stability and buoyancy
The stability of a Buster is excellent thanks to the hull form and weight distribution.
Even so, beware of large breaking waves which always represent a serious danger
to stability.
Note that your boat’s stability will be compromised if any additional weight is placed
too high in the boat. All changes resulting from positioning bulky objects can
significantly influence the stability, trim, and performance of your boat. If you intend to
make such changes, please first contact the manufacturer of the boat.
The amount of water in the bilge should be kept at a minimum as the free movement
of water in the boat always decreases stability.
Stability can also be diminished when towing or being towed.
The Buster L is equipped with pontoons to help the boat carry loads, as defined in
paragraph 5.4, even when the boat has filled with water.
5.7 Prevention of fire and explosions
5.7.1 Engines and fuel systems
The Buster L has reserved spots for two slip tanks under the rear seat. Before
refuelling, switch off the engine. Do not smoke while refuelling and otherwise avoid
naked flames. To fill the slip tank, it must be lifted out of the boat to avoid any fuel
getting into the bilge in the event of the fuelling procedure resulting in an overflow. Do
not use any electrical devices while refuelling.
Do not keep canisters of reserve fuel in any unventilated space or loose in the boat,
or any equipment containing petrol in a place not designed for it. The designated
places for the fuel tanks are shown in Appendix 2: Buster L overall arrangements.

Inha Works Ltd. 2009 12 (31)
At least once a year, check that there has been no wear and tear in the fuel feed
pipes.
The fuel tanks must be fastened in place with the on-board straps to prevent them
from moving around. When moving the fuel tanks, close the air screws to avoid leaks,
but be sure to open the screw of the tank that is being used to avoid prevent the
engine from choking.
5.7.2 Fire extinguishing and fire prevention
Buster L is equipped with a 2-kg hand-held powder extinguisher with a fire rating of
13A89BC (Diagram 3). The extinguisher is located in the storage space on the left-
hand side of the prow. Its position is indicated by a clearly visible symbol in the
cockpit.
Diagram 3. 1) Hand-held fire extinguisher 13A89BC (2 kg)
Hand-held fire extinguishers must be serviced annually. Extinguishers more than ten
years old are not approved unless the pressure chamber has been re-tested. When
changing hand-held fire extinguishers, they should be replaced by a device with a
minimum fire rating of 8A68B.
Ensure that the fire extinguishing equipment is easily accessible when the boat is
loaded. Tell all crew members the location of the equipment and how to operate it.
Keep the bilge clear of fuel and regularly check for possible fuel leaks. The smell of
petrol is a sure sign of a fuel leak.

Inha Works Ltd. 2009 13 (31)
Never
•obstruct access to safety equipment, for example, to the extinguisher and the
main power switch of the electrical system. Before using the boat, always
remember to unlock the padlock of the storage space (for the extinguisher).
•block any of the boat’s ventilation openings, such as the ones in the lower
edge of the rear seat, which are designed to vent any fuel vapour.
•make alterations to the boat’s electrical or fuel systems or permit any
unqualified person to make changes to any system on the boat.
•detach the fuel line from the slip tank when the engine is running, e.g. to
change tanks.
•fill the fuel tank or otherwise handle fuel when the engine is running.
•smoke or light any naked flame while handling fuel.
5.8 Electrical system
The circuit diagram for the electrical systems of the boat is shown in Appendix 3.
The main power switch is located inside the rear seat on the left side of the boat. The
circuitry functions when the switch key is turned clockwise into a horizontal position.
When the key is in a vertical position, the circuitry is off. However, the automatic bilge
pump is always functional when connected to the battery.
Switches for control and electrical devices are located as shown in Diagram 4.

Inha Works Ltd. 2009 14 (31)
Diagram 4. Location of electrical devices:
1) Accumulator housing;
2) Main power switch;
3) Bilge pump;
4) Mast light (detachable), white 360°;
5) Navigation light (detachable), with colour sectors;
6) Switch panel (see Diagram 5.);
7) Power outlet, 12V DC, 10A;
8) Fuse box (see Diagram 6.)

Inha Works Ltd. 2009 15 (31)
Diagram 5. Switch panel; 1. Operating switch for bilge pump; 2. Navigation light
switch
Circuit fuses are located next to the main switch in a separate fuse box inside the
rear seat on the left side of the boat. The Buster L uses automatic fuses which can
be reconnected after overloading by pushing the tripped pin back down. In the
electrical system, there are two extra circuits equipped with fuses (Extra 1 5A and
Extra 2 10A). Accessories installed post-production can be connected to these. The
leads for these circuits are behind the switch panel on the steering pulpit. Do not
replace normal fuses with fuses intended for a higher current feed. Similarly, do not
install as part of the electrical system components which exceed the nominal ampere
value of the respective circuit.

Inha Works Ltd. 2009 16 (31)
Diagram 6. Fuse box: 1) Navigation lights 5A (A+); 2) Bilge pump 5A (C++); 3)
Power outlet 10A (12V+); 4) Extra circuit 5A (X1); 5. Extra circuit 10A
(X2).
When leaving the boat unattended for a long period, switch off the current at the main
switch. Also switch off the power when carrying out electrical installations. However,
the boat’s automatic bilge pump remains functional and can be switched off only by
detaching the battery's terminal lead (+).
To remove the battery, open the rear seat's knurled-head screws and pull the seat
out for a distance equalling the length of its mounting place. Next, open the battery
housing's fastening strap and pull out the battery housing from under the rear left
platform. If the rear seat must be removed from the boat entirely, detach the fuse box
and main switch from the seat by unscrewing the surrounding 4 knurled-head
screws. When you connect or disconnect the battery, take care not to simultaneously
touch both terminals of the accumulator or the aluminium surfaces of the boat with a
metal tool such as, for example, a spanner.
Charge the battery only with the engine or with a battery charger. Charging with too
high a current can lead to an explosion.
ATTENTION! Never switch off the power at the main switch while the
engine is running.
Do not alter the boat’s electrical system or any diagrams associated with it. Changes
and service must be carried out by qualified electricians specialised in marine
electrical systems.

Inha Works Ltd. 2009 17 (31)
5.9 Control characteristics
5.9.1 Driving at high speeds
The recommended maximum engine output for the Buster L is 37 kW (50 hp).
Do not use a boat with an engine that has a greater output than that which is
indicated on the manufacturer’s plate.
Most engines feature electro-hydraulic power trims. The basic rules for adjusting the
engine's power trim are:
•When raising the boat to plane, go to the ‘bow down’ position.
•When the boat is planing, and in a moderate swell, raise the bow until the boat
begins to buck, and the propeller loses its grip (ventilates) or the engine
approaches the upper limit of the normal area of adjustment. Thereafter, lower
the prow slightly until the boat stabilises. The power trim can be optimised with
the aid of the log.
•In a counter swell, lower the bow for a smoother ride. In a favourable swell,
and in a very high counter swell, raise the bow slightly so that it does not dive
(submerge).
•Do not drive the boat at high speed when the engine power trim is at a
negative angle – i.e. with the bow low – as the boat may heel and the steering
become unstable.
Also see the instruction manual for the engine.
The outboard engine is normally intended to be installed at a height where the
engine’s cavitation plate is at the same elevation as the keel of the boat.
WARNING! At high speeds, adjust the power trim with care, as it
radically changes the behaviour of the boat. Do not drive
with the bow too low as the boat can suddenly deviate from
its path.
WARNING! Rapid turns can lead to loss of control. Reduce speed before
sharp turns in whatever direction you are going.
WARNING! Waves reduce the boat’s controllability, causing it to heel.
Bear this in mind and reduce speed in a rising swell.
Learn the rules of navigation, from books and courses, and follow them. Also observe
the requirements of COLREG (Convention on the International Regulations for
Preventing Collisions at Sea). Navigate carefully and use new or updated sea charts.
Always adjust your speed in accordance with prevailing conditions and the
environment. Bear in mind:
•the state of the sea (ask your passengers for their opinions on a comfortable
speed)
•your own wake (greater when rising to plane, smaller at displacement speed,
i.e., below 6 knots). Observe prohibitions associated with a swell. Reduce your

Inha Works Ltd. 2009 18 (31)
speed and your wake as a matter of courtesy, and also for the safety of
yourself and others.
•visibility (islands, fog, rain, blinding sun).
•knowledge of the route (time required for navigation).
•narrowness of the route (other traffic in the waterway, noise, and the effect of
backwash on the shoreline).
•the space needed for coming to a halt and for evasive manoeuvres.
5.9.2 Dead-man's grip
Attach the line for the dead-man’s grip to yourself as soon as you have cast off the
mooring rope. Read the more detailed instructions in the engine manual. Particularly
when driving alone, it is very important that the boat stops, if for any reason you have
fallen overboard or stumble while on board. However, to avoid unintentionally turning
off the engine during landing manoeuvres, remember to detach the line from your
hand beforehand.
DANGER! A rotating propeller is extremely dangerous for anyone who
has fallen overboard or to a swimmer. Switch off the engine
until the swimmer or water-skier has climbed back on board.
5.9.3 Visibility from the steering position
In beautiful and calm weather, driving is simple provided you keep a sharp lookout,
which also complies with the requirements of COLREG. Always take care to have the
best possible visibility from the steering position:
•Position passengers so that they do not limit the field of vision.
•Do not drive continuously at planing threshold speed, as the rising prow
impedes visibility.
•Use the engine’s power trim and possible trim tabs to adjust the boat’s
position in such a way that the rising prow does not obstruct visibility.
•Remember also to look astern in case of approaching vessels, particularly
while boating in shipping lanes.
At the approach of darkness and in any situation with limited visibility (fog, heavy
rain, etc.) use the navigation lights. Their switch is located on the steering pulpit.
Install both aft and prow light masts.
5.10 Good seamanship – other recommendations and
instructions
5.10.1 How to avoid falling overboard and procedures for getting back
on board
The boat’s work areas are marked on Diagram 7. Do not sit, stand or walk on other
parts of the boat while it is in motion.

Inha Works Ltd. 2009 19 (31)
If someone falls overboard the easiest way to get back on board is via the swim
ladder at the stern, which can also be pulled down by the person in the water.
Remember to switch off the engine as the swimmer approaches the boat.
Diagram 7. Location of work decks (defined areas) and swim ladder (1).
5.10.2 Securing loose equipment
Secure all weighty items, such as the anchor, in place before departure. Bear in mind
that wind and turbulence can easily snatch away lighter objects.
5.10.3 Respect for the environment
Shorelines everywhere (sea and lakes alike in all countries where Buster boats are
sold) are a precious natural resource and their preservation is a matter of honour for
all sailors. Therefore avoid
−
fuel and oil leaks
−
disposing rubbish and waste in the water or on the shoreline
−
discharging washing detergents or solvents into the water
−
loud noise on the water and in harbours
−
generating backwash, especially in narrow passages and shallow waterways.
Pay special attention to local environmental laws and regulations. Familiarise
yourself with international regulations on preventing the contamination of the marine
environment (MARPOL) and comply with them as far as possible.

Inha Works Ltd. 2009 20 (31)
5.10.4 Anchoring, mooring and towing
Always anchor your boat carefully even in sheltered spots, as conditions can change
suddenly. The mooring line should be equipped with a spring-loaded device to
cushion the effect of jerking. See the attaching points in Diagram 8. Do not use other
parts of the boat for mooring, towing, or anchoring. Use sufficiently large fenders to
avoid chaffing and friction.
The eyelet on the prow is meant for docking on a slipway or mounting on a trailer, not
for pulling the boat sideways when mooring to a jetty. The boat also has a thief-proof,
hardened-steel eyelet attached to the foredeck, which is intended for a locking chain
only and should not be used for any purpose other than locking the boat.
The strength of the attaching points is also shown in Diagram 8. It is the responsibility
of the owner/user to ensure that mooring, towing and anchor ropes, anchor chains
and anchors are appropriate for use on the boat and that the breaking strength of the
ropes and chains does not exceed 80% of the strength of the corresponding
attaching point. However, rope wear and knots that weaken the strength of ropes
should also be kept in mind.
When anchoring in a natural harbour, ensure that the depth of the water is sufficient
and that you drop the anchor at a sufficient distance from the shore. A reasonable
grip can be achieved when the rope is 4–5 times the water depth. The grip also gets
better the more the rope is extended. Grip improves significantly if the first 3–5
metres of the anchor rope is weighted rope or chain.
WARNING! Do not try to stop the boat’s motion by using your hand or
placing your hand or foot between the boat and the jetty, the
shore, or another boat. Practise mooring and anchoring in
good conditions and use engine power with restraint but
resolutely.
ATTENTION! When mooring your boat, always bear in mind wind change,
tidal effects, backwash from other boats, etc. Further
information can be had, for example, from your insurance
company.
When towing another boat, use a sufficiently strong, floating tow rope. Initiate the
towing procedure carefully, avoid jerks, and do not overload the engine. Take care to
keep the towing rope from entangling in the propeller. If you are towing a small
dinghy, adjust the length of the tow rope so that the dinghy rides the wake of your
boat favourably. However, in narrow channels and in a heavy swell tow the dinghy
close to the transom so as to minimise the twisting motion. Securely batten down the
equipment in the dinghy in case it capsizes. In a swell in open water, cover the
dinghy to avoid it filling with splash water.
If you tow another boat, or your boat needs to be towed, attach the tow rope as per
the attaching points shown in Diagram 8.
WARNING! A tow rope is subject to high tension. If it snaps, the recoiling
speed at the breaking point can be highly dangerous. Always
use a sufficiently thick rope and stay well clear of it.
Other manuals for L
1
Table of contents
Other buster Boat manuals

buster
buster X User guide

buster
buster MAGNUM User guide

buster
buster Magnum PRO User manual

buster
buster XL User manual

buster
buster BUSTER XXL Cabin 2011 User guide

buster
buster LX User guide

buster
buster MAGNUM CABIN User manual

buster
buster X User manual

buster
buster L User manual

buster
buster MAGNUM User manual