manuals.online logo
Brands
  1. Home
  2. •
  3. Brands
  4. •
  5. Buyers
  6. •
  7. Automobile Accessories
  8. •
  9. Buyers SnowDogg 16062290 User manual

Buyers SnowDogg 16062290 User manual

1
9049 Tyler Blvd. • Mentor, Ohio 44060
Phone (440) 974-8888 • Fax (440) 974-0165
Toll-Free Fax 800-841-8003 • buyersproducts.com
—continued inside
SnowDogg®Snowplow
truck mount
INSTALLATION MANUAL
16062290
DODGE RAM 2019+ 2500/3500
www.storksplows.com
2
ITEM PART NO. QTY. DESCRIPTION
116062291 1 SIDEPLATE, WELD, 19 RAM 2500, PS
216062292 1 SIDEPLATE, WELD, 19 RAM 2500, DS
316062279 1 PUSHBAR, RAM 13+, W/ MID TAB, HD
416062293 2 BRACKET, SWAYBAR ATTACH
516062294 2 REAR BRACE, ARM, 19 RAM 2500
63038493 2 SPACER, SWAY BAR, RAM 2500
73006202 18 SCREW, HEX HD-1/2-13 X 1-1/2 GR 8 ZC
Bill of Materials
ITEM PART NO. QTY. DESCRIPTION
83005140 4 SCREW, HH1/2-13 x 3.5, GR 5 ZN
9 3011523 6 NUT, HEX, 1/2-13 W/HANDLE, GR8
10
3035677
4 SCREW,M10 X 1.5MM X 45MM, ZN 10.9
11 3002397 16 LOCKNUT, HEX NYLOCK, 1/2-13 ZN, G8
12
FWF050138014
6 WASHER, FLAT, 1/2" USS, ZN
13 FWL050088013 6
WASHER, LOCK - 1/2 SPLIT ZN
1
2
3
4
5
6
7 8
9
10
11
12
13
7
9
7
8
3
1. It is recommended to remove the bumper for this
installation.
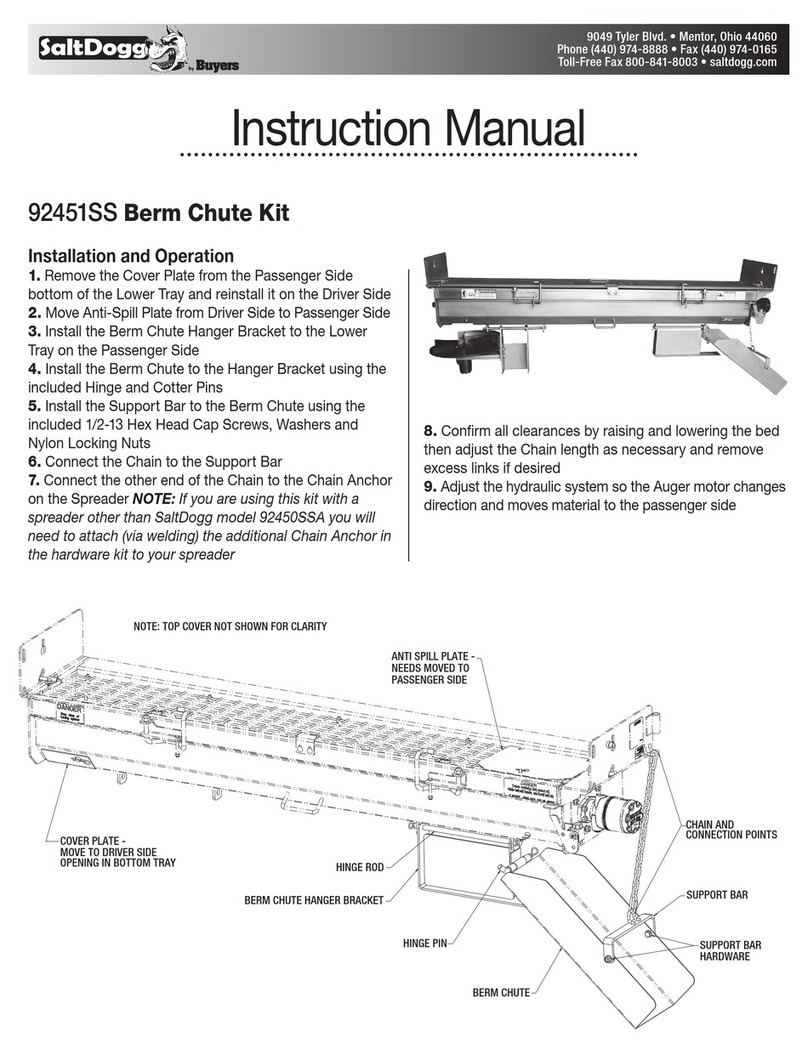
2. Remove the two Add-On Bracket bolts and one
lower-front bumper bolt and install the DS Sideplate
(2) in its place. Use longer bolts if existing bolts are
too short. Secure these bolts with the proper size
nuts required. Add On Bracket will not be re-used.
3. At the bottom of the sideplate, mark and drill open
one hole from the frame and install one 1/2" bolt and
nut. A nut on a stick is provided to help maneuver the
bolt alignment. This stick may have to be bent and
twisted in order to match the holes you just drilled.
4. Repeat step 2-3 for the passenger side Sideplate (1).
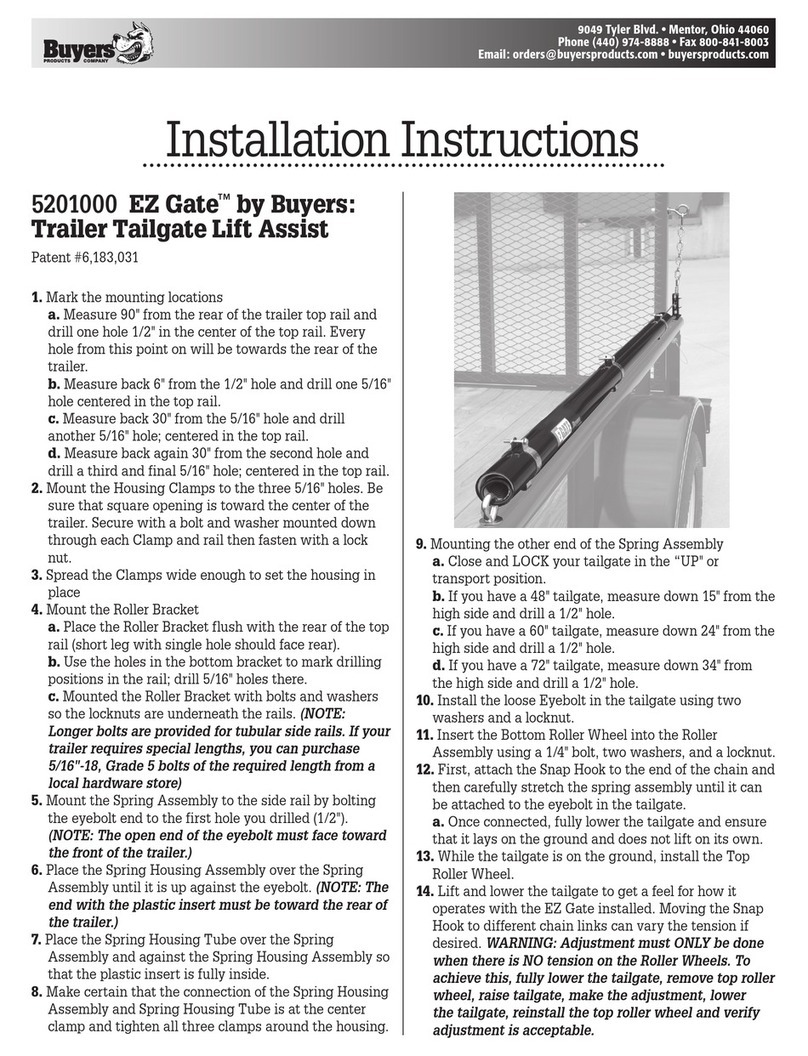
5. Install the Pushbar (3) onto the two Sidplate
(1,2) installed earlier using 8 bolts (7) and nuts (11)
provided. Measure the Pushbar to about 11 inches
from the level Floor (see Fig. 3).
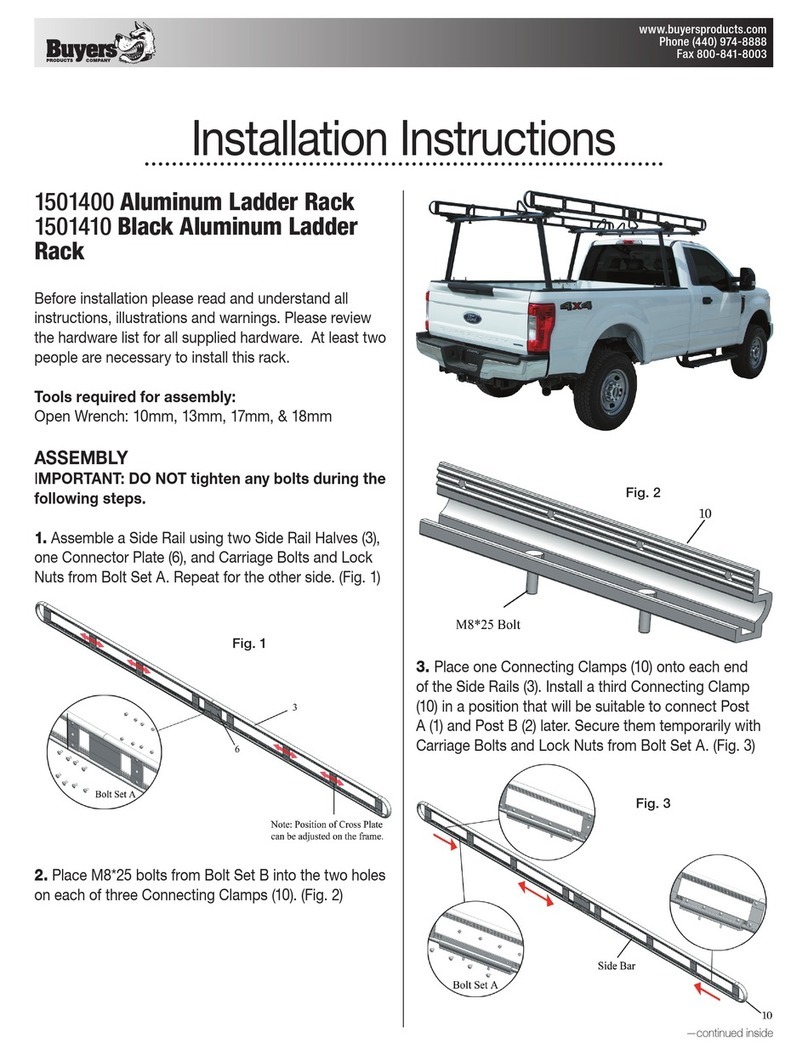
6. Temporarily, lower the swaybar from the bottom of
the truck. Install the Swaybar Bracket (4) and re-attach
the swaybar into place like a sandwich. Make sure to
insert the Swaybar Spacer (6) up against the rubber
toward the frame. Secure it with two new metric bolts
(10). Connect the Rear Brace (5) to the Pushbar (3)
and the Swaybar Bracket (4). Loosely, secure them
together with four 1/2" fasteners.
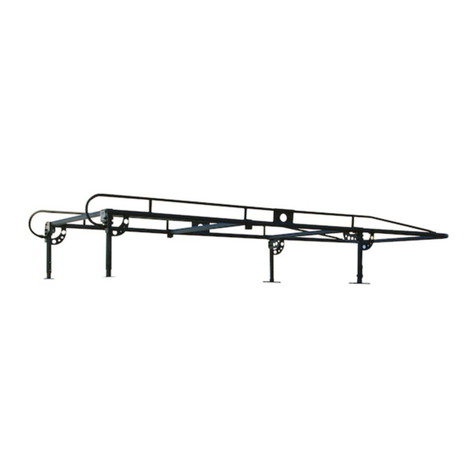
7. Repeat Step number 6 for the PS Rear Brace Arm (4).
8. Torque all fasteners as shown in the chart. Check
and re-torque all fasteners after 5 hours of usage to
ensure safe plow operation. Ensure all coolant lines
and wires are clear from moving or hot components.
Fig. 3
Fig. 2
Fig. 1
Fig. 4
ALIGN SIDE PLATE TO
EXISTING HOLES LOCATION
RE-USE EXISTING
TOW HOOK BRACKET
REMOVE THIS
ADD ON BRACKET
OPEN UP EXISTING
HOLE FOR 1/2" BOLT
USE 1/2 FASTENERS
PROVIDED
ADJUST DISTANCE TO
MEASURE 11 INCHES
FROM LEVEL FLOOR
ATTACH PUSHBAR BETWEEN
2 SIDEPLATES
SECURE WITH 1/2"
BOLTS & NUTS
SWAYBAR BRACKET
LONGER METRIC BOLT
CONNECT THE REAR BRACE
TO THE SWAYBAR BRACKET
SECURE ARM
TO PUSHBAR
SECURE ARM TO
SWAYBAR BRACKET
4
9049 Tyler Blvd. • Mentor, Ohio 44060
Phone (440) 974-8888 • Fax (440) 974-0165
Toll-Free Fax 800-841-8003 • buyersproducts.com
16062290INST_ A
WARNING
• DO NOT under any circumstances disable, remove or relocate any sensors or components related to the operation of the air
bags.
• Always follow the vehicle manufacturers' recommendations relating to snowplow installation.
• To comply with Federal Regulations and to assure a safe vehicle, the Front Gross Axle Weight Rating (FGAWR), Rear Gross
Axle Weight Rating (RGAWR), and the Gross Vehicle Weight Rating (GAWR) must not be exceeded at any time.
• Due to the variety of equipment that can be installed on this vehicle, it is necessary to verify that the Front Gross Axle Weight
Rating (FGAWR), Rear Gross Axle Weight Rating (RGAWR), and the Gross Vehicle Weight Rating (GAWR) are not exceeded at
any time. This may require weighing the vehicle and adding ballast as necessary. It may also limit payload capacity of the vehicle.
It is the operator’s responsibility to verify that these ratings are not exceeded.
CAUTION
• Read all instructions prior to assembly
• It is critical that all fasteners be properly torqued for safe plow operation – see chart above.
• Fasteners should be retorqued after 5-8 hours of plow use
FULL ONE-YEAR WARRANTY
Manufacturer will repair, or at manufacturer’s discretion will replace any part of this snowplow which proves to be defective in
workmanship or material under normal use for a period of one year from the date of delivery to the original purchaser. Any cost
incurred in returning the product to the supplier is the responsibility of the consumer.
EXCLUSIONS
Manufacturer shall not be liable for special, incidental, or consequential damages, or for damages resulting from lack of neces-
sary maintenance, from misuse, abuse, acts of God, or alteration of the product. Some states do not allow the exclusion or limi-
tation of inci¬dental or consequential damages, so the above limita¬tion or exclusion may not apply to you.

Other Buyers Automobile Accessories manuals

Buyers SaltDogg TGS07 User manual

Buyers

Buyers SaltDogg TGS07 User manual

Buyers 8891100 Operation and maintenance manual

Buyers

Buyers 8891100 Operation and maintenance manual

Buyers LT19 Setup guide

Buyers

Buyers LT19 Setup guide

Buyers 1718010 User manual

Buyers

Buyers 1718010 User manual

Buyers SaltDogg PRO2000 Series User manual

Buyers

Buyers SaltDogg PRO2000 Series User manual

Buyers G9003 User manual

Buyers

Buyers G9003 User manual

Buyers 8883000 User manual

Buyers

Buyers 8883000 User manual

Buyers EZ Gate 5201000 Service manual

Buyers

Buyers EZ Gate 5201000 Service manual

Buyers 1501250 User manual

Buyers

Buyers 1501250 User manual

Buyers SaltDogg TGS06 User manual

Buyers

Buyers SaltDogg TGS06 User manual

Buyers SaltDogg TGSUV1B User manual

Buyers

Buyers SaltDogg TGSUV1B User manual

Buyers SnowDogg HDII Series User manual

Buyers

Buyers SnowDogg HDII Series User manual

Buyers 1501400 User manual

Buyers

Buyers 1501400 User manual

Buyers SaltDogg PRO2500 Series User manual

Buyers

Buyers SaltDogg PRO2500 Series User manual

Buyers SnowDogg MDII User manual

Buyers

Buyers SnowDogg MDII User manual

Buyers SaltDogg 92451SS User manual

Buyers

Buyers SaltDogg 92451SS User manual

Popular Automobile Accessories manuals by other brands

Whispbar K373W Fitting instructions

Whispbar

Whispbar K373W Fitting instructions

Broadfeet WCHO-281-21-10S quick guide

Broadfeet

Broadfeet WCHO-281-21-10S quick guide

kincrome K12070 Owner's assemble and Operating manual

kincrome

kincrome K12070 Owner's assemble and Operating manual

Whispbar K688W Fitting instructions

Whispbar

Whispbar K688W Fitting instructions

DVB SPJL-05D installation manual

DVB

DVB SPJL-05D installation manual

CrimeStopper EP-3000 Electroplate owner's manual

CrimeStopper

CrimeStopper EP-3000 Electroplate owner's manual

Airxcel Aqua-Hot Reporter 400 Series Use and care guide

Airxcel

Airxcel Aqua-Hot Reporter 400 Series Use and care guide

Bestop 51254 RT installation instructions

Bestop

Bestop 51254 RT installation instructions

packright rightline GEAR StrapRight Strap Set quick start guide

packright

packright rightline GEAR StrapRight Strap Set quick start guide

Safe Fleet PRIME DESIGN UXR 003-E quick start guide

Safe Fleet

Safe Fleet PRIME DESIGN UXR 003-E quick start guide

Schwaiger LADC0140 user guide

Schwaiger

Schwaiger LADC0140 user guide

FVC Sprinter Headliner Shelf installation guide

FVC

FVC Sprinter Headliner Shelf installation guide

Fisher Xtreme V 44600-1 installation instructions

Fisher

Fisher Xtreme V 44600-1 installation instructions

Steinhof R-020 FITTING AND OPERATION MANUAL

Steinhof

Steinhof R-020 FITTING AND OPERATION MANUAL

Kuryakyn PRISM+ PRO KIT WITH CONTROLLER installation instructions

Kuryakyn

Kuryakyn PRISM+ PRO KIT WITH CONTROLLER installation instructions

Directed Electronics Xpresskit DBALL installation guide

Directed Electronics

Directed Electronics Xpresskit DBALL installation guide

Holley NOS 02121NOS owner's manual

Holley

Holley NOS 02121NOS owner's manual

Westin PRO TRAXX 4 OVAL TUBE STEP BARS installation instructions

Westin

Westin PRO TRAXX 4 OVAL TUBE STEP BARS installation instructions

manuals.online logo
manuals.online logoBrands
  • About & Mission
  • Contact us
  • Privacy Policy
  • Terms and Conditions

Copyright 2025 Manuals.Online. All Rights Reserved.