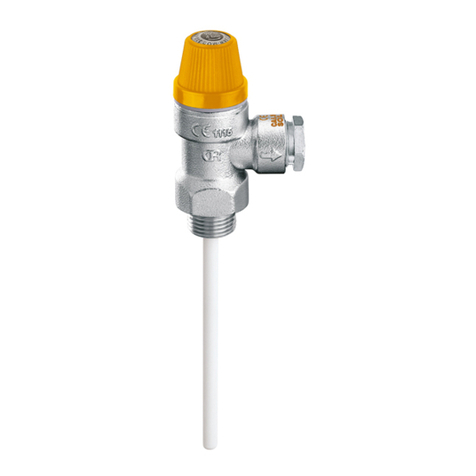
Caleffi solar 2522HP Series User guide

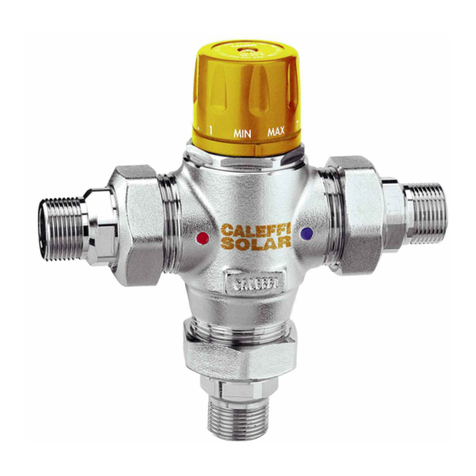
empering valve for solar and instantaneous applications
2522HP series
Installation, commissioning and servicing instructions
The tempering valve is used to regulate the set
temperature of mixed hot and cold water even when
variations occur in the water supply conditions.
The Caleffi 2522HP series has been specifically
designed and manufactured to meet the
requirements of “AS 4032.2:2005 empering valves
and end-ofline temperature actuated devices”.
This particular series of tempering valves has been
developed primarily for installation in solar hot water
systems. These valves are also suitable for use on
instantaneous and general hot water storage systems.
Produc code
252212HP: 15 mm (1/2”)
252219HP: 20 mm (3/4”)
Valves are supplied standard with union connections
at the inlets and include in-line strainers and check
valves.
AS 4032.2
C of C 02466
2 090.02
www.caleffi.com
1
© C pyright 2012 Caleffi

Technical da a
Materials: - valve body: DZR alloy EN 12165 CW602N
- regulating spindle: DZR alloy EN 12165 CW602N
- internal shutter: PPO
- sealing elements: EPDM
- cap: ABS
Temperature adjustment range: 35–50°C (55°C only under supervision and not within
requirements of AS 3500 and AS 4032.2)
Temperature set: Must be commissioned on site to achieve desired temperature
Temperature control: ±3°C
Minimum cold inlet temperature: 5°C
Maximum cold inlet temperature: 30°C
Minimum hot inlet temperature: 55°C
Maximum hot inlet temperature: 100°C
Maximum working pressure (static): 1400 kPa
Maximum working pressure (dynamic): 500 kPa
Minimum working pressure (dynamic): 20 kPa
Maximum unbalanced dynamic supply (hot/cold or cold/hot): 6:1
Minimum temperature differential between hot water inlet
and mixed water outlet to ensure thermal shutoff function: 10°C
Minimum temperature differential between mixed water outlet
and cold water inlet to ensure stable operation: 5°C
Minimum flow rate for stable operation: 4 l/min
Dimensions
A
Code
252212HP 252219HP
AØ 15 Ø 20
B
C
D
E
F
62,5 69
125 138
91 126,5
48,5 84
42,5 42,5
A
AFE
D
BB
C
E*
D*
*
Only for 252219HP
AS 4032.2
C of C 02466
2

Opera ion
A tempering valve mixes hot and cold water in such a way as to maintain the set temperature
of the mixed water at the outlet.
A thermostatic element is fully immersed into the mixed water. It then contracts or expands
causing movement of the piston, closing either the hot or cold inlets, thus regulating the flow of
water entering the valve.
If there are variations of temperature or pressure at the inlets, the internal element automatically
reacts attempting to restore the original temperature setting.
Thermal shu -off
In the event of a failure of the hot or cold supply, the piston will shut off, stopping water
discharging from the mixed water outlet.
The Caleffi valve requires a minimum temperature differential from hot inlet to mixed water outlet
of 10°C to ensure the correct operation of the thermal shutoff feature.
HOT
COLD
MIXED
3

Flow ra e graph
G (l/min)
5
2
2,5
3
3,5
4
10
1
2
5
9
8
7
6
1,2
1,4
1,6
1,8
2,5
3
3,5
4
4,5
12
14
16
18
20
30
35
40
45
20
∆
p (kPa)
100
50
90
80
70
60
4,5
10
6
7
8
9
12
14
16
18
25
30
35
40
45
20
50
Ø 20 mmØ 15 mm
120
140
150
Pressure drop - kPa
Use and flow ra e
Caleffi series 2522HP tempering valves are typically installed at the hot water heater. In order
to maintain the set temperature, the tempering valve must have a minimum flow rate of 4 l/min.
When used in instantaneous hot water systems, the most stable conditions are achieved with
the hot water temperature set lower than 65°C and with a flow rate greater than 6 l/min.
The system should be sized in accordance with the current legislation in regard to the nominal
flow rate of each outlet.
The reference is AS/NZS 3500.1 Table 3.1.
Flow rate - Litres per minute
Code Ø (mm) Kv (m3/h)
252212HP 15 1,5
252219HP 20 1,7
4

5874
1
2
69
1CAP
3
4
7
9
8
5
6
3
2
VALVE BODY
UNION NUT
GASKET
INSERT CHECK VALVE
TAIL PIECE BODY
INSERT STRAINER
TEMPERATURE ADJUSTMENT SPINDLE
LOCKING NUT
Exploded diagram
KIT A
5

Ins alla ion
The Caleffi 2522HP
series
must be installed by a licensed plumber. The installer has a duty of
care to ensure that all aspects of the installation comply with the AS/NZS 3500, appropriate
Codes of Practice and/or local government requirements.
Prior to the installation of the Caleffi 2522HP series valve, the system must be checked to
ensure that the system operating conditions fall within the recommended operating range
of the valve, i.e. verify supply temperatures, supply pressures, risk assessments, etc.
Also, be aware of all current legislation, e.g. the maximum distance from the outlet of the valve to
any terminal fitting, etc.
The supply system must be thoroughly flushed and cleaned to remove any debris which may
accumulate during the installation. Failure to remove any debris will affect the performance and
may void the manufacturer’s warranty.
In areas that are subject to high levels of aggressive water, provision must be made to treat the
water prior to it entering the valve.
The valve can be installed in any position, vertical or horizontal. To allow for maintenance, it is
important that access to the valve and fittings is not impeded.
The hot and cold water supplies must be connected to the valve strictly in accordance with the
indications on the body of the valve.
The inlets of the valves are clearly marked with the letter H (Hot) and C (Cold).
The outlet is marked with the word MIX.
Where one or both of the incoming supply pressures are excessive, a Caleffi pressure reducing
valve should be fitted to reduce the pressure(s) to within the limits as quoted previously.
Any tempering valve should be installed with isolating valves, line strainers and check valves
at both the inlets.
The Caleffi 2522HP series is supplied complete with line strainers and check valves at the hot
and cold inlets. Strainers prevent debris from entering the valve and the check valves at both
hot and cold inlets prevent cross-connection.
Installing isolating valves should be considered so the valve can be isolated during
commissioning or if servicing is required.
The pipework must not be used to support the weight of the valve.
If the valve is not installed correctly then it will not function correctly and may put the user in
danger.
Ins alla ion diagram
Pressure
reducing valve
(if required)
Isolating
valve Isolating
valve
Strainer
& check
valve
Strainer
& check
valve
T
Pressure
reducing valve
(if required)
Temperature
limiting valve
(if required)
HOT SUPPLY COLD SUPPLY
MIXED
OUTLET
T < 50∞C
AS4032.2
Cof C 02466
6

Solar system
MAINS
SUPPLY
System without recirculation
System with recirculation
MAINS
SUPPLY
MAINS
SUPPLY
HOT WATER
STORAGE
HEATER
HOT WATER
STORAGE
HEATER
SOLAR
HOT WATER
STORAGE
7
Applica ion diagrams

Commissioning
After installation, the valve should be tested and commissioned in accordance
with AS 4032.3,
as per the procedure outlined below or as specified by the local authority.
The following instructions should be read and understood prior to commissioning the Caleffi
2522HP series valve. If, under any circumstances, there are aspects of the installation/system
which do not comply with the requirements or the specifications as laid down, the valve must
not be put into service until it does comply.
1) Ensure that the system is thoroughly clean and free from debris prior to commissioning the
tempering valve.
2) Measure the mixed water temperature at the nearest outlet
(we recommend using an
accurate digital thermometer)
.
3) The temperature of the mixed water supplied to an outlet primarily for personal hygiene
purposes shall be in accordance with the requirements of AS/NZS 3500.
4) Once the supply temperatures and normal operating conditions have stabilised, the valve
can be commissioned. The temperature setting can be adjusted by removing the cap and
rotating temperature adjustment spindle.
We suggest that the following sequence is followed when commissioning the valve.
a) Set the mixed water discharge temperature to the required temperature.
b) Measure the temperature of hot and cold water at the inlets of the valve.
c) Measure the temperature of discharged mixed water for high and low flow conditions.
d) Perform the thermal shut-off test, by isolating the cold water supply to the Caleffi 2522HP
valve and monitor the mixed water temperature. The outlet flow should quickly cease.
e) Restore the cold water supply to the valve and measure the mixed water temperature
when it has stabilised. The final temperature found during this test should not exceed the
set temperature by +3°C.
5) Once commissioning is completed, lock the temperature adjustment spindle using the
locking nut supplied and secure the cap back on to the valve to prevent tampering by
unauthorised persons.
6) Complete the “TEMPERING VALVE FITTED” label and affix it to the water heater (or where
required by the Local Authority).
8
Instantaneous
system
MAINS
SUPPLY
INSTANTA-
NEOUS
WATER
HEATER

9
1
2
3
4
Tempera ure adjus men
Remove the cap
Direction of temperature adjustment
Temperature adjustment
Lock adjustment spindle with locking nut

Main enance
Tests should be carried out periodically to monitor the performance of the valve in accordance
with AS 4032.3. Deterioration in performance can indicate the need for varying water supply
conditions and/or maintenance or replacement of the valve. If the mixed water temperature
has changed significantly from the previous set temperature, record the change before
re-adjusting the mixed water temperature. If the final mixed water temperature is greater than
the permitted values, we recommend that service work is required.
The following checks should be carried out at least every 12 months, to ensure that the
optimum performance of the valve is maintained.
With reference to the exploded diagram:
A) The inlet strainers ( ) on both hot and cold water inlets should be removed for cleaning by
unscrewing the inlet union nuts and carefully pulling apart the connecting pipework.
B) The built-in check valves (7) can be accessed in a similar way to A). Ensure freedom of
operation and correct seating.
C) Any limescale evident should be removed by immersion in a suitable de-scaling fluid.
4) The valve body must not be disassembled.
When this maintenance is complete, the commissioning process should be repeated.
We recommend that any field test and maintenance work carried out on the valve are recorded in
a relevant report.
Should the valve still not function correctly, it may be necessary to replace it.
As a safety measure, we recommend that the Caleffi 2522HP series is replaced after 5 years service.
Contact Agent Service Department for details and advice.
Spare par s
The following spare parts for the Caleffi 2522HP series are available upon request.
Kit A - Service kit for the inlet sub-assembly. Refer to the exploded diagram.
10

Faul finding
Under normal operating conditions the Caleffi 2522HP series tempering valve will provide a
very high level of performance. However, in some circumstances, where our maintenance plan
is not followed, the following problems may arise.
Symp om
Hot water at the cold taps
Fluctuating mixed water
temperature
Erratic flow of water from
the valve
No flow of water from the
valve
Valve does not shutoff
when tested
Cause
a) Operation of the inlet
check valve is hindered;
check valve is not
sealing correctly.
b) Check valves not fitted.
a) Erratic supply
temperatures at the
inlets of the valve.
b) Starvation of the water
supplies at the inlets
of the valve.
c) Incorrect commissioning
of the valve.
a) Insufficient water
supplies.
b) Fluctuations in supply
pressures/temperatures.
c) Adverse effect created
by other draw off points
on the system.
a) In-line filters blocked.
b) Insufficient supply
pressures.
c) Debris obstructing valve
operation.
a) Installation not in
accordance with our
recommendations.
b) The minimum
temperature differential
not achieved.
c) Internal mechanism
hindered by debris.
Correc ive ac ion
·Replace faulty check
valves
·Restore inlet conditions
within the limits of the
valve.
·Stabilise inlet supply
conditions.
·Clean filters.
·Restore inlet supplies.
·Clean debris or scale
from valve.
·Install as oulined in the
instructions.
·Raise hot water
temperature.
·Clean debris or scale
from valve.
11

Safe y
· Tempering valves must only be installed by a licensed plumber.
· A minimum temperature differential of 10°C is required between the hot water inlet
and the mixed water outlet to ensure correct operation of the thermal shutoff feature.
· Water temperatures higher than 50°C can endanger people.
· Ensure that the valve is supported and that the connecting pipework is not overstressed as
breakages can cause harm to people and/or water damage to property.
· In the case of highly aggressive water, in accordance with the current legislation, treat the
water before it enters the tempering valve. This will avoid damage to the valve.
· If the tempering valve is not installed, commissioned and maintained properly, according to
the instructions contained in this manual, it may not operate correctly and may endanger the user.
Leave this manual for the user.
CALEFFI
S.R. 229, n. 25 · 28010 F ntanet d’Ag gna (NO) · Italy · Tel. Int. +39 322 8491 R.A. · Fax +39 322 863723
Http://www.caleffi.c m · E-mail:inf @caleffi.c m
AUSTRALIAN AGENT
All Valve Industries
Unit 2, 18-28 Sir Joseph Banks Drive
Kurnell NSW 2231
Ph: (02) 8543 9811
Fax: (02) 8543 9822
Email: info@allvalve.com.au
This manual suits for next models
2
Other Caleffi solar Control Unit manuals
Popular Control Unit manuals by other brands

Motorline professional
Motorline professional MC61PL User& installer's manual

Laird
Laird BT85 Series user guide

NXP Semiconductors
NXP Semiconductors TWR-56F8400 user manual

Immergas
Immergas MAGIS PRO ERP Instruction and recommendation booklet

Rockwell
Rockwell RCVDL56DPFL/SP Designer's guide

Okuma
Okuma OSP-U100M Operation manual

NXP Semiconductors
NXP Semiconductors Freescale TWR-WIFI-GS1500M Lab Guide

Supermicro
Supermicro MicroBlade MBI-6119M-C2 user manual

ADTRAN
ADTRAN Total Access Quad BNC Installation and Maintenance

Proxim
Proxim HZB-PROXMB92 user guide

Ehong
Ehong EH-MC10 manual

Texas Instruments
Texas Instruments LM5123EVM-BST user guide