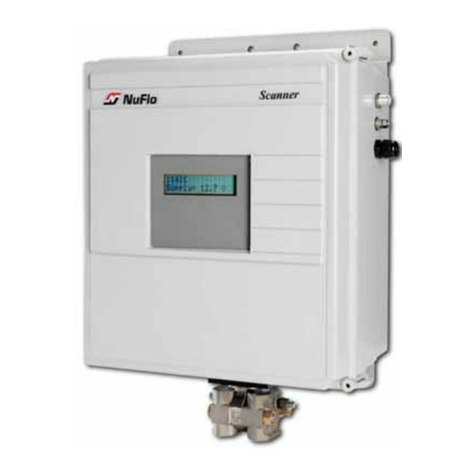
Cameron Scanner 3100 User manual

Scanner 3100 Wi-Fi & Advanced
Networking Guide
Manual No. 50349155, Rev 2


i
Scanner 3100 Wi-Fi & Advanced Networking Guide Table of Contents
Important Information
Symbols and Terms Used in this Manual
! WARNING Thissymbolidentiesinformationaboutpracticesorcircumstancesthatcan
lead to personal injury or death, property damage, or economic loss.
Caution Indicates actions or procedures which if not performed correctly may lead to personal
injury or incorrect function of the instrument or connected equipment.
IMPORTANT Indicates actions or procedures which may affect instrument operation or may lead to an
instrument response which is not planned.
Note Indicatesadditionalinformationaboutspecicconditionsorcircumstancesthatmayaffectinstrument
operation.
Technical Support Contact Information
TEL: +1.844.226.6327
EMAIL: [email protected]
WEB: products.slb.com
*Mark of Schlumberger.
Other company, product, and service names are the properties of their respective owners.
Copyright © 2019 Schlumberger Limited. All rights reserved.
Manual No. 50349155, Rev 2
May 2019

ii
Table of Contents Scanner 3100 Wi-Fi & Advanced Networking Guide
Table of Contents
Important Information ...........................................................................................................................................i
Section 1 - INTRODUCTION TO WI-FI & ADVANCED NETWORKING ...........................................1
Scanner3100NetworkCongurations............................................................................................................... 2
Wireless Access Point.................................................................................................................................. 2
Wireless Client............................................................................................................................................. 2
Ethernet Client............................................................................................................................................. 2
Ethernet DHCP Server................................................................................................................................. 3
Quick Start Flow Chart ....................................................................................................................................... 3
Section 2 - CONNECTING TO THE SCANNER 3100 FOR THE FIRST TIME .................................6
Connecting the Scanner 3100 to an existing managed network........................................................................ 7
Connecting directly to the Scanner 3100 without a managed network – Stand-Alone Ethernet Access............ 8
Section 3 - CONFIGURING A WIRELESS NETWORK...................................................................11
ConguretheScanner3100asaWirelessAccessPoint .................................................................................11
ConguretheScanner3100asaWirelessClient............................................................................................ 15
Section 4 - CONFIGURING AN ETHERNET NETWORK................................................................19
ConguretheScanner3100overEthernet...................................................................................................... 19
Congure the Scanner 3100 as an Ethernet Client .................................................................................. 19
Congure the Scanner 3100 as a DHCP Server ....................................................................................... 23
Section 5 - CONNECTING TO A SCANNER 3100..........................................................................27
DiscoveringaScanner3100NetworkConguration........................................................................................ 27
Wi-Fi Network Conguration options ......................................................................................................... 28
Connect to a Wi-Fi Access Point................................................................................................................ 28
Connect to a Wi-Fi Client (DHCP) ............................................................................................................. 29
Connect to a Wi-Fi Client (Stat) ................................................................................................................. 29
LAN Network Conguration options........................................................................................................... 30
Connect to a LAN Client (DHCP)............................................................................................................... 30
Connect to a LAN Client (Stat)................................................................................................................... 31
Connect to a LAN Server ........................................................................................................................... 31

1
Scanner 3100 Wi-Fi & Advanced Networking Guide Section 1
Section 1 - INTRODUCTION TO WI-FI &ADVANCED NETWORKING
TheoptionalWi-Fi&AdvancedNetworkingexpansionenablestheScanner3100owcomputertoestablish
a local wireless network or to connect to an existing wireless network. This feature allows you to connect to
theScanner3100usingtheintegralWi-Fiofasmartphone,tablet,orPC,therebyavoidingtheneedtoopen
the device enclosure to access the web interface through the wired Ethernet connection. Connecting to your
establishedwirelessnetworkinfrastructurebringsimmediateconnectivitytotheScanner3100WebInterface,
FTP server, and TCP communication ports.
Since this is an optional expansion, it is important to ensure it is installed before attempting any connection
orcongurationoftheWi-Fi&AdvancedNetworkingexpansion.Thiscanbeveriedbyholdingyourhandan
inch or less away from the left side of the screen. After 3 seconds, the screen will switch to show the LAN and
Wi-Ficongurations.IftheWi-Fisays“NotInstalled”,thentheWi-Fi&AdvancedNetworkingexpansionisnot
installed.
WithWi-Fi&AdvancedNetworkingexpansionboardinstalledintheScanner3100,theEthernetconnection
is also upgraded with additional features. In addition to connecting to existing managed networks as a client,
the Scanner 3100 can also act as a router, creating and managing its own local network of wired devices.
This feature allows you to operate the Scanner 3100 as a stand-alone network and directly connect a wired
laptop with ease, requiring only an ethernet cable and no additional networking equipment.
TheWi-FiconnectionontheScanner3100isindependentandseparatefromtheEthernetconnection;using
one does not limit or preclude the use of the other. For example, you can connect the Scanner 3100 to your
wiredinfrastructurewhileconguringtheScanner3100toadditionallyprovideawirelessaccesspointforuser
Wi-Fienableddevices.
WiredandwirelessnetworksintheScanner3100arenotbridgedandaddinganadditionalnetworkposes
nosecurityrisktotheothers.AuserconnectingviaWi-FitotheScanner3100isonaseparatenetworkand
cannot access computers or resources that may be connected to the Scanner 3100’s wired network. Similarly
users connected to the wired network have no access to resources on the wireless network.
ThisguidewillprovidestepsonhowtoconnecttoyourScanner3100forthersttimeusingtheEthernetso
youmaygainaccesstotheWebInterfaceforconguration,andhowtocongureyourScanner3100asa
WirelessAccessPoint,aWirelessClient,anEthernetDHCP(Stand-Alone)LANserver,oranEthernetClient.
ThisguidealsodetailsthestepsforconnectingyourpersonalWi-FiorEthernetenableddevicestoaScanner
3100thatisalreadyconguredinoneofthesemodes.

2
Section 1 Scanner 3100 Wi-Fi & Advanced Networking Guide
Scanner3100NetworkCongurations
AScanner3100equippedwithaWi-FiexpansionmodulecanbeconguredtooperateinoneoftwoWireless
modes and one of two Ethernet modes, as described below.
Wireless Access Point
A wireless access point is a device that creates a wireless local area
network for other devices to connect to. As a wireless access point,
theScanner3100hostsapublicnetwork(asshowninFigure 1)with
the Scanner 3100 as the default SSID. If you have more than one
wirelessaccesspoint(i.e.twoScanner3100’shostingseparatewire-
lessaccesspoints),eachpublicnetworkmusthaveauniqueSSID.
The section ConguretheScanner3100asaWirelessAccessPoint
(page 11)willstepyouthroughthisconguration.
Figure 1 - Wireless Access Point
Wireless Client
As a wireless client, the Scanner 3100 connects to
anexistingwirelessnetwork(asshowninFigure 2),
thereby allowing the Scanner 3100 to be available on
acustomer’sexistingWi-FinetworkthroughtheIP
addressassignedbythecustomer’sDHCPserver.
TheScanner3100canalsobeconguredbyas-
signing it a valid static IP address on the customer’s
existing network.
The section ConguretheScanner3100asaWire-
less Client(page 15)will step you through this
conguration.
Ethernet Client
As an ethernet client, the Scanner 3100 connects
toanexistingwirednetwork(asshowninFigure 3),
thereby allowing the Scanner 3100 to be available
on a customer’s existing network through the IP ad-
dressassignedbythecustomer’sDHCPserver.The
Scanner3100canalsobeconguredbyassigning
it a valid static IP address on the customer’s existing
network.
The section ConguretheScanner3100asan
Ethernet Client(page 19)will step you through this
conguration. Figure 3 - Ethernet Client
Figure 2 - Wireless Client

3
Scanner 3100 Wi-Fi & Advanced Networking Guide Section 1
Ethernet DHCP Server
ADHCPserverisadevicethatdynamicallyassignsIPaddresses
todevicesthatconnecttothenetworkitisoperatingon.When
conguredasaethernetDHCPserverandnotconnectedtoany
other wired network, the Scanner 3100 hosts its own managed wired
network(asshowninFigure 4).Thispermitsuserstoconnecttheir
personalEthernetenableddevice(e.g.Laptop)directlytotheScan-
ner3100withanethernetcablewithnoadditionalcongurationor
equipment.
The section ConguretheScanner3100asaDHCPServer(page
23)willstepyouthroughthisconguration. Figure 4 - Ethernet DHCP Server
Quick Start Flow Chart
Figure 5, summarizestheworkowsfortherst-timecongurationofScanner3100networkoptionsandthe
optionstoeitherconnectorconguretheScanner3100.Figure 6(page 4)andFigure 7(page 5)give
moredetailedoptionsonconguringorconnectingtoaScanner3100fordifferentnetworkcongurations.
Figure 5 - Scanner 3100 network conguration and connection options ow chart
Start
I want to ...
CongureaScanner
3100’s network con-
nections
Connect to a pre-
conguredScanner
3100
Section2-CONNECTINGTOTHE
SCANNER3100FORTHEFIRST
TIME(page 6)
Discovering a Scanner 3100 Net-
workConguration(page 27)

4
Section 1 Scanner 3100 Wi-Fi & Advanced Networking Guide
CongureaScanner
3100’s network con-
nections
The Scanner‘s
connection will
be … Wi-FiEthernet
As a ...
Client DHCPServer Client Access Point
ConguretheScanner
3100 as an Ethernet
Client(page 19)
ConguretheScan-
ner3100asaDHCP
Server(page 23)
ConguretheScanner
3100asaWireless
Client(page 15)
ConguretheScanner
3100asaWirelessAc-
cess Point(page 11)
As a ...
Figure 6 - Scanner 3100 network conguration options ow chart

5
Scanner 3100 Wi-Fi & Advanced Networking Guide Section 1
Connect to a pre-
conguredScanner
3100
ConnecttoaWi-Fi
Access Point
(page 28)
ConnecttoaWi-Fi
Client(Stat)
(page 29)
ConnecttoaWi-Fi
Client(DHCP)
(page 29)
Connect to a LAN
Client(DHCP)
(page 30)
Connect to a LAN
Client(Stat)
(page 31)
Connect to a LAN
Server
(page 31)
Figure 7 - Scanner 3100 network connection options ow chart

6
Section 2 Scanner 3100 Wi-Fi & Advanced Networking Guide
Section 2 - CONNECTING TO THE SCANNER 3100 FOR THE FIRST
TIME
WhenrstconnectingtotheScanner3100andawirelessconnectionhasnotbeenconguredyet,youwill
havetoconnectthroughtheEthernetporttocongurethewirelessnetworkortofurtherconguretheEther-
netnetwork.Onceconnected,youcanthenproceedtocongureeitheraWirelessAccessPointoraWire-
lessClient,orawirednetworkasaDHCPclientorDHCPserver.
TherearetwowaysinwhichtheScanner3100canbeconnectedtotheEthernetforthersttime:connect-
ing to an existing managed network, or connecting directly to the Scanner 3100 without a managed network
-“StandaloneEthernetAccess”.
Dependingonthenetworkyouareconnectingto,theScanner3100mayhavetooperateasaDHCPClient
(existingmanagednetwork)orasaDHCPServer(Stand-AloneEthernetAccess).TheScanner3100net-
work interface can be changed from the Scanner 3100 keypad.
Figure 8 shows the effects of entering and exiting the StandAlone mode. The instructions below will tell you
how and when to activate these modes.
Stand-
Alone
Ethernet
Access
Mode
Keypad
Combination Without Advanced Networking Option
Installed With Advanced Networking Option Installed
OFF (default) ACCESS+LEFT DHCP Client Enabled
Scanner 3100 continually searches for server until
found.
All network parameters granted by server.
DHCP Client Enabled
Scanner 3100 continually searches for server until found.
All network parameters granted by server.
When enabling mode, the network may reset.
ON ACCESS+UP Static Network Settings
Scanner 3100 sets network to user congured
settings.
Client Defaults:
IP Address: 192.168.0.40
Default Gateway: 192.168.0.254
Subnet Mask: 255.255.255.0
Primary DNS Server: 194.25.2.129
Secondary DNS Server: 194.25.2.130
DHCP Server Enabled
Scanner 3100 manages the Ethernet network.
Scanner 3100 will grant an address to any directly connected
computer.
When enabling mode, the network may reset.
Server Defaults:
IP Address: 192.168.0.40
Default Gateway: 192.168.0.254
Subnet Mask: 255.255.255.0
Primary DNS Server: 194.25.2.129
Secondary DNS Server: 194.25.2.130
Client Settings Defaults:
Start IP Address: 192.168.0.100
Maximum Clients: 5
Lease Time: 12 hours
Figure 8 - Stand-Alone Ethernet Access Modes


7
Scanner 3100 Wi-Fi & Advanced Networking Guide Section 2
Connecting the Scanner 3100 to an existing managed network
FollowthestepsinthissectionifyouareconnectingtheScanner3100forthersttimeusinganexistingwork
or home network which is managed by a router or server.
IMPORTANT Place hand over the left hand side of the Scanner 3100 LCD for 8 seconds to wake up the
gesture detection mode.
1. ConguretheScanner3100asa“LANClient(DHCP)”usingthekeypadontheScanner3100faceplate:
a. Press <ACCESS> and <LEFT>keypadbuttonstogetheratthesametime(RefertoFigure 8).
b. Release the buttons at the same time.
c. Wait3secondsandaEthernet Mode Stand-Alone Off message will appear.
d. TheScanner3100willrestartthenetworkcongurations.ARestarting Network message will
appear on the device and the restart will take 90 seconds.
2. ToconrmiftheScanner3100isconguredasaLAN
Client(DHCP),covertheleftsideoftheScanner3100
LCD and after 3 seconds a window will appear as shown in
Figure 9. The lower section of the window will show the LAN
Client (DHCP).
3. Connect the Scanner 3100’s Ethernet Port to the managed
network with an Ethernet cable.
Figure 9 - LAN Client (DHCP)
4. OntheScanner3100faceplate,topleftcornerofLCD:
a. A Not Connected or Link Searching message
may appear while the Scanner is negotiating its IP
address.
b. TheIPaddressappears(seeFigure 10).
Figure 10 - IP Address
5. OpenanyWebBrowser(e.g.Chrome,InternetExplorer,Safari,etc.):
a. Type the IP address from the top left hand corner of the Scanner 3100 LCD into the browser’s ad-
dress bar, as shown on Figure 11. You may also enter http://scanner if there is only one scanner
on the network.
Figure 11 - Web browser entry of IP Address

8
Section 2 Scanner 3100 Wi-Fi & Advanced Networking Guide
b. The Scanner 3100 home page will appear as shown in Figure 12.
6. LogintotheScanner3100usingthefollowingdefaultcredentials:
User Name – admin and Password – scanner.
Note:Usernamesandpasswordsarecasesensitive.
7. Click on the LoginbuttonandnowyouaresuccessfullyconnectedtotheEthernetforthersttimeusing
LANServer(DHCP).
Now the Scanner 3100 has been successfully setup to connect to the Ethernet directly over a managed
network,younowhavetheoptiontoeither:ConguretheScanner3100asaWirelessAccessPoint(page
11), or ConguretheScanner3100asaWirelessClient(page 15).
However,ifyouwanttofurtherconguretheEthernetsettingsontheScanner3100gotoSection 4 - CON-
FIGURINGANETHERNETNETWORK(page 19).
Connecting directly to the Scanner 3100 without a managed network –
Stand-Alone Ethernet Access
FollowthestepsinthissectionifyouareconnectingtheScanner3100forthersttimewhenthereisnoex-
istingmanagednetworkfortheScanner3100toconnectto(Stand-AloneAccess).Thesestepswillsetupthe
Scanner3100asaDHCPServerandtheScanner3100willissueanIPaddressadevice(e.g.laptop,PC)
connected to it through an ethernet cable.
IMPORTANT Place hand over the left hand side of the Scanner 3100 LCD for 8 seconds to wake up the
gesture detection mode.
1. ConguretheScanner3100asa“LANServer”usingthekeypadontheScanner3100faceplate:
a. Press <ACCESS> and <UP> keypadbuttonstogetheratthesametime(RefertoFigure 8).
b. Release the buttons at the same time.
c. Wait3secondsandaEthernet Mode Stand-Alone On message will appear.
Figure 12 - Scanner 3100 Login Screen

9
Scanner 3100 Wi-Fi & Advanced Networking Guide Section 2
d. TheScanner3100willrestartthenetworkcongurations.ARestarting Network message will
appear on the device and the restart will take 90 seconds.
2. ToconrmiftheScanner3100isconnectedasaLANServ-
er, cover the left side of the Scanner 3100 LCD and after 3
seconds a window will appear as shown in Figure 13. The
lower section of the window will show the LAN Server.
Figure 13 - LAN Server
3. PlugintheScanner3100directlyintothedevice(laptop)withanEthernetcable.
4. OntheScanner3100faceplate,topleftcornerofLCD:
a. A Not Connected or Link Searching message
may appear while the Scanner is negotiating the IP
address.
b. TheIPaddressappears(seeFigure 14).
Figure 14 - IP Address
5. OpenanyWebBrowser(e.g.Chrome,InternetExplorer,Safari,etc.):
a. Type the IP address from the top left hand corner of the Scanner 3100 LCD into the browser’s ad-
dress bar, as shown in Figure 15.
Figure 15 - Web browser entry of IP Address

10
Section 2 Scanner 3100 Wi-Fi & Advanced Networking Guide
The Scanner 3100 home page will appear as shown in Figure 16.
Figure 16 - Scanner 3100 Login Screen
6. LogintotheScanner3100usingthefollowingdefaultcredentials:
User Name – admin and Password – Scanner.
Note:Usernamesandpasswordsarecasesensitive.
7. Click on the LoginbuttonandnowyouaresuccessfullyconnectedtotheEthernetforthersttimeusing
the Scanner 3100 as the LAN Server.
Now the Scanner 3100 has been successfully setup to connect to the Ethernet directly over a unmanaged
network(stand-alone),younowhavetheoptiontoeither:ConguretheScanner3100asaWirelessAccess
Point(page 11), or ConguretheScanner3100asaWirelessClient(page 15).
However,ifyouwanttofurtherconguretheEthernetsettingsontheScanner3100gotoSection 4 - CON-
FIGURINGANETHERNETNETWORK(page 19).

11
Scanner 3100 Wi-Fi & Advanced Networking Guide Section 3
Section 3 - CONFIGURING A WIRELESS NETWORK
NowtheScanner3100hasbeensuccessfullysetupwithanEthernetconnection,youcancongurethewire-
lessnetwork.TherearetwowaystoconguretheScanner3100onawirelessnetwork,eitheraWireless
AccessPointoraWirelessClient.
ConguretheScanner3100asaWirelessAccessPoint
1. WhentheDeviceStatusscreenappears,selectAdministration→Network from the main toolbar above
the Status screen as shown in Figure 17.
2. Click the Wi-Fibuttonlocatedontheleftsidetoolbar.TheWi-FiCongurationscreenwillappearas
shown in Figure 18.
Figure 17 - Navigation to Network menu item
3. Click ModifybuttontochangetheWi-Fisettings.
Figure 18 - View Wi-Fi Conguration screen

12
Section 3 Scanner 3100 Wi-Fi & Advanced Networking Guide
4. Underthe‘Wi-FiConguration’heading;
a. OntheEnableWi-FiPorteldselect‘Yes’toenabletheWi-Fiportor‘No’todisabletheWi-Fiport
from the dropdown list.
b. Tocongurethedevicetoactasawire-
lessaccesspoint,clickontheWi-Fi
ServiceModeeldandselect‘Wire-
less Access Point’ from the Change
Wi-FiServiceModedialog,asshownin
Figure 19.
c. Select the wireless transmit power from
theWirelessTransmitPowerdropdown
list.
Figure 19 - Change Wi-Fi Service Mode dialog
5. Underthe‘AccessPointConguration’heading(whichwillonlyappearifyouselectWirelessAccess
Pointastheservicemode),asshownonFigure 20.
a. SelecttheRadioBandfromthedropdownlist.Ifyouareunsurewhatthebandis,choose802.11n.
b. Select the Channel from the dropdown list or select ‘Auto’ to automatically connect to the channel.
c. SelecttheChannelWidthfromthedropdownlist.
d. TypetheSSIDofthedeviceintotheSSIDeld.ThedefaultSSIDis‘Scanner3100’.
IMPORTANT Each device must have a unique SSID.
e. OntheEnableSSIDBroadcasteldselect‘Yes’tobroadcastthedevice’sSSIDorselect‘No’tonot
broadcast the device’s SSID, and you will have to manually enter the correct SSID on the connecting
devices.TheSSIDeldisnottolerantofvariationsandamistakewillpreventadevicefromconnect-
ing wirelessly to the Scanner 3100.
Figure 20 - Access Point Conguration section on the Modify Wi-Fi Conguration screen

13
Scanner 3100 Wi-Fi & Advanced Networking Guide Section 3
6. Underthe‘Wi-FiSecurityParameters–AccessPoint’heading,asshownonFigure 21;
a. SelecttheEncryptionTypefromthedropdownlist.Cameronrecommendsthe‘WPA2-PSKAES’
encryption type because it offers a high level of security.
b. Select the Passphrase Mode from the dropdown list. The selections will change depending on the
Encryption Type selected.
c. EnterthePassphrasefortheencryptedWi-Fideviceintheeldprovided.
7. Underthe‘IPConguration–AccessPoint’heading,asshowninFigure 22;
Figure 21 - Wi-Fi Security Parameters-Access Point section on Modify Wi-Fi Conguration screen
a. EntertheHostNameintheHostNameeld.
b. EntertheIPAddressintheIPAddresseld.
c. Theremainingeldswillself-populate.
IMPORTANT MakesuretheWi-FisubnetenteredisdifferenttotheEthernetsubnet,ifnotthisconictwill
causetheScanner3100toshutdowntheWi-Finetwork.Themessageyouwillseeonthe
web interface is shown in Figure 23.
Figure 22 - IP Conguration - Access Point section on the Modify Wi-Fi Conguration screen
Figure 23 - Wi-Fi & Ethernet Conict message

14
Section 3 Scanner 3100 Wi-Fi & Advanced Networking Guide
8. Underthe‘DHCPServerConguration’heading,asshowninFigure 24;
a. StartIPAddresseld;asanAccessPoint,theScanner3100managesthewirelessnetwork,enter
thestartingIPsubnetaddresstodenewhichaddressestheScanner3100willassigntoconnecting
clients.
b. TheMaximumClientseld,enterthemaximumnumberofclientsyourScanner-managednetwork
can have at one time. The minimum and maximum number of clients is 1 and 10.
c. LeaseTimeeld,enterthecontracttimebeforeanassignedaddresswillbereleasedifitsleaseis
not renewed. The minimum and maximum lease time is 1 and 24.
9. Underthe‘Wi-FiAccessControl’headingasshownonFigure 25;
Figure 24 - DHCP Server Conguration section on the Modify Wi-Fi Conguration screen
a. OntheEnableClientAccessSessionsdropdowneldandselect‘Yes’or‘No’.WhentheWi-FiPort
isenabledinAccessPointservicemode,ClientAccessSessionscanbeusedtolimitaccessbyWi-
Fi clients by disabling the wireless network until it is manually activated.
b. Sessions can be initiated via a Modbus register command, a digital input special function, or by
gesturedetection.ActiveWi-Fiserviceismaintainedduringasessionwhilethereisnetworkactivity
fromaconnectedclient,butifthetimeoutperiodexpireswithoutcommunication,theWi-Fiserviceis
turned off and the session is closed - as shown in Figure 26 and Figure 27.
Figure 25 - Wi-Fi Access Control section on the Modify Conguration screen
Figure 26 - Client Access Off Figure 27 - Client Access On
c. ClickontheSessionTimeouteldtosetthetimewhentheclientsessionshouldbeautomatically
timed out. To reset the device timeout session, log out of the current session or cover the left side of
theScannerLCDforapproximately8secondsiftheWi-FiWakeOnGesturefeatureisenabled.

15
Scanner 3100 Wi-Fi & Advanced Networking Guide Section 3
d. OntheEnableWi-FiWakeonGesturedropdownlist,select‘Yes’toenablethefeature.Todisable
thefeatureselect‘No’.WhentheWakeOnGesturefeatureisenabled,coveringtherightsideofthe
Scanner 3100 for a few seconds will activate a Client Access Session.
10. Click the Save button to accept the changes. The system will write the changes and reset the wireless
congurationsettings.Allnetworkswillbeshutdownandrestartedafter90seconds.
ConguretheScanner3100asaWirelessClient
1. WhentheDeviceStatusscreenappears,selectAdministration→Network from the main toolbar above
the Status screen as shown in Figure 28.
Figure 28 - Navigation to Network menu item
2. Click the Wi-Fibuttonlocatedontheleftsidetoolbar.TheWi-FiCongurationscreenwillappearas
shown in Figure 29.
Figure 29 - View Wi-Fi Conguration screen
3. Click the ModifybuttontochangetheWi-Fisettings.

16
Section 3 Scanner 3100 Wi-Fi & Advanced Networking Guide
4. Underthe‘Wi-FiConguration’heading,asshownontheFigure 30;
a. OntheEnableWi-FiPorteldselect‘Yes’toenabletheWi-Fiportor‘No’todisabletheWi-Fiport
from the dropdown list.
b. Tocongurethedevicetoconnectto
an existing wireless network as wireless
client,clickontheWi-FiServiceMode
eldandselect‘WirelessClient’from
theChangeWi-FiServiceModedialog,
as shown in Figure 31.
c. Select the wireless transmit power from
theWirelessTransmitPowerdropdown
list.
Figure 30 - Wi-Fi Conguration section on the Modify Wi-Fi Conguration screen
Figure 31 - Change Wi-Fi - Service Mode dialog
5. Underthe‘WirelessClientConguration’heading,asshownonFigure 32;
a. ClickontheClientAddressTypeeldandselectwhethertheIPaddressshouldbeautomaticallyas-
signed(DynamicallyAssigned)ormanuallyassigned(Static),asshownonFigure 33.
Figure 32 - Wireless Client Conguration section on the Modify Wi-Fi Conguration dialog
Figure 33 - Change Client Address Type dialog
IMPORTANT MakesuretheWi-FisubnetenteredisdifferenttotheEthernetsubnet,ifnotthisconictwill
causetheScanner3100toshutdowntheWi-Finetwork.
Other manuals for Scanner 3100
1
Table of contents
Other Cameron Measuring Instrument manuals

Cameron
Cameron Scanner 2000 microEFM Instructions for use

Cameron
Cameron NUFLO MC-III User manual

Cameron
Cameron BARTON 289A User manual

Cameron
Cameron Scanner 3100 EFM User manual

Cameron
Cameron NUFLO MC-III EXP User manual

Cameron
Cameron Barton 199 User manual

Cameron
Cameron 351 User manual

Cameron
Cameron LEFM 200 User manual

Cameron
Cameron NuFlo MC-II User manual

Cameron
Cameron Scanner 3100 User manual