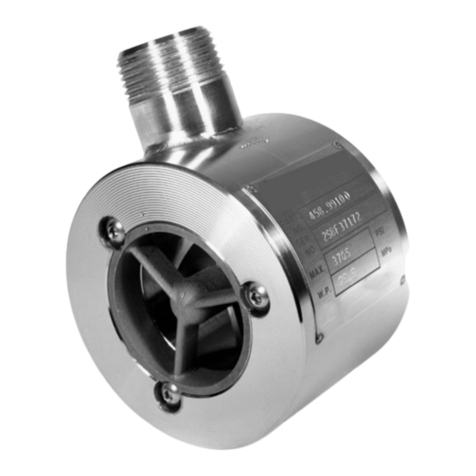
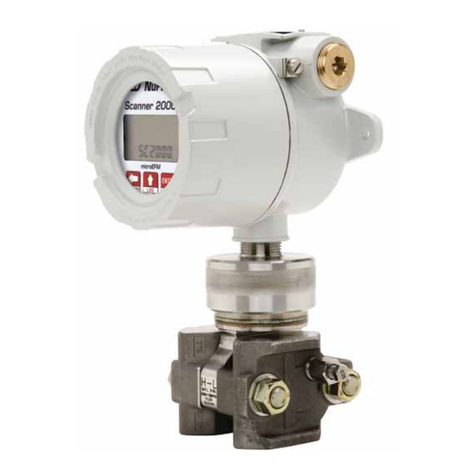
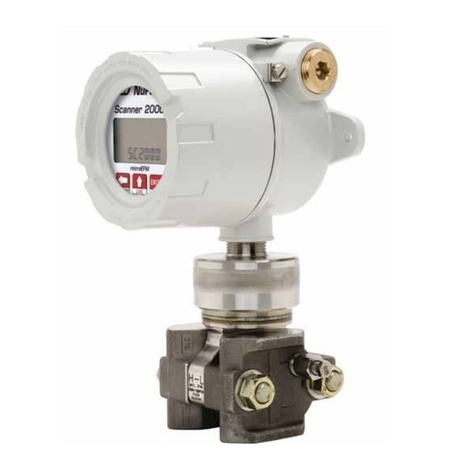
Cameron Scanner 3100 EFM User manual

Scanner 3100 EFM
Hardware Manual
Manual No. 2350759-01, Rev. 03

Important Safety Information
Symbols and Terms Used in this Manual
!WARNING: This symbol identies information about practices or circumstances that can lead to personal injury or
death, property damage, or economic loss.
CAUTION Indicates actions or procedures which if not performed correctly may lead to personal injury or
incorrect function of the instrument or connected equipment.
Important Indicates actions or procedures which may affect instrument operation or may lead to an instru-
ment response which is not planned.
Symbols Marked on Equipment
Attention! Refer to manual Protective (earth) ground
Technical Support Contact Information
TEL: +1 281 582 9500
EMAIL: [email protected]
WEB: products.slb.com
*Mark of Schlumberger.
Other company, product, and service names are the properties of their respective owners.
Copyright © 2017 Schlumberger Limited. All rights reserved.
Manual No. 2350759-01, Rev. 03
November 2017

Table of Contents
Important Safety Information ..................................................................................................................................................2
Section 1—Introduction................................................................................................................................... 7
About the Scanner 3100 EFM ................................................................................................................................................7
Web Browser-Based Interface ........................................................................................................................................7
Supporting Software and User Help Documents.............................................................................................................7
Standard Features ..................................................................................................................................................................8
Product Identication ..............................................................................................................................................................8
Hardware Options...................................................................................................................................................................8
Sensors ...........................................................................................................................................................................8
Battery Packs ..................................................................................................................................................................9
Explosion-Proof Control Switch .....................................................................................................................................10
Explosion-Proof RTD Assembly .................................................................................................................................... 11
Flameproof RTD Assembly (ATEX, Zone 1) ..................................................................................................................12
Pole-Mounting Kits ........................................................................................................................................................12
Wireless Communications .............................................................................................................................................13
Conguration Lock................................................................................................................................................................14
Specications .......................................................................................................................................................................15
Table 1.1—General Specications ................................................................................................................................15
Table 1.2—Hardware Options .......................................................................................................................................20
Table 1.3—Scanner Companion Software ....................................................................................................................22
Flow Rate and Fluid Property Calculations ..........................................................................................................................23
Table 1.4—Flow Rate Standards...................................................................................................................................23
Table 1.5—Fluid Property and Energy Flow Calculations .............................................................................................24
Table 1.6—Flow Correction Factors ..............................................................................................................................25
Section 2—Installing the Scanner 3100 EFM............................................................................................... 27
Overview...............................................................................................................................................................................27
Hazardous Area Precautions ................................................................................................................................................27
ATEX Installations (Conditions for Safe Use) ................................................................................................................27
CSA Installations ..................................................................................................................................................................28
Wiring Precautions ........................................................................................................................................................28
Pressure Precautions ....................................................................................................................................................28
Table 2.1—MVT Materials and Bolt Specications ........................................................................................................28
Thermowell Location (for Gas and Liquid Flow Runs Only) ..........................................................................................29
Mounting Options .................................................................................................................................................................29
Pole-Mounting the Scanner 3100 ..................................................................................................................................30
Hazardous Area Requirements for Wireless Communications.............................................................................................31
FCC Radio Frequency Compliance...............................................................................................................................32
IC Radio Frequency Compliance ..................................................................................................................................33
Radio Frequency Compliance Labeling ........................................................................................................................33
Antenna Installation Options.................................................................................................................................................34
Direct-Mount Antenna....................................................................................................................................................34
Remote-Mount Antenna for Pole Outside Diameters up to 2 Inches.............................................................................34
Remote-Mount Antenna for Pipe Outside Diameters of 2 3/8 Inches............................................................................35
Industry Standard Compliance .............................................................................................................................................35
Table 2.2—Industry Standards for Meter Installation ...................................................................................................36
Measuring Natural Gas via a Differential Pressure Meter ....................................................................................................37
Best Practices ...............................................................................................................................................................37
Direct Mount to Orice Meter or Cone Meter ................................................................................................................38
Remote Mount to Orice Meter or Cone Meter .............................................................................................................39
Measuring Natural Gas via a Turbine Meter .........................................................................................................................41
Best Practices ..............................................................................................................................................................41
Remote Mount to a Turbine Meter.................................................................................................................................41
Measuring Steam via a Differential Pressure Meter .............................................................................................................42
Best Practices ...............................................................................................................................................................42
Installation Procedure—Remote Mount to Orice Meter or Cone Meter .......................................................................43
iii
Scanner 3100 EFM Table of Contents

Measuring Liquid via a Differential Pressure Meter ..............................................................................................................46
Best Practices ...............................................................................................................................................................46
Direct Mount to Orice Meter or Cone Meter ................................................................................................................47
Remote Mount to Orice Meter or Cone Meter .............................................................................................................48
Measuring Compensated Liquid via a Turbine Meter ...........................................................................................................50
Best Practices ..............................................................................................................................................................50
Performing a Manifold Leak Test ..........................................................................................................................................51
Zero Offset (Static Pressure or Differential Pressure) ..........................................................................................................51
Static Pressure Calibration and Verication .........................................................................................................................52
Differential Pressure Calibration and Verication .................................................................................................................53
Placing the Scanner into Operation ......................................................................................................................................54
Section 3—Wiring the Scanner 3100 EFM.................................................................................................... 55
Field Wiring Connections......................................................................................................................................................55
Power Supply Wiring ............................................................................................................................................................57
Internal Power Supply ...................................................................................................................................................57
External Power Supply .................................................................................................................................................58
Input Wiring ..........................................................................................................................................................................59
Turbine Flowmeter Inputs ..............................................................................................................................................59
RTD Inputs ....................................................................................................................................................................59
Analog Inputs ................................................................................................................................................................60
Pulse Inputs...................................................................................................................................................................60
Digital Inputs—Contact Closure ....................................................................................................................................61
Digital Inputs—Pulse .....................................................................................................................................................62
Digital Inputs—Open Collector ......................................................................................................................................62
Output Wiring........................................................................................................................................................................63
Analog (4 to 20 mA) Outputs .........................................................................................................................................63
Digital Outputs ...............................................................................................................................................................64
Communications ...................................................................................................................................................................65
RS-485 Communications ..............................................................................................................................................65
RS-232 Communications ..............................................................................................................................................65
Ethernet Communications .............................................................................................................................................66
Section 4—Connecting to the Scanner 3100 Interface ............................................................................... 67
IP Address Options ...............................................................................................................................................................67
Connection Options ..............................................................................................................................................................68
Direct (1-to-1) Connection to a Laptop .................................................................................................................................68
Ad-Hoc Wireless Router Connection ....................................................................................................................................69
Single-Port Router Option (Requires Wireless-Enabled Laptop) ..................................................................................69
Multi-Port Router Option................................................................................................................................................70
Scanner 3100 Network Connection...............................................................................................................................70
WiFi Communications Accessory .........................................................................................................................................70
Installation .....................................................................................................................................................................71
Wiring the WiFi Box .......................................................................................................................................................73
Connecting to the Scanner 3100 ..................................................................................................................................77
Troubleshooting the Wireless Connection .....................................................................................................................77
Adding Security to the WiFi Connection ........................................................................................................................77
Section 5—Display and Keypad Operations................................................................................................ 79
IP Address ............................................................................................................................................................................79
Status Indicators (Glyphs) ....................................................................................................................................................79
Table 5.1—Device Status Glyph Denitions ..................................................................................................................80
Table 5.2—Parameter Status Glyph Denitions ............................................................................................................81
Congurable Display Features .............................................................................................................................................81
Message Display Mode ........................................................................................................................................................82
Keypad Controls ...................................................................................................................................................................82
Table 5.3—Keyboard Controls ......................................................................................................................................82
LCD Display Indicator....................................................................................................................................................82
Viewing Communication Settings ..................................................................................................................................83
iv
Table of Contents Scanner 3100 EFM
Section 6—Scanner 3100 EFM Maintenance ............................................................................................... 85
Lithium Battery Pack Replacement ......................................................................................................................................85
Replacement Procedure................................................................................................................................................85
Section 7—Scanner 3100 Parts..................................................................................................................... 87
Spare Parts and Optional Hardware.....................................................................................................................................87
Table 7.1—Scanner 3100 EFM Parts ............................................................................................................................87
Table 7.2—Wireless Components .................................................................................................................................88
Table 7.3—RTD and Cable Assemblies .......................................................................................................................89
Electronics Replacement ......................................................................................................................................................89
Table 7.4—Scanner 3100 Circuit Board Replacements ................................................................................................89
Appendix A—Lithium Battery Information..................................................................................................A-1
Lithium Battery Disposal .................................................................................................................................................... A-1
Transportation Information ................................................................................................................................................. A-1
Battery Safety Datasheet.................................................................................................................................................... A-1
Appendix B—FTP Downloads ......................................................................................................................B-1
Downloading SDF Files from the Scanner 3100 ................................................................................................................ B-1
Slave Device Archive Logs ................................................................................................................................................. B-2
Viewing and Sharing Downloaded Data ............................................................................................................................. B-2
Appendix C—Firmware, Conguration, Scanner Logic, and Modbus Register Map Uploads...............C-1
Firmware Uploads .............................................................................................................................................................. C-1
Conguration Uploads ........................................................................................................................................................ C-1
Register Map Uploads ........................................................................................................................................................ C-1
ScanFlash Upload .............................................................................................................................................................. C-2
v
Scanner 3100 EFM Table of Contents

This page intentionally left blank.
vi
Table of Contents Scanner 3100 EFM
Section 1—Introduction
About the Scanner 3100 EFM
The Scanner* 3100 EFM is uniquely designed to serve as a stand-alone ow computer or as a network manager capable
of collecting and storing data from up to 20 Scanner 2000 Series ow computers. As a stand-alone ow computer, the
Scanner 3100 offers dual ow stream and bidirectional measurement and control, as well as the processing power to
handle the industry’s most challenging ow computations for liquid and natural gas measurement. For operations requir-
ing the monitoring of several measurement points, the Scanner 3100 combines up to 20 external wired or wireless Scan-
ner 2000 Series devices into a single scalable local area network that can be managed via a web browser-based interface.
Each of the three serial ports can support multiple wired Scanner 2000 Series devices or other external Modbus devices.
Optional wireless communications signicantly reduce installation costs and setup time and increase worker safety.
The device is explosion-proof and approved by for ATEX/IECEx Zone 1 hazardous area installations and for CSA Class
I, Division 1 hazardous area installations. It is designed for use with a 9-30 VDC external power supply (9 to 24 VDC in
Mexico installations) and two optional lithium battery packs for backup power.
The Scanner 3100 can be ordered with a multivariable transmitter (MVT) and paired with a cone or orice meter for ac-
curate measurement of liquids and natural gas. The Scanner device also computes the corrected (standard) amounts of
uid using signals from external turbine, positive displacement (PD), Venturi, Coriolis and ultrasonic ow meters and
integral or remote pressure and temperature sensors. The measured uids may be expressed as volume, mass or energy
accumulations or rates. See Table 1.4—Flow Rate Standards, page 23 and Table 1.5—Fluid Property and Energy Flow
Calculations, page 24 for a detailed description of supported calculations.
In addition to its two integral ow runs, the device supports 17 inputs and outputs and communications with chromato-
graphs, samplers, and densitometers.
The device logs daily and hourly ow data for each ow run, and provides one-second triggered logging for analysis of
critical events. High-speed communication via Modbus and Enron Modbus protocols makes it easy to integrate the Scan-
ner 3100 into other measurement systems. When congured for use with Modbus master protocol, each of the device’s
three serial ports can log up to 128 data points from external Modbus devices.
For a complete list of specications, see Specications, page 15.
Web Browser-Based Interface
A web browser-based interface equips you to congure ow runs, gas streams, and inputs/outputs, calibrate inputs, and
view archive data from a laptop, tablet, smartphone, or other browser-enabled mobile device without installing software.
You need only an Ethernet connection and an IP address to connect to the device. Four user security levels are avail-
able for customizing access for up to 20 users. An electronic user manual (PDF) is embedded in the interface, providing
searchable on-screen help. To position the manual alongside the user interface for simultaneous viewing, congure your
laptop per the instructions provided in the Scanner 3100 Web Interface User manual.
Supporting Software and User Help Documents
To experience the full range of the Scanner 3100’s functionality, explore the complimentary software products and user
documentation available on the Cameron website. See Table 1.3—Scanner Companion Software, page 22 for more
information.
Important To download software or user documentation, visit Cameron’s Measurement website,
products.slb.com/owcomputers, select Scanner 3100 Series Wired and Wireless, and click on the
link for the desired software installation or user manual.
7
Scanner 3100 EFM Section 1

Standard Features
The Scanner 3100 features a double-ended explosion-proof enclosure with four conduit openings for inputs/outputs, a
bottom conduit opening for a sensor, a large digital display, and a four-button keypad. Removing the front windowed
cover provides access to batteries and the keypad. The rear cover is removed for eld wiring. See Section 3—Wiring the
Scanner 3100 EFM, page 55 for wiring diagrams.
Product Identication
Each device is labeled with a serial tag that identies the product by model number and serial number and identies
the maximum operating pressure, working pressure, and differential pressure of the integral MVT (Figure 1.1). The tag
content depicted illustrates the electrical protection afforded by ATEX/IECEx certication. CSA-approved products are
marked accordingly with the respective ratings and symbols.
7000 NIX DRIVE, DUNCAN, OK
SCANNER 3100 EFM
WARNING: BATTERIES MUST ONLY BE CHANGED IN A NON-HAZARDOUS LOCATION.
WARNING: DO NOT OPEN WHEN AN EXPLOSIVE ATMOSPHERE IS PRESENT.
WARNING: ALL CABLE AND CABLE GLANDS MUST BE RATED FOR 80ºC.
FOR INSTALLATION AND OPERATION INFORMATION, SEE MANUAL PART NO. 2350759-01.
MODEL
SERIAL
3100-
SP/SWP
DP
IN H2O
PSIA
Ex d [ia Ga] ib IIC T5 Gb (Tamb -40°C to 70°C) or
Ex tb [ia Da] ib IIIC T100°C Db (Tamb -40°C to 70°C)
Sira 15ATEX 1122X
IECEx SIR15.0049X
INPUT POWER: 9 to 30V @
150 mA
II 2 (1) GD
0518
Certification number
Explosion-proof marking
CE marking and number of notified body responsible
for production
Equipment Group II, Category 2
Hazardous conditions are likely to occur in normal
operation occasionally (>10<1000 hours/year);
Explosive atmosphere: Gas, Dust
Flameproof for gas and dust; temperature class
Figure 1.1—Device serial tag
Hardware Options
The following hardware options are available for customizing the Scanner 3100 to your specic needs: sensors, battery
packs, explosion-proof control switches, explosion-proof RTD assemblies, pole-mounting kits, and wireless communica-
tion components. See the sections below for details.
Sensors
The Scanner 3100 is available with no sensor or with an integral MVT (Figure 1.2, page 9). MVTs are available in
NACE and non-NACE models with bottom ports (gas measurement) or side ports (liquid measurement).
8
Section 1 Scanner 3100 EFM

MVT adapter
High pressure/
low pressure
port indicator
Integral
vent plugs
Multi-variable transmitter
(NACE-compliant MVT available)
Conduit entry
3/4-in. NPT
Ground
screw
Conduit plug
Antenna*
(available for wireless option)
Battery
packs
Mounting boss
for pole mount
hardware
Antenna*
(available for wireless option)
SCANNER 3100 (NO SENSOR)
SCANNER 3100 + OPTIONAL MVT
*Remote-mount
antenna also
available.
Figure 1.2—Scanner 3100 sensor options
Battery Packs
Cameron’s dual lithium battery packs (Figure 1.3, page 10) provide backup power for the Scanner 3100. Battery life
can vary signicantly depending on the input and output congurations in use. For continuous operation, an external pri-
mary power supply is required (9 to 30 VDC at 150 mA; for Mexico installations, use 9 to 24 VDC at 150 mA).
!WARNING: EXPLOSION RISK. Housing temperature must not exceed 70 degC (158 degF). Excessive tem-
peratures, which could result from ambient conditions combined with radiated and conductive heat from
the process, could cause the internal lithium battery to ignite or explode.
Each stick-style battery pack contains two 3.6 V batteries. Together, the dual packs can autonomously power the device
for a short period (approximately 2 to 3 weeks with a default conguration) in the event of a primary power outage. With
dual packs installed, you can replace a depleted battery pack without interrupting operations even when the device is op-
erating solely on battery power.
9
Scanner 3100 EFM Section 1

For more information on battery replacement, see Lithium Battery Pack Replacement, page 85.
Battery packs
Figure 1.3—Lithium stick-style battery packs
Explosion-Proof Control Switch
An external explosion-proof control switch (Figure 1.4) allows you to manually control the operation of a peripheral de-
vice (such as a radio), unlatch an alarm, or reset a total being accumulated by the device, depending on how it is cong-
ured. The switch is available in either of two models:
• Toggle Switch. Opens or closes a circuit with each push and release of the button. Uses include manual control of
ow accumulation, and manual control of a triggered archive.
• Momentary Switch. Opens or closes a circuit when the button is pushed and held in position. Unlike the toggle
switch, the switch action is terminated upon release of the button. Uses include pacing the display, toggling a wireless
transmitter on and off, resetting grand totals for ow run or pulse input accumulations, unlatching a digital output, and
resetting a latch on a triggered archive.
Figure 1.4—Explosion-proof control switch (left); control switch with factory-installed safety lockout device (right)
Control switches are wired and pre-congured at the factory (Figure 1.5, page 11) when they are purchased with the
Scanner 3100. However, you can change the conguration via the web interface. A momentary switch is connected to
DIO Terminal 5 at the factory, and a toggle switch is connected to DIO Terminal 6. See Digital Inputs—Contact Closure,
page 61 and Digital Outputs, page 64 for wiring diagrams.
Either switch is available with a factory-installed mechanical lockout device (Figure 1.4, right) that can be used with a
10
Section 1 Scanner 3100 EFM

lock or a seal to prevent unauthorized changes to the switch position as is sometimes required for audit compliance.
Important When a mechanical lockout device is required, the lockout must be installed in the switch at the
factory. A lockout mechanism cannot be added to an existing Scanner 3100 control switch after the
switch is installed.
Approx. 8.0
(204.7)
Toggle switch Momentary
switch
Approx. 8.0
(204.7)
Approx. 5.3
(134.07)
Approx. 10.6
(268)
Figure 1.5—Control switch dimensions in inches (mm); the above diagram shows the default locations of factory-installed
switches
Explosion-Proof RTD Assembly
The Barton Model 21 RTD, shown in Figure 1.6, page 12, is a 4-wire, 100-ohm explosion-proof RTD assembly that
can be connected to the Scanner 3100 without conduit in a Class I, Division 1 installation. Factory-sealed, armored leads
are covered in PVC. The RTD assembly can be ordered with teck cable lengths of 5, 10, or 30 ft, and is available with a
6-in. or 12-in. RTD probe.
The Model 21 RTD is CSA certied for use in Class I, Groups B, C, and D; Class II, Groups E, F and G; and Class III
hazardous area environments.
Each RTD assembly is tted with 1/2-in. and 3/4-in. connectors for adapting to various size conduit openings and thread-
olets. The RTD is eld-adjustable for insertion lengths of up to 12 in. For wiring instructions, see Figure 3.6, page 59.
For part numbers, see Table 7.3—RTD and Cable Assemblies, page 89.
11
Scanner 3100 EFM Section 1

Probe
length
Cable length
Figure 1.6—Explosion-proof (Class I, Div. 1) RTD assembly
Flameproof RTD Assembly (ATEX, Zone 1)
Cameron offers a ameproof RTD that is ATEX-certied for use in Zone 1 installations. The 4-wire, Class A sensor is
encapsulated in a stainless steel sheath long enough to accommodate line sizes from 2 to 12 inches. It is attached to a
3500-mm armoured cable. For wiring instructions, see Figure 3.6, page 59. For part numbers, see Table 7.3—RTD and
Cable Assemblies, page 89.
Pole-Mounting Kits
Cameron’s pole mounting kit (Figure 1.7) is recommended for mounting a Scanner 3100 to a 2-in. pole. The kit consists
of a stainless steel “L” mounting bracket, two U-bolts, and four 10-mm M6 screws.
The bracket bolts directly to the four mounting bosses on the side of the Scanner enclosure and the U-bolts secure the as-
sembly to the pole. For installation instructions, see Pole-Mounting the Scanner 3100, page 30. For part numbers, see
Table 7.1—Scanner 3100 EFM Parts, page 87.
Figure 1.7—Pole mounting kit
12
Section 1 Scanner 3100 EFM

Wireless Communications
The Scanner 3100 wireless communications option includes a factory-installed wireless radio module and an explosion-
proof coupler (Figure 1.8) that enables an external antenna to be safely used in a hazardous area.
Explosion-proof Coupler
An explosion-proof coupler is factory-installed in the top left conduit opening of the Scanner 3100 enclosure and the
coupler cable is factory-connected to the radio module inside the Scanner 3100. The coupler is rated for compliance with
CSA (North America) or ATEX certication requirements. See Table 7.2—Wireless Components, page 88 for replace-
ment part numbers.
Direct-Mount Antenna
The Cameron-supplied right-angle antenna (Figure 1.8) connects directly to the threaded coupler connection. When in-
stalling the antenna, ensure that it is in a vertical position well above ground level and positioned away from large struc-
tures that could interfere with signal transmission and reception.
Cameron’s direct-mount antenna is rated for a maximum of 1 watt of power and a maximum antenna gain of 10 dB (in
North America) and has a frequency range of 2.35 to 2.50 GHz. Antennas with equivalent ratings may also be used with
the coupler.
Antenna coupler
and cable
Cameron direct-mount antenna
Figure 1.8—Direct-mount antenna and explosion-proof antenna coupler (left); the coupler cable is factory-connected to
the Scanner 3100 enclosure
Remote-Mount Antenna
In locations where a physical barrier restricts the use of a direct-mount antenna or where a longer transmission distance
is required, a remote-mount antenna (Figure 1.9, page 14) may be installed up to 30 ft (10 m) away and connected by
cable to the antenna coupler. A remote-mount antenna and connecting cable may be purchased from Cameron (see Sec-
tion 7—Scanner 3100 Parts, page 87). If purchasing cable elsewhere, verify that the cable meets the maximum capaci-
tance and inductance ratings (Figure 2.5, page 32) and that the cable length is adequate to connect to both the antenna
and the coupler. See Specications, page 15 for additional details.
The installation of the antenna coupler, antennas, and antenna cable must meet the requirements shown in Figure 2.4 and
Figure 2.5, page 32. For installation instructions, see:
• Remote-Mount Antenna for Pole Outside Diameters up to 2 Inches, page 34
• Remote-Mount Antenna for Pipe Outside Diameters of 2 3/8 Inches, page 35
13
Scanner 3100 EFM Section 1

Mounting hardware supplied with
the Cameron remote-mount antenna
(fits pole outside diameters up to 2 inches)
Optional hardware kit for mounting the
Cameron remote-mount antenna to a
2-in. pipe (fits outside diameter of 2 3/8-in.)
Figure 1.9—Remote-mount antenna mounting options
Conguration Lock
The conguration lock is located inside the Scanner 3100 housing along the top edge of the display circuit board as-
sembly, just left of center (Figure 1.10). The switch can be enabled to prevent unauthorized individuals from changing
the conguration of the Scanner 3100. By default, this conguration lock feature is disabled and the switch position is
ignored. The conguration lock feature must be enabled via the ADMINISTRATION>GENERAL>SECURITY page
of the Scanner 3100 web interface. For more information, see the Scanner 3100 Web Interface User Manual. After a de-
vice is fully congured, the lock can be enabled by changing the mechanical switch to the active position (pushed in the
direction of the display face) and enable the switch in the web interface security settings. After the lid is replaced, a wire
can be connected to an external set screw and secured with a lead seal to prevent unauthorized conguration changes.
Configuration
Lock Switch
Figure 1.10—Conguration lock switch
14
Section 1 Scanner 3100 EFM

Specications
Table 1.1—General Specications
Approvals CSA (US and Canada)
Class I, Div. 1, Groups C and D, T4; Type 4 enclosure
ATEX 15ATEX1122X— Ex d [ia Ga] ib IIC T5 Gb (Tamb –40 degC to 70 degC; –40 degF to
158 degF)
IECEx SIR 15.0049X— Ex tb [ia Da] ib IIIC T100 degC Db (Tamb –40 degC to 70 degC; –40
degF to 158 degF)
(IP66 protection from dust and water)
ANSI 12.27.01 single seal (MVT ≤ 3000 psi)
ASME pressure vessel code (MVT ≤ 3000 psi); CRN 0F10472.5C
Environmental
Safety
Relative humidity: 0% to 95% non-condensing
Altitude: Up to 2000 meters
Enclosure Cast aluminum (less than 0.05% copper), painted with epoxy and polyurethane
Double-ended with single window
Dimensions: 5.43 in. wide, 11.27 in. deep, 10.76 in. tall with MVT
5 conduit ports including bottom sensor port, 3/4-in. FNPT connections
Weight Base unit (no MVT or batteries) 4.1 kg (9.1 lb)
Base + MVT and 2 batteries 8.3 kg (18.4 lb)
Base + MVT, direct-mount antenna, and 2 batteries 8.6 kg (19 lb)
System Power External user-supplied power supply (9 to 30 VDC, 150 mA) with internal lithium battery
backup.
For installations in Mexico, the power supply is limited to 9 to 24 VDC.
Two integral 7.2 V lithium stick-style battery packs, each containing two “D” batteries in series
(air transport regulations apply)
Real-time Clock Accurate within 2 minutes/year over temperature range
Lithium coin cell battery maintains clock during loss of system power (lithium content: 0.11 g)
Processor 32-bit dual-core ARM Cortex M4
Operating
Temperature
–40 degC to 70 degC (–40 degF to 158 degF)
LCD contrast is reduced below –30 degC (–22 degF)
WARNING: EXPLOSION RISK. Housing temperature must not exceed 70 degC (158 degF). Excessive
temperatures, which could result from ambient conditions combined with radiated and conductive heat from
the process, could cause the internal lithium battery to ignite or explode.
LCD Display/
Keypad
2.7-in. diagonal graphic display, 400 × 240 pixels
0.3-in. high characters
Displays up to 32 user-dened parameters (ve at a time), with auto-scrolling
External power indicator
Integral battery capacity indicators
Wireless communications indicator
Parameter status indicators
Congurable background (dark or light) and scroll frequency
4-button keypad for advancing the display; viewing communication settings, serial number,
and rmware version; and restoring factory default settings to the device
Memory 2.18 MB RAM for processing
512 KB non-volatile memory for conguration data
32+1 MB on-board system ash memory
48 MB on-board archive ash memory
15
Scanner 3100 EFM Section 1

Table 1.1—General Specications
Supported
Meter Types
Turbine meter
Cone meter
Orice meter
Ultrasonic meter
Positive displacement (PD) meter
Coriolis meter
Venturi meter
Download Types Per Device Complete (all records, including slave device records as
applicable)
Local (integral ow records in a condensed le ideal for
emailing)
Events
Triggered (one-second logs, including PID tuning)
Per Flow Run Daily
Interval (hourly)
Event
Recent (past 7 days of interval logs)
Per Slave Daily
Interval (hourly)
Recent (past 7 days of interval logs)
Archive
Capacity
Up to 58 archivable parameters per ow run
Daily log capacity 2,048 days
Interval log capacity 2.8 years with 13 parameters (plus date, time and status)
logged hourly
Capacity varies with the number of parameters logged (13 to
58) and logging frequency (1 second to 12 hours)
Triggered log capacity
(1 to 19 parameters)
1,351,680 logs with one parameter logged;
135,168 logs with 19 parameters logged
Congurable to log periodically (1 second to 12 hours) on
a real-time period (daily, weekly, etc.) on device alarm, on
digital input, or when activated remotely via the web browser
Event log capacity 98,304 records
Downloadable via FTP, HTTP (web interface), or Enron Modbus protocol (see Scanner Data
Manager User Manual for information on viewing data les)
Logs stored in non-volatile memory for up to 10 years
Communications/
Archive Retrieval
Wireless Optional SmartMesh wireless radio module available with or
without external antenna. See Table 1.2—Hardware Options,
page 20.
Wired RS-485 Two dedicated ports (1 and 2) and one shared RS-485/RS-
232 port (3)
Software-selectable 120-ohm termination resistor
Selectable master and slave protocols (Enron Modbus,
Modbus RTU, Modbus TCP)
Wired RS-232 Shared RS-485/RS-232 port (port 3)
TXD, RXD, RTS, CTS
Time-of-day digital output conguration
16
Section 1 Scanner 3100 EFM

Table 1.1—General Specications
Communications/
Archive Retrieval
(cont’d)
Ethernet/TCP One RJ-45 connection supports two TCP/IP user-
congurable ports with selectable slave protocols
Continuous use requires external power
Supports 10/100 Mbits/second
Port Pass-Through Any communications port can be routed to another port
Ethernet can be bridged to serial communications for
remotely interfacing with connected Modbus devices.
(For example, a Scanner slave device can be congured
using ModWorX* Pro software without changing wiring
connections.)
Flow Rate
Calculations
Natural Gas AGA 3 (1992 and 2012), ISO 5167-2 (2003), ASME MFC-14M
(2003), AGA 7
Liquids API MPMS 5.3, AGA 3, ISO 5167, AGA 7
Fluid Property
Calculations
Natural Gas AGA 8 2017 (Parts 1 and 2), GERG-08, SGERG-88, AGA 3,
AGA 5, GPA 2145-09
Liquids API MPMS Chapter 11.1 (2004)
Pure Substances IAPWS-IF97 (Steam) Quality-corrected saturated steam,
water, dry steam, critical range (Regions 1 through 4)
Liquid
Compensation and
Correction Factors
Temperature and pressure compensation
Meter factor compensation
Shrinkage factor compensation
Live BS&W correction
Live density correction
Dynamic oil fraction (watercut)—derived from owing density or watercut analyzer; automatic
base density updates from owing density measurement
Chisholm-Steven orice meter multiphase correction for steam
Chisholm-Steven cone meter multiphase correction for steam
Flow Streams Two integral compensated ow run inputs
Up to 20 remote ow runs via Scanner 2000 Series devices in local area Scanner network
Three additional integral uncompensated pulse/frequency inputs
Bidirectional ow measurement
Up to 8 gas streams using gas chromatograph inputs or user-entered static compositions
16-point calibrations for all inputs (linear factory and multipoint meter factor calibrations also
supported); see Table 1.6—Flow Correction Factors, page 25 for information on multipoint
meter factor calibration
Stacked differential pressure and static pressure inputs for rangeability
MVT
Specications
Linearized digital data for static pressure (absolute) and differential pressure
Measures pressure in absolute and displays pressure in gauge
Standard MVT has bottom ports, which are ideal for gas measurement; MVT can be inverted
for liquid measurement (LCD autocorrects for easy viewing)*
Complies with pre-qualied materials of NACE MR0175/ISO 15156. This certification does
not imply or warrant the application of the product in compliance with NACE MR0175/ISO
15156 service conditions in which the customer/user installs the product.
Process temperature: –40 degC to 121 degC (–40 degF to 250 degF)
User-adjustable sample time (up to 10 Hz) and damping
*Side-port MVT for liquid measurement is available by special order.
17
Scanner 3100 EFM Section 1

Table 1.1—General Specications
MVT Accuracy Differential Pressure ± 0.05% of range for all except for 30 “H2O
± 0.1% of range for 30 “H2O
Static Pressure ± 0.05% of range
Temperature Effect ± 0.25% of full scale over operating range
Stability (long-term drift) Less than ± 0.05% of URL per year over a ve-year period
Resolution 24 bits
Effect on Differential Pressure for a 100-psi Pressure Change
Differential Pressure
Range (in. H2O)
Zero Shift
(% URL)
Span Shift
(% reading)
± 30* .05 .01
± 200** .01 .01
± 400 .04 .01
± 840 .04 .01
*±Indicates bidirectional capabilities (for example, a range of 30 in. H2O is –30 to +30 H2O).
**Exception: 200 x 300 psi has a zero shift of .007% and a span shift of .01%.
MVT Pressure
Ranges
Static Pressure/SWP
(psia)
Differential Pressure
(in. H2O)
Maximum Overrange
Pressure (psia)
100 30 150
300 200 or 840 450
500 30 or 200 750
1500 200, 400, or 840 2250
3000 200, 400, or 840 4500
5300 200, 400, or 840 7420
Custom ranges available by special order. For materials of construction, see Table 2.1—MVT Materials
and Bolt Specications, page 28.
Analog Inputs 4 channels
1 to 5 V, 0 to 5 V, 4 to 20 mA, or 0 to 20 mA
Accuracy: ± 0.030% of span maximum error at 25 degC (77 degF)
Temperature effect: ± 0.25% of span over operating range
Impedance: > 60 Kohm for 1 to 5 V input; approximately 250 ohm for 4 to 20 mA input
Transmitter voltage supply: 10 VDC at 20 mA, protected to 50 mA
Over-voltage protection: 30 VDC
A/D resolution: 22 bits (minimum 20 effective bits)
Linearity error: ± 0.020% max.; ± 0.010% typical
Single-ended inputs
Sample rate: 0.1 seconds to 12 hours
Four previous calibrations available stored in device
Congurable shutoff for saving power when transducer warm-up period is not required
Integral battery backup
18
Section 1 Scanner 3100 EFM

Table 1.1—General Specications
RTD Inputs 2 channels
100-ohm platinum RTD with 2-wire, 3-wire, or 4-wire interface
Range: –40 degC to 427 degC (–40 degF to 800 degF), excluding RTD uncertainty
Accuracy: ± 0.2 degC (0.36 degF) over sensing range at calibrated temperature
Temperature effect: ± 0.3 degC (0.54 degF) over operating range
A/D resolution: 24 bits
Sample rate: 0.1 seconds to 12 hours
Congurable shutoff for power savings when transducer warm-up period is not required
Pulse/Frequency
(TFM) Inputs
3 channels
Maximum voltage: 30 VDC
Maximum frequency: 10,000 Hz
Gated transmitter power for each input channel
Transmitter voltage supply: 10 VDC at 20 mA, protected to 50 mA
TFM Channel 3 has no sleep mode and increased power consumption
Accumulation types: uncompensated gas volume, uncompensated liquid volume, mass
Volume: pulse represents discrete units of volume from a turbine, PD, Venturi, Coriolis, or
ultrasonic meter
Mass: pulse represents discrete units of mass from a Coriolis meter
Congurable turbine sensitivity (20, 50, 100 mV, peak-to-peak)
Analog Outputs 2 channels
Type 4 to 20 mA, optically isolated, externally powered
Accuracy (after calibration): ± 0.1% of span maximum error at 25 degC (77 degF)
Temperature drift: ±50 ppm/degC (±27.8 ppm/degF)
Maximum output load resistance (ohms) = {supply (volts) – 8.0} / 0.02
Maximum voltage: 30 VDC
D/A resolution: 16 bits
Calibration (zero and full-scale) via software
Programmable output alarm value for use during loss of power or communication to CPU
Regulates control valve in PID control applications
Digital I/O 6 channels, user-congurable as input or output
DIO1, DIO2, DIO3, and DIO4 are optically isolated with a max. output of 60 mA at 30 VDC
DIO5 and DIO6 are high-speed and non-isolated with a max. output of 500 mA at 30 VDC
Input Types Control switch
Pulse
Open collector
Contact closure
Special Functions Advance display
Turn transmitter on/off
Reset ow run totals
Reset pulse input totals
Unlatch digital inputs/outputs
Reset latching state of triggered archive
19
Scanner 3100 EFM Section 1

Table 1.1—General Specications
Digital I/O (cont’d) Output Modes Pulse (based on pulse count or time period)
Alarm (based on the status of any or all selected alarms; up
to 32 user-congured alarms are selectable)
Conditional (value above or below setpoint, out of setpoint
range)
Programmed [time of day or output state (normally open,
normally closed)]
Pulse Output Maximum frequency: 50 Hz
Congurable pulse duration (10 msec to 1 day)
Congurable pulse representation (1 pulse = 1 MCF) based
on time or volume
Based on any accumulator (ow run or turbine meter run)
Alarm Output Low/high
Out-of-range
Status/diagnostic
Web Interface—
Local Device
Management
Access data and device settings via laptop, tablet, or smartphone
Congure, calibrate, and maintain ow runs, inputs/outputs, and gas streams
Poll real-time data
Download data
View daily logs and up to 7 days of interval (recent) logs
Control user access with four levels of security
Web Interface—
Network
Management
Congure communications with up to 20 wired or wireless Scanner 2000 Series devices
Display real-time data, ow rate calculation method, and input averages for up to 20 slave
devices
Read and store conguration data from up to 20 slave devices
Read and store daily and interval archive records for up to 20 slave devices
Change gas composition and plate size in slave device congurations
Download slave data via FTP, HTTP, or Enron Modbus protocol
Synchronize slave device conguration and slave archive data
Read gas streams connected to slave devices
Clear slave device grand totals and alarms
Load factory default conguration le
Remotely reset slave device without cycling power
Table 1.2—Hardware Options
Wireless
SmartMesh Radio
2.4 GHz self-healing and self-sustaining network
Factory installed with stainless steel, explosion-proof antenna coupler, N female × 3/4 MNPT,
with 12-in. coaxial cable and MMCX male connector
Transmits up to 300 m (985 ft) node-to-node
20
Section 1 Scanner 3100 EFM
Table of contents
Other Cameron Measuring Instrument manuals

Cameron
Cameron NUFLO EZ-IN Series User manual

Cameron
Cameron NuFlo MC-II User manual

Cameron
Cameron NUFLO MC-III EXP User manual

Cameron
Cameron BARTON 289A User manual

Cameron
Cameron 351 User manual

Cameron
Cameron NUFLO Scanner 2000 microEFM User manual

Cameron
Cameron NUFLO 1141C User manual

Cameron
Cameron LEFM 200 User manual

Cameron
Cameron Scanner 2000 microEFM Instructions for use

Cameron
Cameron NUFLO Scanner 2000 microEFM Instructions for use