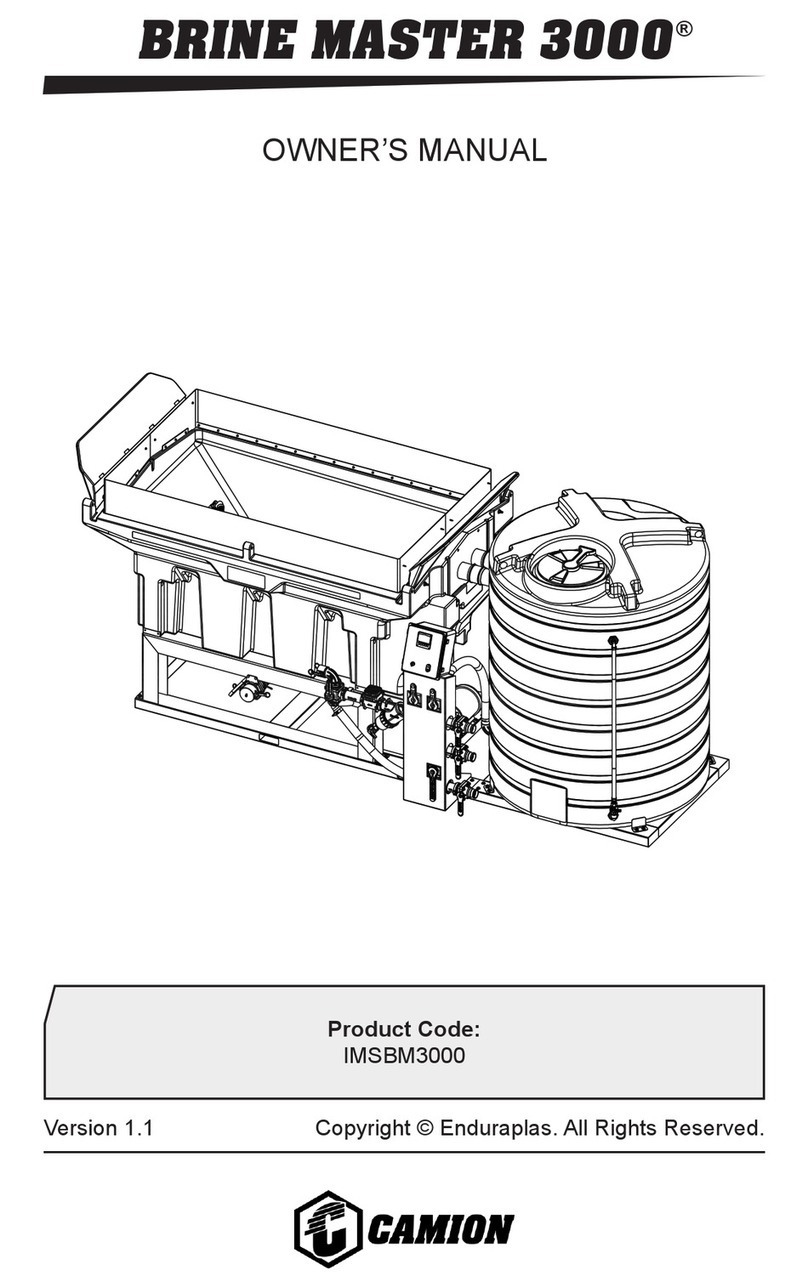
CAMION BRINE MASTER 3000 User manual

Version 1.2 Copyright © Enduraplas. All Rights Reserved.
Product Code:
IMSBM3000
OWNER’S MANUAL
®
BRINE MASTER 3000
®
BRINE MASTER 3000

2Brine Master®
English
INTRODUCTION 3
WARNINGS 4 - 5
GETTING STARTED 6 - 7
OPERATION 8 - 11
MAINTAINING 12 - 14
TROUBLESHOOTING 15
WARRANTY 16 - 19
PARTS BREAKDOWNS 20 - 26
!
CONTENTS

3Version 1.2
English
Congratulations! You now own a Camion™ Brine Master®.
Durable design and construction assure you a lifetime of
extreme performance.
Take a look through this owner’s manual to learn how the
pros use their Camion™ Brine Master®.
Discover More Helpful Tips:
www.IceControlTraining.com
Watch Instruction Videos:
www.youtube.com
INTRODUCTION

4Brine Master®
English
1. To ensure your own safety and that of others, you must
comply with all relevant environmental, work place health,
safety legislation and codes of practice.
2. Select and wear appropriate Personal Protection
Equipment in accordance with the label of the product
you intend to use.
3. Always dispose of debris and out of spec brine,
generated from the brining operation, in compliance with
current environmental, work place health and safety
regulations.
4. Improper or careless use of this Brine Master® can
cause serious injury. Minors should never be allowed to
use this Brine Master®. This Brine Master® should not
be used when bystanders or animals are in the area. This
Brine Master® should never be used while children are in
the area.
5. Never leave the Brine Master® unattended without
turning o the pump and relieving any line pressure.
6. You must be in good mental health to operate this Brine
Master® and not be under the inuence of alcohol or any
drugs that could impair your vision, physical strength,
dexterity, judgment, or other mental capacity.
7. No modications and/or alterations may be made to this
Brine Master®. Any such modications not only void the
warranty but can make the unit dangerous to anyone
operating it.
8. Always inspect hoses and piping to avoid burst injuries.
!
WARNINGS

5Version 1.2
English
Discover More Helpful Tips:
www.IceControlTraining.com

6Brine Master®
English
This Brine Master 3000® requires a 230 volt, 30 amp circuit
to operate. This product comes pre-wired and has a plug for
easy setup. Follow all local code requirements. Use a certied
electrician to install power supply.
Electrical Requirements
GETTING STARTED
To achieve best cycle times and reduce waiting time, you need
to have a good water source. Usually, a 1.5” or larger city
water supply, or freshwater storage tanks with a minimum of
3000 gallons of fresh water is necessary to eciently produce
brine.
Water Source
For best results and hassle-free operation
during your brine making process, it is
highly recommended to use a salt source
that is over 98% pure (often referred to
as Solar Salt). Impure salt will repeatedly
cause debris to restrict ow in the lter
and will likely leave sediment build up in
the Brine Master® batch tank, and your
onsite brine storage tanks.
Salt Source

7Version 1.2
English
GETTING STARTED
It’s important to make sure the Brine Master® is positioned
to allow easy access to fresh water supply and storage tank
hook ups at the control station and that it’s level before use.
If you are working with an uneven surface, place shimming
material under each end and in the middle of the stainless-
steel base frame on either side to level the machine.
Positioning & Leveling
It is best if the bucket used for loading
the Brine Master® salt hopper is no
more than 72” wide. This will keep your
workspace as clean as possible. Using
a wider bucket will cause spillover while
loading the salt.
Loading Equipment

8Brine Master®
English
Startup
3) Without powering on the pump, gravity ll the Brine Master®
hopper by opening the “Fresh Water” port valve (#4). Once
the water is covering the jet nozzles inside the brining hopper,
close the valve (#4) to stop the fresh water
lling process. If the pump is powered on
during this initial start-up lling process,
the high-pressure jets will cause water
splash/spray from the hopper.
4) Load hopper with the rst batch of salt. Always load the salt
slowly to avoid water splashing. Load towards the opposite
end of the hopper overow, so that the salt does not obstruct
the overow screen. For best results,
make sure the salt is heaped above the
water. Once you start the pump, the water
ow will distribute the salt down and to
the sides of the hopper.
2) Place discharge valve (#1) to “Discharge to
Brining Hopper” position and place the suction
valve (#2) to “Suction from Fresh Water” posi-
tion.
1) Connect fresh water supply hose to
the “Fresh Water” port valve (#4), and
the brine to storage tank hose to the
“Discharge” port (#5) and plug the power
cord into the power source.
OPERATION

9Version 1.2
English
Initial Filling
5) Open the “Fresh Water” port valve (#4) and power on the
pump, to continue lling the system with fresh water until
the orange brine batch tank is lled to the 600 gallon mark.
Reference the site
gauge tube. Do not
ll past 600 gallons
to prevent overow
in the gray brining
hopper.
6) Once the water reaches the 600 gallon marker on the brine
batch tank, without stopping the pump, move the suction
valve (#2) to “Suction from Brining
Tank” position. The liquid is now
recirculating from the brine batch
tank through the salt in the hopper.
Make sure your salinity reader is
powered on. Monitor the % by
weight value on the screen.
OPERATION
Brining
Important Tip:
Your rst batch will always take the longest. Subsequent
batches will take much less time to reach salinity.

10 Brine Master®
English
OPERATION
Unloading
7) Once the salinity reader indi-
cates the brine is at 23.0%, move
the discharge valve (#1) to “Dis-
charge to Storage” position. Make
sure the valve to the left of the ow
meter (#6) is in the down position.
Important Tip:
Perfect brine is 23.3%. As the brine is discharging, you
will notice the % weight value on the screen rising. It’s
expected that the value could reach up to 24%. If you are
consistently getting over 24% at the end of the unloading
process, you will need to start the unload process earlier in
the cycle. Ideally the salinity % should reach 23.6-23.8% at
the end of an unloading process.
Important Tip:
The ow meter can be used to measure the gallons of
brine unloaded from the machine. A batch total can be
tracked along with a total of all batches. Refer to the man-
ual for the Banjo ow meter for detailed operation instruc-
tions.
8) During the unload operation, reload
the salt hopper as detailed in step 4. The
unload operation takes about 5 mins.
The process runs smoothest if you have
a bucket full of salt ready to load immedi-
ately after the unload process is started.

11Version 1.2
English
Important Tip:
END OF RUN PROCESS: If you are getting close to the
nish of your run, don’t reload the hopper with salt. Simply
repeat steps 9-6-7 until most of
the salt in the hopper is dissolved.
During this “end of run” process,
each batch will take longer to reach
salinity because new salt is not
being added.
OPERATION
Filling
9) Once the brine batch tank is empty, move the suction valve
(#2) to “Suction from Fresh Water” position. Continue lling
the system with fresh water until the orange brine batch tank
is lled to the 600 gallon mark.
Reference the site gauge tube. Do
not ll past 600 gallons to prevent
overow in the gray brining hop-
per. Go back to step 6 and repeat
the process.

12 Brine Master®
English
Always Clean unit with fresh water at the end of every season
to clean out all brine left in brine maker to ensure proper
operations for the following years. The unit requires proper care
for longevity and proper operation. Follow all requirements for
pump and motor by reviewing their manuals that are included.
DO NOT leave salt brine in your brine maker for extended
periods of time when not in use. This can cause salt creep
which can move into the motor and cause seizing issues and
damage seals. The best practice is to clean the hopper after
each use to prevent salt from hardening in the bottom of the
unit. Run clean water through the brine maker and then drain
the pump using the drain plug located at the bottom of the
pump.
If you notice your ow rate has decreased to under 100 gpm
on the owmeter, this indicates that your lter is partially
restricted by debris. SLOWLY crack open the shuto valve to
ush out debris buildup. To fully clean the lter, disassemble
by shutting o unit and opening the drain valve on the
bottom of the inline lter. Once the liquid has drained from
the lter, unscrew housing, remove lter screen and clean it.
Reassemble and continue use.
The salinity measuring instrument should be cleaned with
fresh water at the beginning of each brining run.
Debris left in the hopper can be removed using the 3” cleanout
valve/port at the bottom of the hopper. First, suck out the brine
from your hopper and then remove debris using the cleanout
valve.
MAINTAINING

13Version 1.2
English
MAINTAINING
The information applies in normal operating conditions. The specic intervals must be
shortened accordingly for longer daily working hours. If the machine is only used occa-
sionally, the intervals can be extended accordingly.
Instruction Ref.
Before starting work
At the end of work
and/or daily
When no immediate
scheduled use
If damaged
As required
Salinity Measuring Instrument Dissasemble and clean lens. 14.1 X X X
In-Line Filter Clean X
Drain X
Hoses and Fittings
Rinse with clean water X
Drain 14.2 X
Pump Rinse with fresh water and remove
drain plug to avoid salt creep. 14.3 X
Power Disconnect X
Salt Hopper Drain and Clean 14.4 X
Vertical Brine Batch Tank Clean out sediment and debris. X

14 Brine Master®
English
14.1 - To clean your refractometer, turn the 5/16” push to
connect valves to the o position. Then pull the pin on the
front and twist the body of the refractometer counter clockwise
to remove it. Clean the lens and the inside body removing
any debris. To reinstall, pull the pin
and turn the body clockwise. Make
certain the O-ring is seated correctly
when reassembling. Lastly reopen
your 5/16” push to connect valves.
14.2 - Turn valves to positions in the
following image to drain the hoses and
ttings.
14.3 - Remove drain plug from bottom of pump
to allow liquid to drain.
14.4 - To drain the salt hopper, connect your suction hose
onto the additive port and insert the suction end (with a foot
strainer attached) into the salt hopper. Your discharge hose
needs to be connected to an appropriate holding vessel that
will contain the out of spec brine from the
salt hopper. Once the hopper is mostly
drained, the 3” discharge valve can be
opened and remaining debris can be
drained into a skid steer bucket.
MAINTAINING
Instruction References

15Version 1.2
English
CONDITION REMEDY
Reduced ow rate 1) Check for a blockage in the lter
screen.
Hopper is backing up
or overowing
1) Ensure there is no blockage on
internal hopper screen.
2) Clean debris or salt away from the
screen.
3) Make sure you are not lling your
orange brining tank over 600 gallons.
Pump will not turn on 1) Check breakers and relays. Reset if
needed.
2) Check adequate power supply.
3) Verify wiring is in good condition.
Bottom clean out on
hopper drain will not
ow
1) Place a large cleanout vessel (ie:
skidsteer bucket) underneath the 3”
clean out valve and remove compacted
salt or debris by inserting a garden
hose up into hopper cleanout valve.
Salinity measuring
instrument is not
reading or reading
inaccurately
1) Ensure that the push to connect
valves are in the open position to allow
ow.
2) Check that the salinity measuring
instrument is cleaned
3) Refer to salinity measuring
instrument manual for further
troubleshooting.
TROUBLESHOOTING

16 Brine Master®
English
LIMITED WARRANTY
1. Poly Tank Limited Warranty -Subject to other terms in this Limited
Warranty, Manufacturer warrants to the original end user that this
Tank will be free from material defects caused during the
manufacturing process for a period of 5 years from the Purchase
Date provided such warranty to the original end user shall be
extended to 10 years from the Purchase Date if the original end
user registers the Tank with Manufacturer within 30 days of the
Purchase Date. To register the Limited Warranty, registration must
be completed in accordance with the requirements set forth at
enduraplaswarranty.com
Other Products and Parts Limited Warranty -Subject to other
terms in this Limited Warranty, Manufacturer warrants to the
original end user that products and parts manufactured by
Manufacturer (other than tanks) will be free from material defects
caused during the manufacturing process for a period of 1 year
from the Purchase Date unless otherwise expressly stated in
writing by Manufacturer that an extended warranty applies.
2. Other Warranties Disclaimed and Excluded
THERE ARE NO WARRANTIES, EXPRESS OR IMPLIED,
WHICH EXTEND BEYOND THE LIMITED WARRANTY HEREIN
STATED, AND MANUFACTURER EXPLICITLY DISCLAIMS AND
EXCLUDES ANY AND ALL OTHER WARRANTIES INCLUDING
BUT NOT LIMITED TO WARRANTIES OF MERCHANTABILITY,
FITNESS FOR PARTICULAR PURPOSE, CUSTOM OR USAGE
OF TRADE, AND COURSE OF DEALING. NO AGENT,
EMPLOYEE OR REPRESENTATIVE OF MANUFACTURER HAS
AUTHORITY TO BIND MANUFACTURER TO ANY
REPRESENTATION OR WARRANTY EXCEPT AS STATED IN
THIS LIMITED WARRANTY.
WARRANTY

17Version 1.2
English
3. Limitation of Liability under the Limited Warranty -In addition to
those warranties disclaimed and excluded in clause 2 above,
Manufacturer expressly further limits its warranty and liability
under the Limited Warranty as set forth below in this clause 3.
3.1. The liability of Manufacturer under this Limited Warranty is
excluded to the extent that any defect has been caused or
contributed to by:
a) any accident, contamination, tampering, willful damage,
abuse, modification, improper storage, improper use
(including but without limitation the storage of material) or
negligent act of, or omission by, any person other than
Manufacturer;
b) the improper installation of the Goods, or deterioration of
the base on which any of the Goods rest or are mounted
to;
c) any damage to the Goods caused by storm, wash away,
landslide, mudslide, lightning, or any other natural
phenomenon, vermin or other pests, and any
undermining of the base of the Tank through any cause
whatsoever;
d) the repositioning of the Goods from their original
installation;
e) weathering or degradation of the Goods due to extreme
climatic conditions;
f) improper installation of extra fittings;
g) any staining or discoloration, including from trees or ash
fall-out from fires or other causes;
h) a Tank not being placed on a base that is free of any
protruding objects of any kind;
i) a Tank being used for any purpose other than the storage
of suitable liquids at the ambient temperatures.

18 Brine Master®
English
3.2. Without limiting the generality of clause 3.1:
a) Manufacturer will not be liable for any personal injury,
indirect or incidental damages, consequential losses, loss
of liquids, loss of profit or any like claims whatsoever
arising from any use of, or incidental to, or repairs to any
of the Goods by a party other than Manufacturer;
b) to the extent that any component or material (including,
but without limitation the polyethylene) used in the
manufacture of any of the Goods is supplied and/or
manufactured by a third party, the liability of Manufacturer
is limited to Manufacturer’s right of redress (if any)
against the third-party supplier/manufacturer;
c) Tanks feature a vented lid at the time of manufacture.
Any subsequent pressurization of the Tank by removing
the vent, sealing the vent, or otherwise will cause this
Limited Warranty as to such Tank to be null and void.
d) The liability of Manufacturer under this Limited Warranty
is limited to, at Manufacturer's discretion:
e) providing a replacement Good (including shipping but
excluding other replacement costs);
f) refunding an amount equal to a sum equal to the current
Retail price divided by the months in the warranty,
multiplied by the months remaining in the warranty
period;
g) repairing the Good at no cost.
4. Proof of Purchase -The original invoice or other similar proof of
purchase of the applicable must be provided by Purchaser to
Manufacturer when making a claim under this Limited Warranty.
Warranty claims must be received in writing by Manufacturer
within the Limited Warranty period.

19Version 1.2
English
5. Claims and Questions -If you have questions about this Limited
Warranty or to make a warranty claim, contact Manufacturer at:
6. Definitions -For this Limited Warranty the following definitions
apply:
a) Manufacturer means Enduraplas LLC.
b) Purchase Date means the date upon which the
applicable goods were purchased by the original end
user.
c) Purchase Price means the actual price paid for the Tank
by the original Purchaser.
d) Tank means the storage Tank manufactured by
Manufacturer and purchased by the original end user
Purchaser being the subject matter of the Limited
Warranty.
e) Good(s) mean Tanks and/or other products or parts
manufactured by Enduraplas LLC.
f) Limited Warranty means this written Limited Warranty.
7. State Law -Some states do not allow the exclusion or limitation of
incidental or consequential damages, so the above limitation and
exclusion may not apply to certain parties. Some states do not
allow limitation on how long an implied warranty lasts, so the
above limitation may not apply to certain parties. This limited
warranty gives specific legal rights and other rights, which vary
from state to state, may also apply.
8. Governing Law -This Limited Warranty will be governed by the
laws of the State of Minnesota, without giving effect to any choice
of law rule that would cause the application of the laws of any
other jurisdiction.

20 Brine Master®
BRINE MASTER®
OVERVIEW
7
63
6
62
56
28
22
43
73 2
33
38
38
38
34
34
1 5
9
32 8235 37 37 11
13
33
38
34 33
34
4
34
33
38
38
41
42
44
56
38 33
38
38
13
46
68
717083
34 38 33 38
72
38
1881 80 384 8586 57 8
40
DETAIL A
DETAIL B
DETAIL C
DETAIL D
Other manuals for BRINE MASTER 3000
1
This manual suits for next models
1
Table of contents
Other CAMION Industrial Equipment manuals

CAMION
CAMION ICE MASTER T Series User manual

CAMION
CAMION BRINE MASTER 1600 User manual

CAMION
CAMION ICE MASTER E Series User manual

CAMION
CAMION ICE MASTER E Series User manual

CAMION
CAMION ICE MASTER T Series User manual

CAMION
CAMION BRINE MASTER 3000 User manual

CAMION
CAMION STORM COMMANDER CEC056 User manual