Camp Chef PG24SSG User manual

1
OWNER’S MANUAL
MODEL PG24SSG PG36SSG
A MAJOR CAUSE OF FIRES IS FAILURE TO
MAINTAIN REQUIRED CLEARANCES AIR SPACES
TO COMBUSTIBLE MATERIALS. IT IS OF UTMOST
IMPORTANCE THAT THIS PRODUCT BE INSTALLED
ONLY IN ACCORDANCE WITH THESE INSTRUCTIONS.
5003132
Certified to UL SUBJECT 2728
Certified to ULC/ORD-C2728

2
IMPORTANT SAFETY WARNINGS
READ AND FOLLOW ALL INSTRUCTIONS BEFORE
INSTALLING AND USING THE APPLIANCE
Please read this entire manual before installation and use of this pellet fuel-burning
appliance. Failure to follow these instructions could result in property damage, bodily
injury, or even death. Contact local building or fire officials about restrictions and
installation inspection requirements in your area. SAVE THESE INSTRUCTIONS.
TO INSTALLER OR PERSON ASSEMBLING THIS APPLIANCE:
Leave this manual with this appliance for future reference.
TO CONSUMER: Keep this manual with this appliance for future reference.
This instruction manual contains important information necessary for the proper
assembly and safe use of this product.
WARNING: FOR OUTDOOR USE ONLY
CARBON MONOXIDE WARNING
Follow these guidelines to prevent this colorless, odorless gas from poisoning you, your
family or others:
• Know the symptoms of carbon
monoxide poisoning: headache,
dizziness, weakness, nausea,
vomiting, sleepiness, and confusion.
Carbon monoxide reduces the blood’s
ability to carry oxygen. Low blood
oxygen levels can result in loss of
consciousness and death.
• See a doctor if you or others develop
cold or flu-like symptoms while cooking
or in the vicinity of this appliance.
Carbon monoxide poisoning, which can
easily be mistaken for a cold or flu, is
often detected too late.
• Alcohol consumption and drug
use increase the effects of carbon
monoxide poisoning.
• Carbon monoxide is especially toxic
to mother and child during pregnancy,
infants, the elderly, smokers and
people with blood or circulatory
system problems, such as anemia, or
heart disease.

3
SAVE THESE INSTRUCTIONS
WARNING
CLEANING:
• Normal use will create a buildup of ash,
grease, and creosote inside the grill.
The grill must be thoroughly cleaned
after every 50 hours of use or if a
buildup of grease or creosote is noticed
inside the grill.
• Clean the grill by removing all internal
parts and thoroughly scrape away all
grease and creosote from all internal
surfaces, including the grease drain,
and remove debris from the grill.
• The drip tray must always be cleaned
prior to turning the grill to high.
Excessive buildup of grease and
creosote may result in a grease fire. If a
grease fire does occur, turn off the grill
using the main power switch and close
the lid. Leave the lid closed until the fire
extinguishes itself. If an uncontrolled
fire does occur, immediately call the
local fire department.
• Never put water on a grease fire.
• Never open the burner clean-out port
when the grill is hot.
DANGER
FIRE HAZARD:
• Never operate this appliance
unattended.
• Never operate this appliance within 10
ft (3 m) of a stored LP cylinder.
• Never operate this appliance within 25
ft (7.5 m) of any flammable liquid.
• If a fire should occur, keep away from
appliance and immediately call your
fire department. Do not attempt to
extinguish an oil or grease fire with water.
• Minimum distance from sides and back
of the unit to walls or railings is 36”.
• Do not operate under overhead
construction.
• Always clean grease tray to remove
excess grease drippings prior to
cooking in Direct Flame Mode. A dirty
grease tray may result in excessive
flare ups or grease fire. If grease fire
does occur, turn off grill using the main
power switch and close the lid. Leave
the lid closed until fire is extinguished.
If an uncontrollable fire does occur,
immediately call local fire department.
Never put water on the fire.
DANGER
ELECTRIC SHOCK:
• Do not work on this grill if it is plugged
in. Electric shock may occur resulting in
death or serious injury.
1m
1m
1m

4
GENERAL WARNINGS
PRE-USE INSPECTION:
• Do not operate appliance under
ANY overhead construction. Keep a
minimum clearance of 36 inches (0.9
m) from the sides, front and back
of appliance to ANY construction.
Keep the area clear of all combustible
material and flammable liquids,
including wood, dry plants and grass,
brush, paper, and canvas.
• Use only on a level, stable non-
combustible surface like bricks, concrete
or dirt. Do not use this appliance on any
surface that will burn or melt like wood,
asphalt, vinyl or plastic.
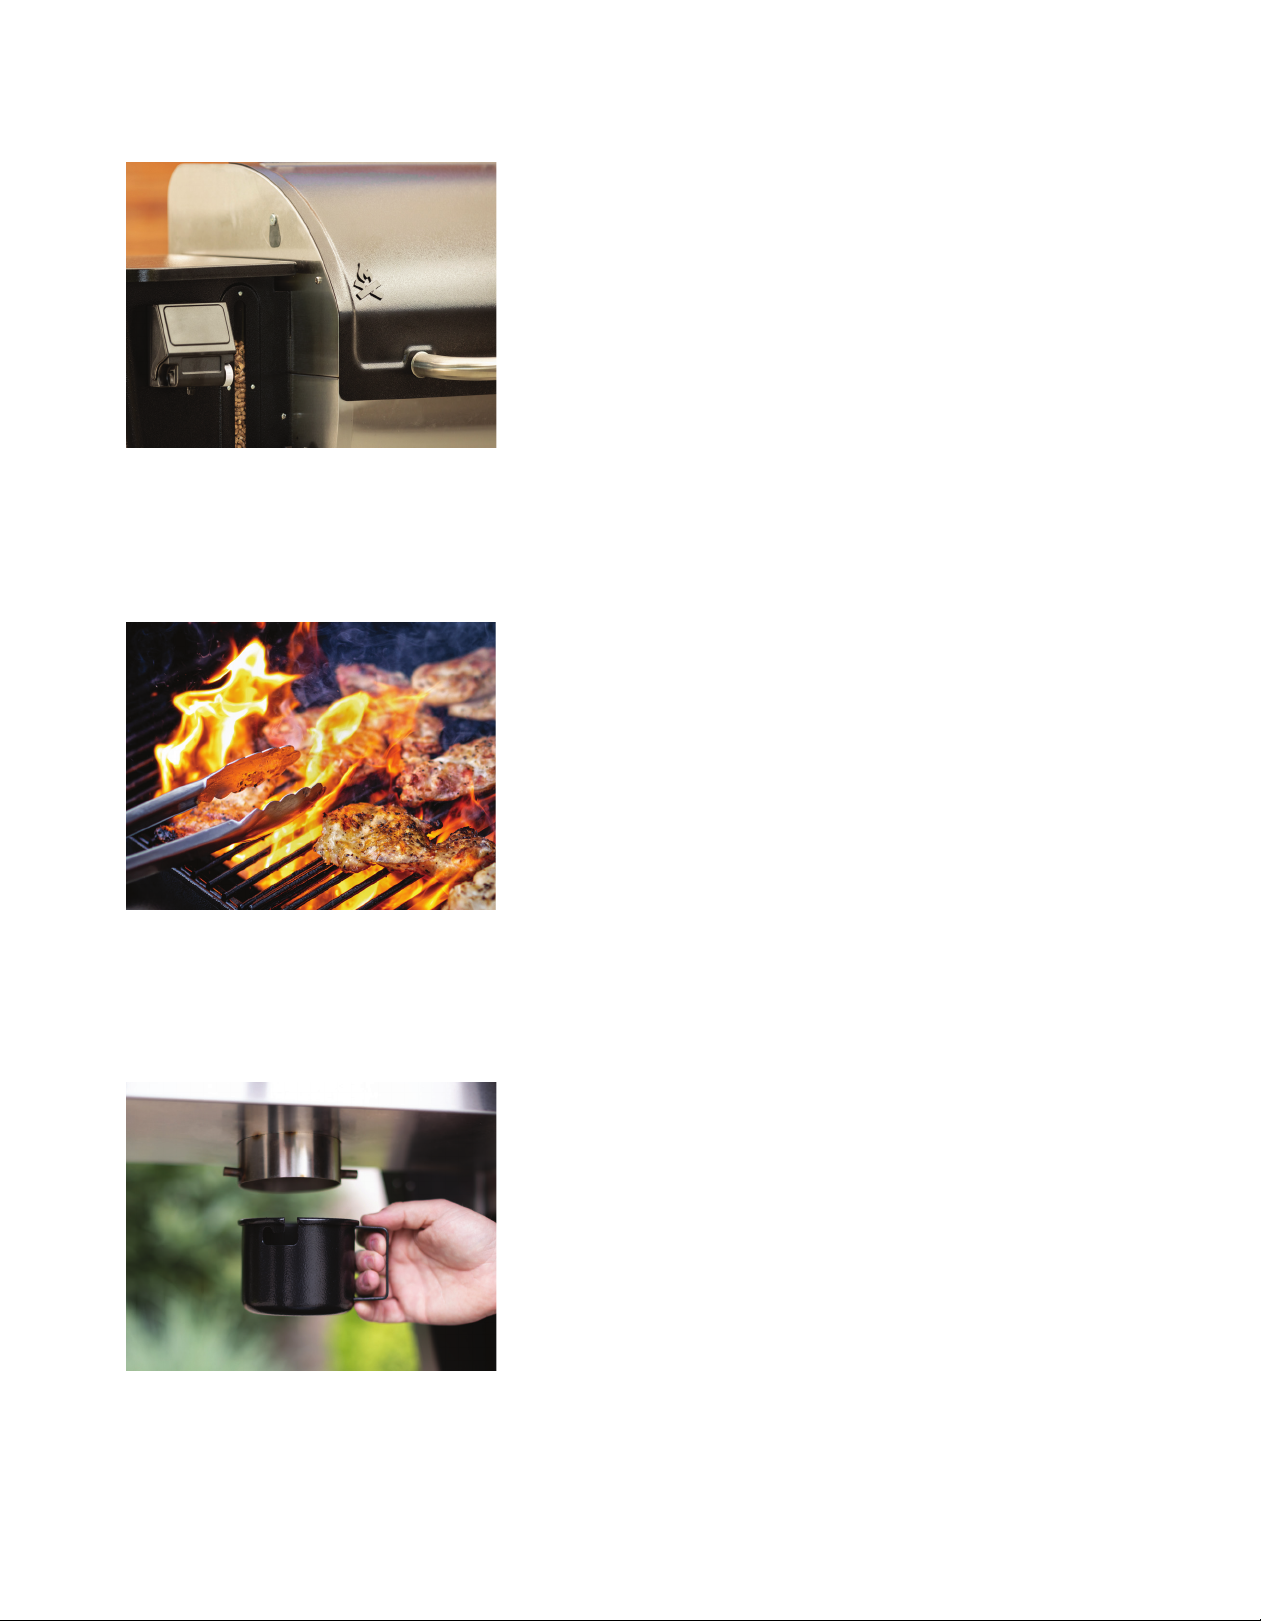
• Make sure burner clean-out is closed
before starting the grill.
• Make sure the grease bucket is in place
before starting the grill.
OPERATION:
• Do NOT leave this appliance
unattended while in use. The user must
remain in the immediate area of the
product and have a clear view of the
product at all times during operation.
• Keep children and pets away from
burner at all times.
• The use of alcohol, prescription or
non-prescription drugs may impair your
ability to properly assemble or safely
operate this appliance.
• For OUTDOOR use only. Do NOT
use in a building, garage or any other
enclosed area. Do NOT use in or on
recreational vehicles or boats. NEVER
use this appliance as a heater.
• Keep the lid closed during cooking.
• In the event of a fire the dial should be
turned to shutdown, close the lid, and
leave it closed until the fire goes out.
After allowing the grill to cool, follow
the cleaning instructions before the
next use.
• Do not use accessories not specified
for use with appliance.
• Never use gasoline, gasoline-type
lantern fuel, kerosene, charcoal
lighter fluid, or similar liquids to start
or freshen up a fire in this appliance.
Keep all such liquids well away from the
appliance when in use.
• This product is not intended for
commercial use.
PELLETS:
• Use only food grade hardwood pellets
manufactured for use in pellet grills.
Using softwood or heating pellets will
void your warranty.
• It is recommended that you not store
pellets in the hopper for extended
periods as they may absorb moisture
from the air and clog the auger.
• Do not allow the hopper to run out
of pellets. Pellets can be added
at any time. The hopper will hold
approximately 22 pounds of pellets.
The pellet usage will vary greatly
depending on the ambient temperature
as well as cooking temperature.

5
CLEANING:
• Creosote – Formation and need for
removal. When wood pellets are
burned slowly, they produce tar and
other organic vapors that combine with
expelled moisture to form creosote.
The creosote vapors condense in a
relatively cool oven flue and exhaust
hood of a slow burning fire. As a
result, creosote residue accumulates
on the flue lining and exhaust hood.
When ignited, this creosote makes
an extremely hot fire. The grease
duct should be inspected every 50
hours of cooking to determine when
grease and/or creosote build-up has
occurred. When grease or creosote has
accumulated, it should be removed to
reduce risk of fire.
• Ashes should be placed in a metal
container with a tight fitting lid. The
closed container of ashes should be
placed on a non-combustible floor
or on the ground, well away from all
combustible materials, pending final
disposal. When the ashes are disposed
by burial in soil or otherwise locally
dispersed they should be retained in
the closed container until all cinders
have thoroughly cooled.
STORAGE:
• Always allow the appliance to cool
before covering with the cover.
• Always cover the appliance, with cover
(if supplied), when not in use.
• Always unplug grill before installing
patio cover.

6
WELCOME TO THE FAMILY
Being a part of the Camp Chef family means more than just
using our products, it also provides a sense of community. We
know every good time starts with an invitation, and there’s no
better enticement than great-tasting food. And the best food,
we believe, is cooked with a flame and kissed by smoke.
Grab a drink and stay a while... we’ve got brisket on.
TABLE OF CONTENTS
Safety Warnings
General Warnings
Welcome to the Family
Special Features
Connecting your WiFi Controller
Grill Operation - First Time
Grill Operation
Maintaining your Grill
FAQs
Troubleshooting
Replacement Parts
Service and warranty

7

8
SPECIAL FEATURES
SIDEKICK COMPATIBLE
The Sidekick gives you VersaGrillity™. As one of Camp Chef’s 14-inch cooking systems, you can add a
griddle, grill box, artisan oven, pot, and more. It easily mounts to the side of your Woodwind and offers
28,000 BTU—perfect for searing. Sauté on the griddle, bake within the pizza oven, sear on the grill box, boil
with a stock pot—the menu possibilities are endless. It truly is the definition of VersaGrillity™.
The purchase of the sidekick accessory is required for propane grilling.
Learn more at www.CampChef.com
SPECIAL FEATURES

9
WIFI CONTROLLER
The Woodwind comes standard with a full color screen
controller and four meat probe ports. Monitor the grill and
food contents using a smart phone and the Camp Chef
Connect app. Set timers, change temperature settings, and
even tailor smoke levels from 1-10 using Smoke Control.
SMOKE CONTROL
Control exactly how much smoke you incorporate into your
cook by adjusting the Smoke Number. The PID controller
gives you the industry’s most precise grill temperature.
As your Smoke Number increases, your smoke output
increases. As your Smoke Number decreases the
temperatures will hold tighter.
CAMP CHEF CONNECT APP
Available on the Apple App Store and Google Play Store, the
Camp Chef Connect allows you to monitor your cook from
anywhere. Set timers with push notifications, view historical
data from past cooks, label your probes and select your meat
type using the Smart Meat Assistant. Using a pellet grill has
never been easier. To learn more see page 14.

10
SPECIAL FEATURES
SLIDE AND GRILL
By sliding the heat deflector plate out of the way, you can
flame broil your grill contents within a matter of seconds. With
a louvered drip tray the flames can escape and allow direct
flame grilling. Quickly hit burgers with a crispy outer crust
before serving. To learn more see page 22.
ASH CLEAN OUT SYSTEM
Unlike other pellet grill companies, our Ash Clean out System
allows for the user to easily clean out the burn cup and
dispose of the ashes. Before each cook, simply pull the lever
and dump out the ash — it’s that easy. To learn more see
page 18.
STAINLESS STEEL CONSTRUCTION
Materials matter. We used stainless steel construction to
resist the normal wear and tear of dents and scratches but
also withstand a variety of weather elements including
high heat.

11
WIFI CONTROLLER
CONTROLLER FUNCTIONS
Rotate the dial to scroll through menus, adjust temperatures,
or smoke settings. Press the dial to select.
Set temperature:
Use this setting to set your temperature (160 - 400˚F). Rotate
the dial to the desired temperature and press to confirm.
Bypass:
Use bypass in the case of power failure/accidentally outage
or you need to restart the grill and it is still hot. Use only if grill
has been off for less than 3-4 minutes. This method is used
to bypass the normal startup, ignite new pellets, and get back
to cooking. BYPASS can be selected during the initial startup
of the grill only by selecting BYPASS from the STARTUP
screen. If the grill fails to ignite using the bypass mode then
restart the grill using the normal startup procedures.
Fan mode:
Use this setting when using a smoke tube for cold smoking.

12
Set smoke level:
Use this setting to adjust the smoke level. Rotate dial to
the desired smoke setting and press to confirm. The smoke
setting can be adjusted from 1-10.
Only available from 160 - 350°F
A smoke setting of 1 will produce less smoke and maintain a
more even temperature. As the smoke setting increases, the
temperature fluctuations will also increase.
WIFI CONTROLLER

13
Feed:
This setting is used to feed pellets to the burner and should
only be used in the following scenarios:
1. The first time you use the grill to fill the auger tube.
2. Anytime you inadvertently run the hopper out of pellets or
if you want to change pellet variety.
Once the FEED cycle has finished, the controller will return to
the main menu and the auger tube will be filled with pellets.
You are now ready to start cooking.
Do not over-fire the grill by over feeding pellets into the
burner prior to startup. If flame is inadvertently extinguished
never restart the grill without first cleaning out the burner.
Improper use can cause an uncontrolled fire.
Shutdown:
Use this setting when you are finished with your cook. The
fan will remain on for up to 20 minutes. This setting will burn
up any extra pellets in the burner and cool down the grill.
After 20 minutes the display screen will turn off and the grill
can be unplugged.
This setting must be used after each use.
Do not turn the main power switch off when the grill is hot.
In event of a grease fire, do not use the shutdown mode.
Turn the grill off and use a fire extinguisher.

14
CAMP CHEF CONNECT APP
With our innovative PID and WIFI enabled controller, stay
connected to your grill using the Camp Chef app.
Getting started:
1. Download the Camp Chef Connect app from the Apple
app store or Android Play store.
2. Allow for notifications. Certain features, like the pellet
sensor, are only available on the app.
3. Turn the grill controller on using the main power switch on
the controller.
4. Open the Camp Chef Connect app and follow the setup
instructions for connecting the grill to your home 2.4GHz
WiFi network.
For safety reasons, you are only able to start the grill from
the controller and not through the app. If you attempt to
start the grill from the app, it will prompt you to start the grill
from the controller.
CAMP CHEF CONNECT APP

15
CAMP CHEF CONNECT APP FUNCTIONS
The Camp Chef Connect app lets you do everything the
controller can do and more.
Probes:
Your grill comes with four probe ports. Organize your probes
by naming them within the app and assigning them target
temperatures. (Yes, we’ll even send you notifications when
they get close!)
Do not use meat probes when grill temperature exceeds
350°F. Damage to the probes may occur.
Smart Meat Assistant:
Choose from a variety of temperature presets for different
meats. Set probe names and goal temperatures. You’ll even
be notified when your cook has reached its desired level such
as rare or well-done.
Timers:
Create a list of timers to remind you to check your grill at
important intervals. Timers are persistent and can be easily
used across different cooks. This can be extremely helpful in
multi-stage smokes like ribs or brisket.
Temperature graphing:
View historical data from your cooks along with temperature
changes over time from both your meat probes and your grill.
Graphs can be customized to show different data and time
intervals. Add notes to your past cooks and use them for
future smokes.

16

17
GRILL OPERATION - FIRST TIME
BEFORE YOU TURN YOUR GRILL ON
Make sure the grill is a minimum of 36” from all combustibles.
Use on a level, stable non-combustible surface. Do not use
this pellet grill on any surface that will burn or melt. Do not
operate under any overhead construction.
Make sure the burner clean-out cup is emptied and closed
before starting the grill.
Make sure the ash cup and grease bucket are in place.
GETTING STARTED:
1. Plug your grill into an outlet.
2. Fill the hopper with pellets.
3. Select FEED mode and allow the feed cycle to finish
running. Once the feed cycle has finished, the controller
will return to the main menu. See page 13.
Empty out the burn cup by pulling the clean-out knob on the
front of the grill. Excess pellets from the feed cycle must be
emptied before starting your grill and beginning your initial
burn-in.
INITIAL BURN-IN
Before you start your first cook, season your pellet grill by
following these instructions:
1. Open the lid of the pellet grill and leave open during the
entire startup cycle.
2. Select SET TEMP from the main menu and set the
temperature to 350°F.
3. Once the startup cycle is finished, close the lid and allow
the grill to cook for 30 minutes at 350°F.
4. Select SHUTDOWN from the main menu
During SHUTDOWN the fan will remain on for 20 minutes
to finish burning any pellets in the burn cup and cool the grill
down. After 20 minutes the screen will turn off and the grill
can be unplugged.
1m
1m
1m

18
Finger pushing power button
GRILL OPERATION
START UP
Now that your pellet grill has been properly seasoned, you are ready to start your wonderful relationship
with your new grill. Follow these instructions every time you operate your grill:
1. Ensure the hopper is filled with premium, food
grade hardwood pellets.
2. Ensure the grease tray is clean and in place.
6. Select SET TEMP and set your temperature.
4. Replace ash cup and close the ash clean-out
by pushing the knob back in and securing it
under the locking collar.
3. Pull the clean-out knob on the front of the grill
and empty out any ash that may have been left
in the burn cup from the last cook.
5. Plug your grill into an outlet and turn it on by
pressing the power button.
Note: I = on. O = off.

19
7. Select SET SMOKE and set your smoke
number. Only available from 160°F - 350°F.
8. Open the lid of the pellet grill and leave open
during the entire startup cycle.
9. When the startup cycle is finished the
controller will display the temperature and the
lid can be closed, allowing the pellet grill to
reach and maintain the set temperature.

20
10. Place your food on the grill.
GRILL OPERATION
COOKING
It’s time to start cooking! Visit www.campchef.com/recipes for some great recipe ideas on what to do for
your first cook.
11. Plug the probe into one of the four available
ports on the controller.
12. Insert the probe and wire through the
stainless flap on the side of the chamber.
13. Insert the probe into the food you want to
monitor. Make sure to insert the probe tip into
the thickest part of the meat and not touching
any bone.
14. Select your probe on the controller or on
your Camp Chef app and set an alarm at your
desired temperature.
This manual suits for next models
1
Table of contents
Other Camp Chef Kitchen Appliance manuals

Camp Chef
Camp Chef PZ30 User manual

Camp Chef
Camp Chef CCP User manual

Camp Chef
Camp Chef ITALIA ARTISAN PIZZA OVEN User manual

Camp Chef
Camp Chef PG24WWSB User manual

Camp Chef
Camp Chef SH140L User manual

Camp Chef
Camp Chef 117654499 User manual

Camp Chef
Camp Chef EX-60LW User manual

Camp Chef
Camp Chef SIDEKICK 14 User manual

Camp Chef
Camp Chef PG24HG User manual

Camp Chef
Camp Chef PZ90 User manual