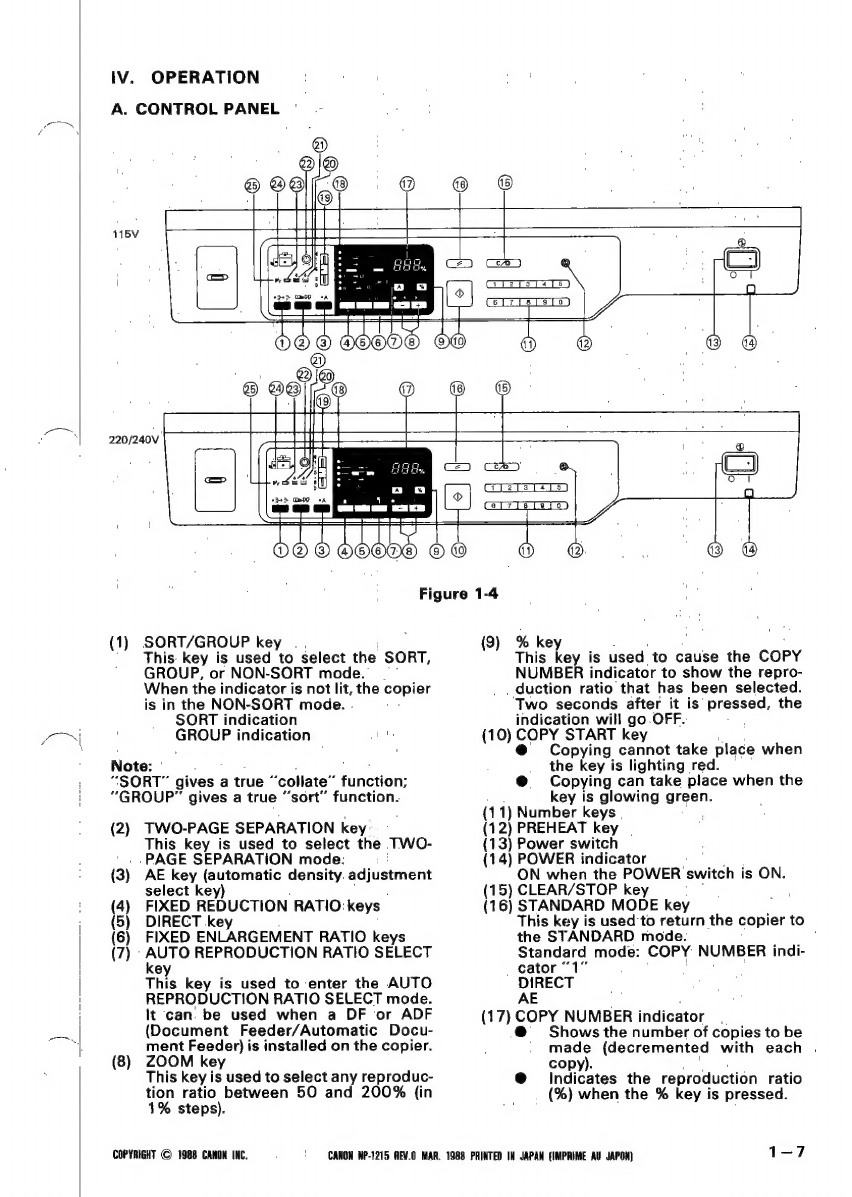
Canon NP-1215 User manual
Other Canon Printer manuals

Canon
Canon iP6210D - PIXMA Color Inkjet Printer Configuration guide

Canon
Canon BJC-S9000 User manual

Canon
Canon GP215 How to use

Canon
Canon i950 Series User manual

Canon
Canon CP-10 User manual

Canon
Canon PIXMA iP8720 User manual

Canon
Canon imagePROGRAF iPF825 MFP Basic Guide No.1 User manual

Canon
Canon S750 User manual

Canon
Canon imageRUNNER ADVANCE 6575i Installation guide

Canon
Canon PIXMA MG5500 Series User manual

Canon
Canon PowerShot S300 Digital Elph User manual

Canon
Canon i900D Series User manual

Canon
Canon imageRUNNER 717iFZ User manual

Canon
Canon Pixma E3400 Series User manual

Canon
Canon 8747B002 Setup guide

Canon
Canon MX490 Series User manual

Canon
Canon imageRUNNER ADVANCE 6575i User manual

Canon
Canon C1333P User manual

Canon
Canon imagePROGRAF iPF9400S User manual

Canon
Canon TS8200 Series User manual